
This makeover has been a long time coming, and we are finally seeing it come together after almost three years of waiting. Time to give him what he’s been so patiently waiting for! We decided to do an easy, board and batten design in here. Here’s how we did it.

Let me walk you through the entire process, from picking the perfect color to the DIY board and batten accents, and all the way to the final touches that made this room come to life.
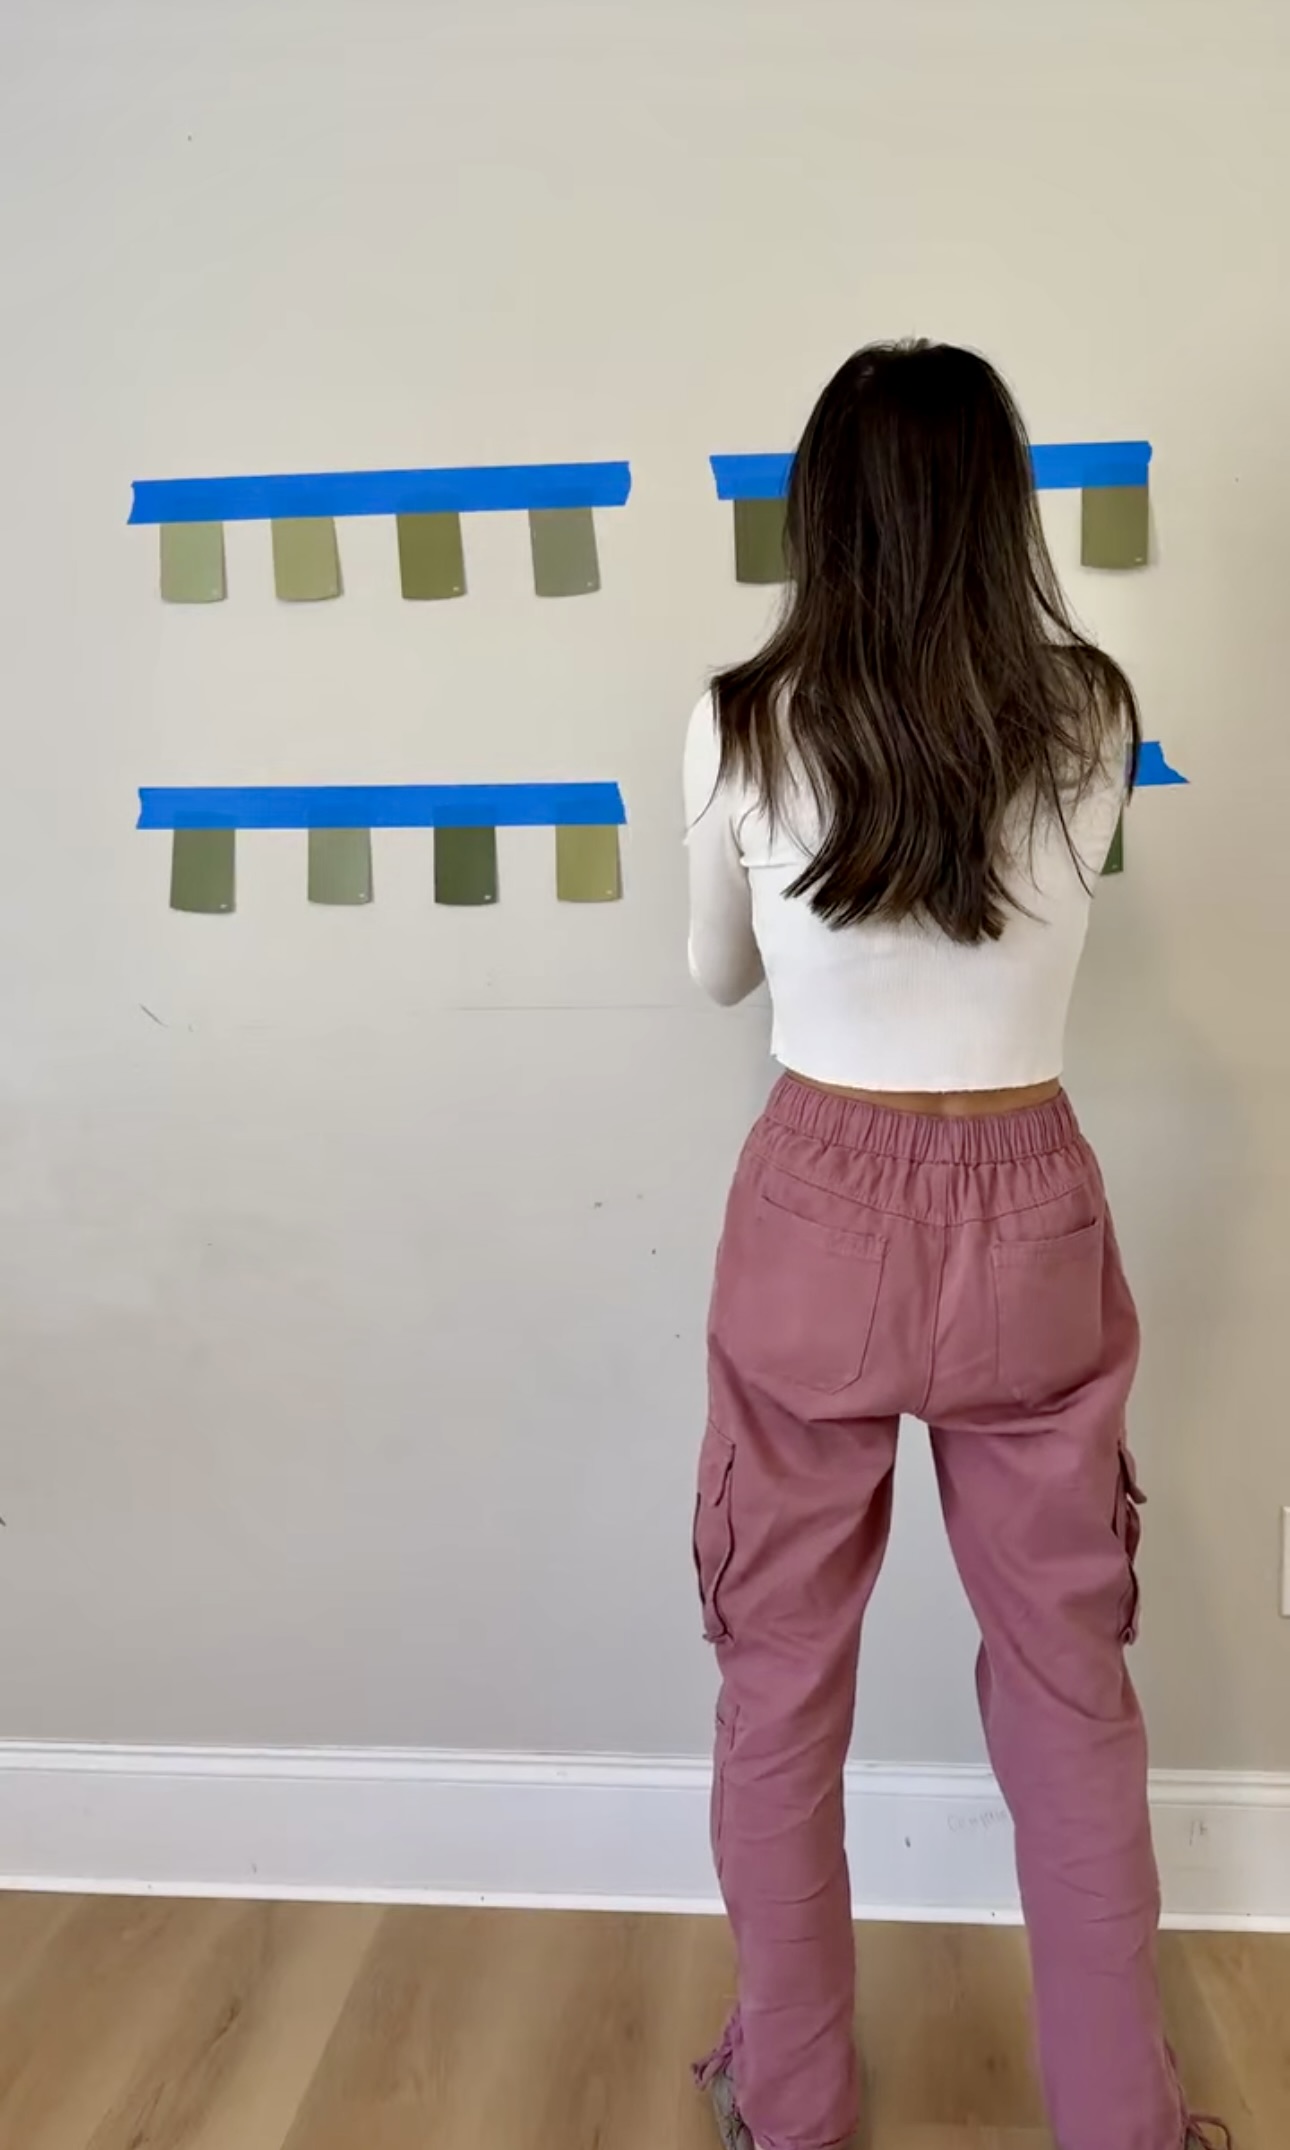
Choosing the Perfect Color
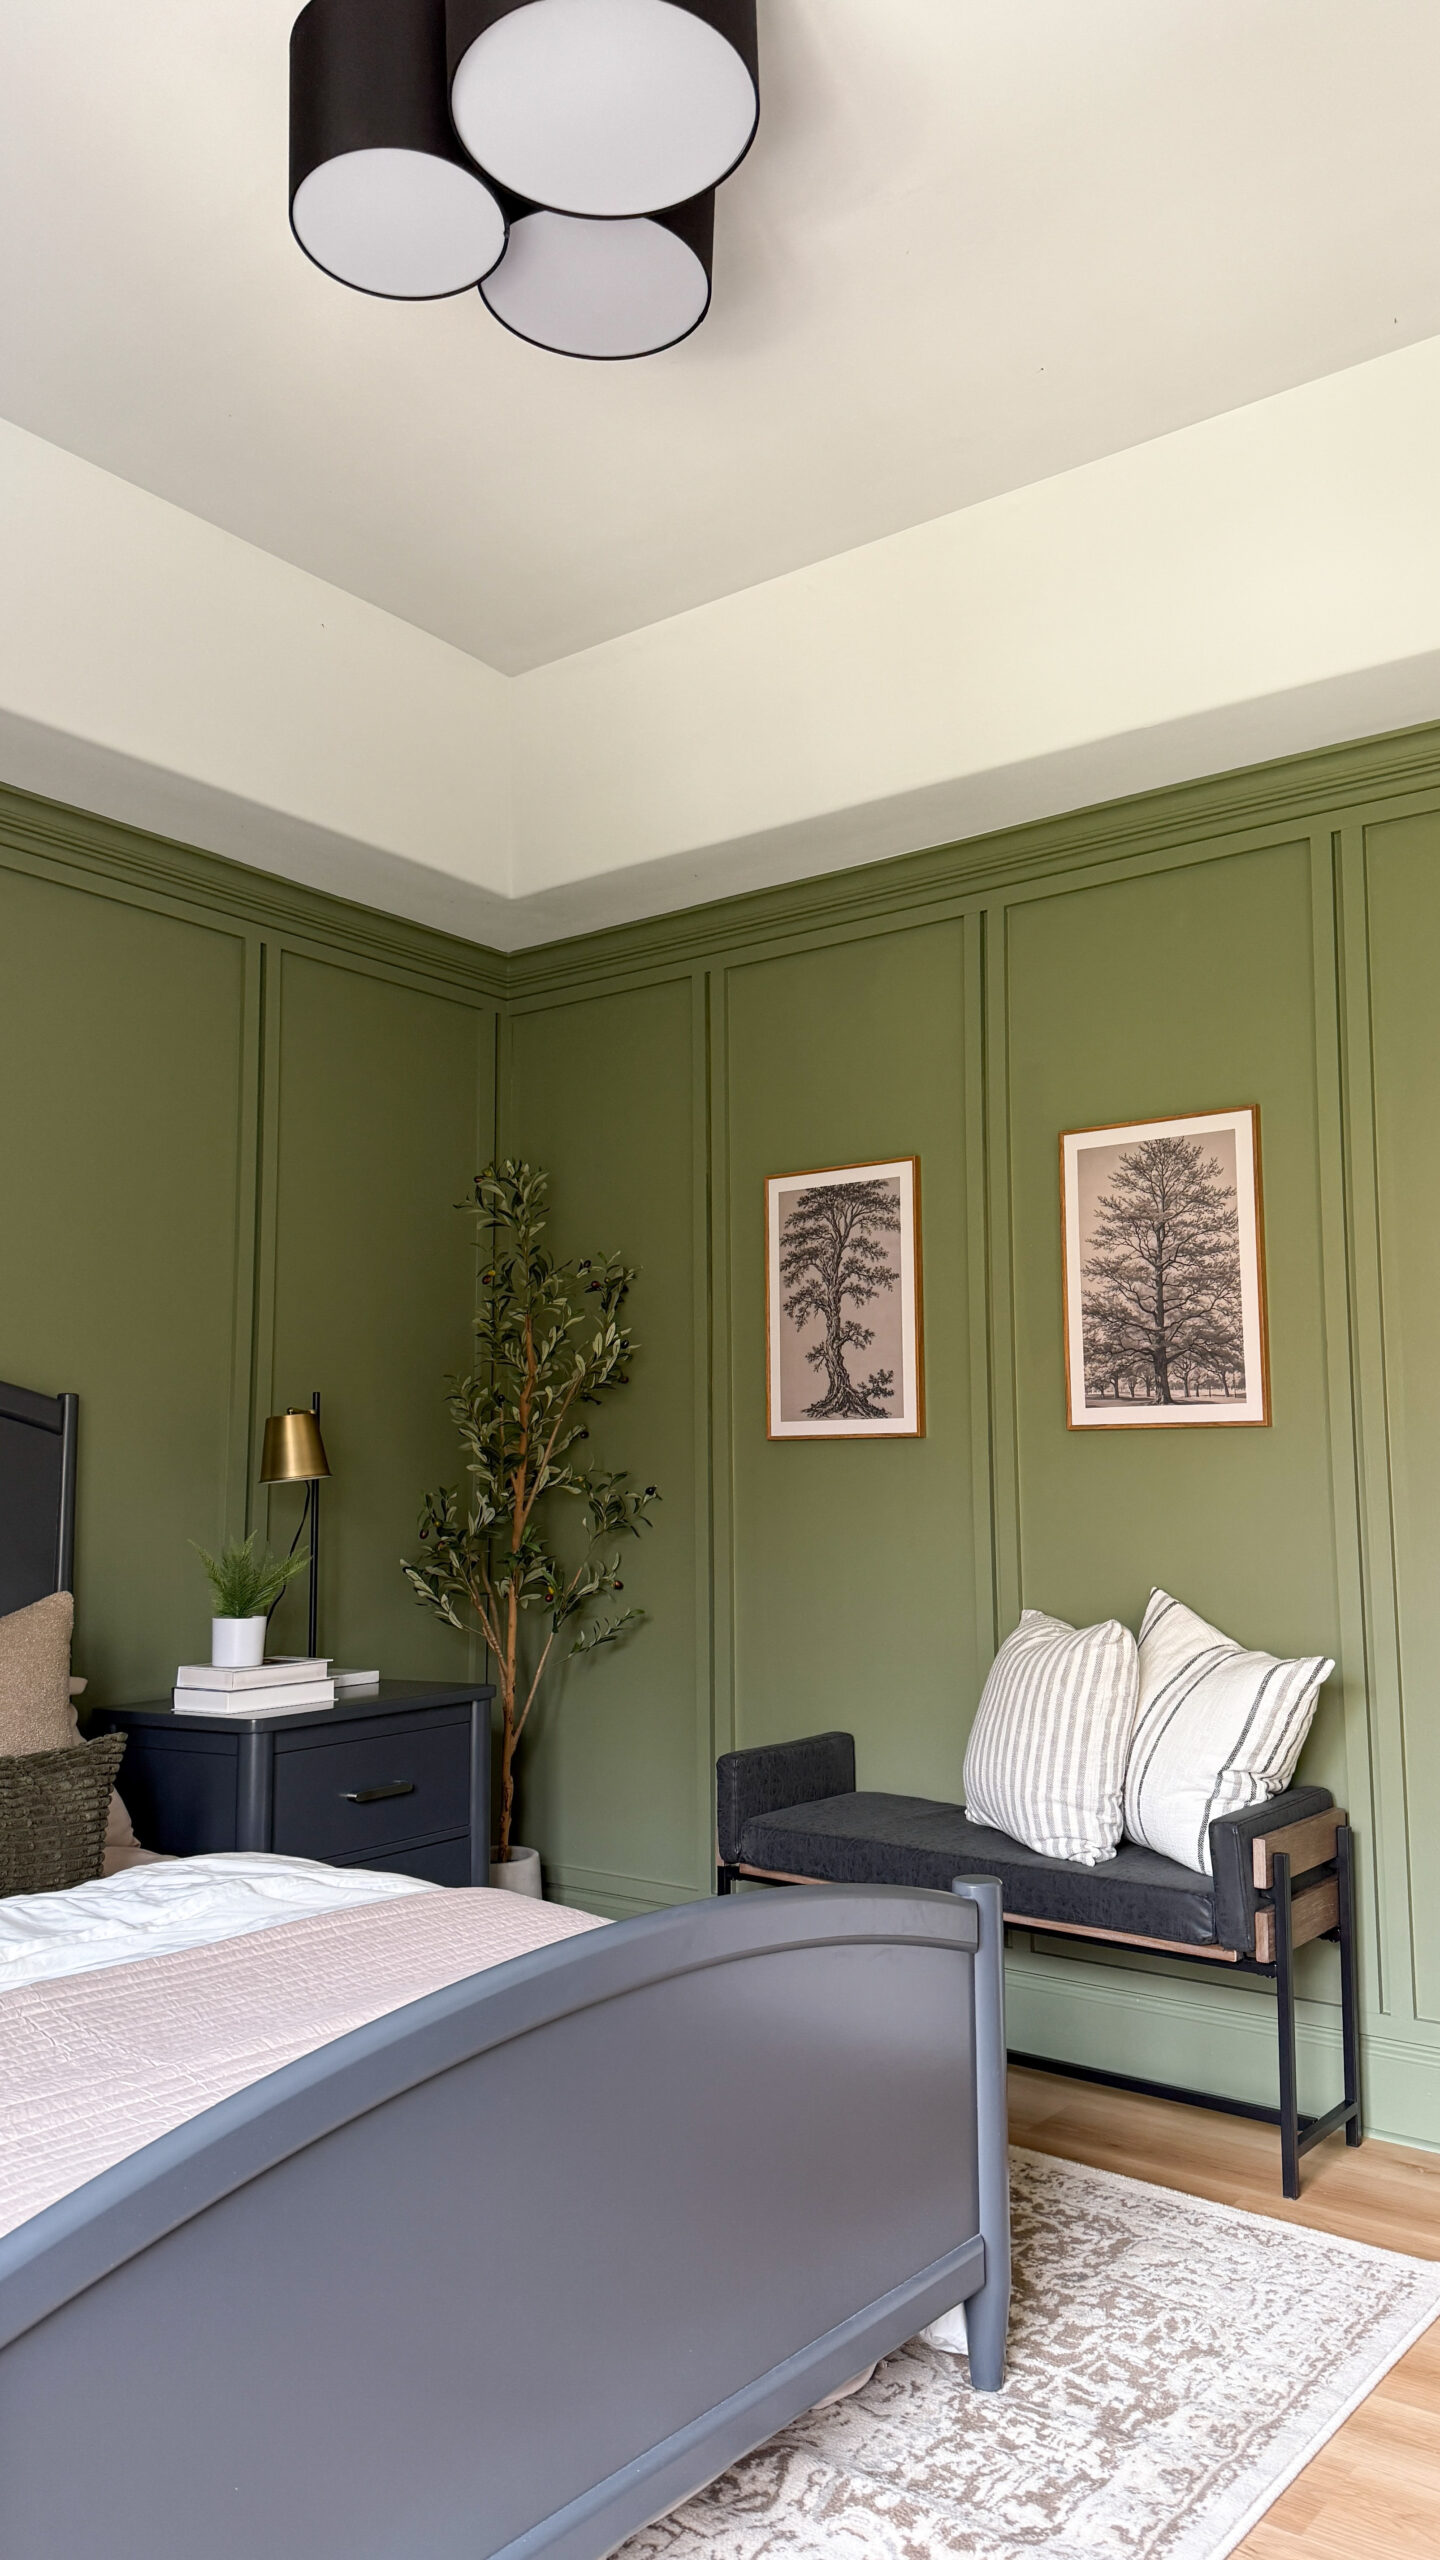
When it comes to paint, choosing the right shade can be overwhelming, but after a trip to Home Depot, I came back with a stack of paint samples in varying shades of green. I was looking for something calming, cozy, and modern, and after narrowing it down, I decided on Sorrel Leaf by Behr in Eggshell. It’s the perfect blend of soft green with a bit of warmth, and it adds a fresh and inviting vibe to the room.
The Painting Process
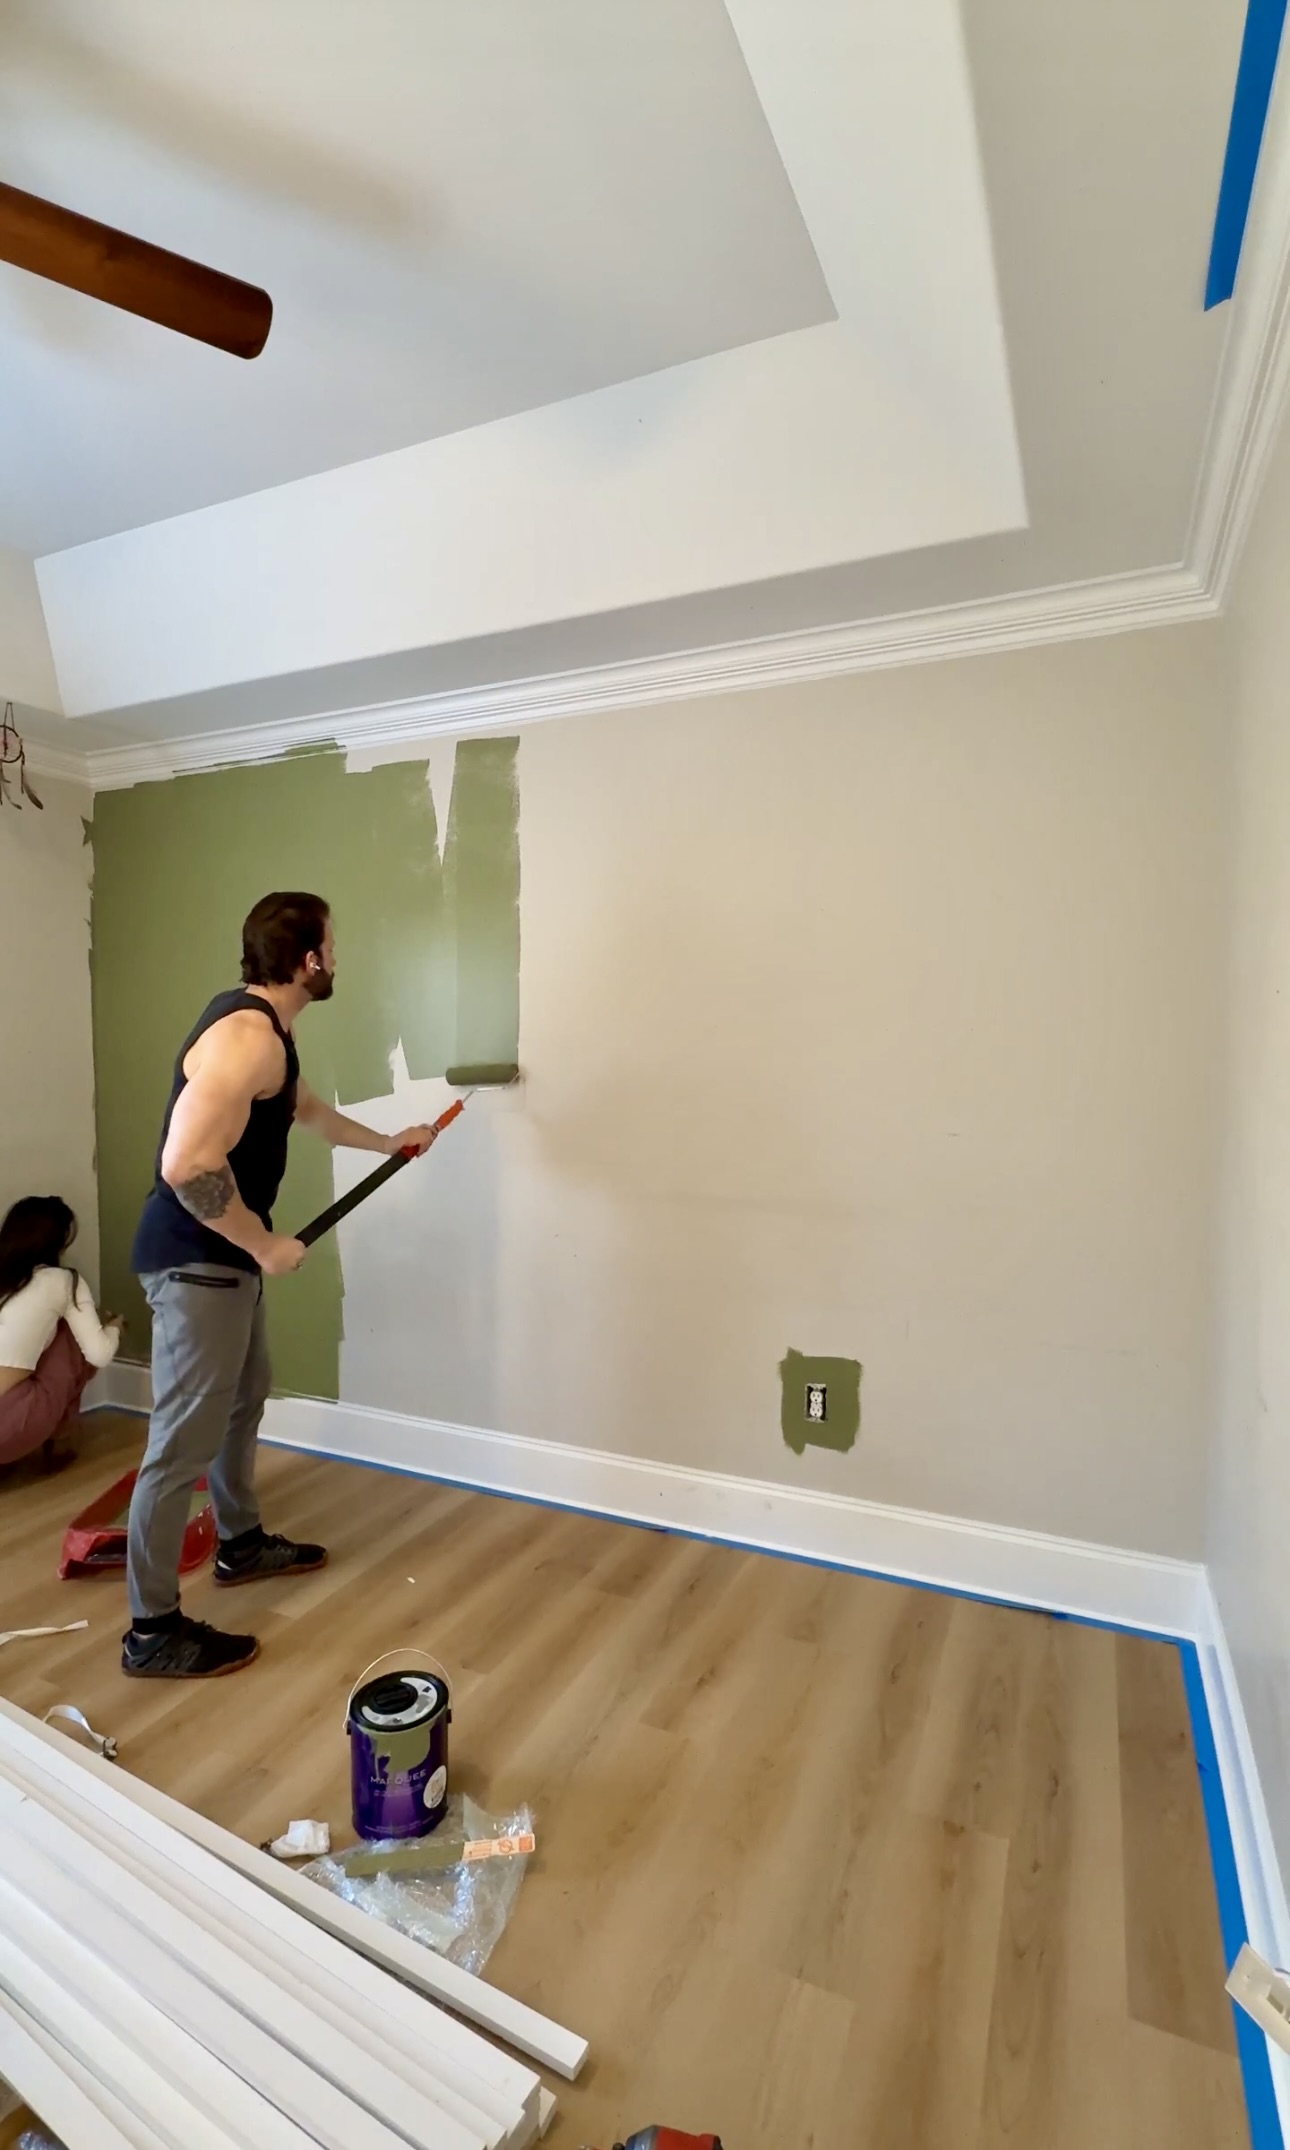
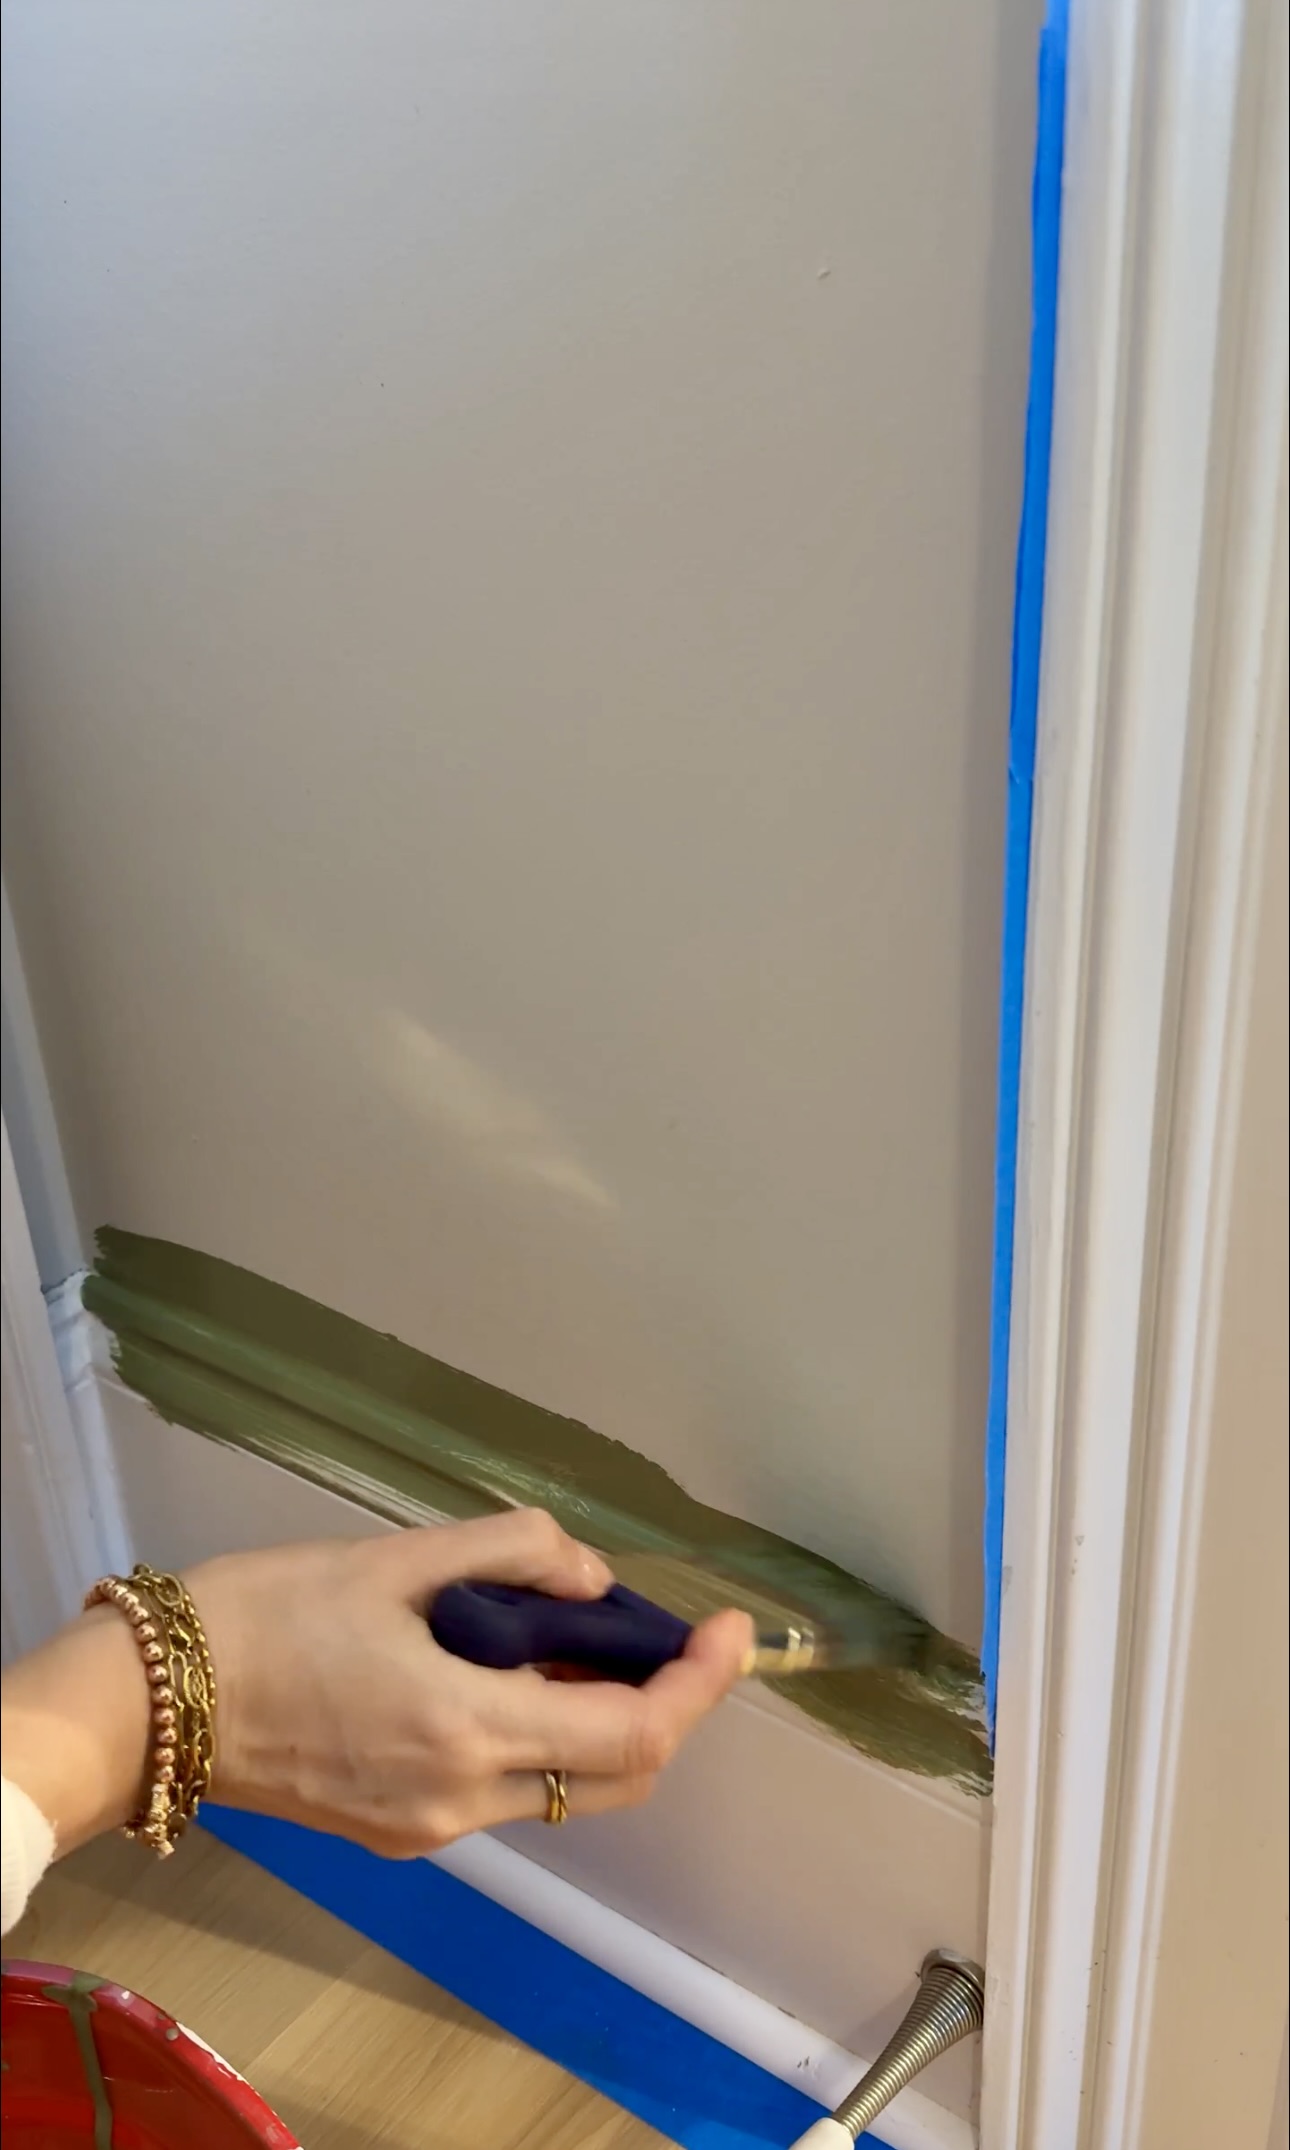
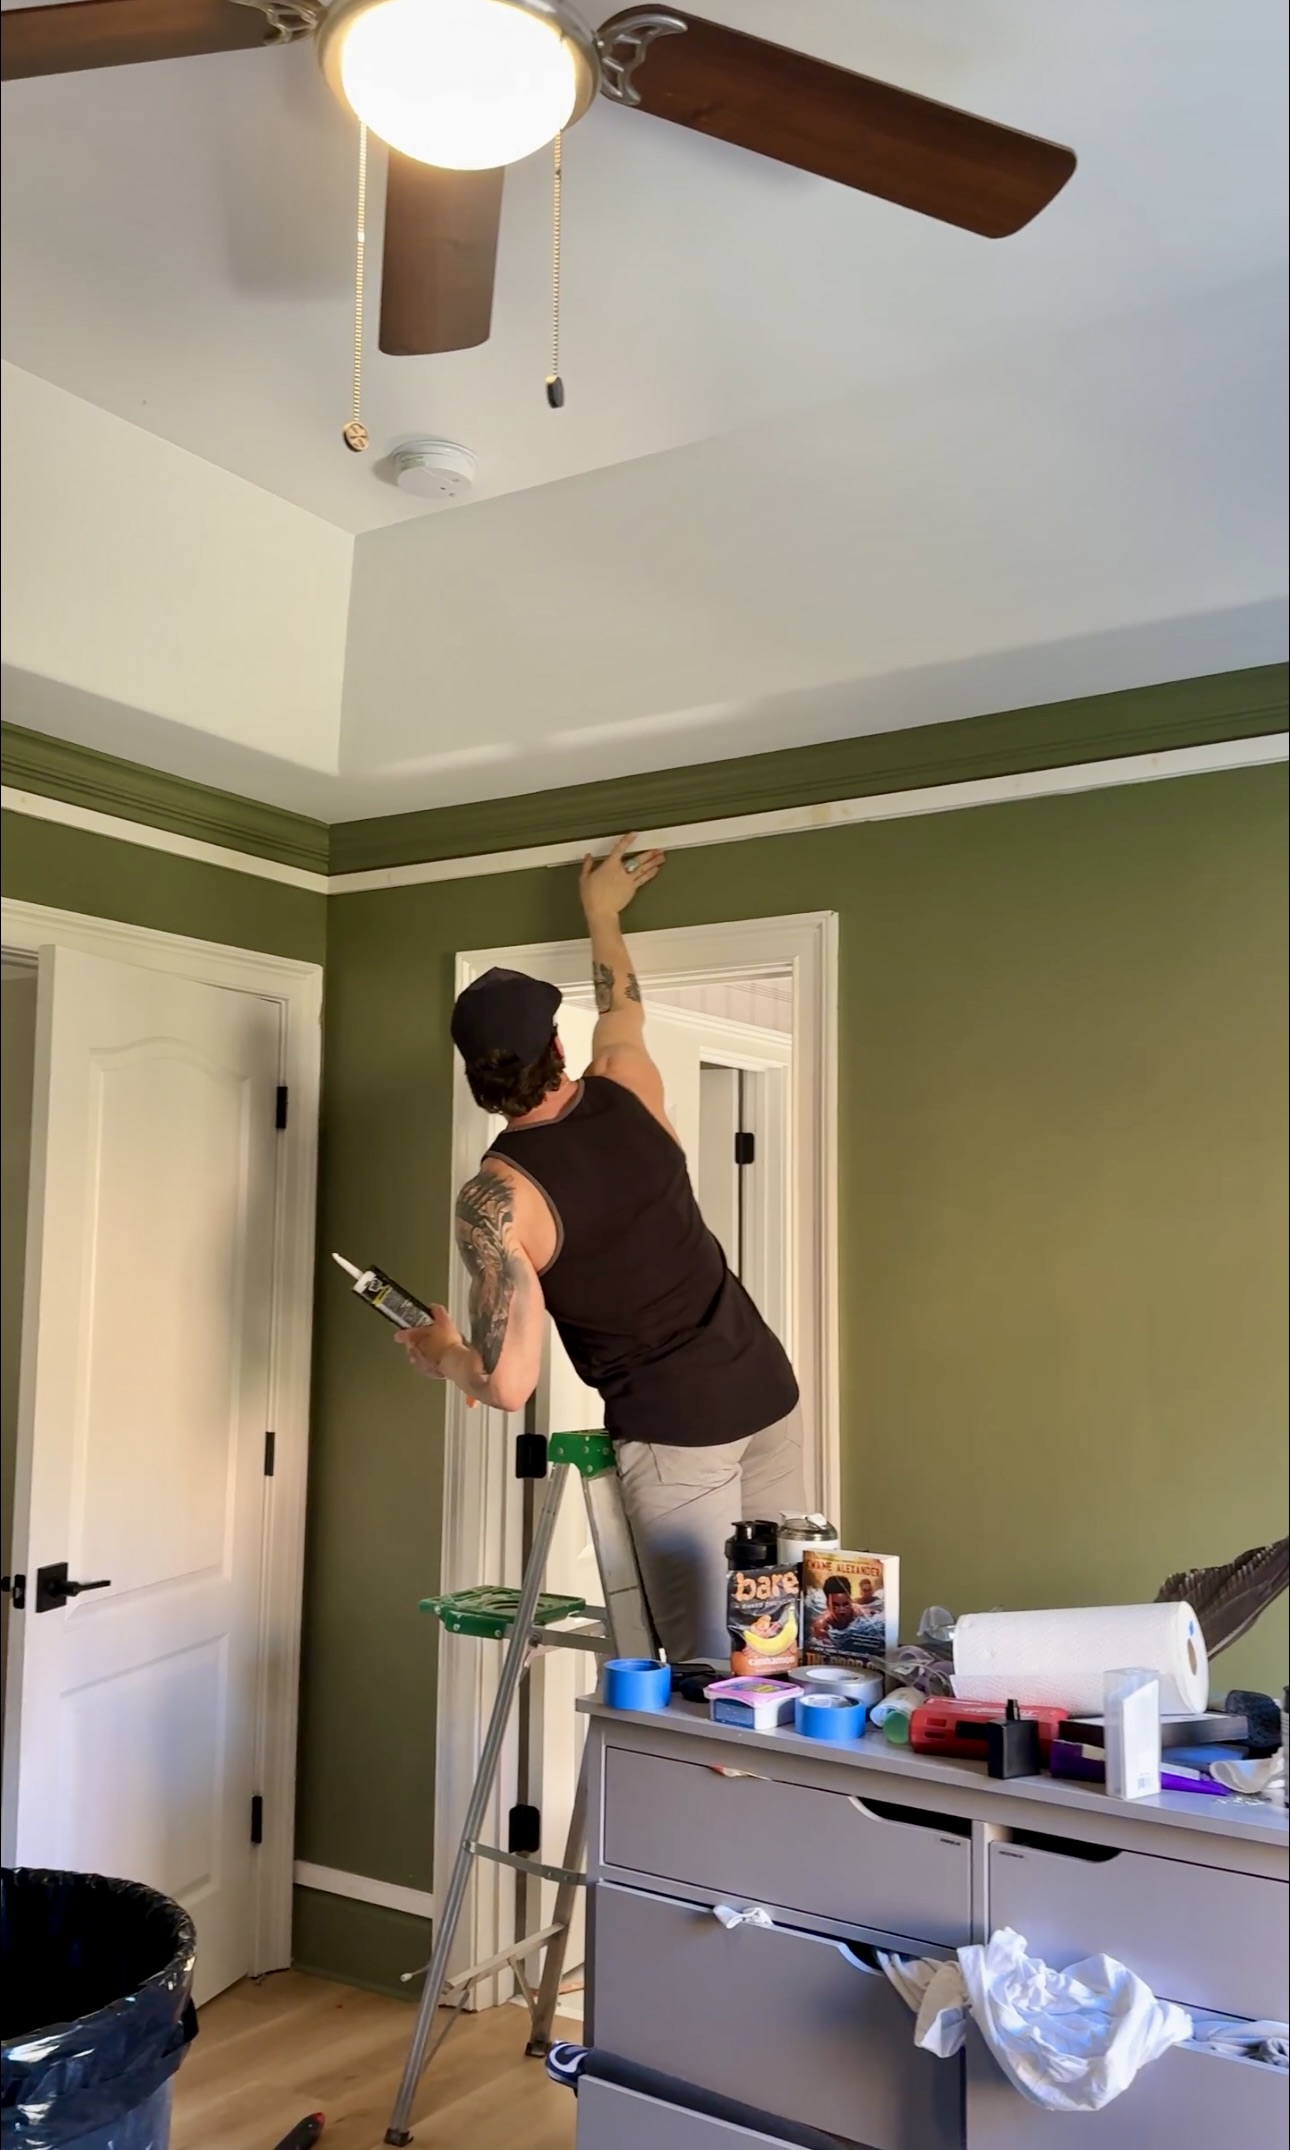
Once we had the color nailed down, it was time to tackle the painting. This was a team effort, with TJ handling the walls and me working on the more detailed edging, crown molding, and baseboards. We started by taping off all the areas we didn’t want to get paint on (trust me, it’s a must-do!). We then got to work painting the entire room with the Sorrel Leaf color. TJ made quick work of the walls, while I focused on the precise details—those little touches really elevate the whole look!
These are all my essential paint tools:
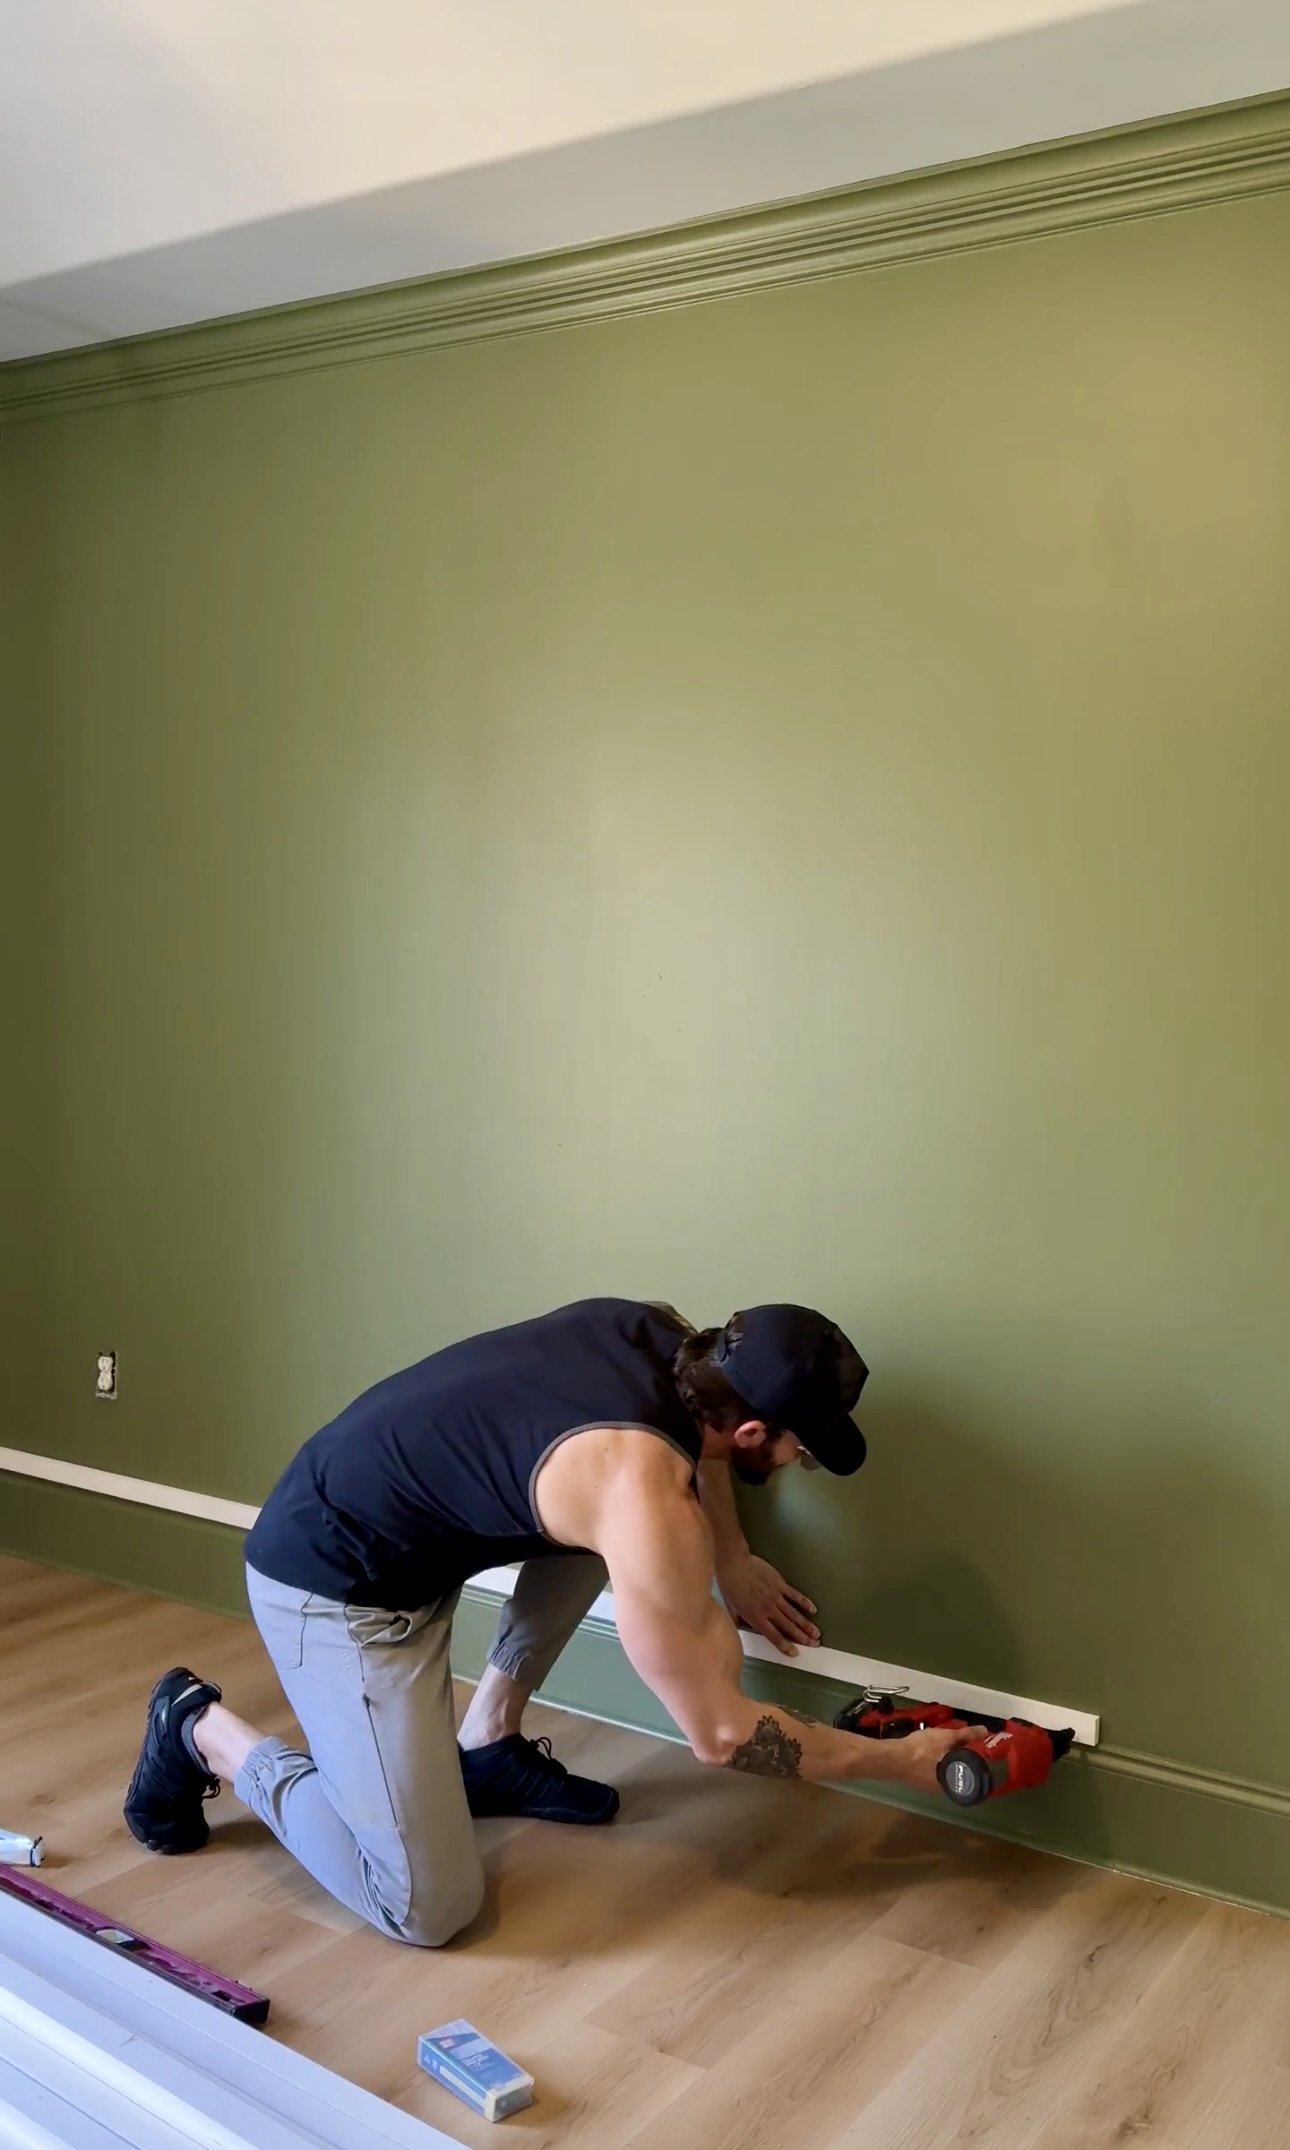
Adding the Board & Batten
One of the key design elements I wanted to include in Zeke’s room was a board and batten look. This timeless, classic design adds character and dimension to any space, and it was a great way to make the room feel more sophisticated and custom. We’ve done this in quite a few rooms in our home and I just love it. We opted for a very simple version using 1×2 MDF boards, which are both affordable and easy to work with.
Here’s how we did it:
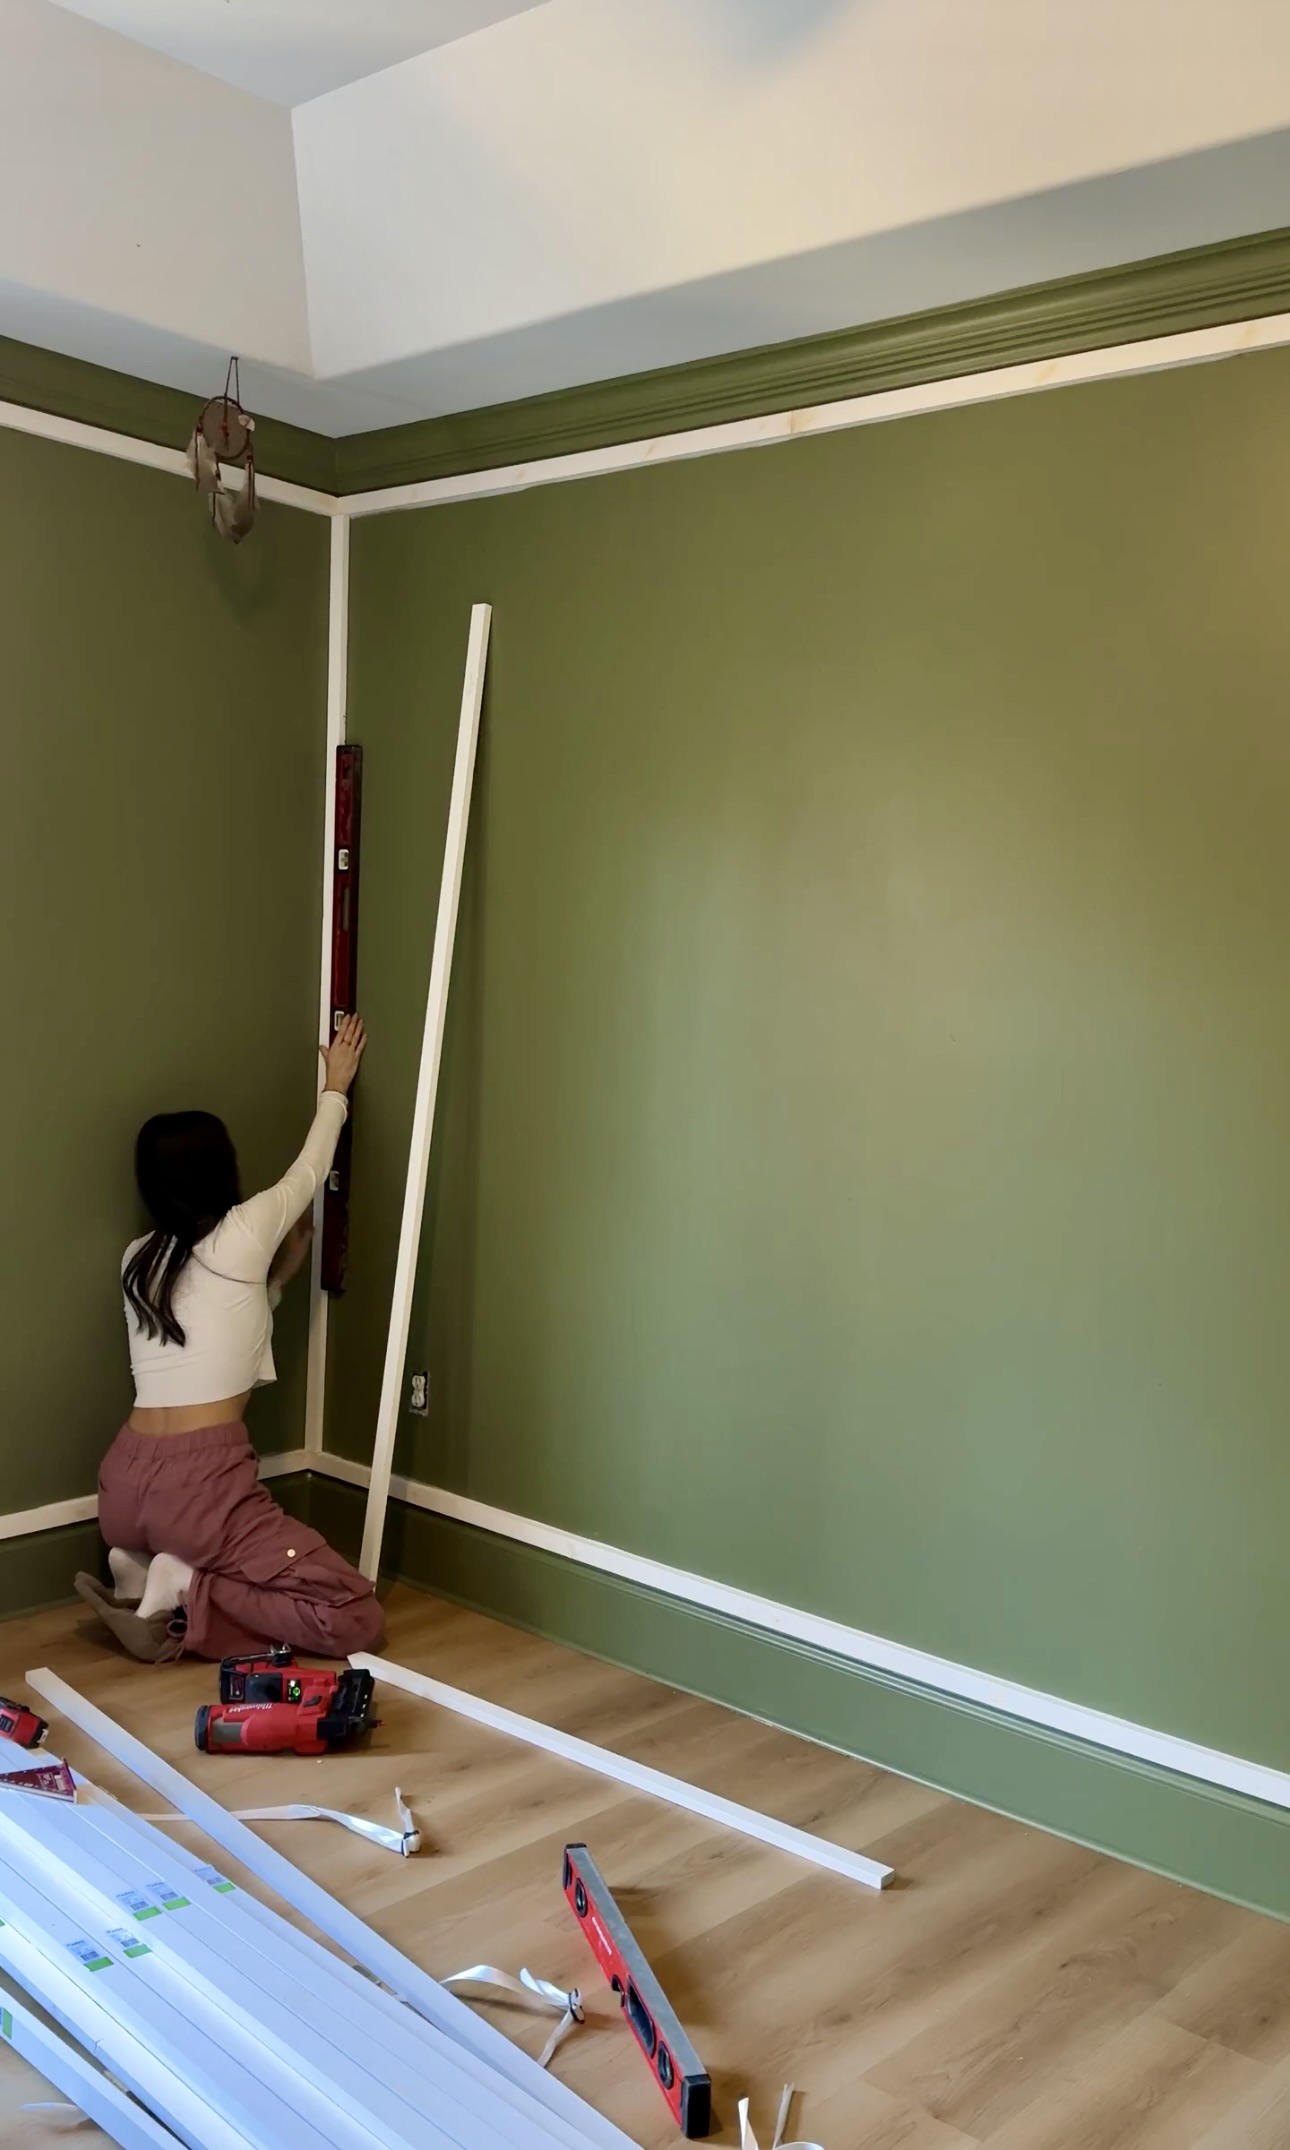
Install the Horizontal Pieces:
First, we installed a horizontal piece along the baseboard and crown molding all the way around the perimeter of the room. We used our brad nailer to secure the pieces in place, making sure they were level and flush against the wall. We did this so that when we installed the vertical pieces, they would look seamless with the wall.
Spacing & Planning
To figure out the right spacing for the vertical pieces, I used an incredibly handy tool on InchCalculator.com. This helped us decide how many boxes we wanted to create and how large each one should be. It was a total game-changer for ensuring everything was symmetrical and looked well-planned.
Install the Vertical Pieces
After the top and bottom frames were up, it was time to add the vertical 1×2 boards. These were spaced evenly between the top and bottom horizontal pieces to create the classic board and batten look.
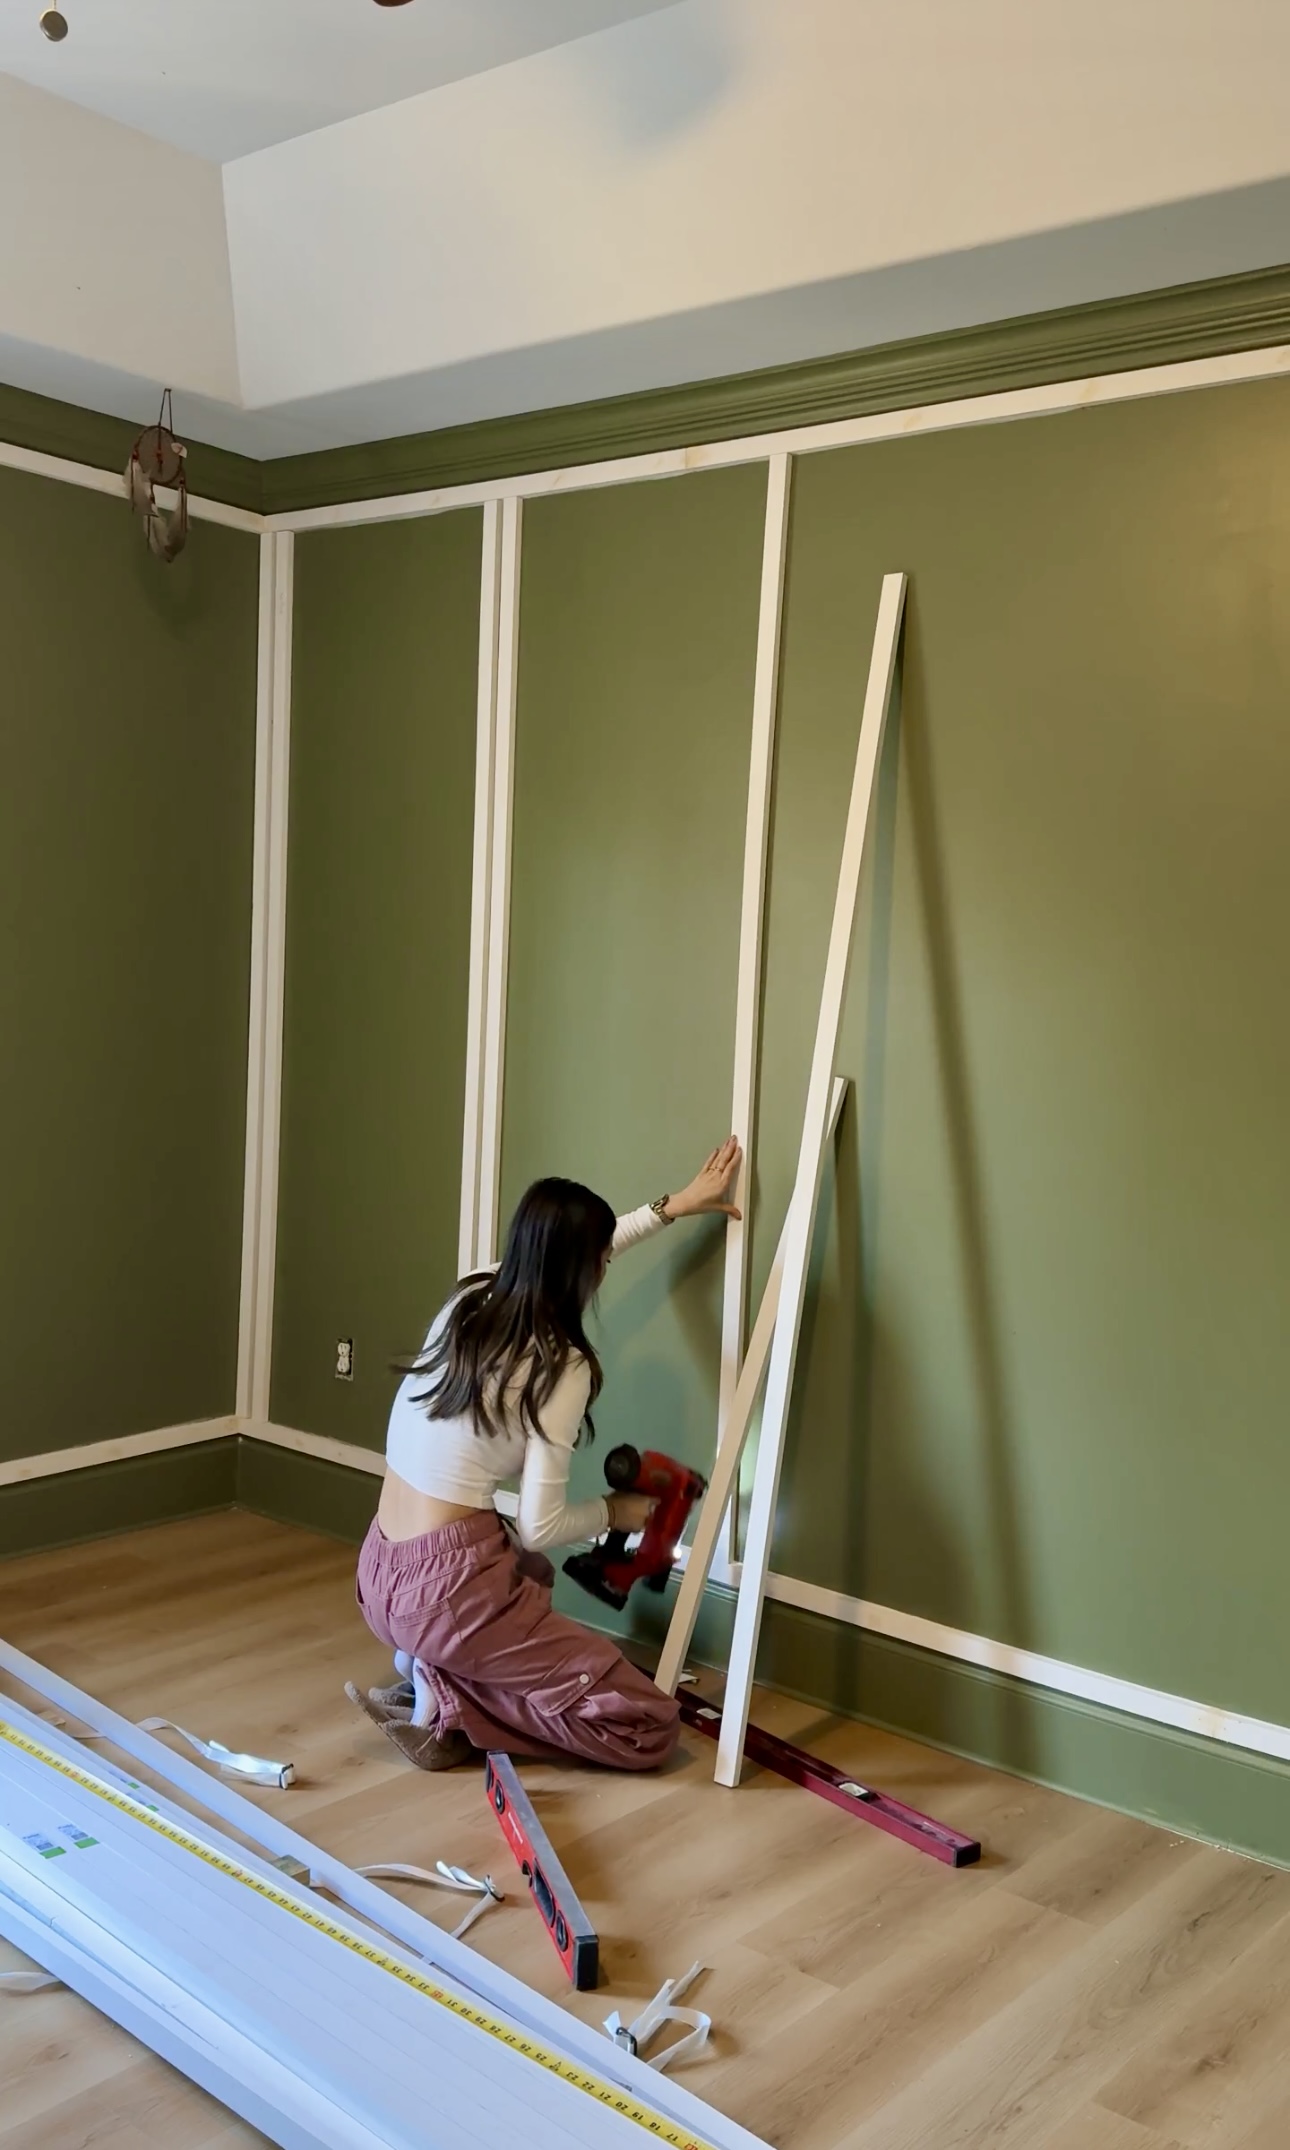
Once all the 1x2s were installed, we caulked and went over everything with Sorrel Leaf to match the rest of the room. The result was a sleek, modern look with a touch of traditional charm.
Room Decor
Now, for my favorite part: the decor! After all the hard work of painting and installing the board and batten, it was finally time to make the room feel like home. We added some fun and functional touches to give Zeke’s room the perfect balance of style and comfort. Whether it’s the cozy bedding, fun wall art, or little personal details, these final touches really brought everything together.
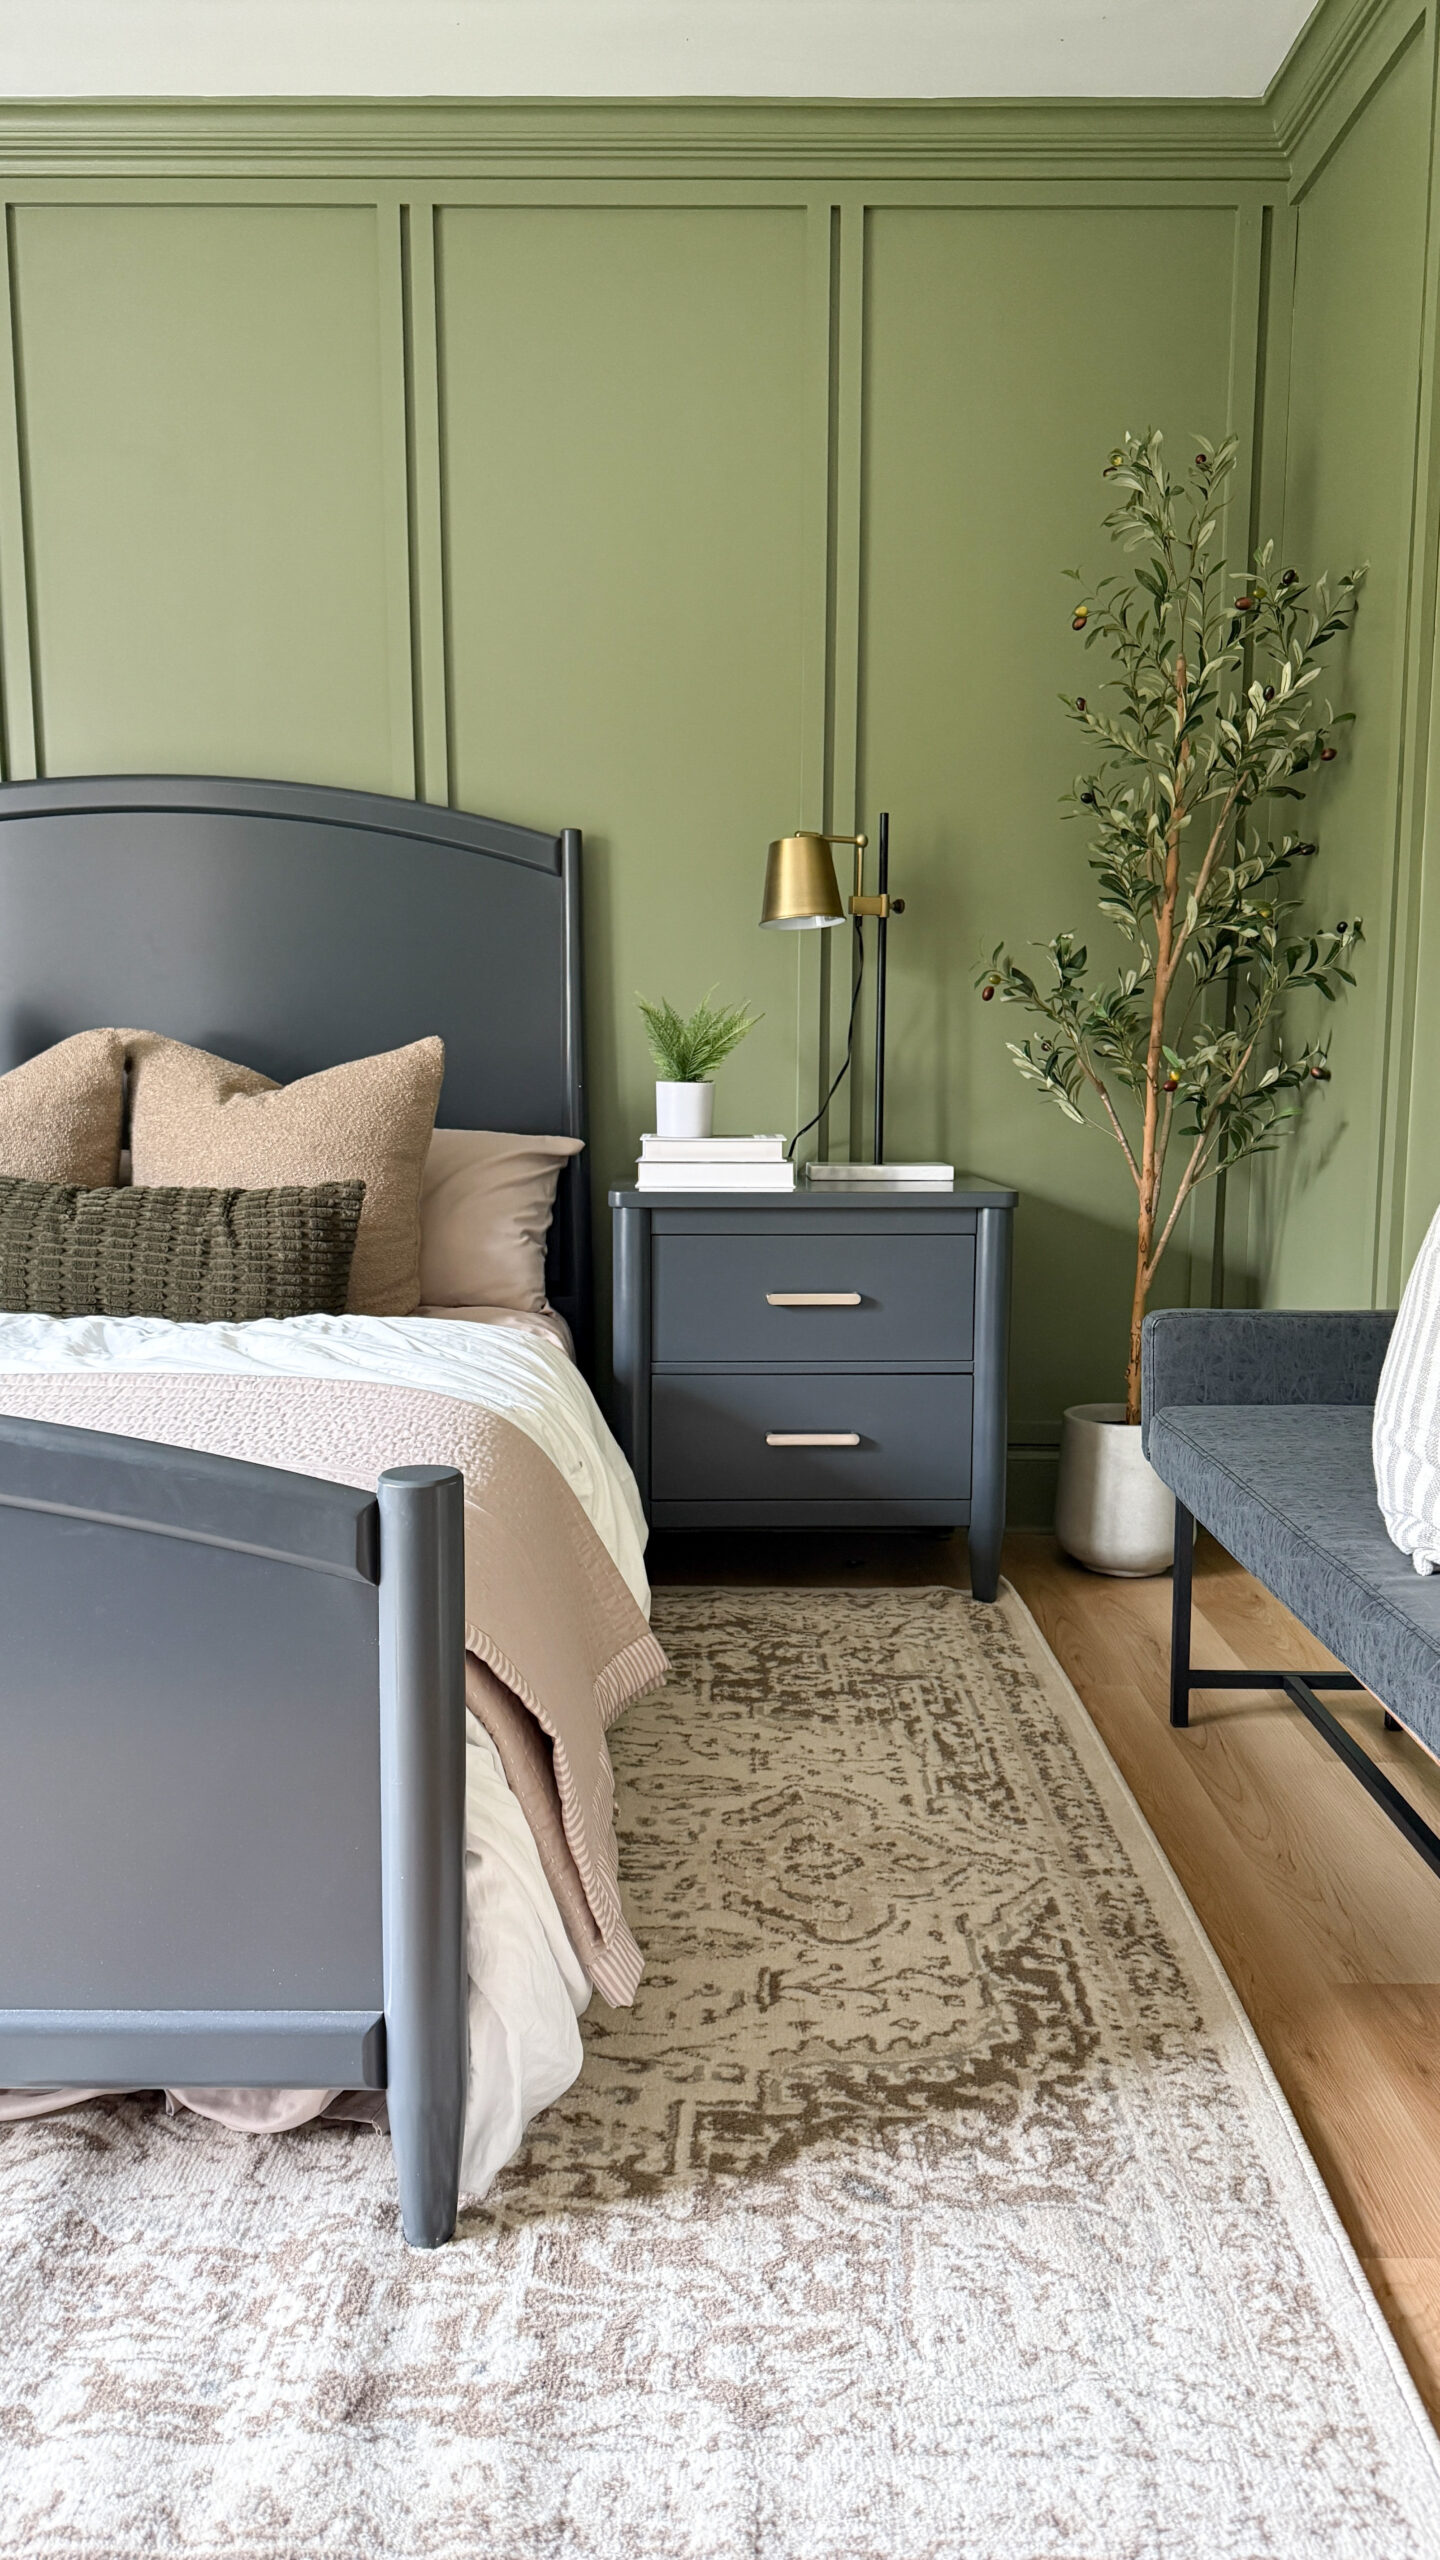
Here’s all the decor we used in Zeke’s room!
Everything I wore working on Zeke’s room this week:


Looks great!
Thank you so much!
Hello! I hope you’re having a great day. Good luck 🙂