Hi
I'm Bong
I'm just a girl who likes to DIY anything and everything. More than that, I love teaching people - especially women - how to pick up power tools and create the home of their dreams. Stop waiting for someone else and starting Doing It Yourself. I'll show you how!
diy projects
diy school
life hacks
categories
must have products
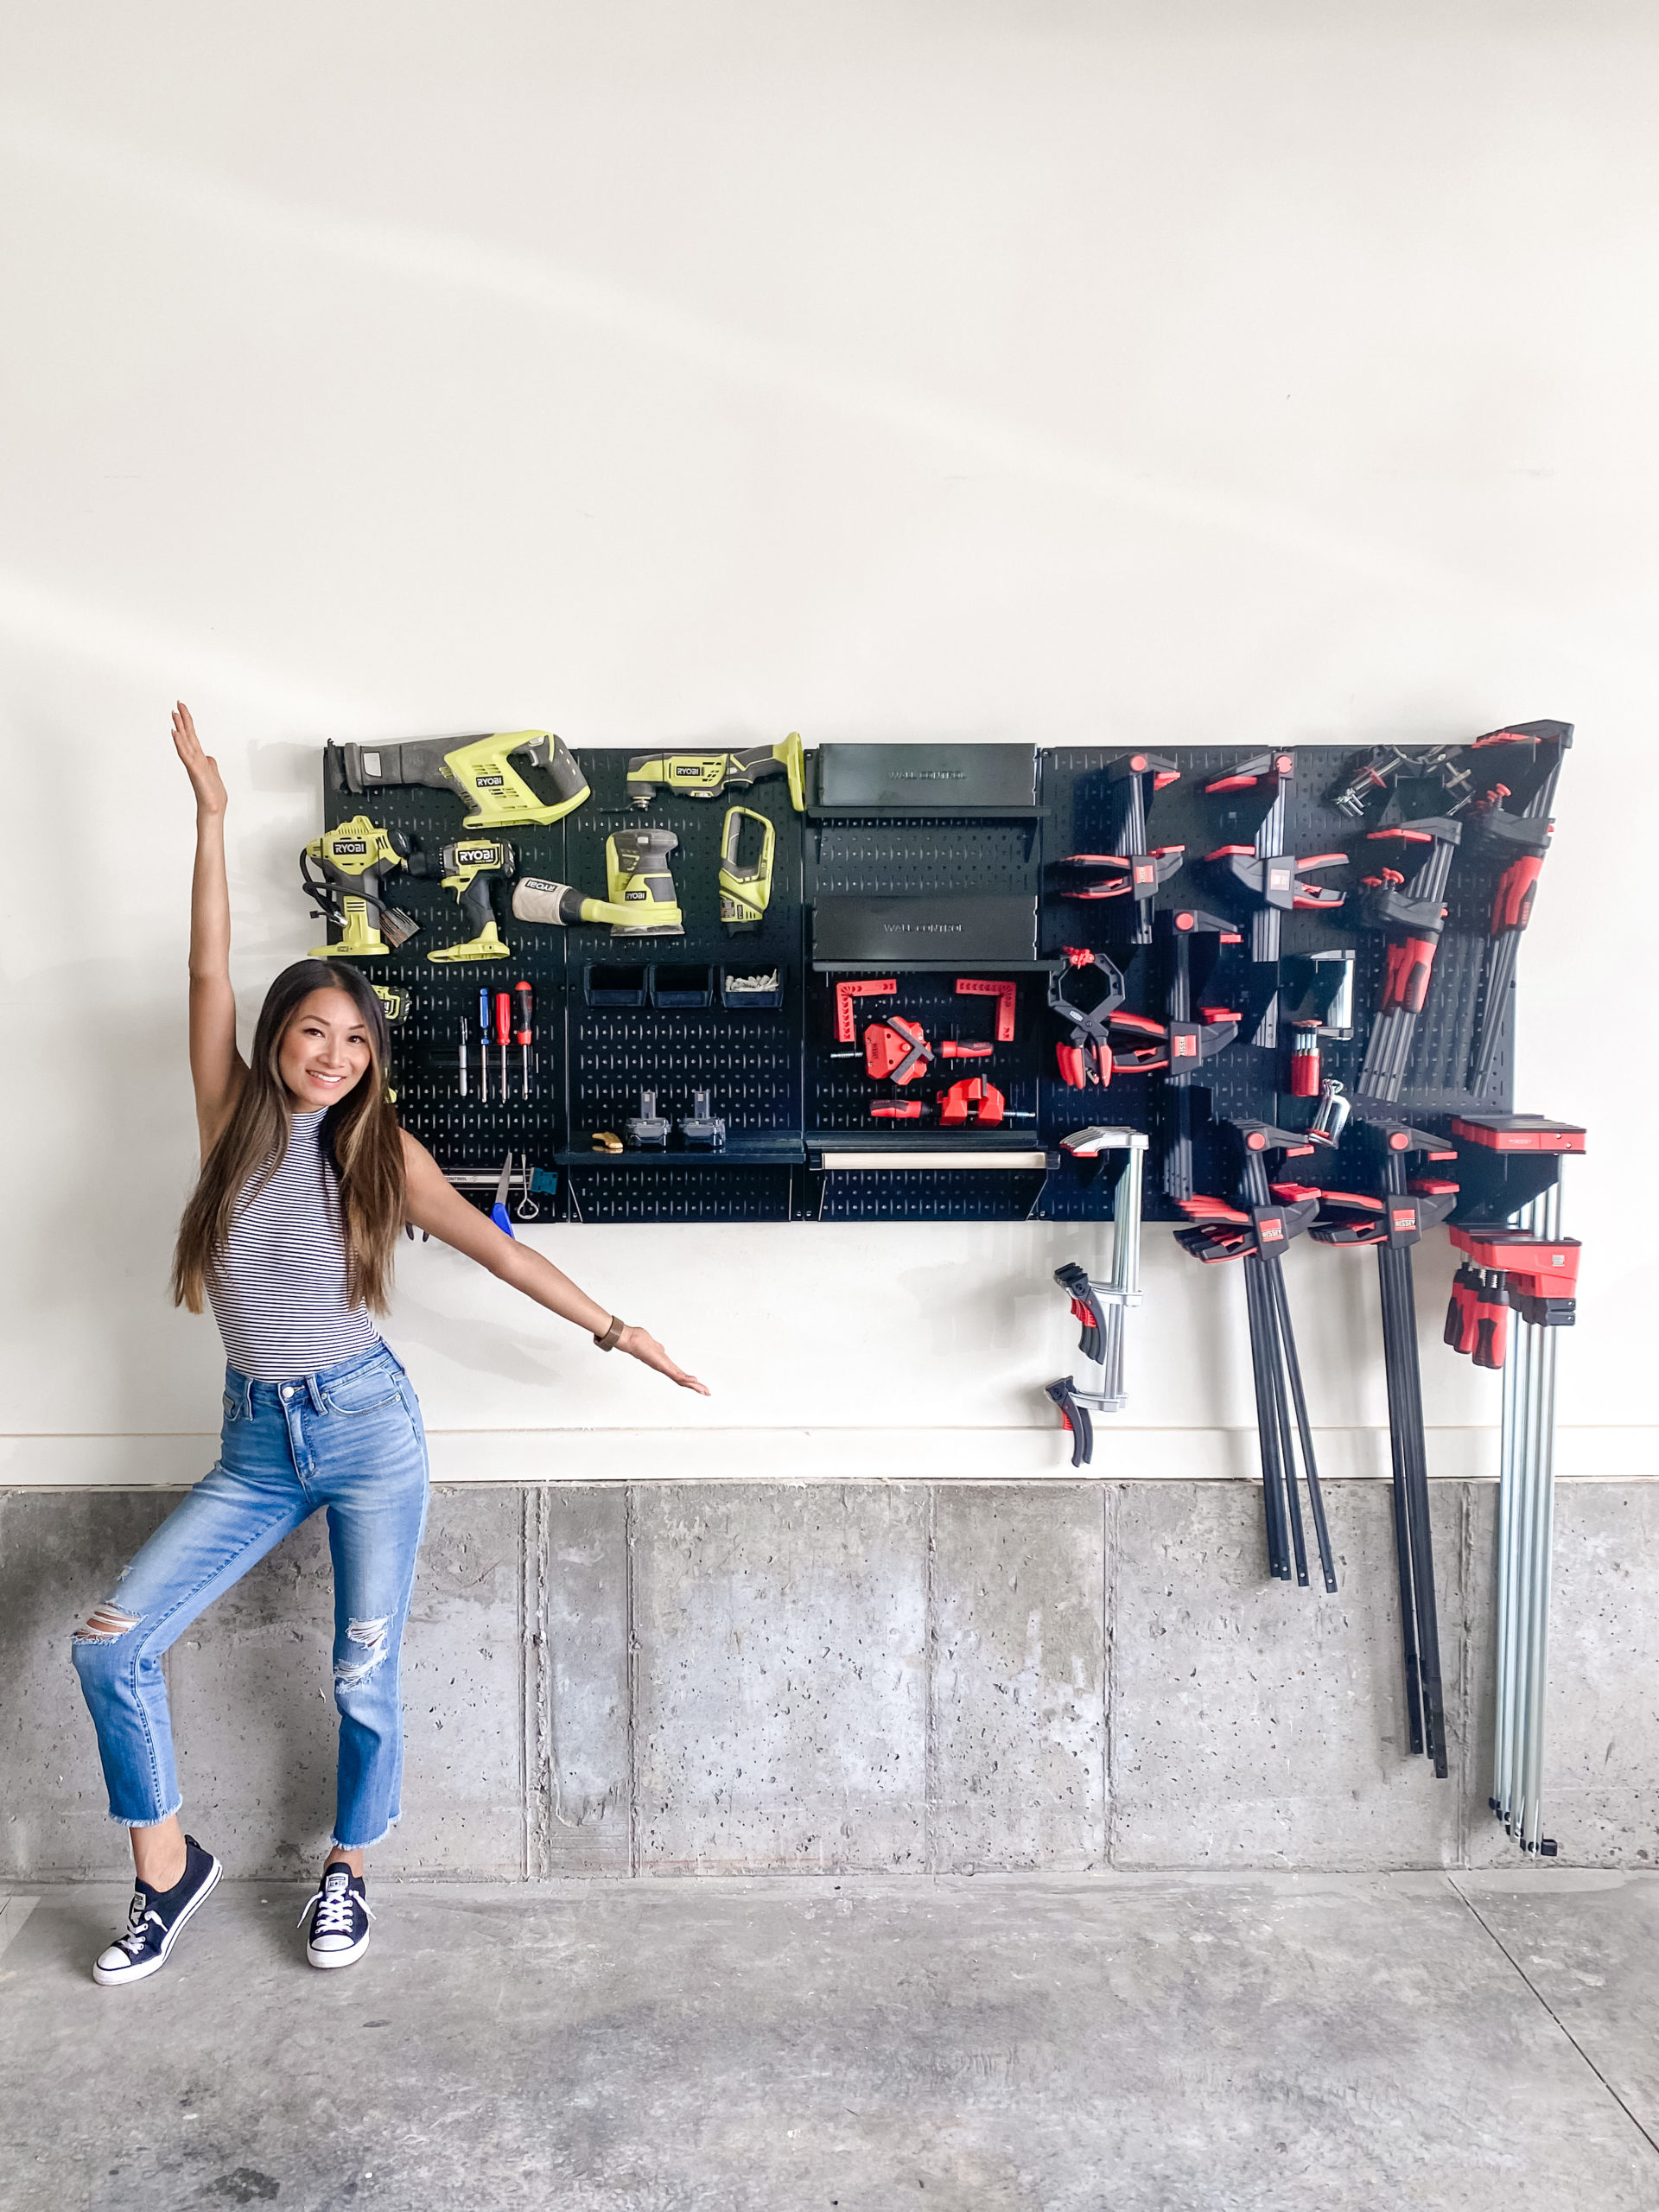
This is a project that I’m very excited about that also is very overwhelming. So I’m in my garage, we have a three-car garage, we have two cars, so on one side I have just done all my projects on the other, and it is a disaster, and I can’t function like this. So I have some fantastic organizing things from wall control that I am beyond stoked about.
I’m deciding where to install the wall control because I need an outlet for my saw.ThisI will take you along and show you all their unique products. I am first laying out my unique pegboard system from Wall Control so I can measure the dimensions. I am most excited about all these accessories that will help me organize everything! It is finally time to clean up this messy garage.
So I have five of these wall control panels, and I wanted to show you how they’re measured. They are about 16in wide from end to end. The reason for that is that you can stick them on studs because most framing studs are 16in apart. So if you do this correctly, it should be able to be put into the two bottom screws into the same stud. That may be tricky, but I will show you how I do that with my new stud finder that shows the thickness of the stud.
Anyways I’m going to try my hardest to mount these all on studs just so they’re fully supported but I will show you guys all the accessories. I showed this stud finder before but I’m going to show it again because it is my absolute favorite. We are going to hold this silver button and glide it along the wall. Once it finds a stud not only does it tell you where the stud is, it tells you where the entire sickness of the stud. These three lines represent the thickness of the stud so I’m going to make sure that I have marked it. Since I know the thickness, I can put two screws to hold the panel on the left and right sides.
I have marked my studs along the wall. I made the marks first with a pencil and ensured they were level. You might have to ask for help to get someone to help you hold the panel. Remember to make sure that the panels are plumb. This means that they are straight up and down. I marked all six holes with a pencil first. And then pre-drilled into studs with the ⅛in drill bit. Next, I installed screws, and I like to put in all six screws but not tighten them until the very end. Check again for plumb, and then tighten the screws all the way. I repeated this process for all the panels. You can do as many panels as you’d like.
Now that the panels are up, I want to discuss the accessories. Use U-shaped hooks to connect to the pannels. The U-shaped hooks are for holding up tools. Then you have a screwdriver panel where you can put any cylinder-shaped device. They also have a magnetic bar that is awesome. You can throw whatever on there, and it keeps it in place. Next, I’ve got a 3-pack of just little cups you can put in. I’m going to use this other shell to store my batteries. Underneath is a wall control charging panel, but I still need to install it to have all my batteries together. Finally, there is a paper towel holder that will be great when your hands are dirty.
On top of that, I have a couple of shelves with enclosed walls to keep things from falling off. Then I also have clamp brackets which are made specifically for clamps. So you don’t have to worry about trying to figure it out Wall Control will have you taken care of it. So I figured out what size I needed because they come in several different sizes, I put all my clams next to each other and measured how long they were, and then I went with the clamp that was just a bigger size.
That is how I organized my tools, but you have so many options when you do this yourself. So excited about how this turned out!


