
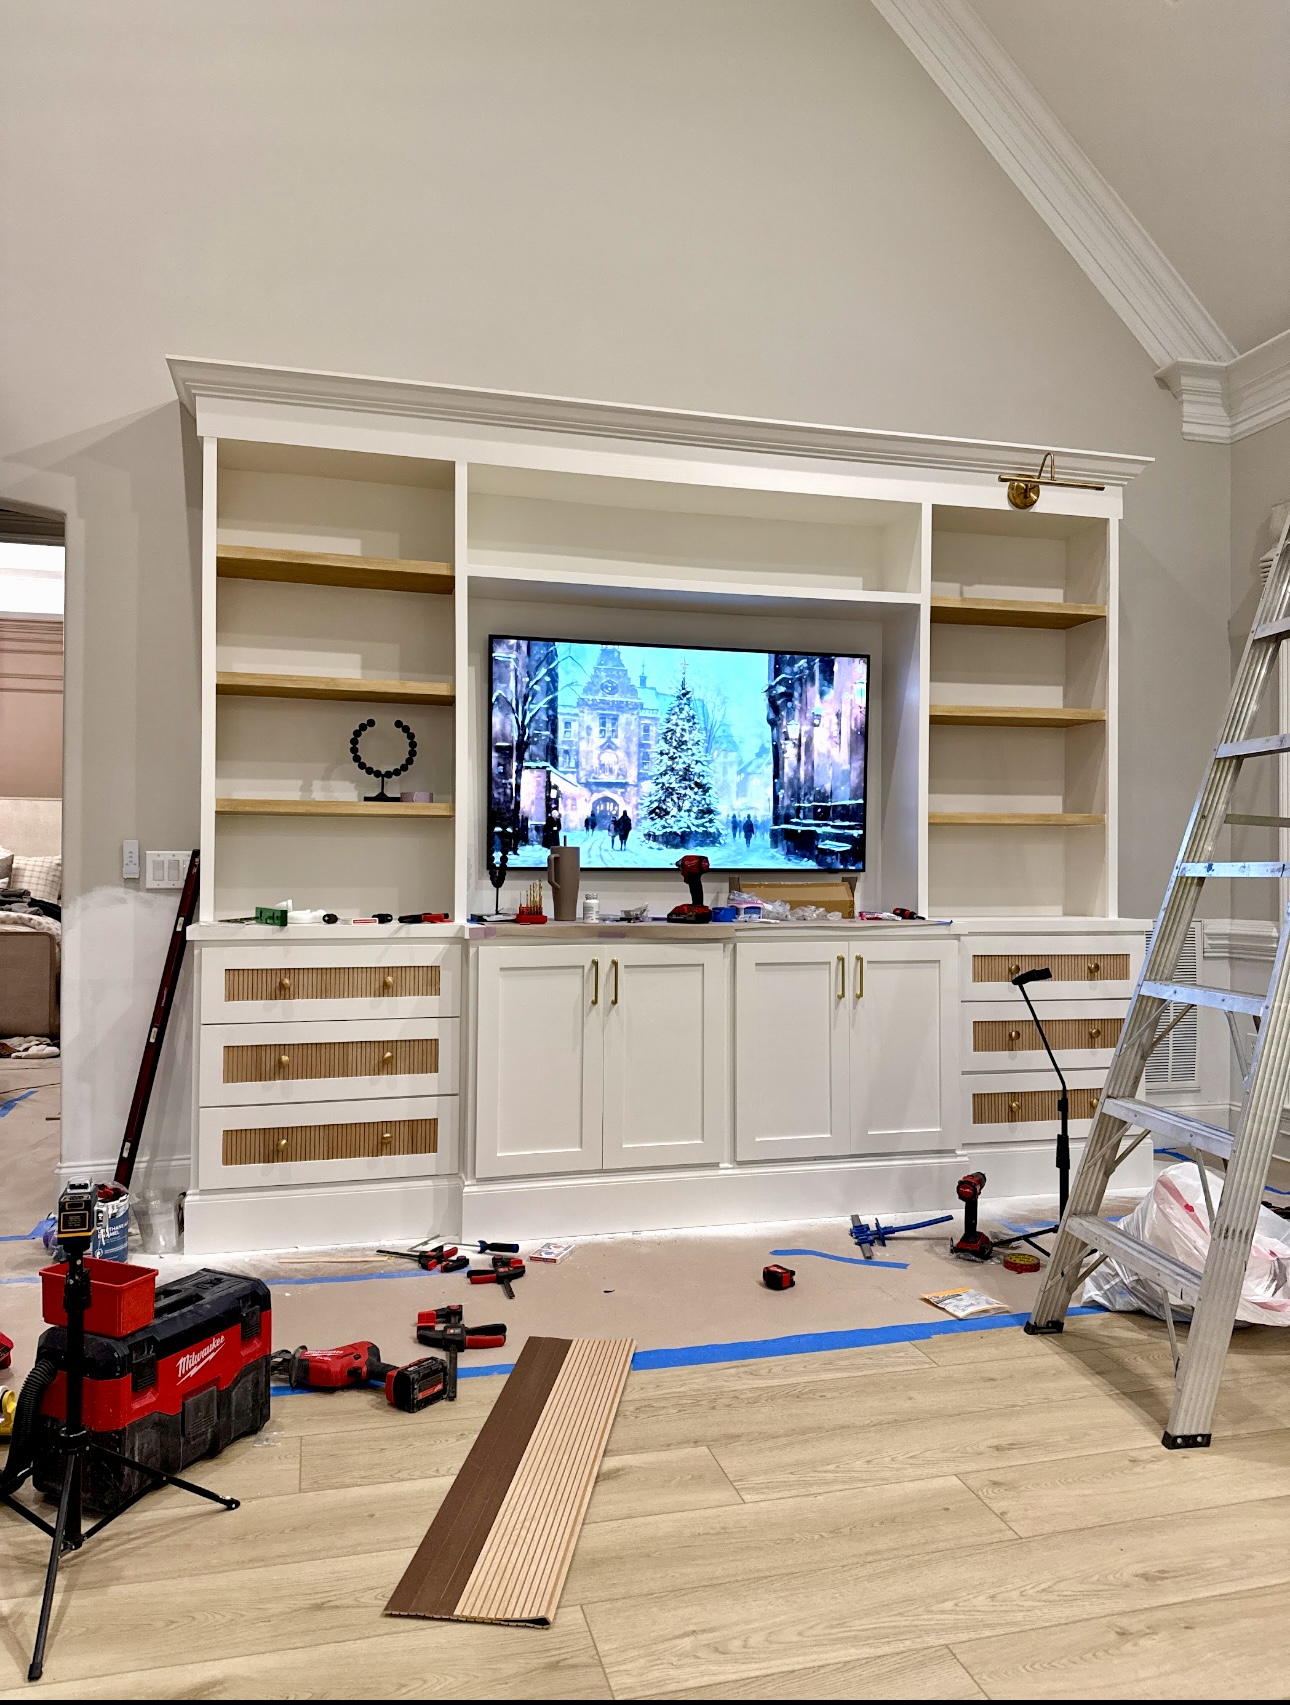
The base frames for our built-ins are DONE! This project is no joke…I’m so glad we are making this dream come to life. You can see how we built the actual built-ins here in this blog post. Next up, we are working on the drawers and cabinet fronts!
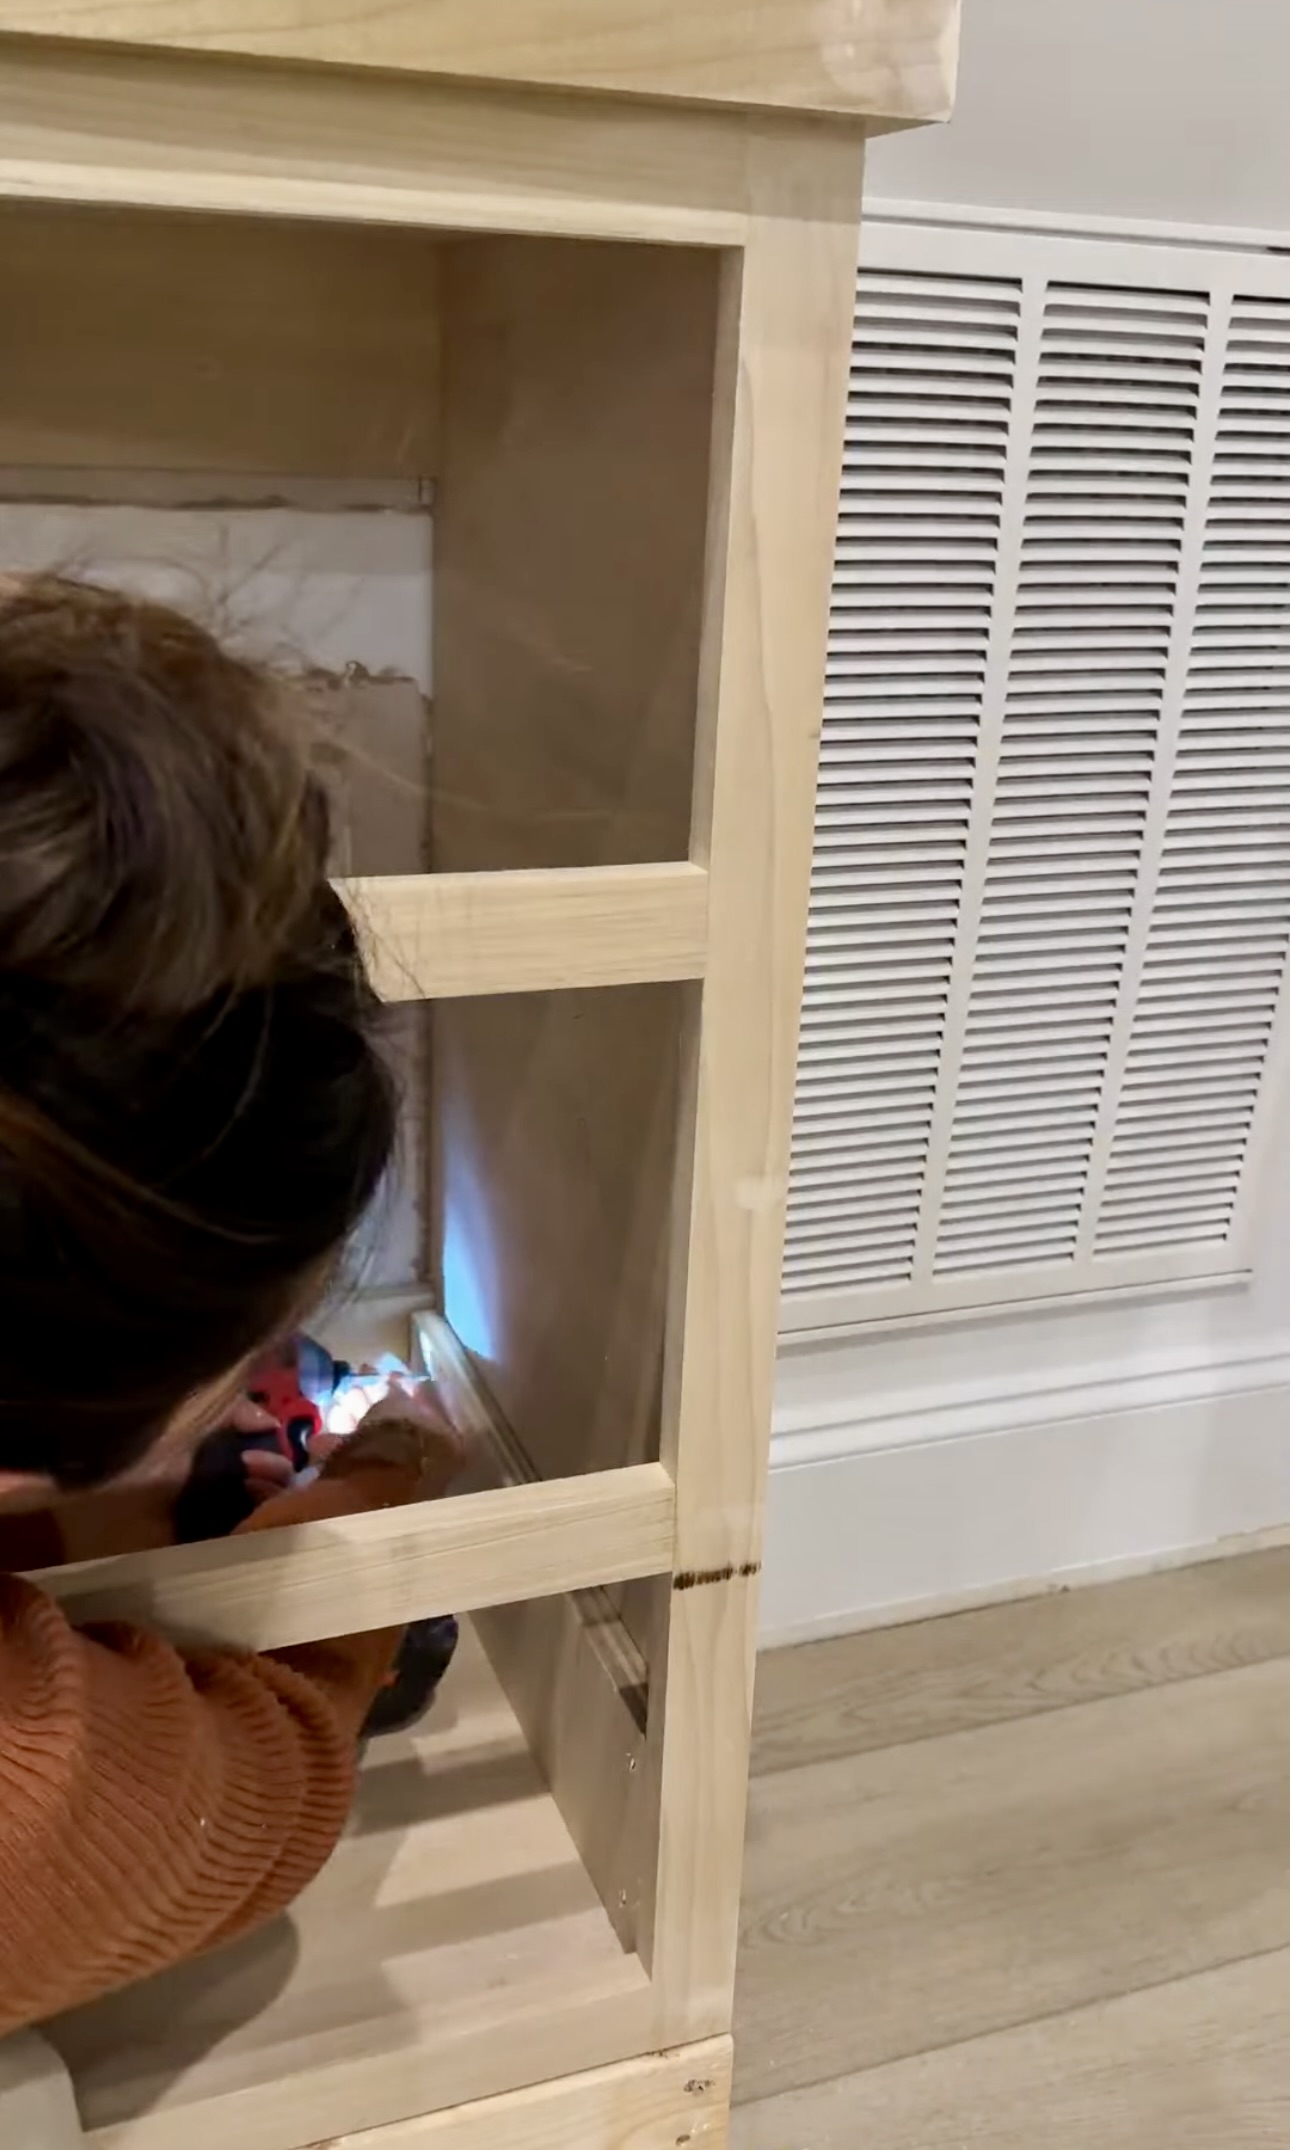
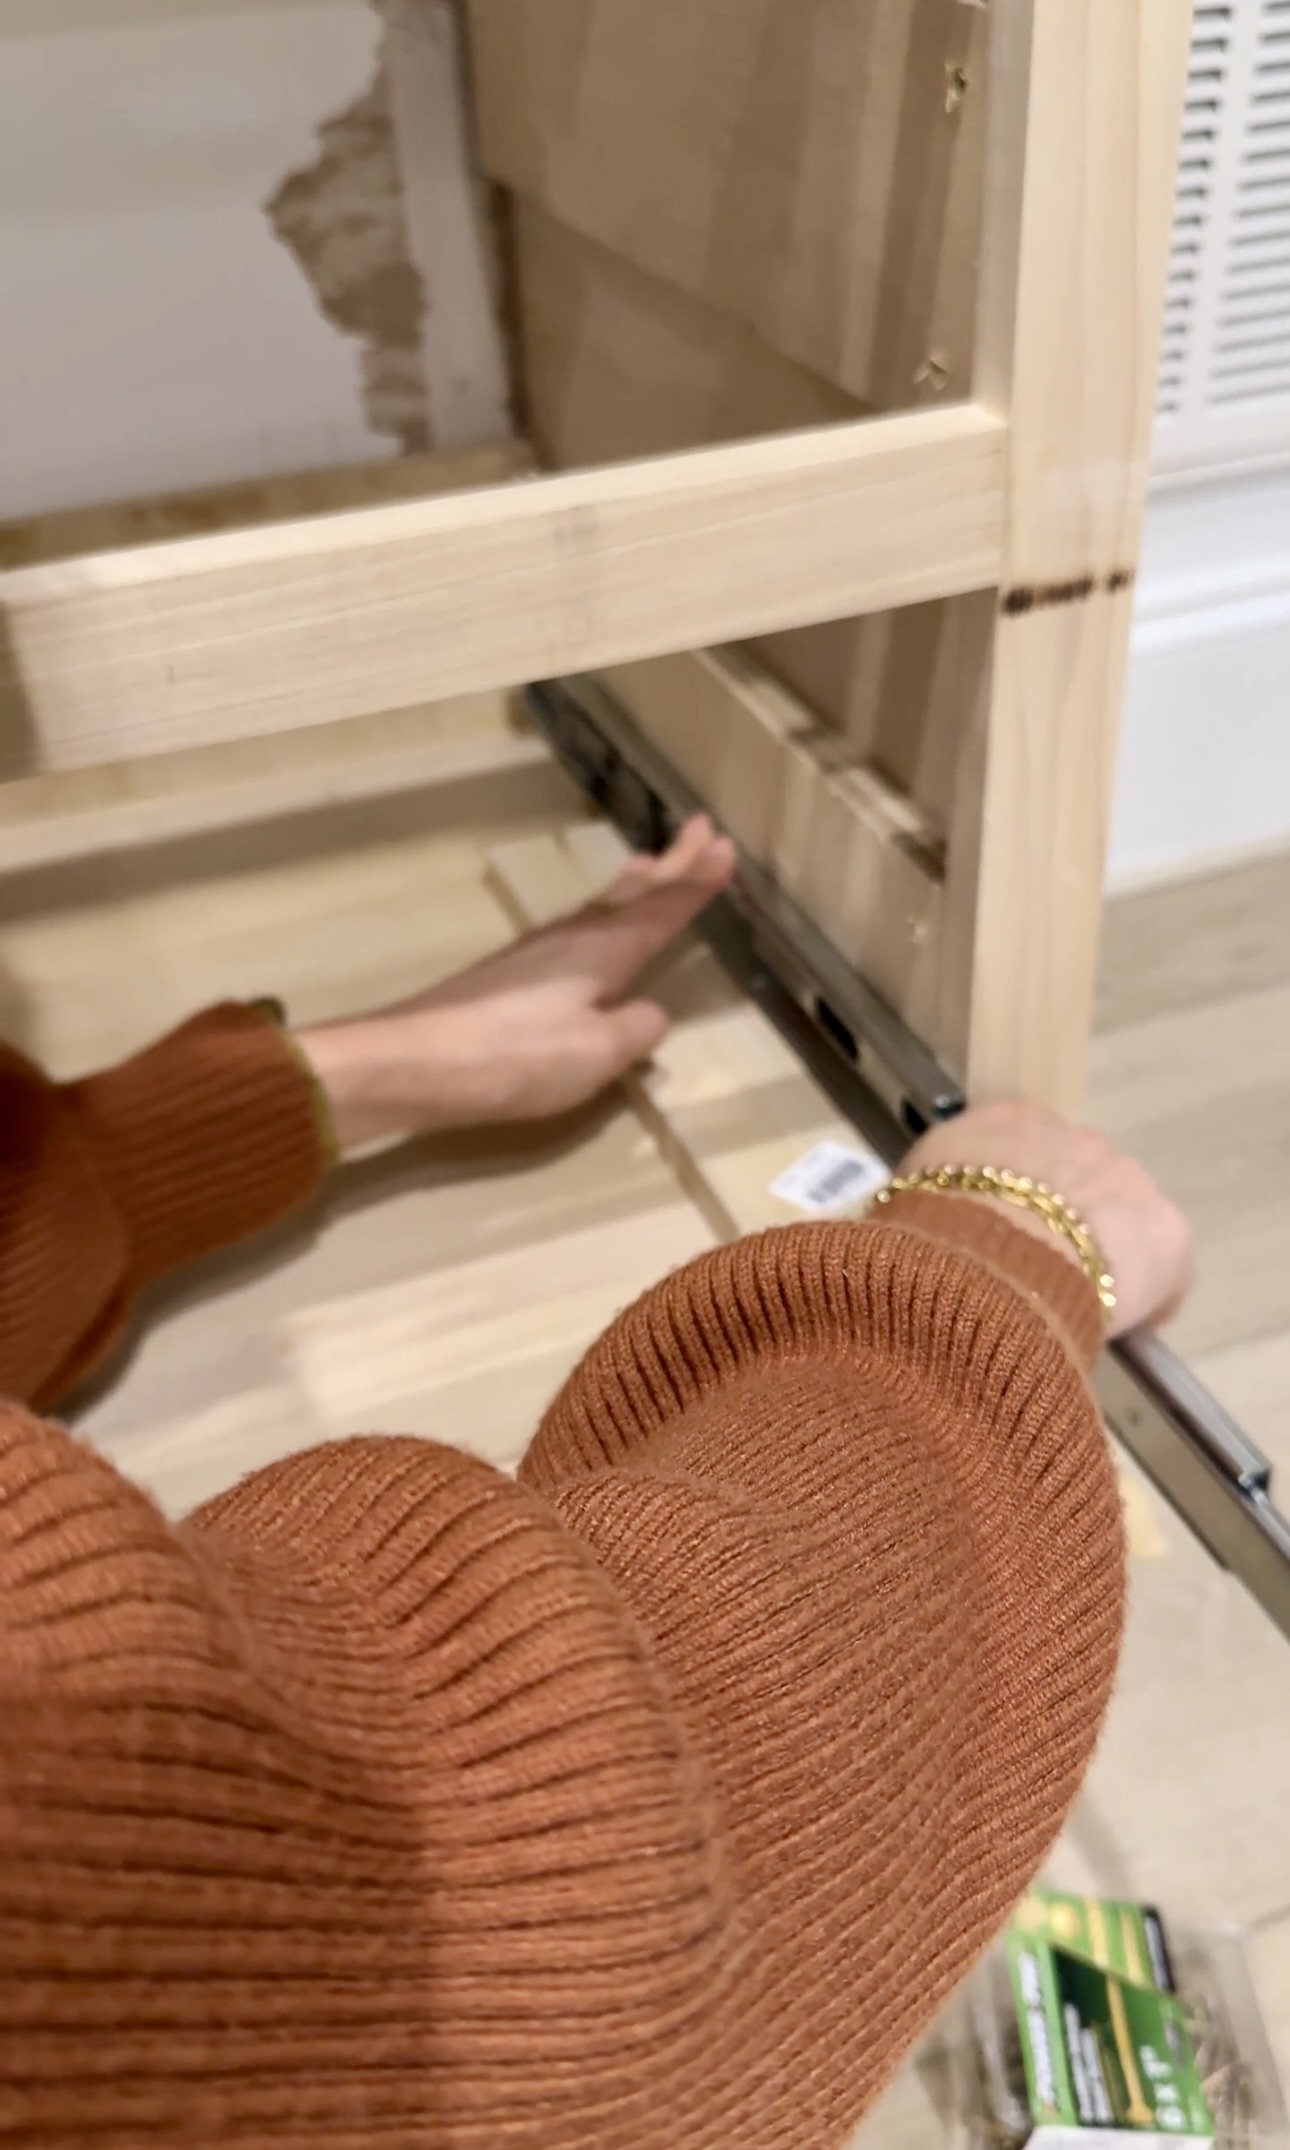
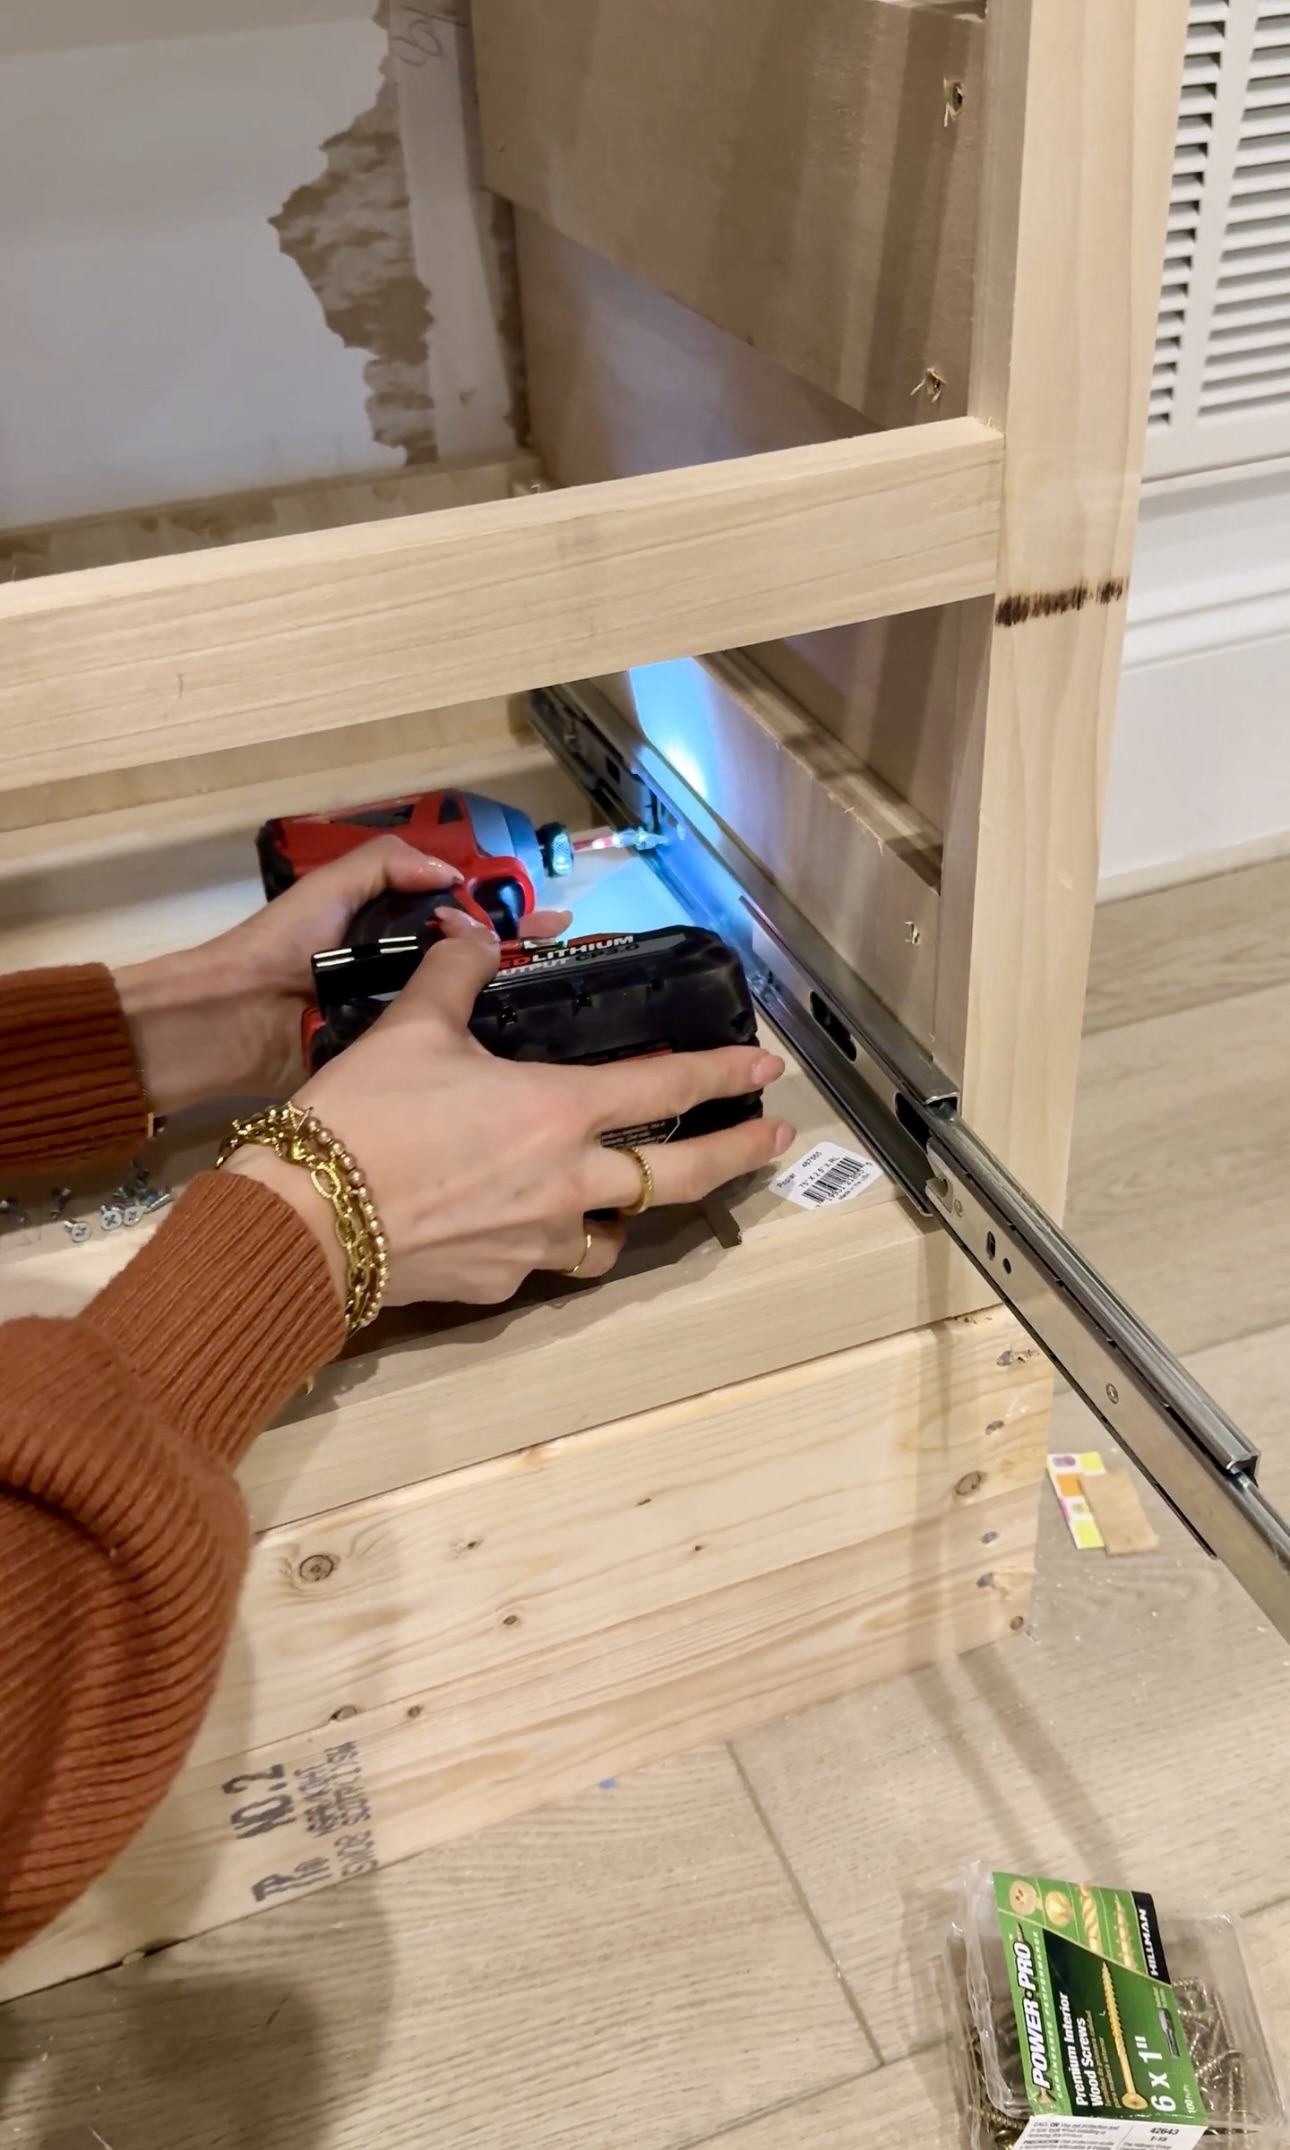
Installing Drawer Slides
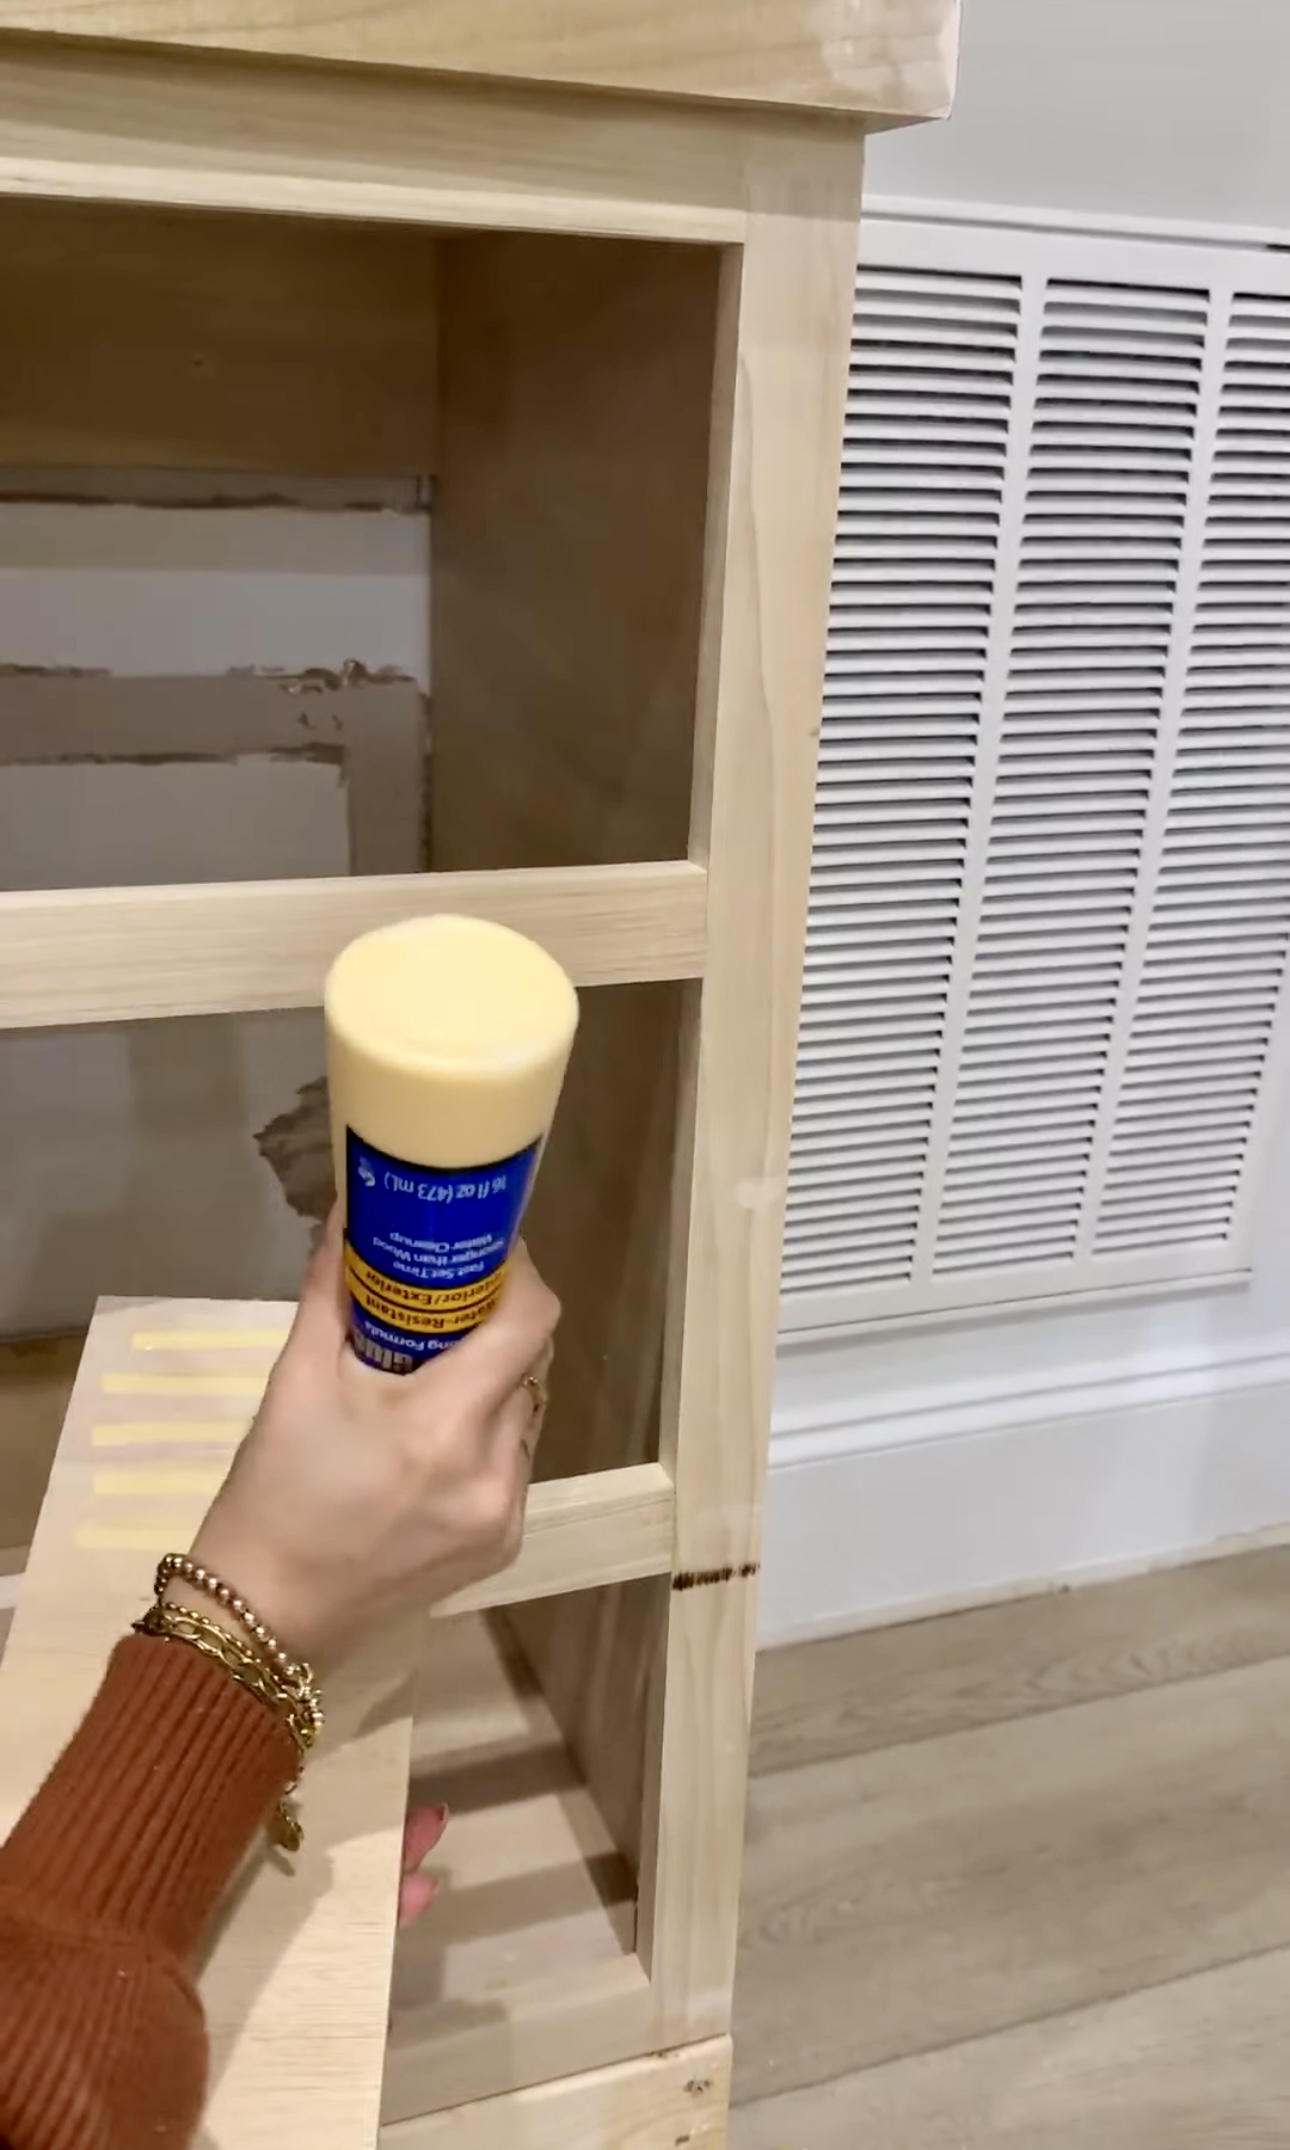
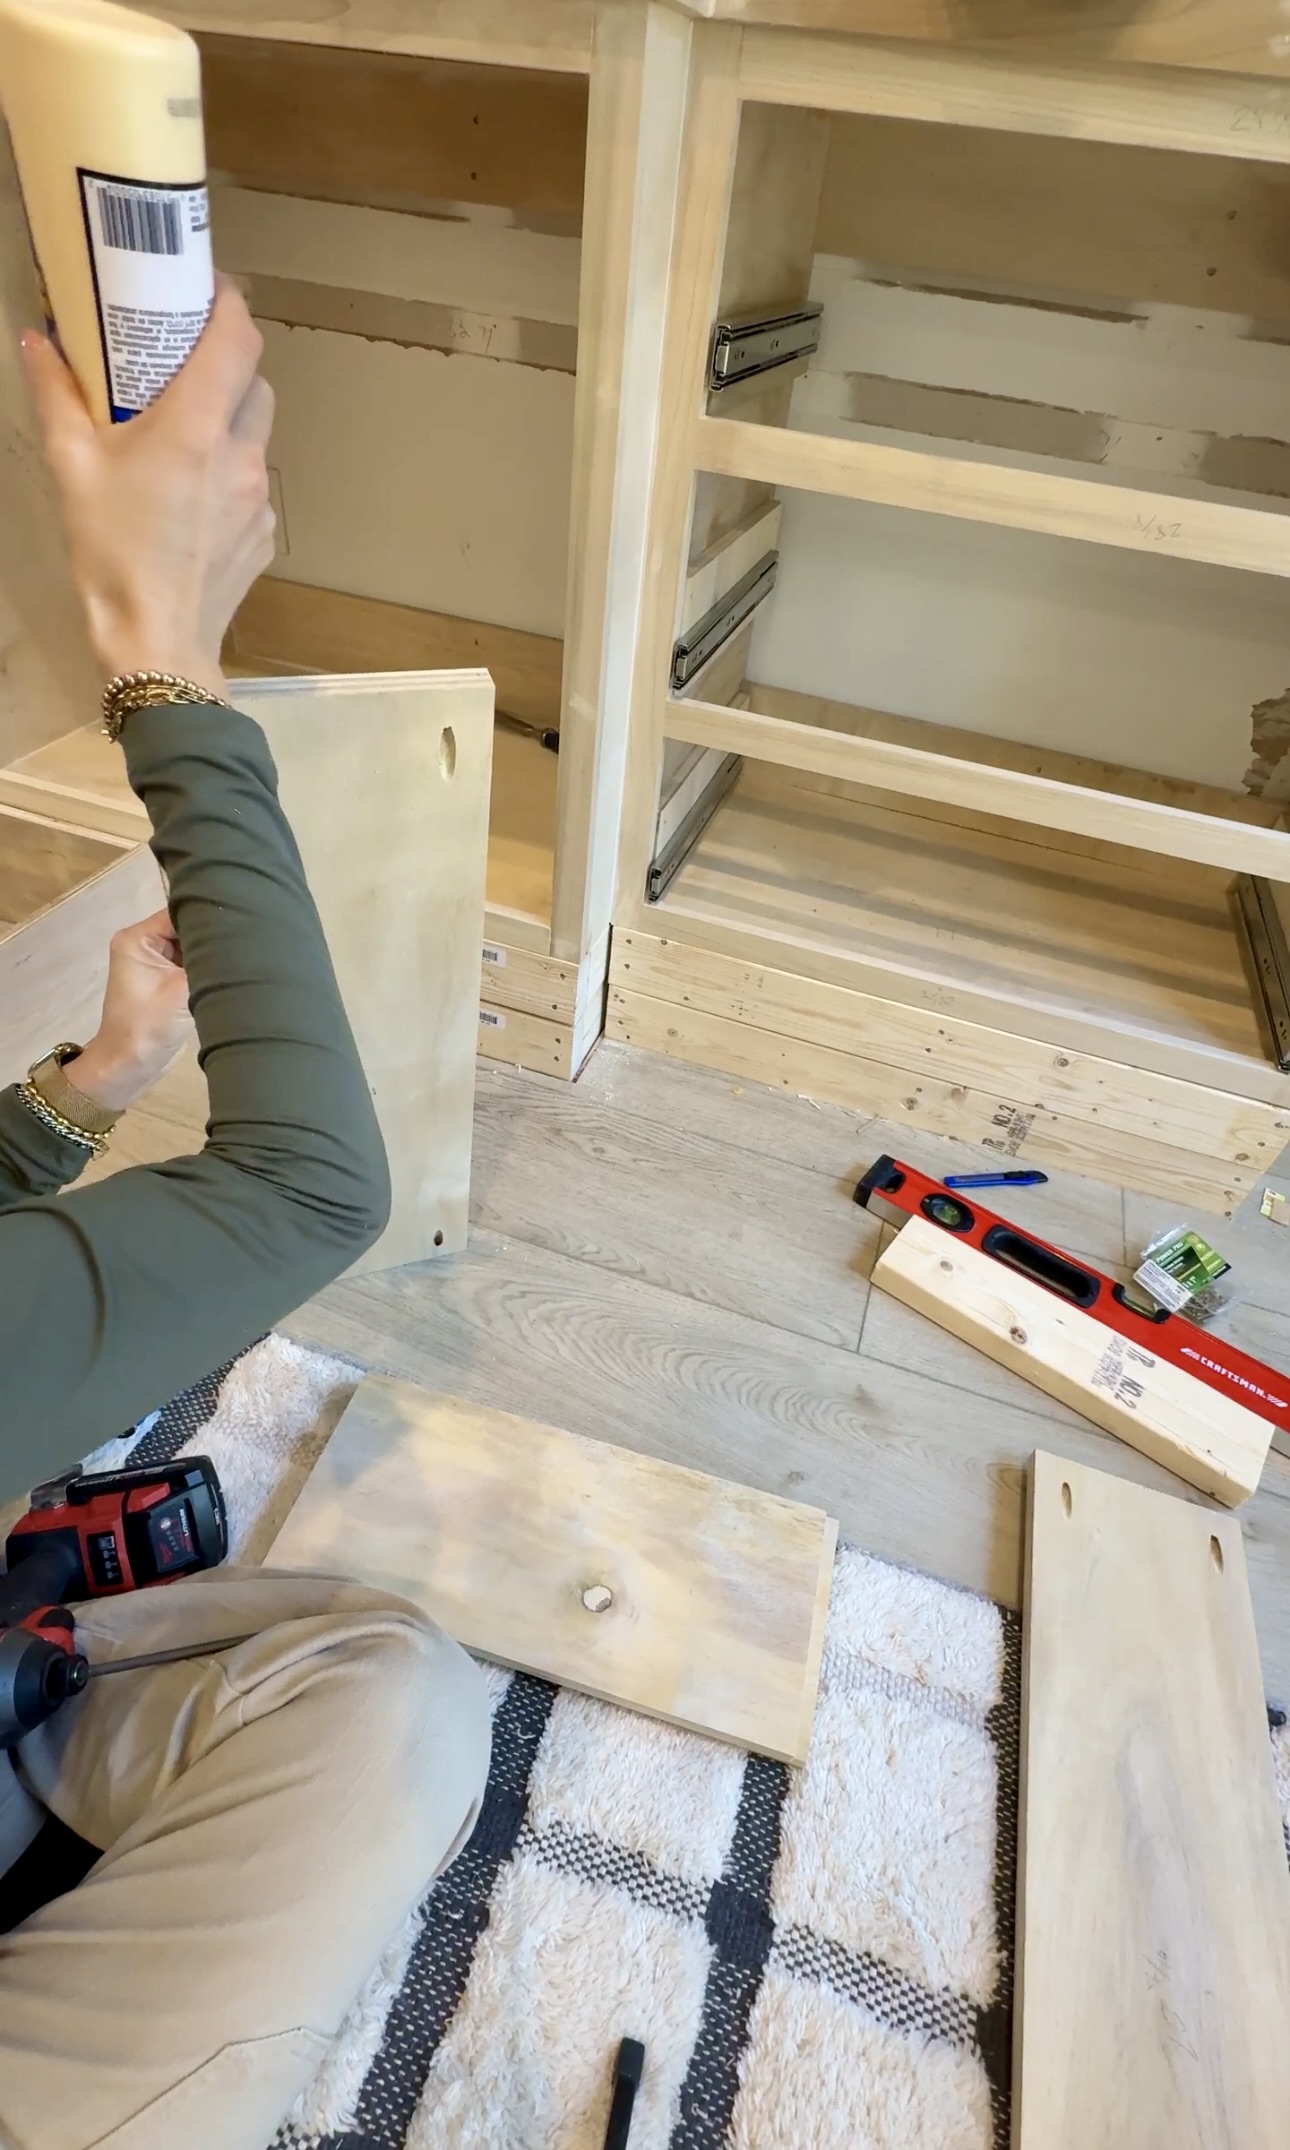
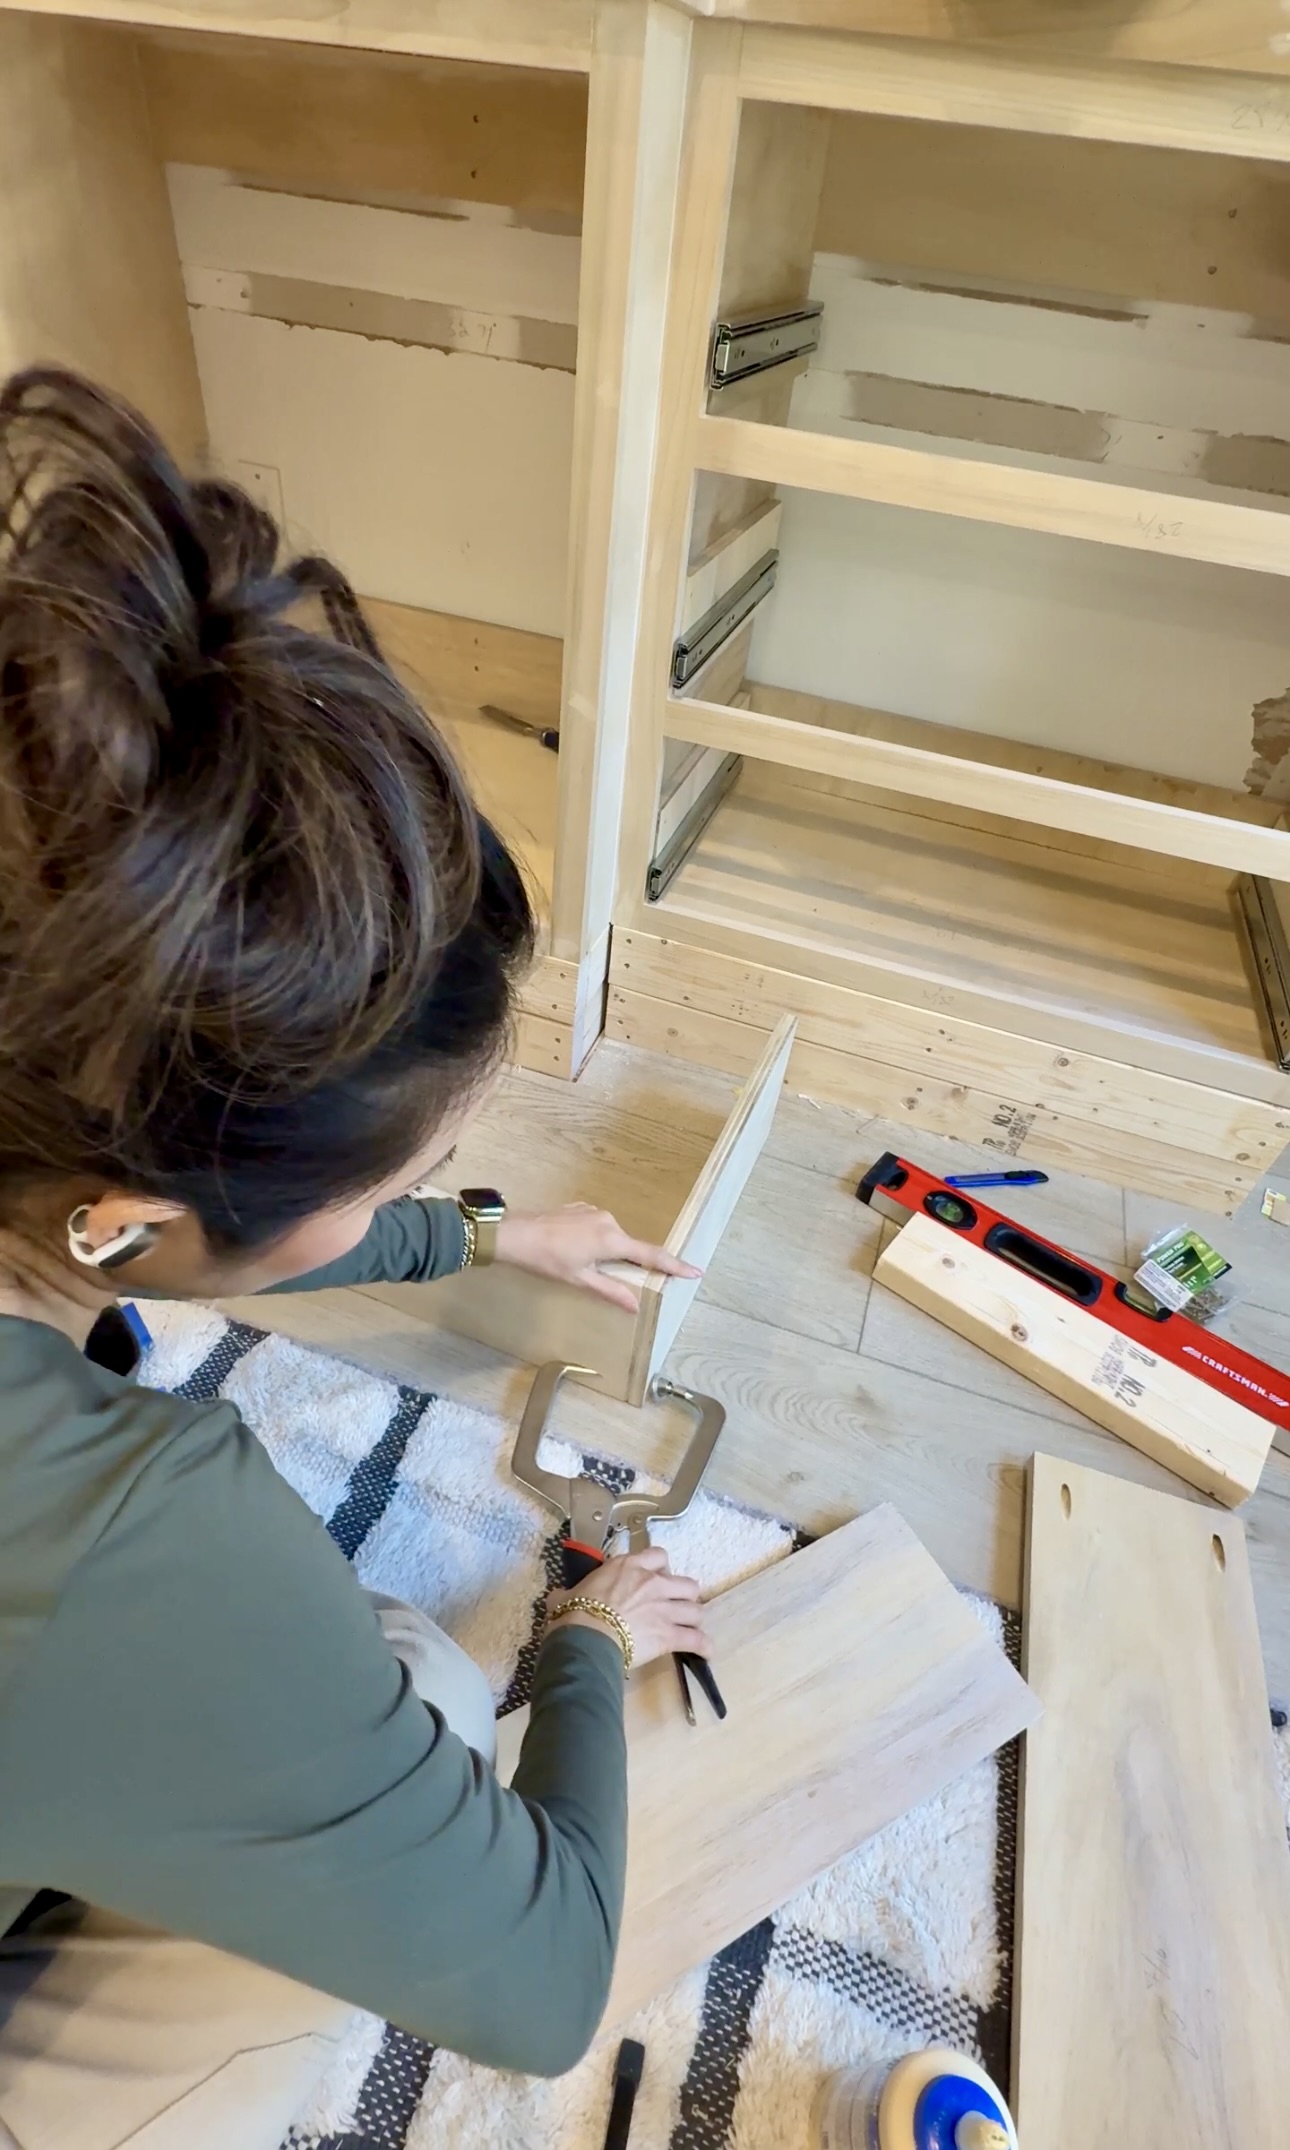
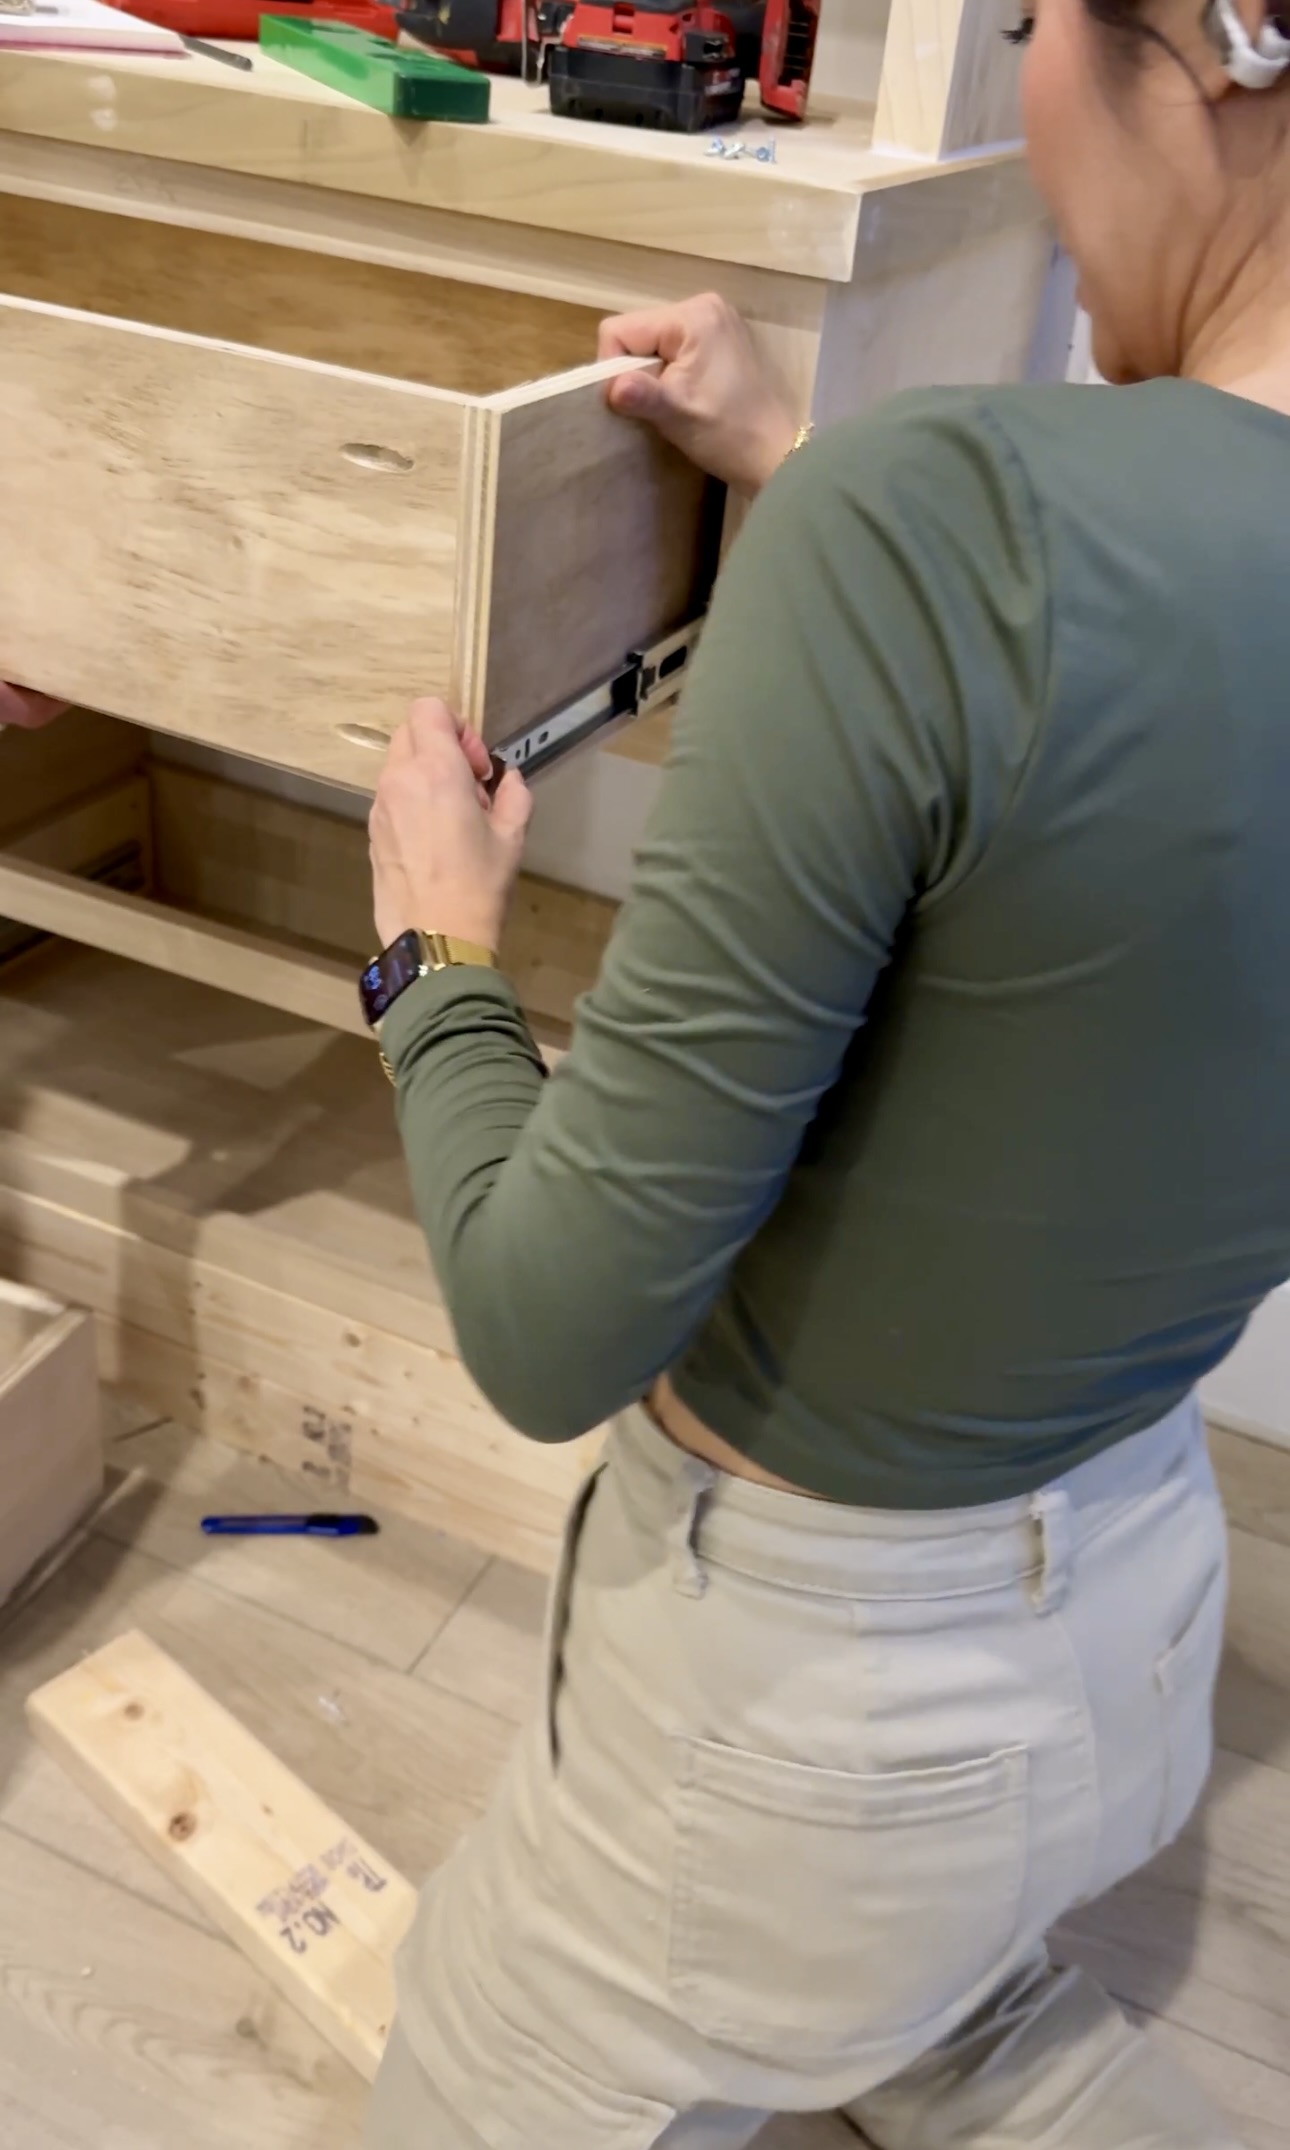
I got 16 inch soft close slides for these built-ins. Because I decided to put trim on these I had to adjust the depth so the drawer fronts would work. I used 1 inch screws for this so it would go past the 3/4″ thickness without tearing through to the other side. So, I put 3 scrap pieces of plywood up because there are 3 drawers. I glued them on and secured them with the screws.
Then, I installed my drawer slides!
Measuring for Drawers
For drawers, you have to measure so freaking precise. I measure down to the 16th of an inch. For the front, you measure from each end – inside to inside. If you aren’t precise here, the drawers won’t close like they should!
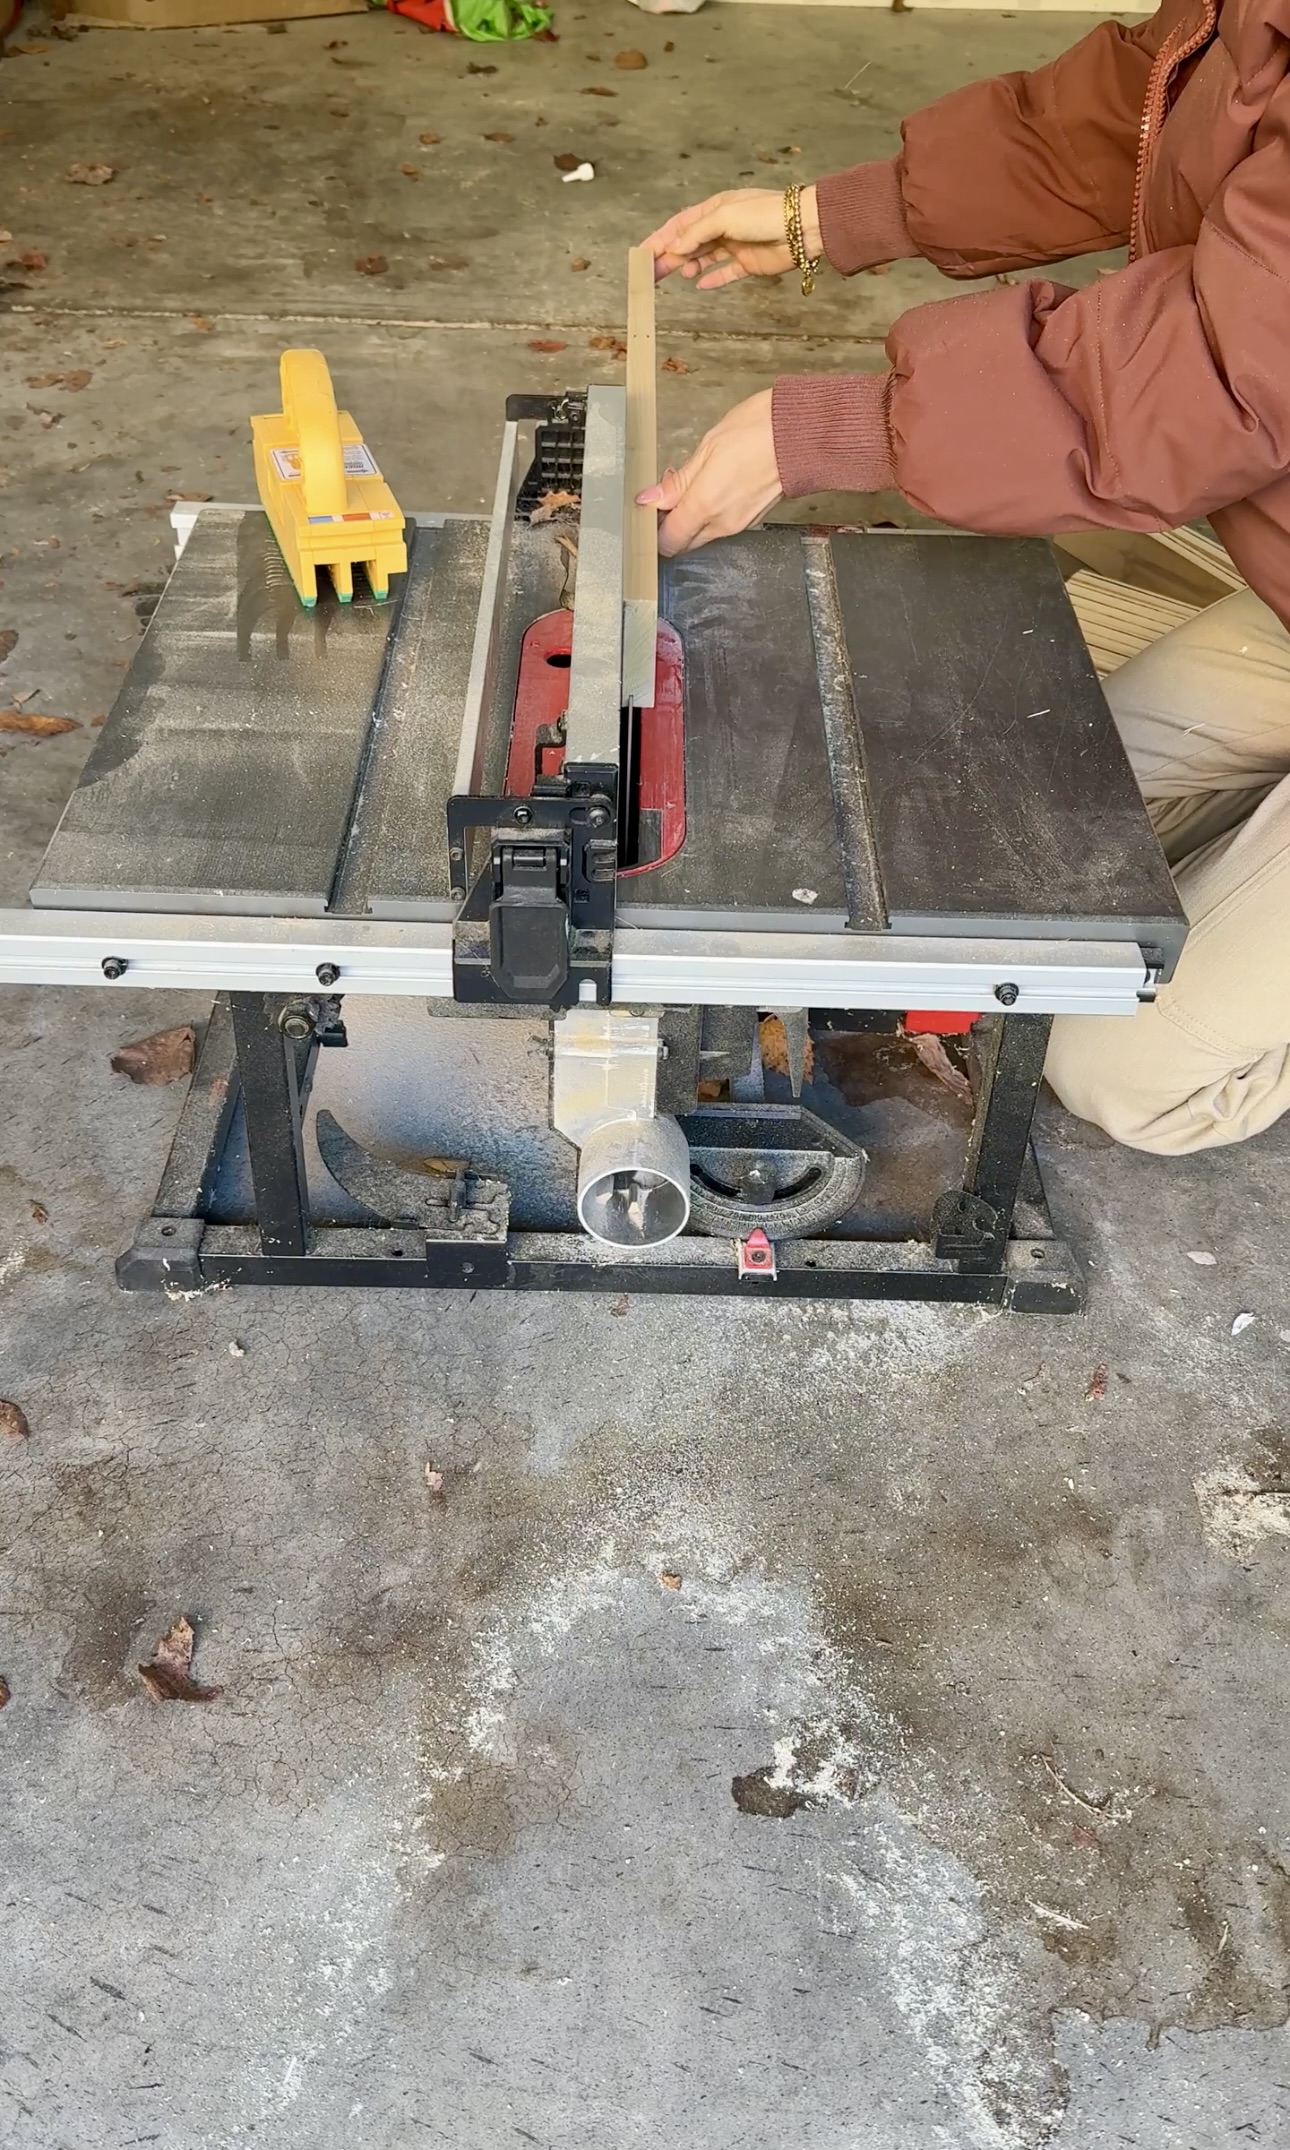
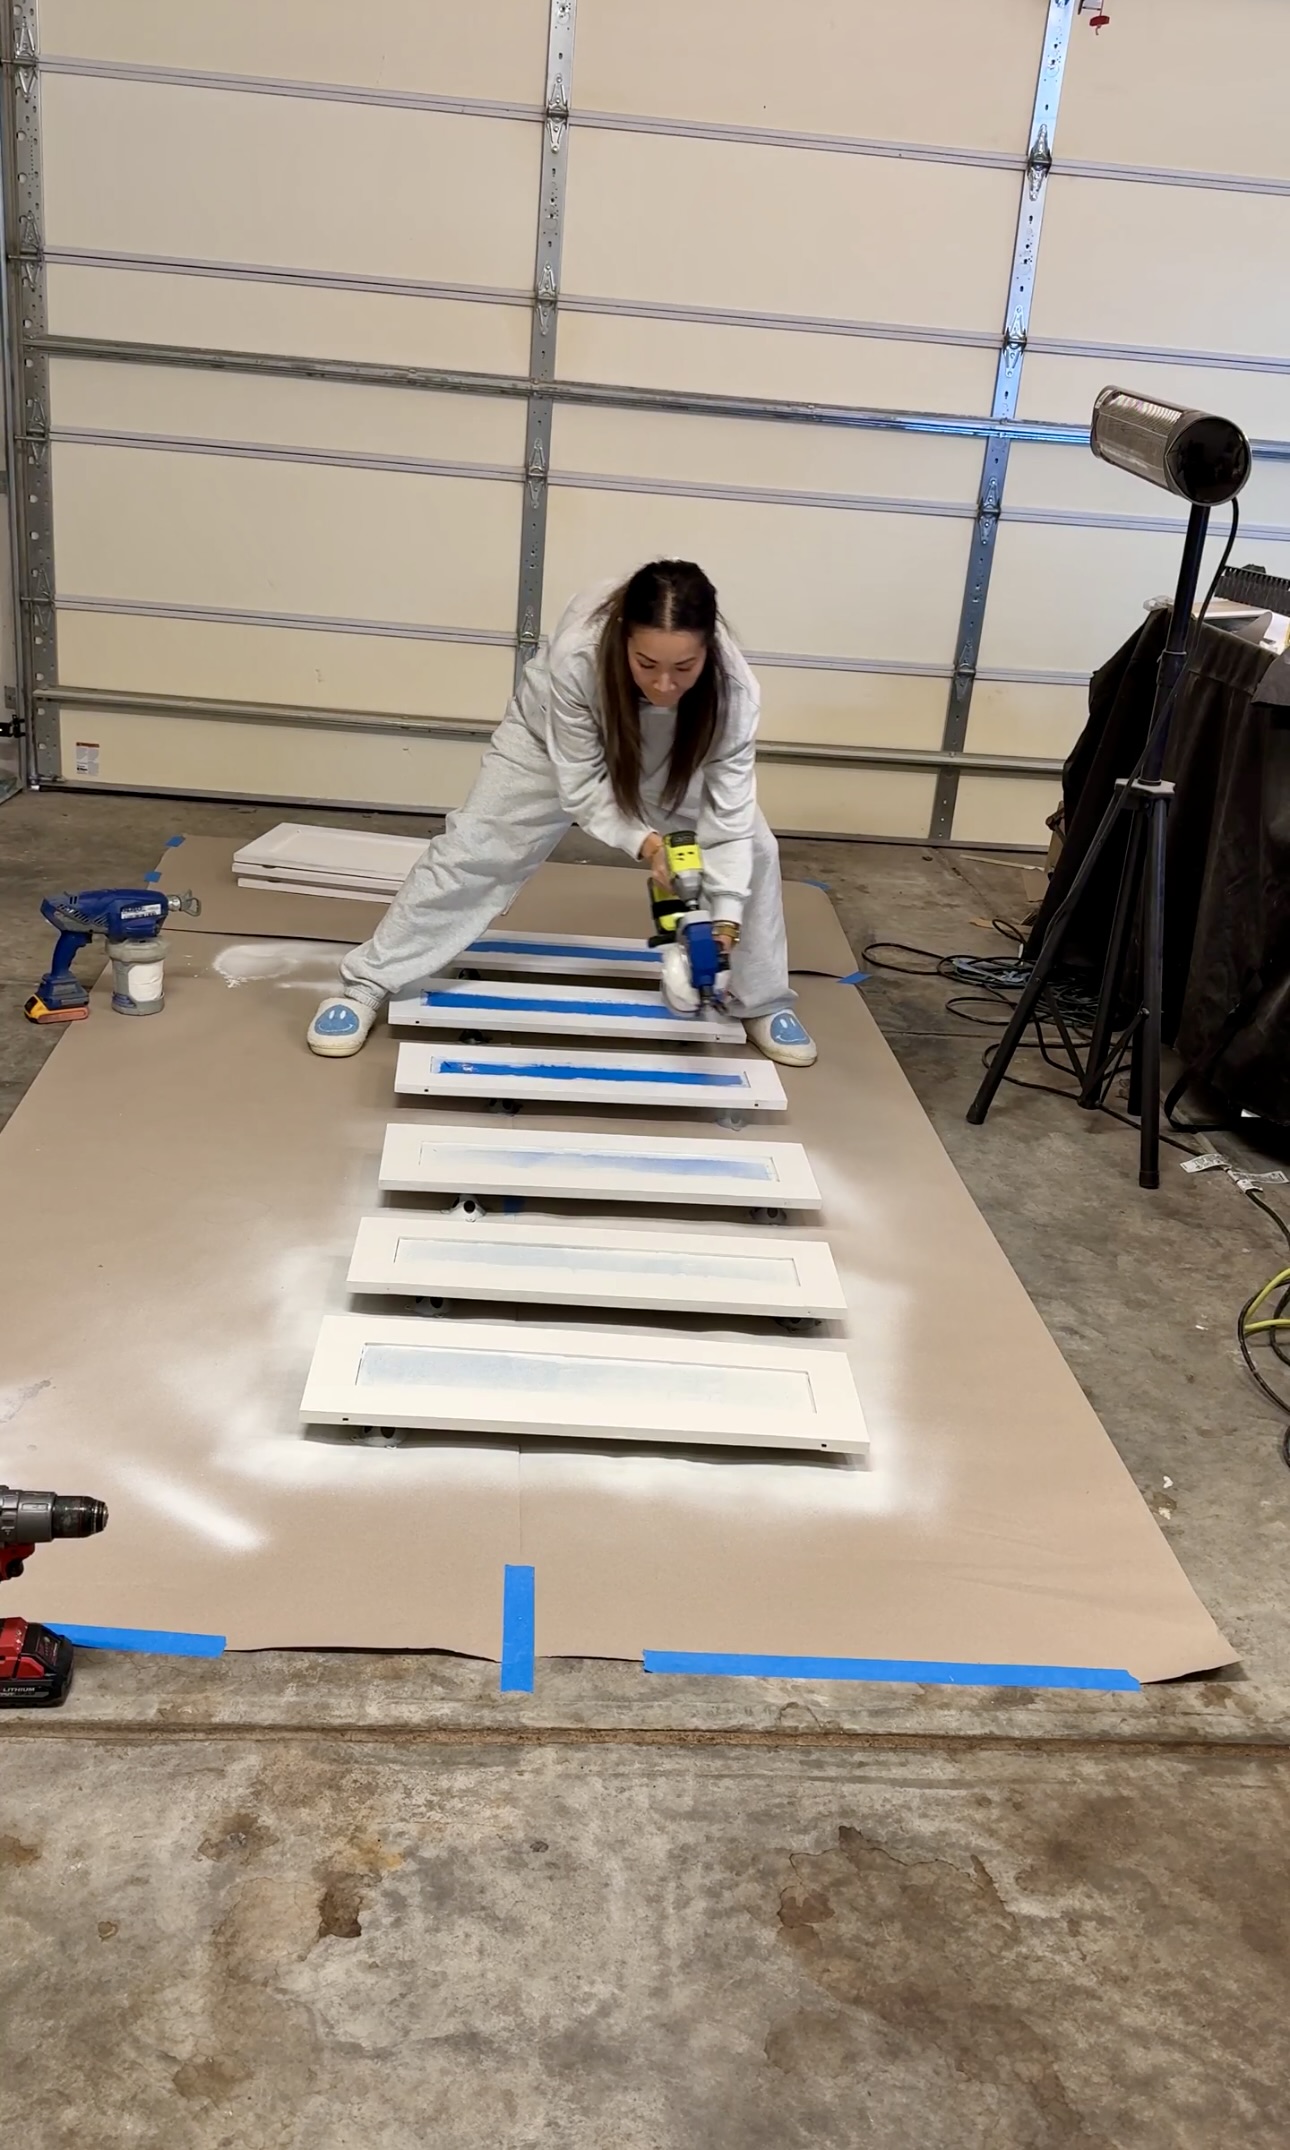
Making my Drawers
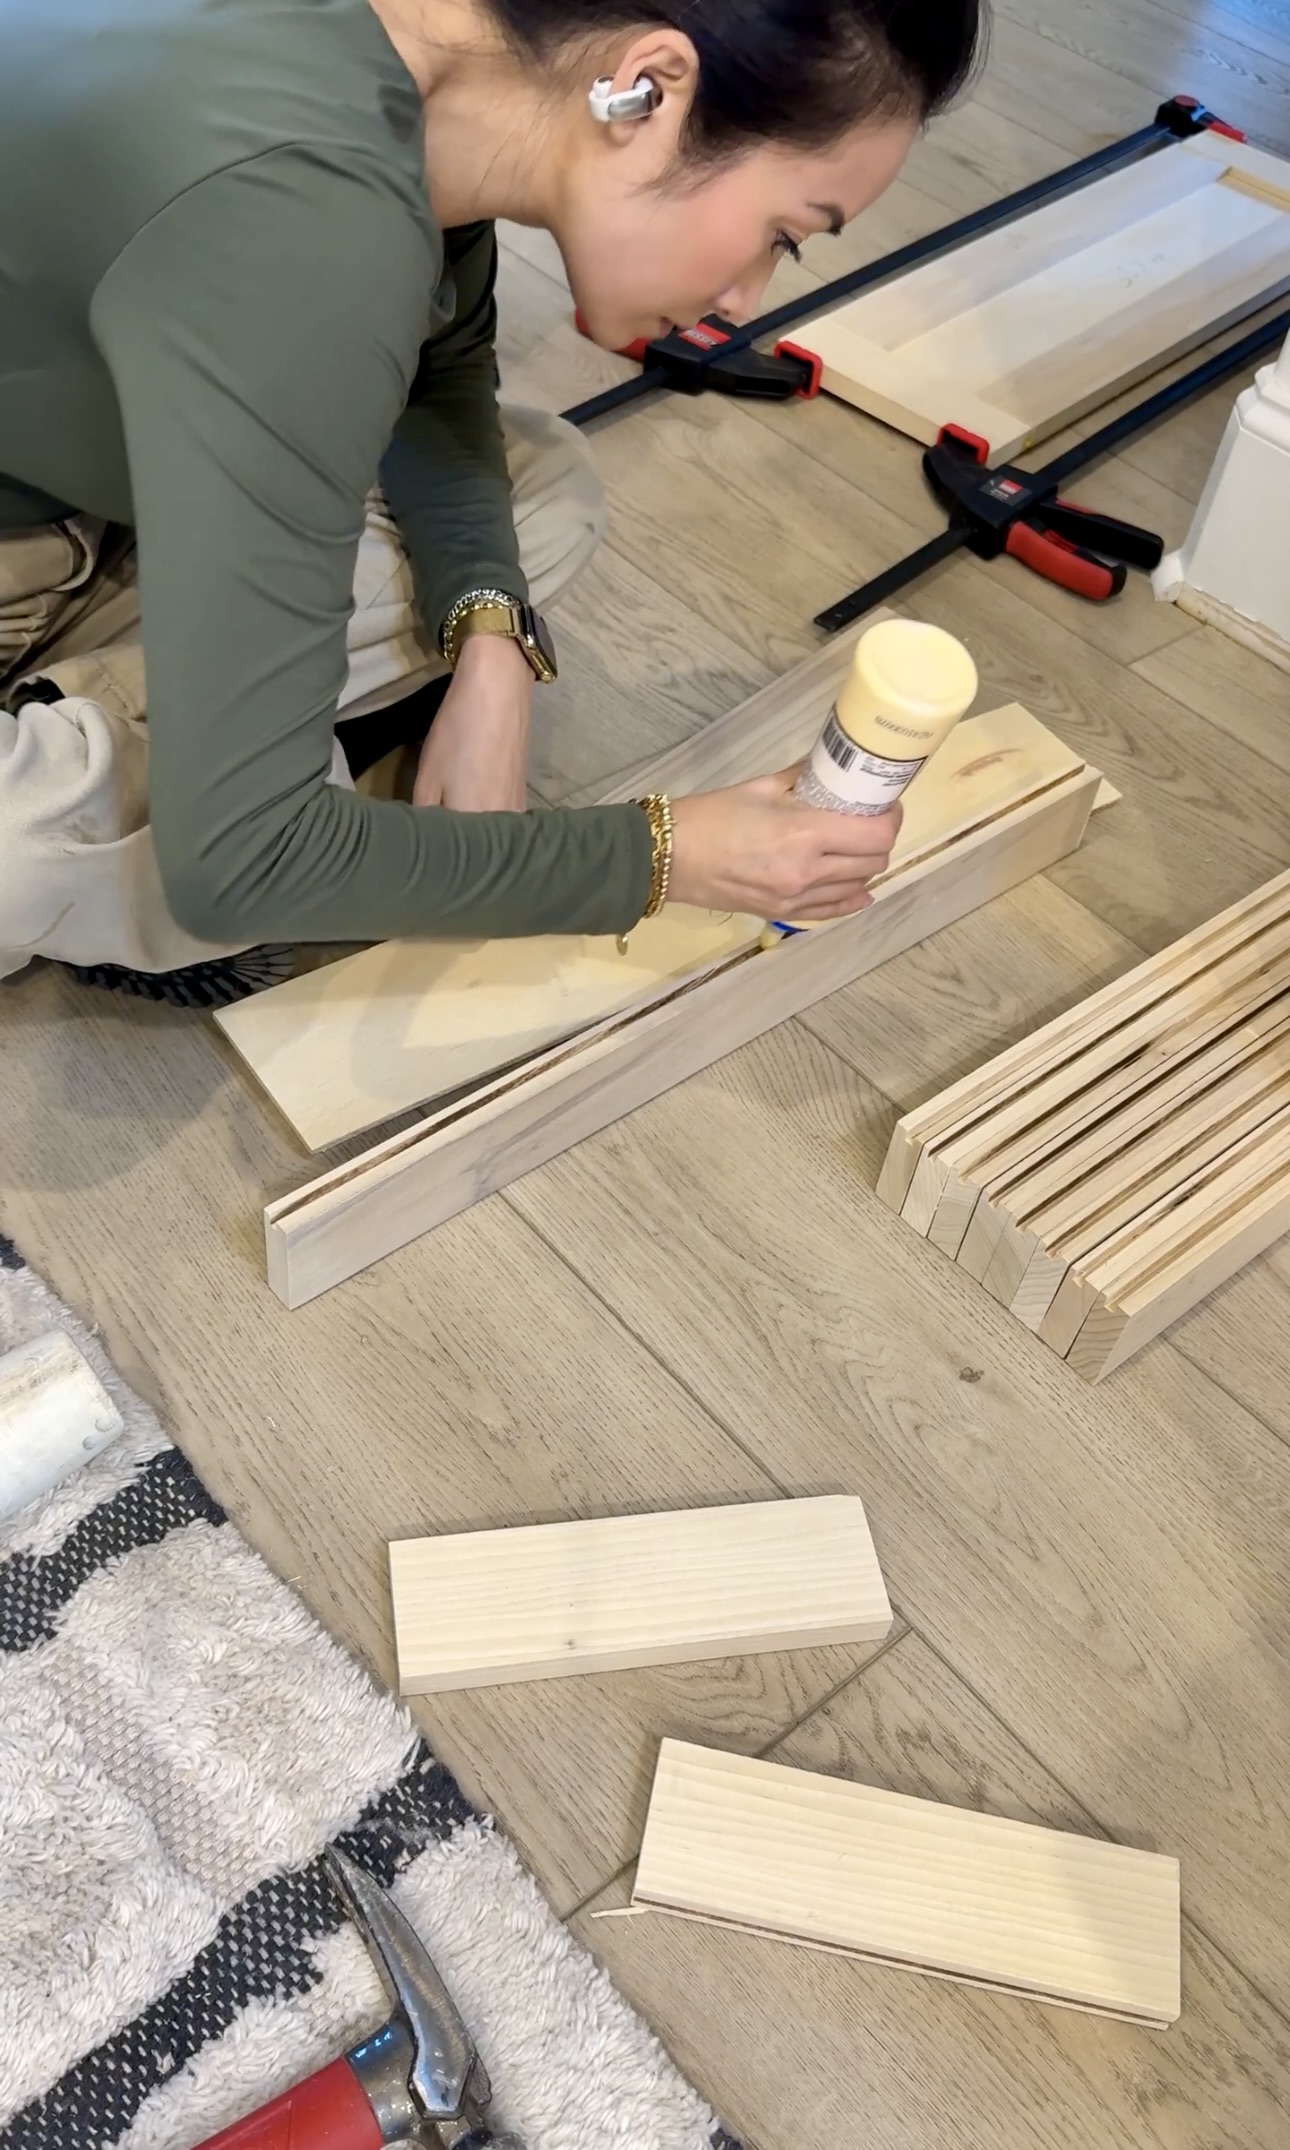
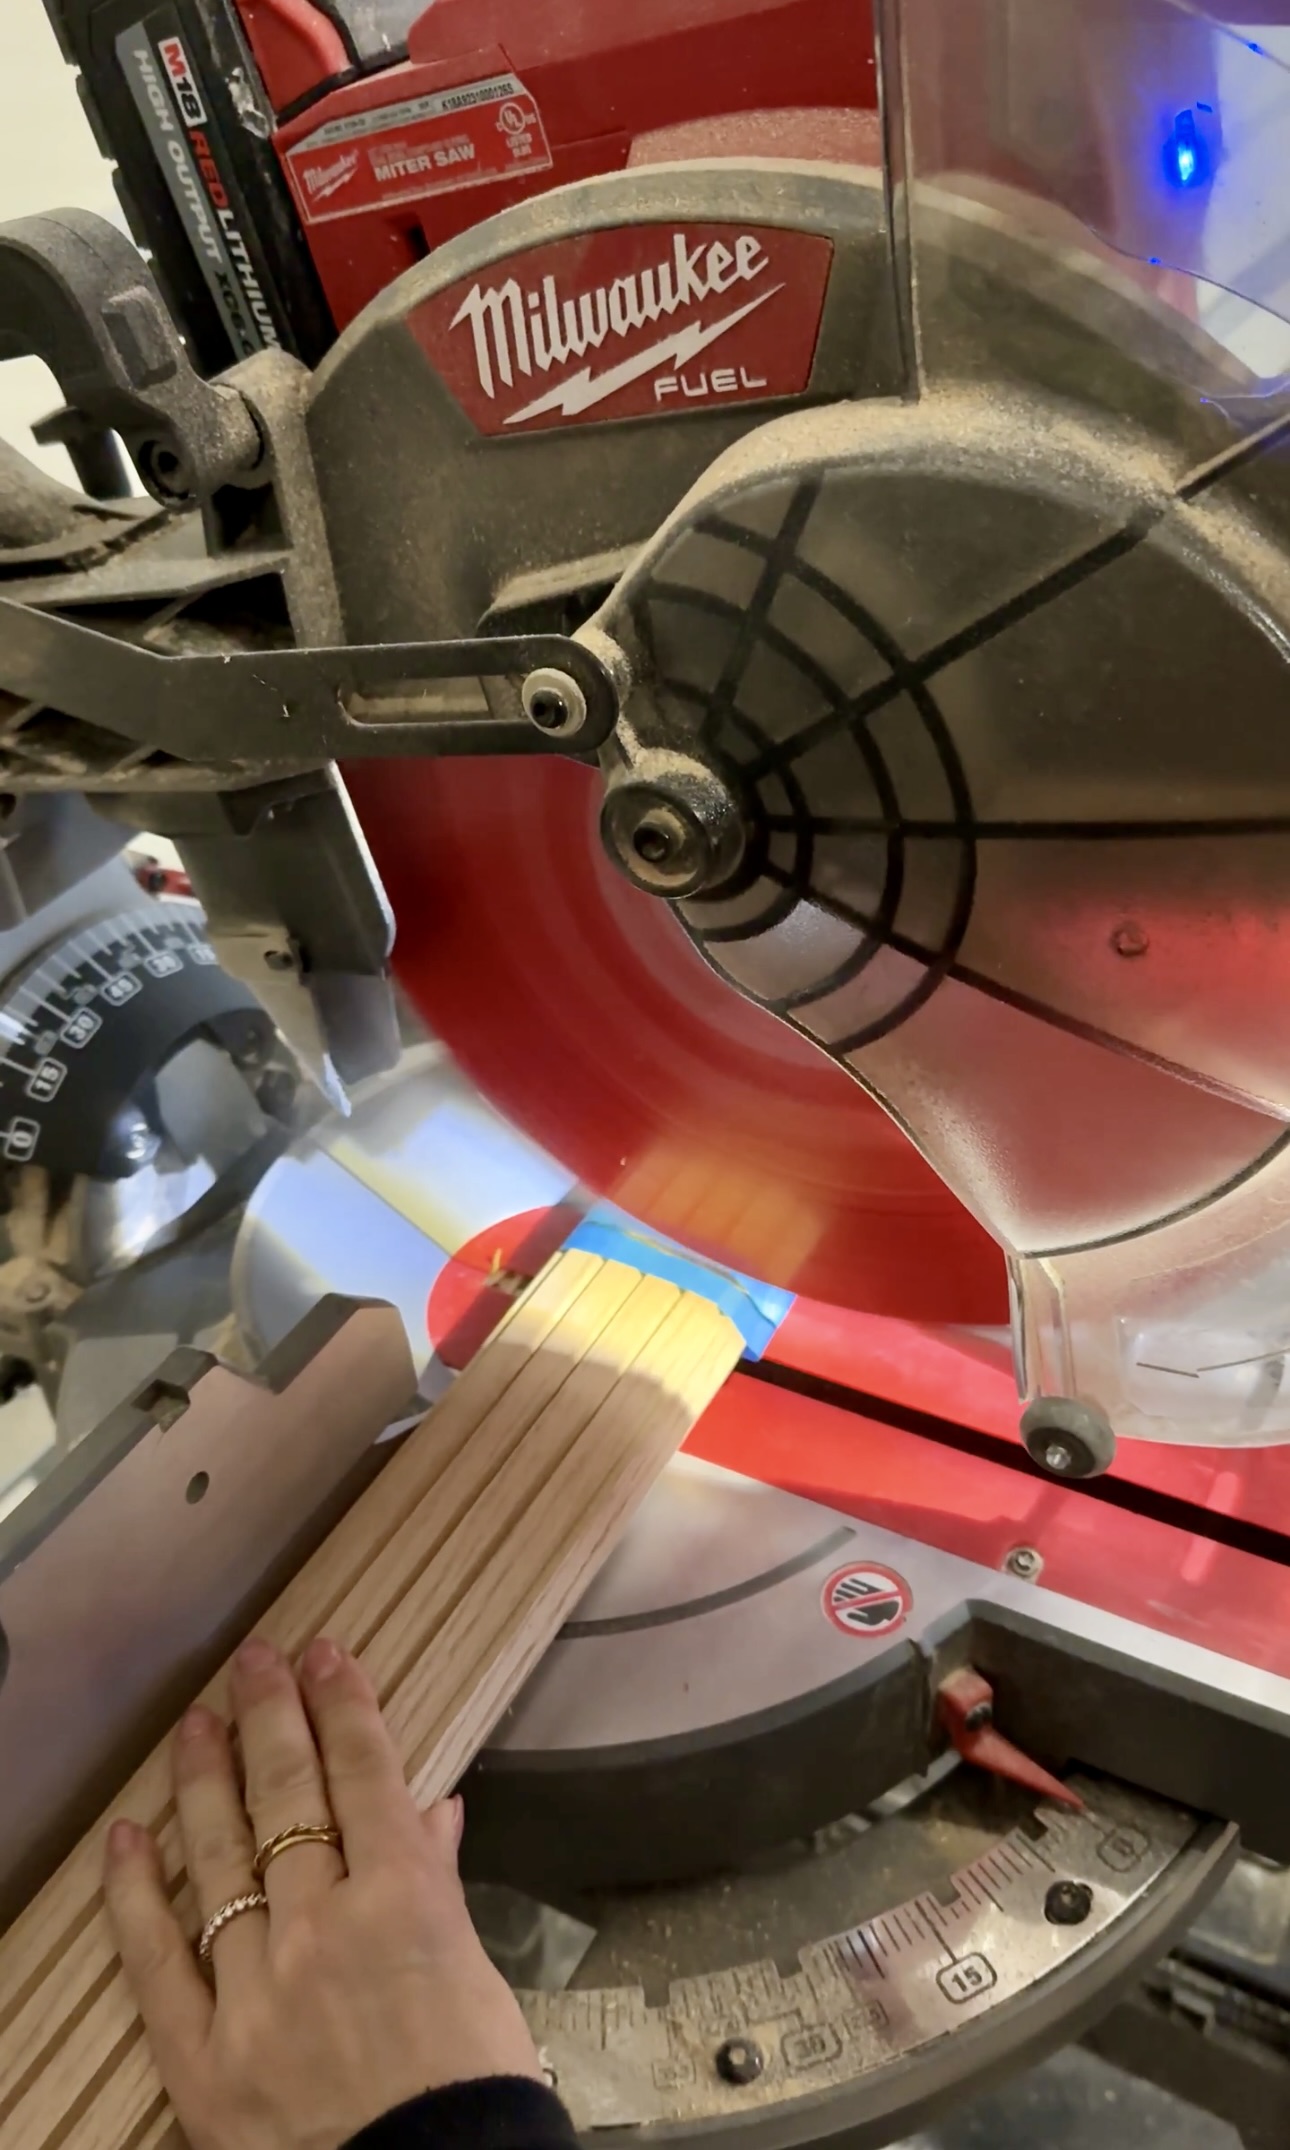
I went out to my table saw to make some grooves in all of my frames for my doors and drawer fronts. The grooves needed to be thick enough for my .25″ plywood. I did the first pass, moved the blade a teeny bit, a second pass, moved a teeny bit, then a third pass. I had to do this on 40 boards🤪

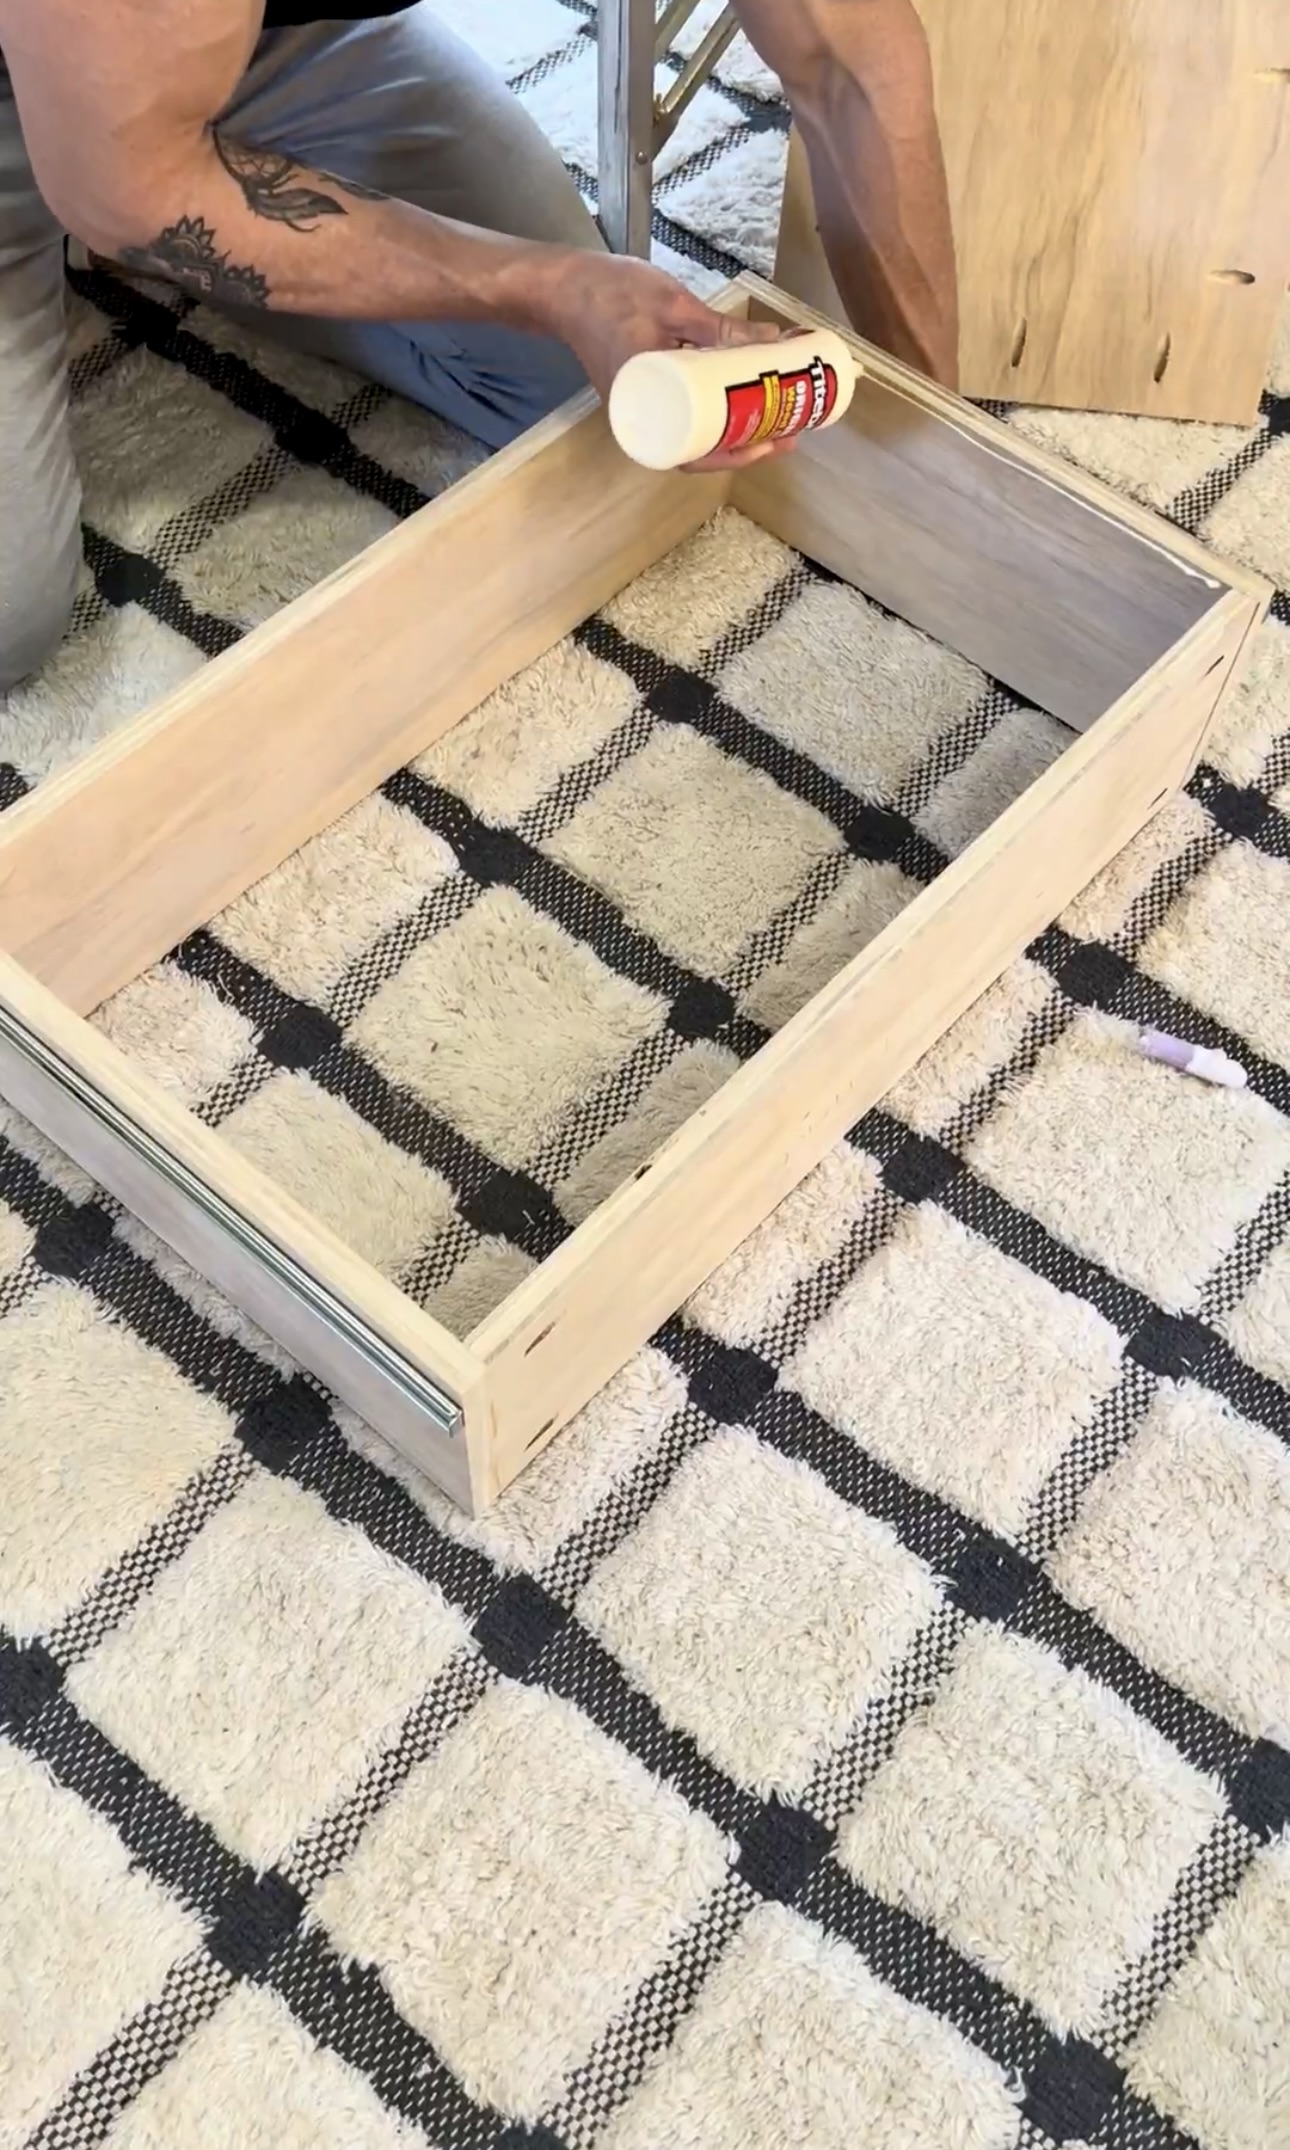
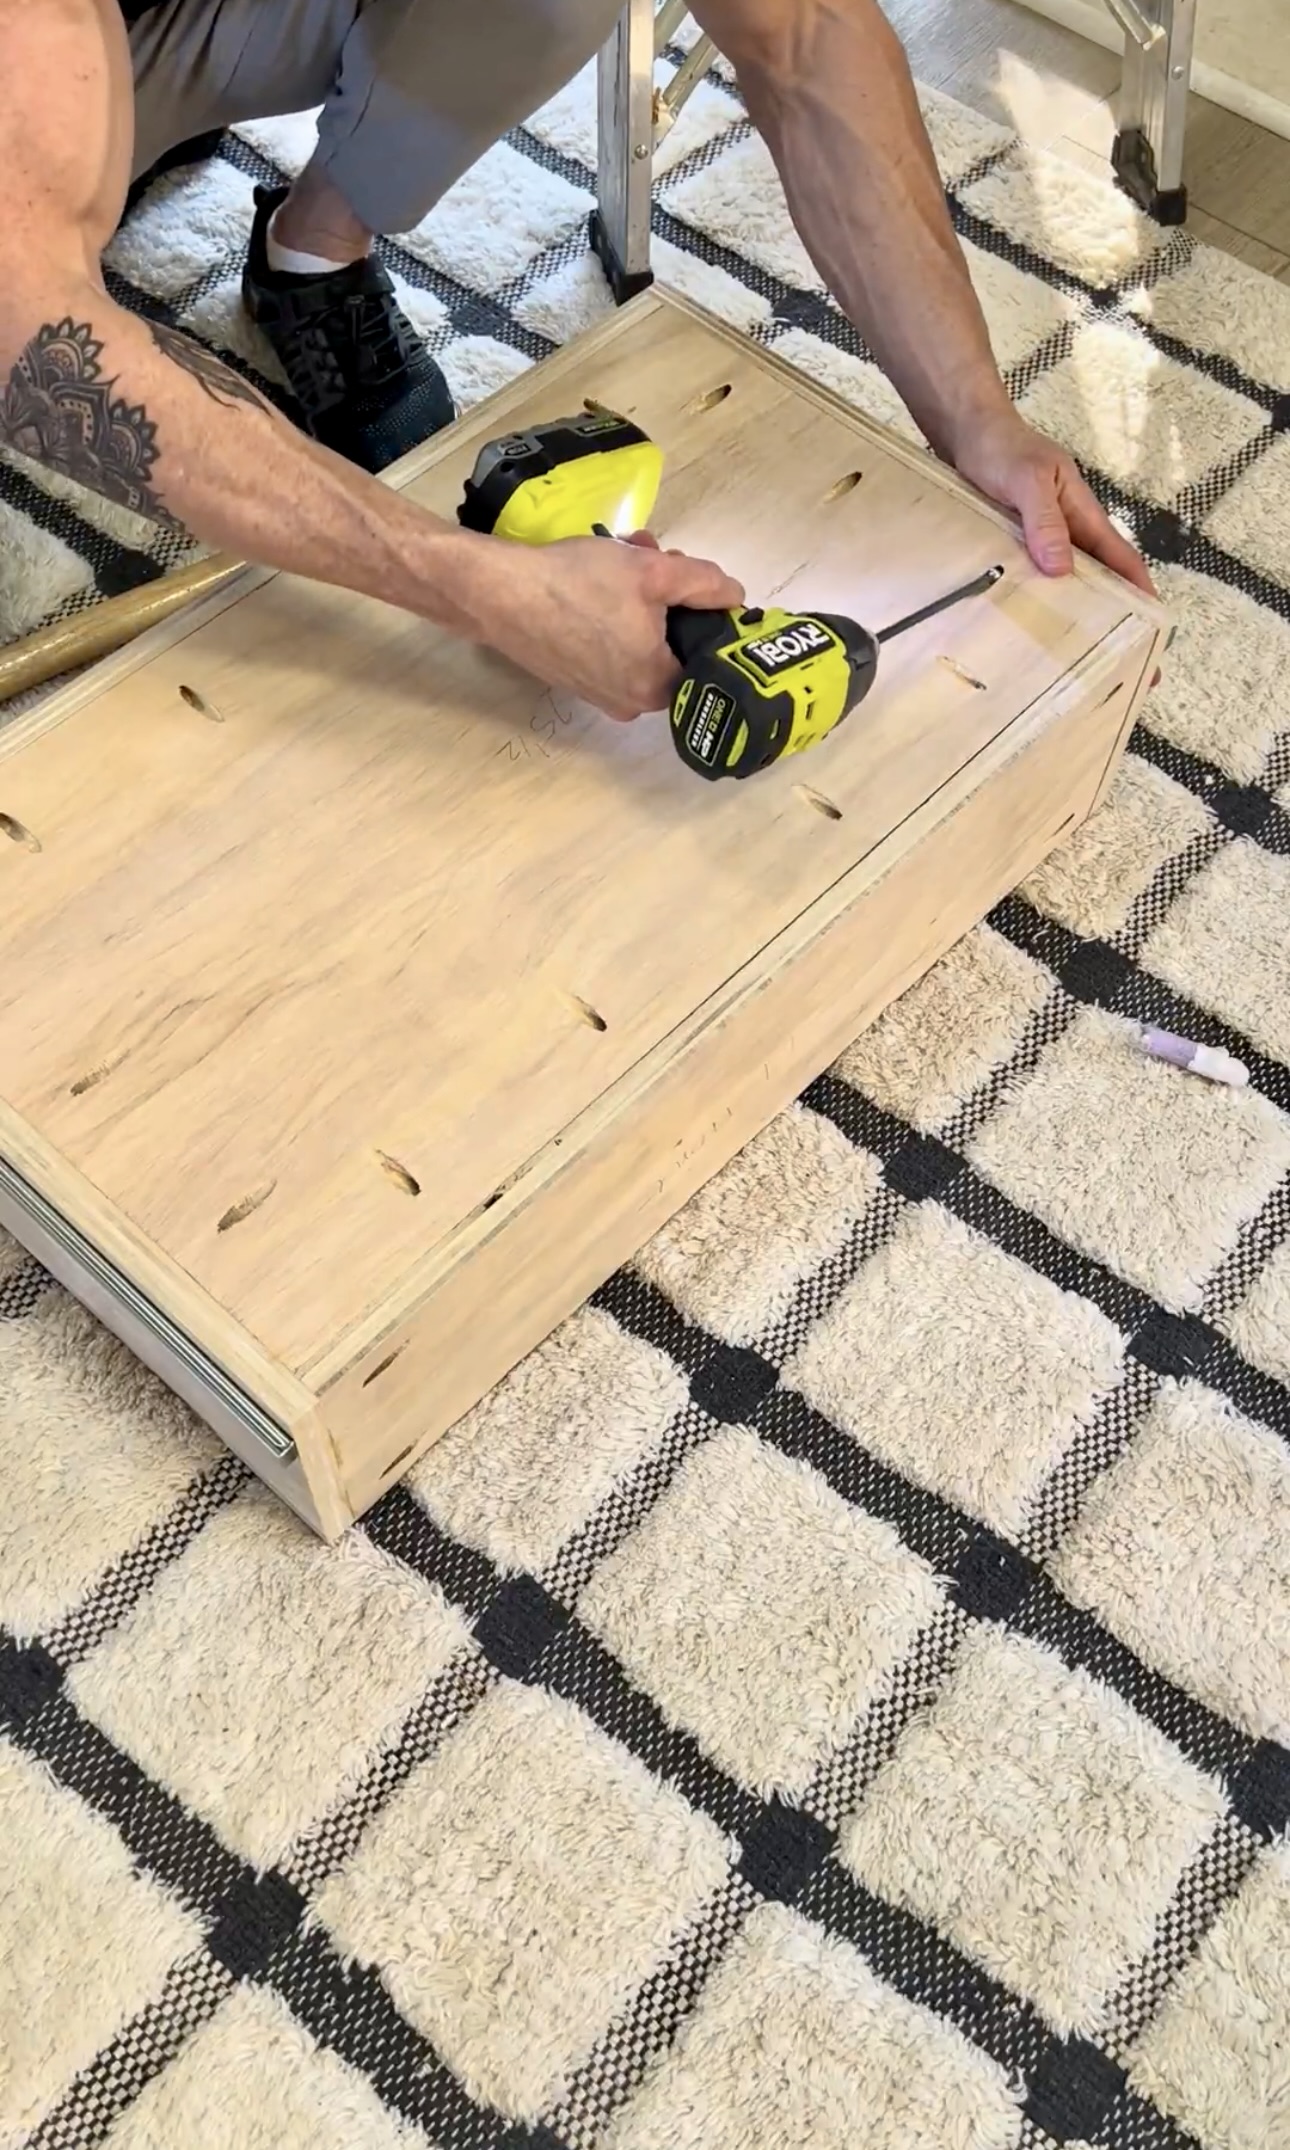
To assemble the drawers, I used wood glue and screws. For the fronts, I used wood glue and a rubber mallet to make sure they were secure. Then, I clamped the drawers so they would dry secure. I made the drawer fronts and the drawer boxes at the same time. Since it is so cold outside, we were trying to cut what we needed all at once, then go back inside to build!

Installation
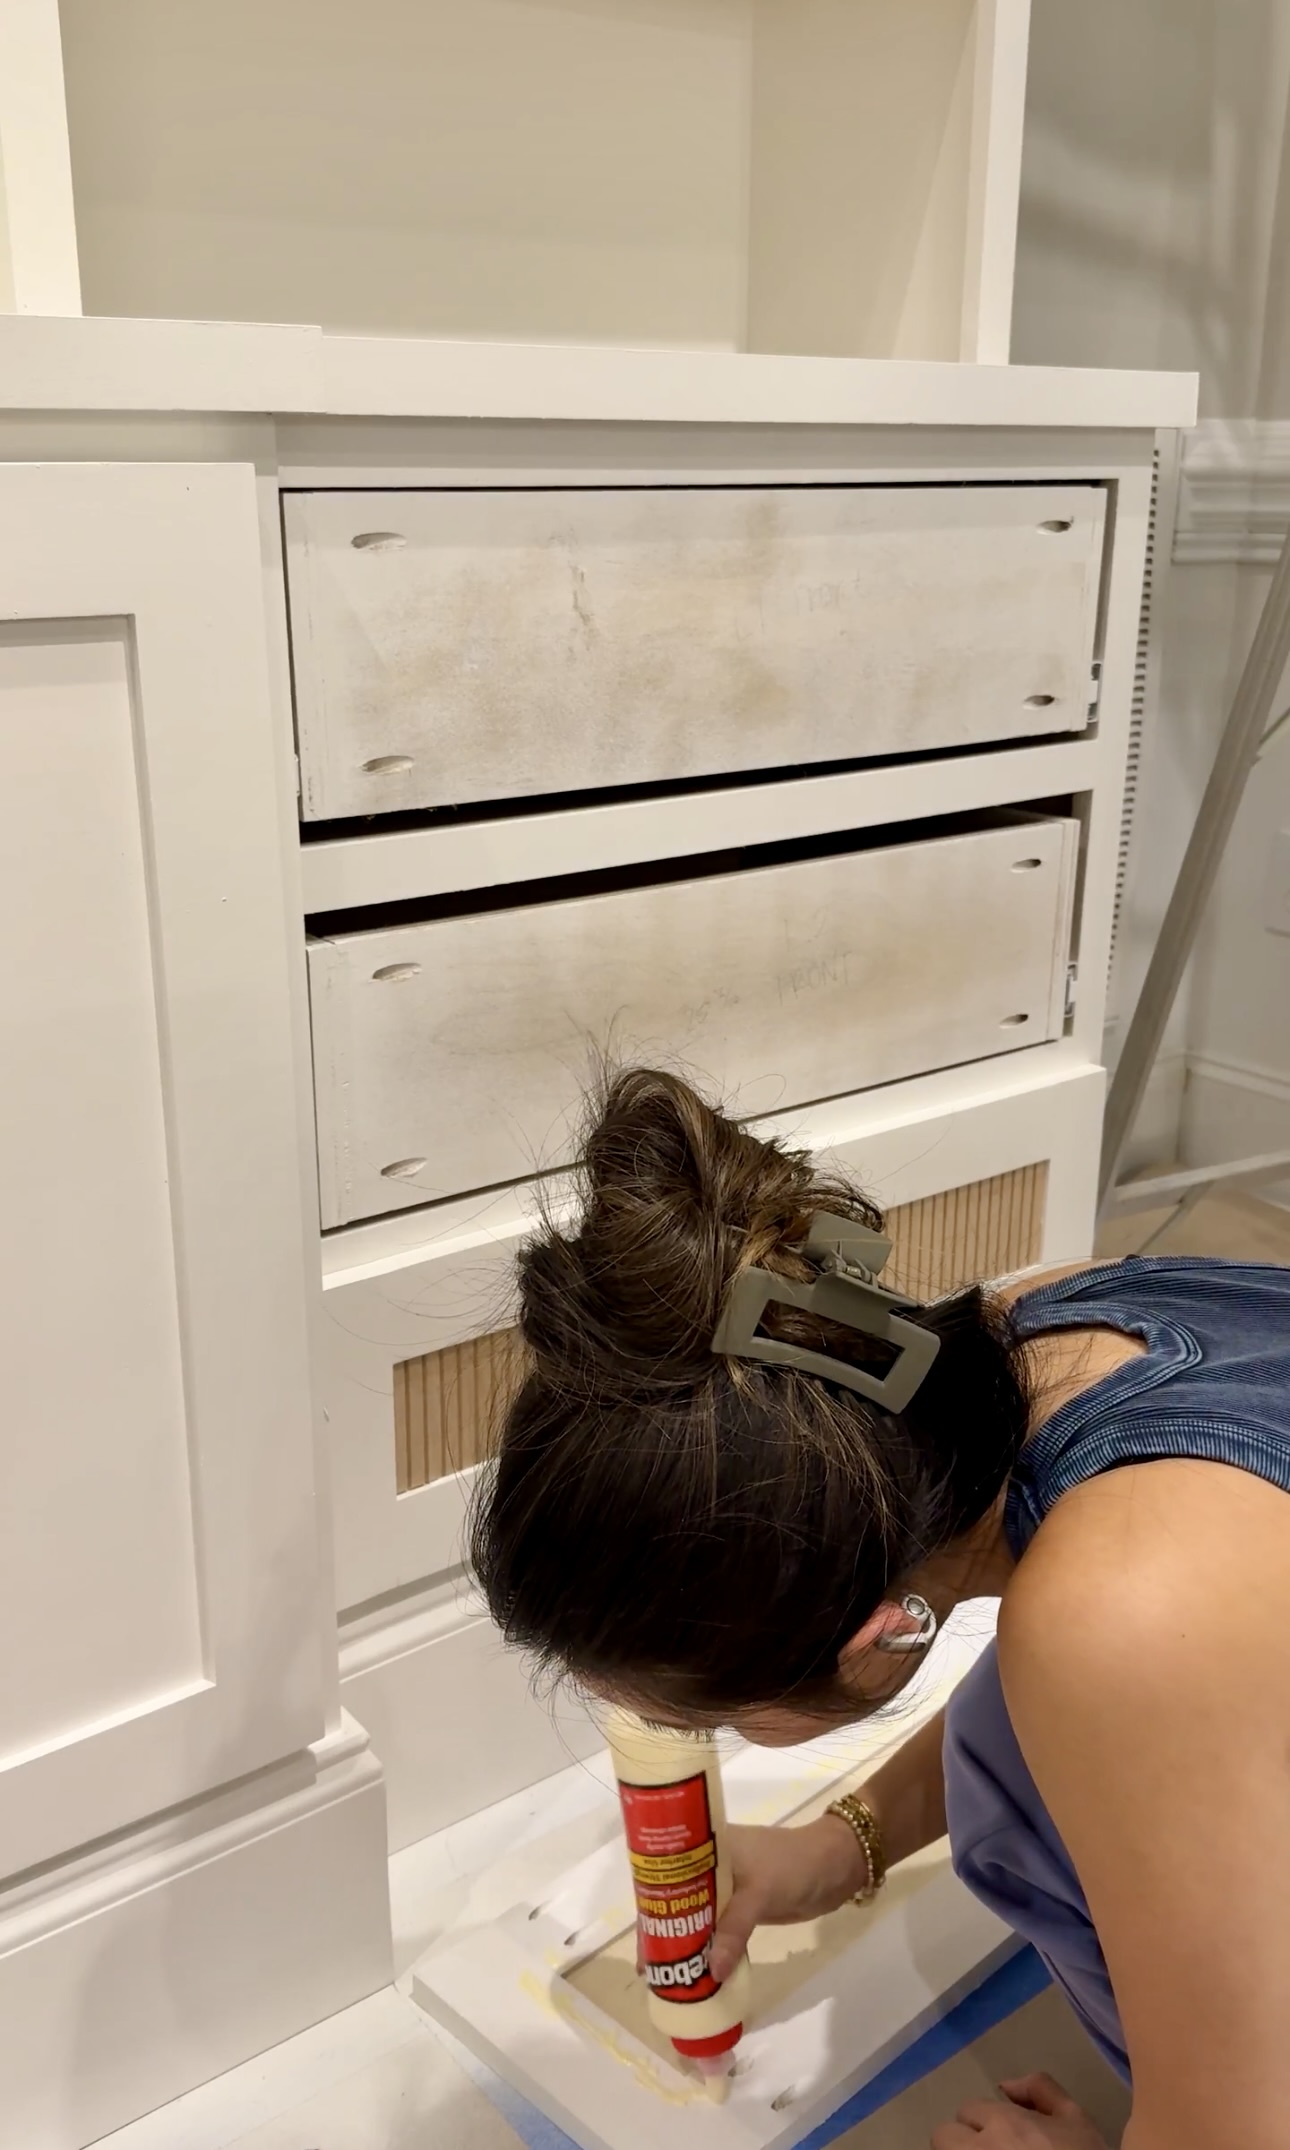
I used some extra .25″ plywood to use as a spacer so the drawer fronts wouldn’t drag on the trim. I made sure my drawers were level and flush on the drawer slides and secured them with screws!
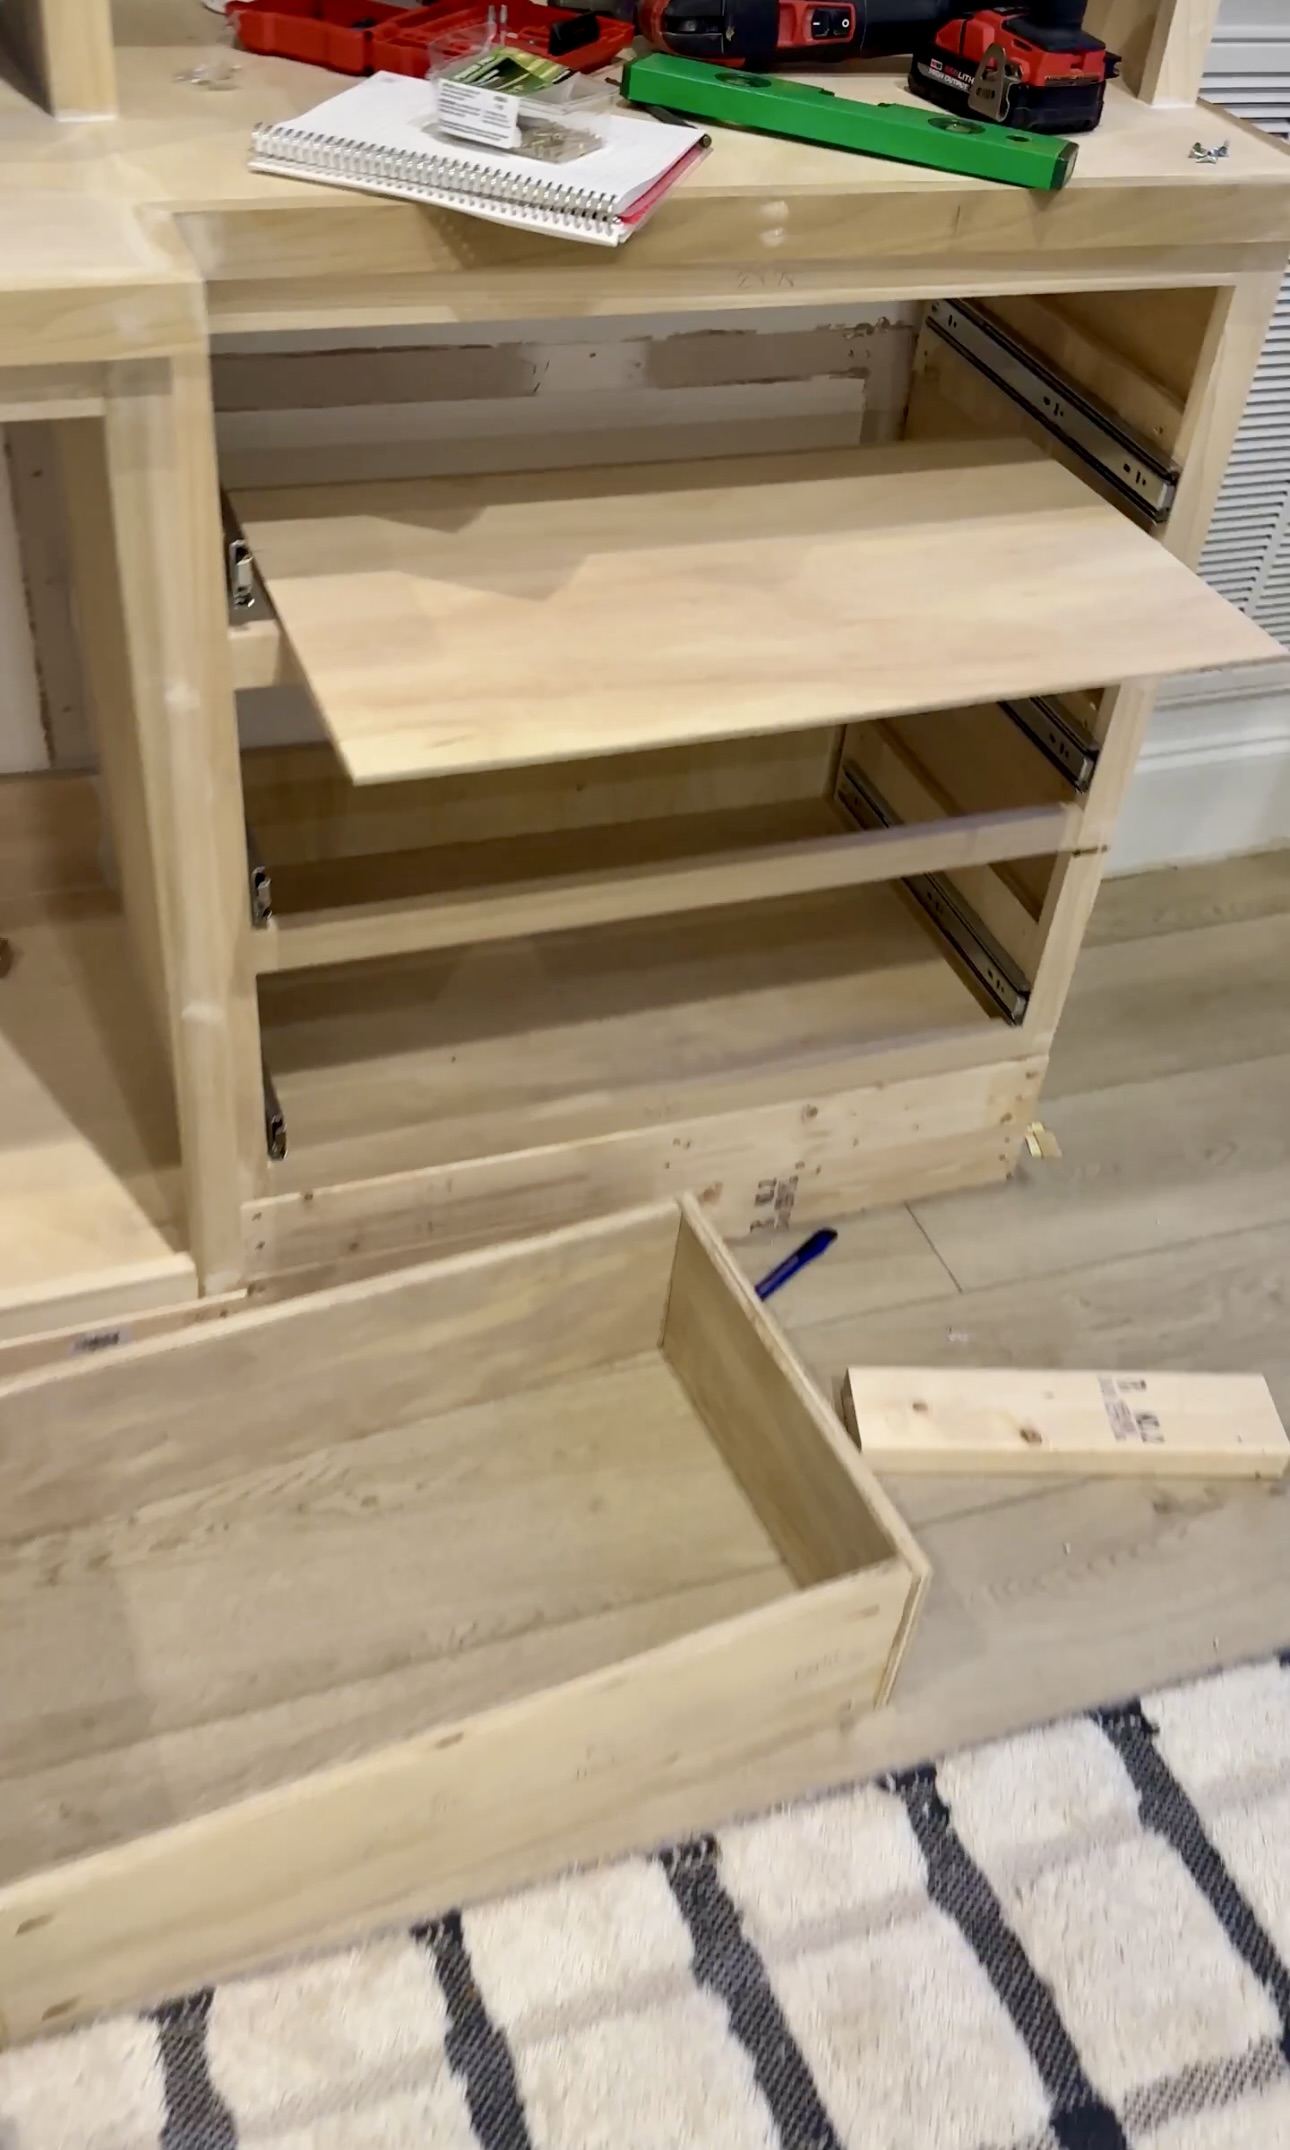

We attached the bottom of each drawer to the box with wood glue, pocket holes, and screws.

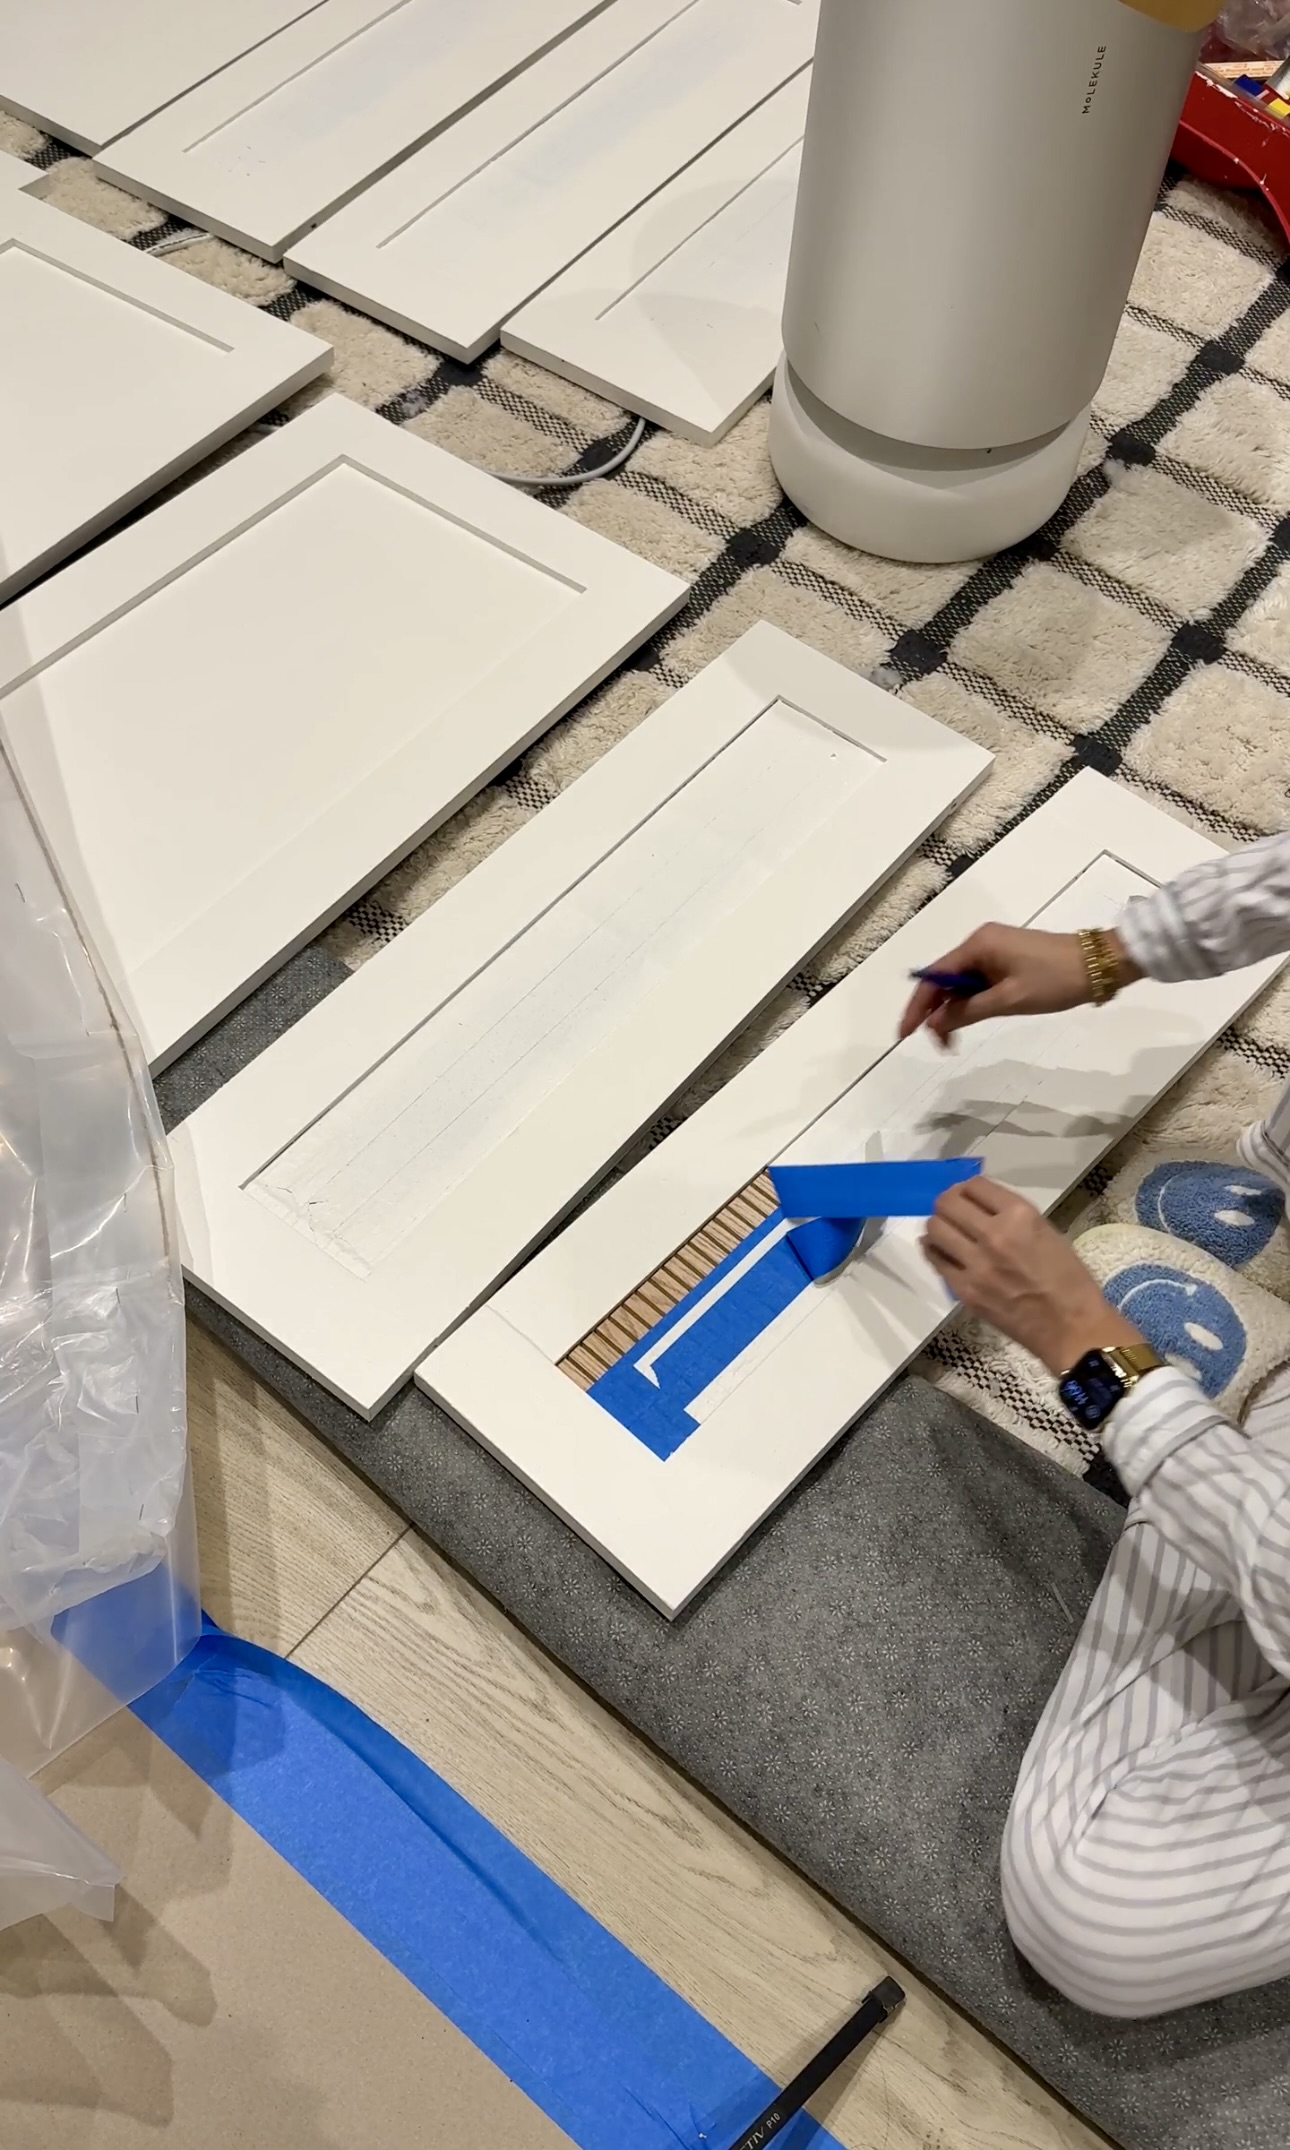
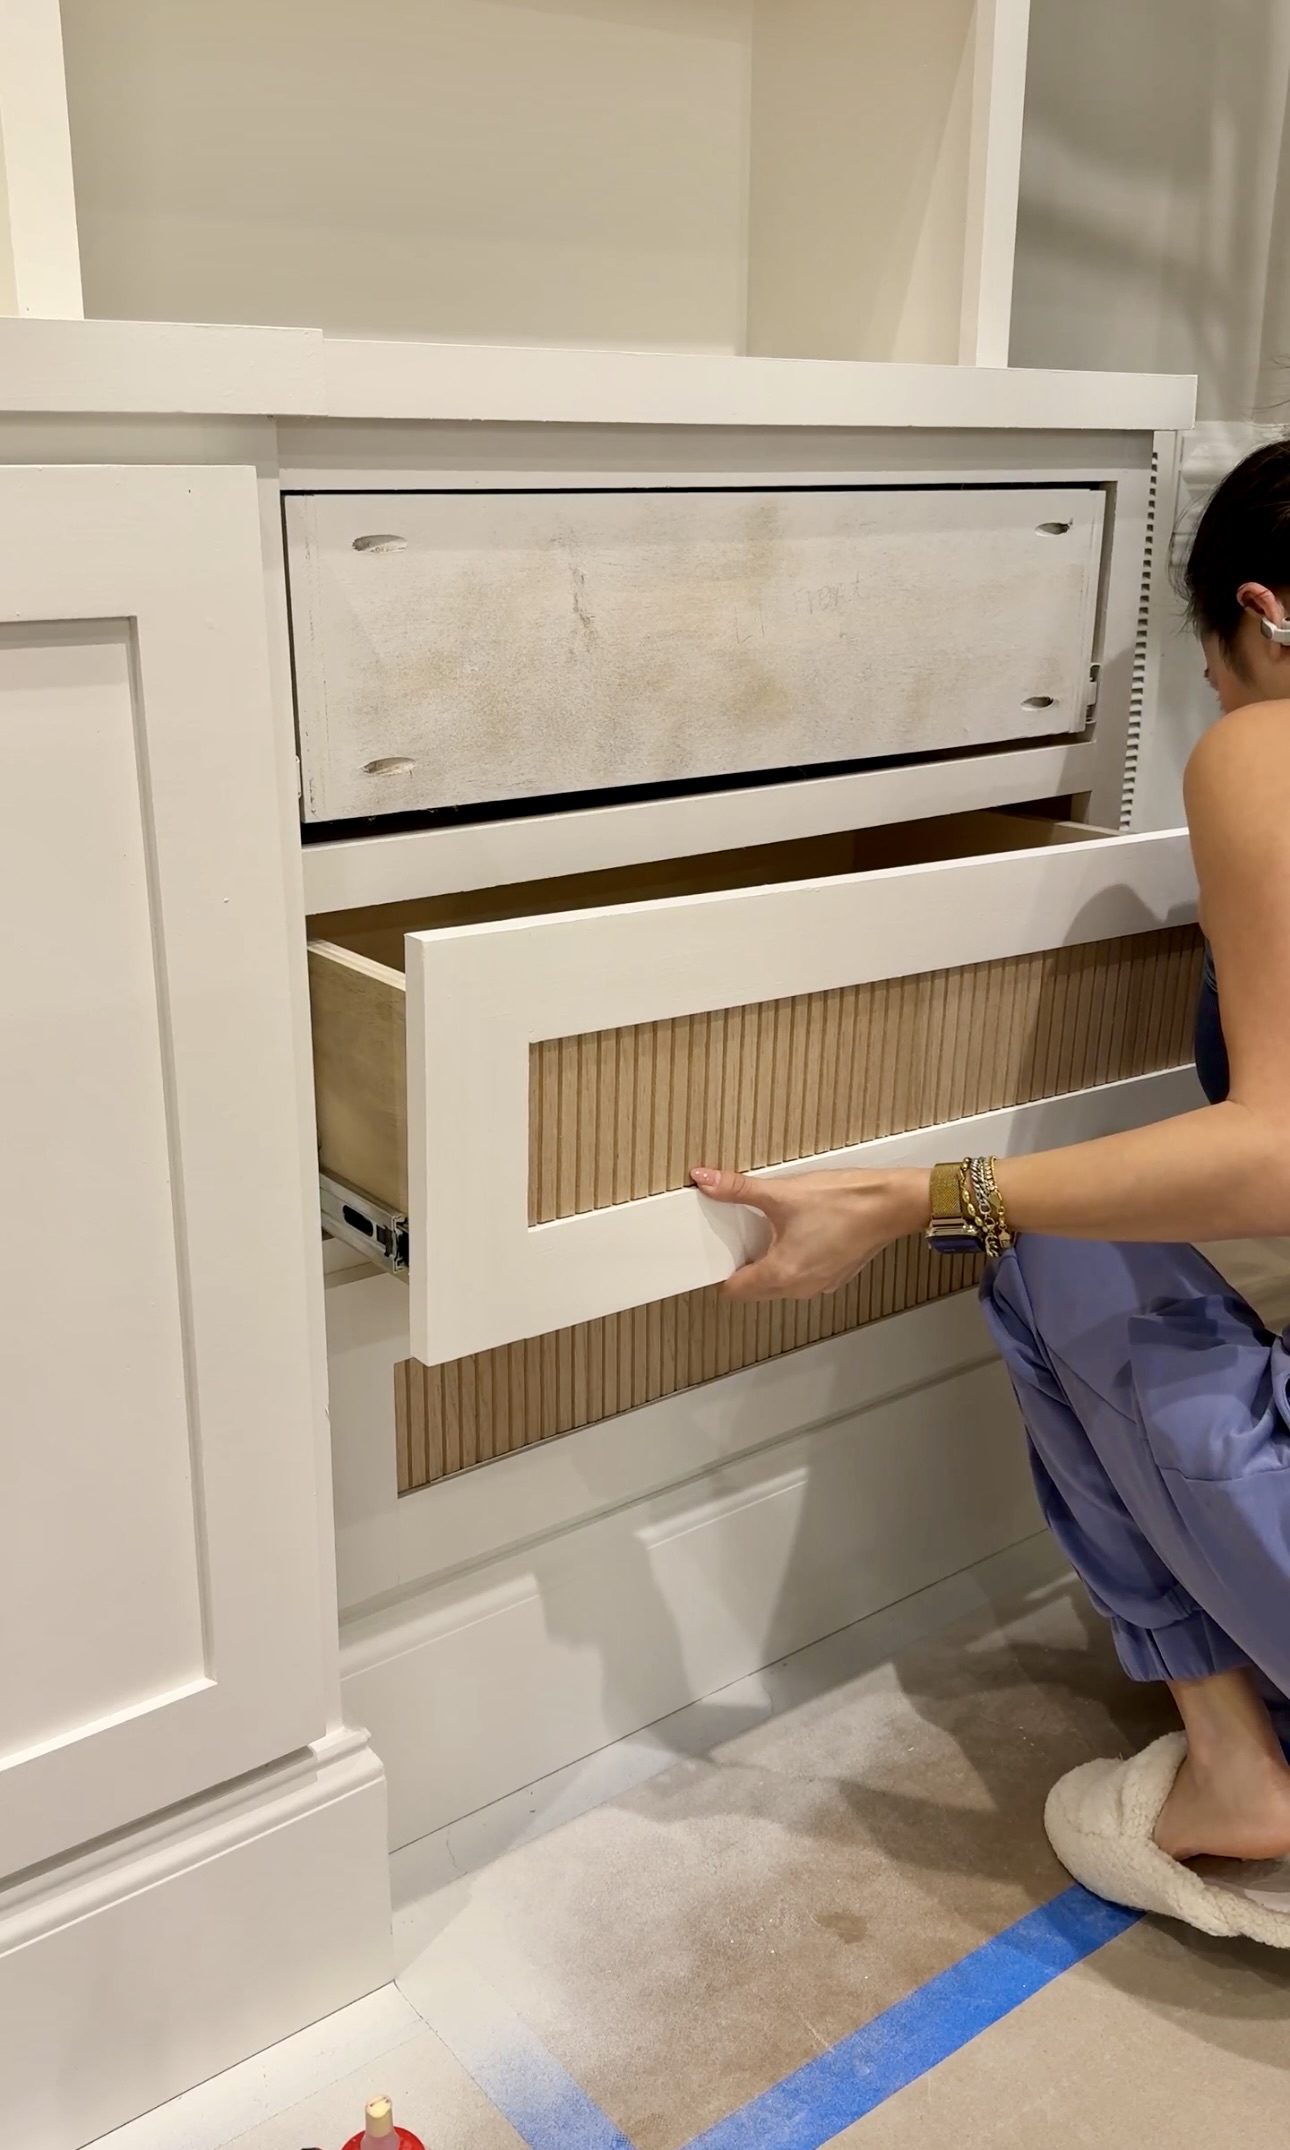
Pole Wrap
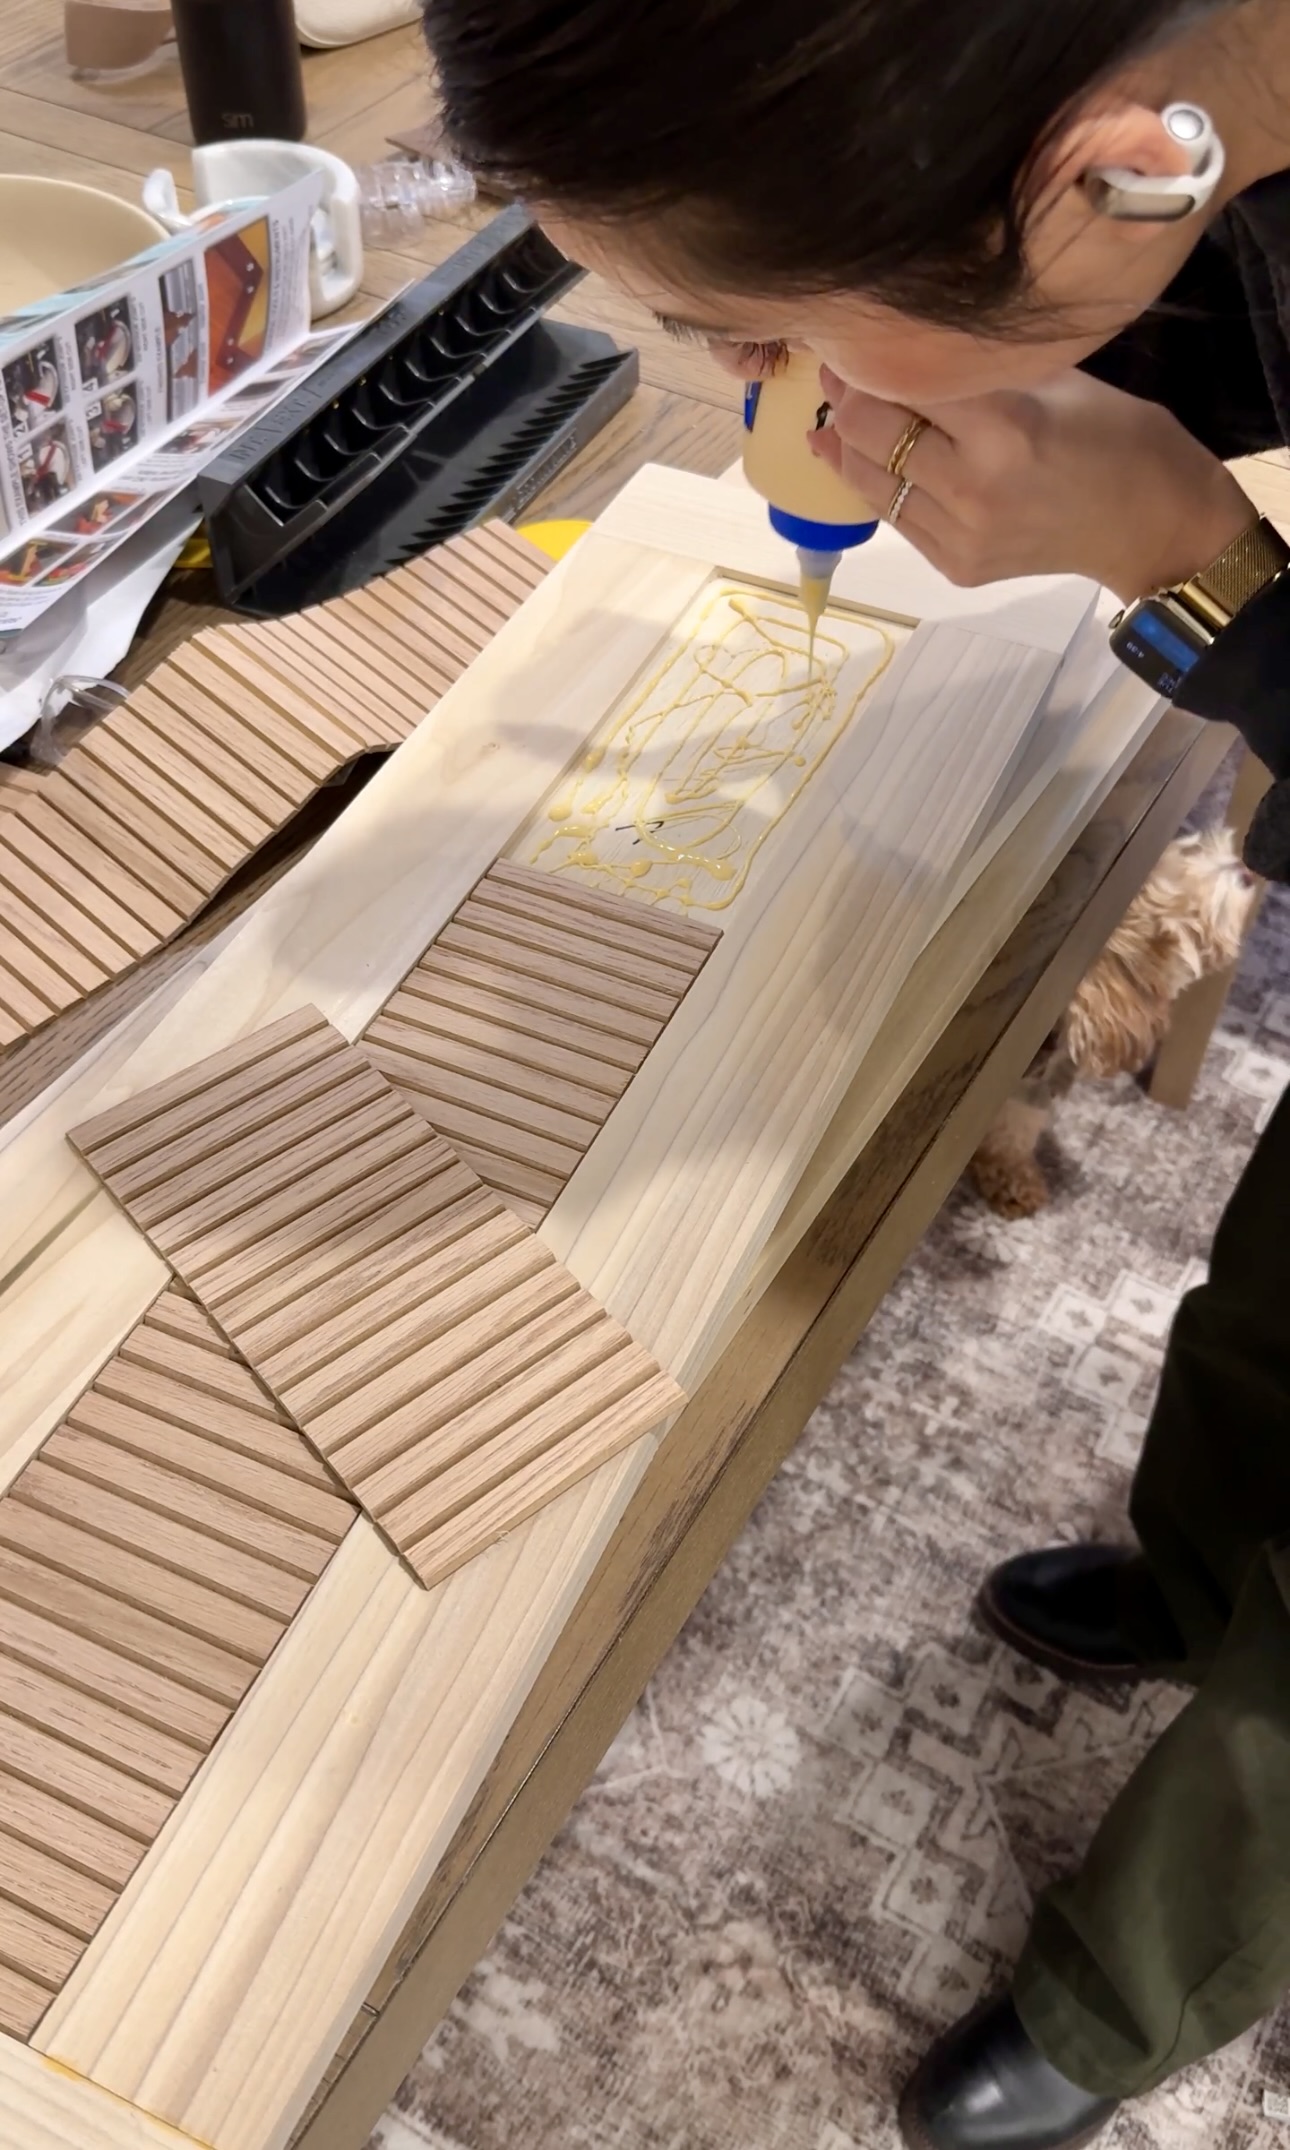
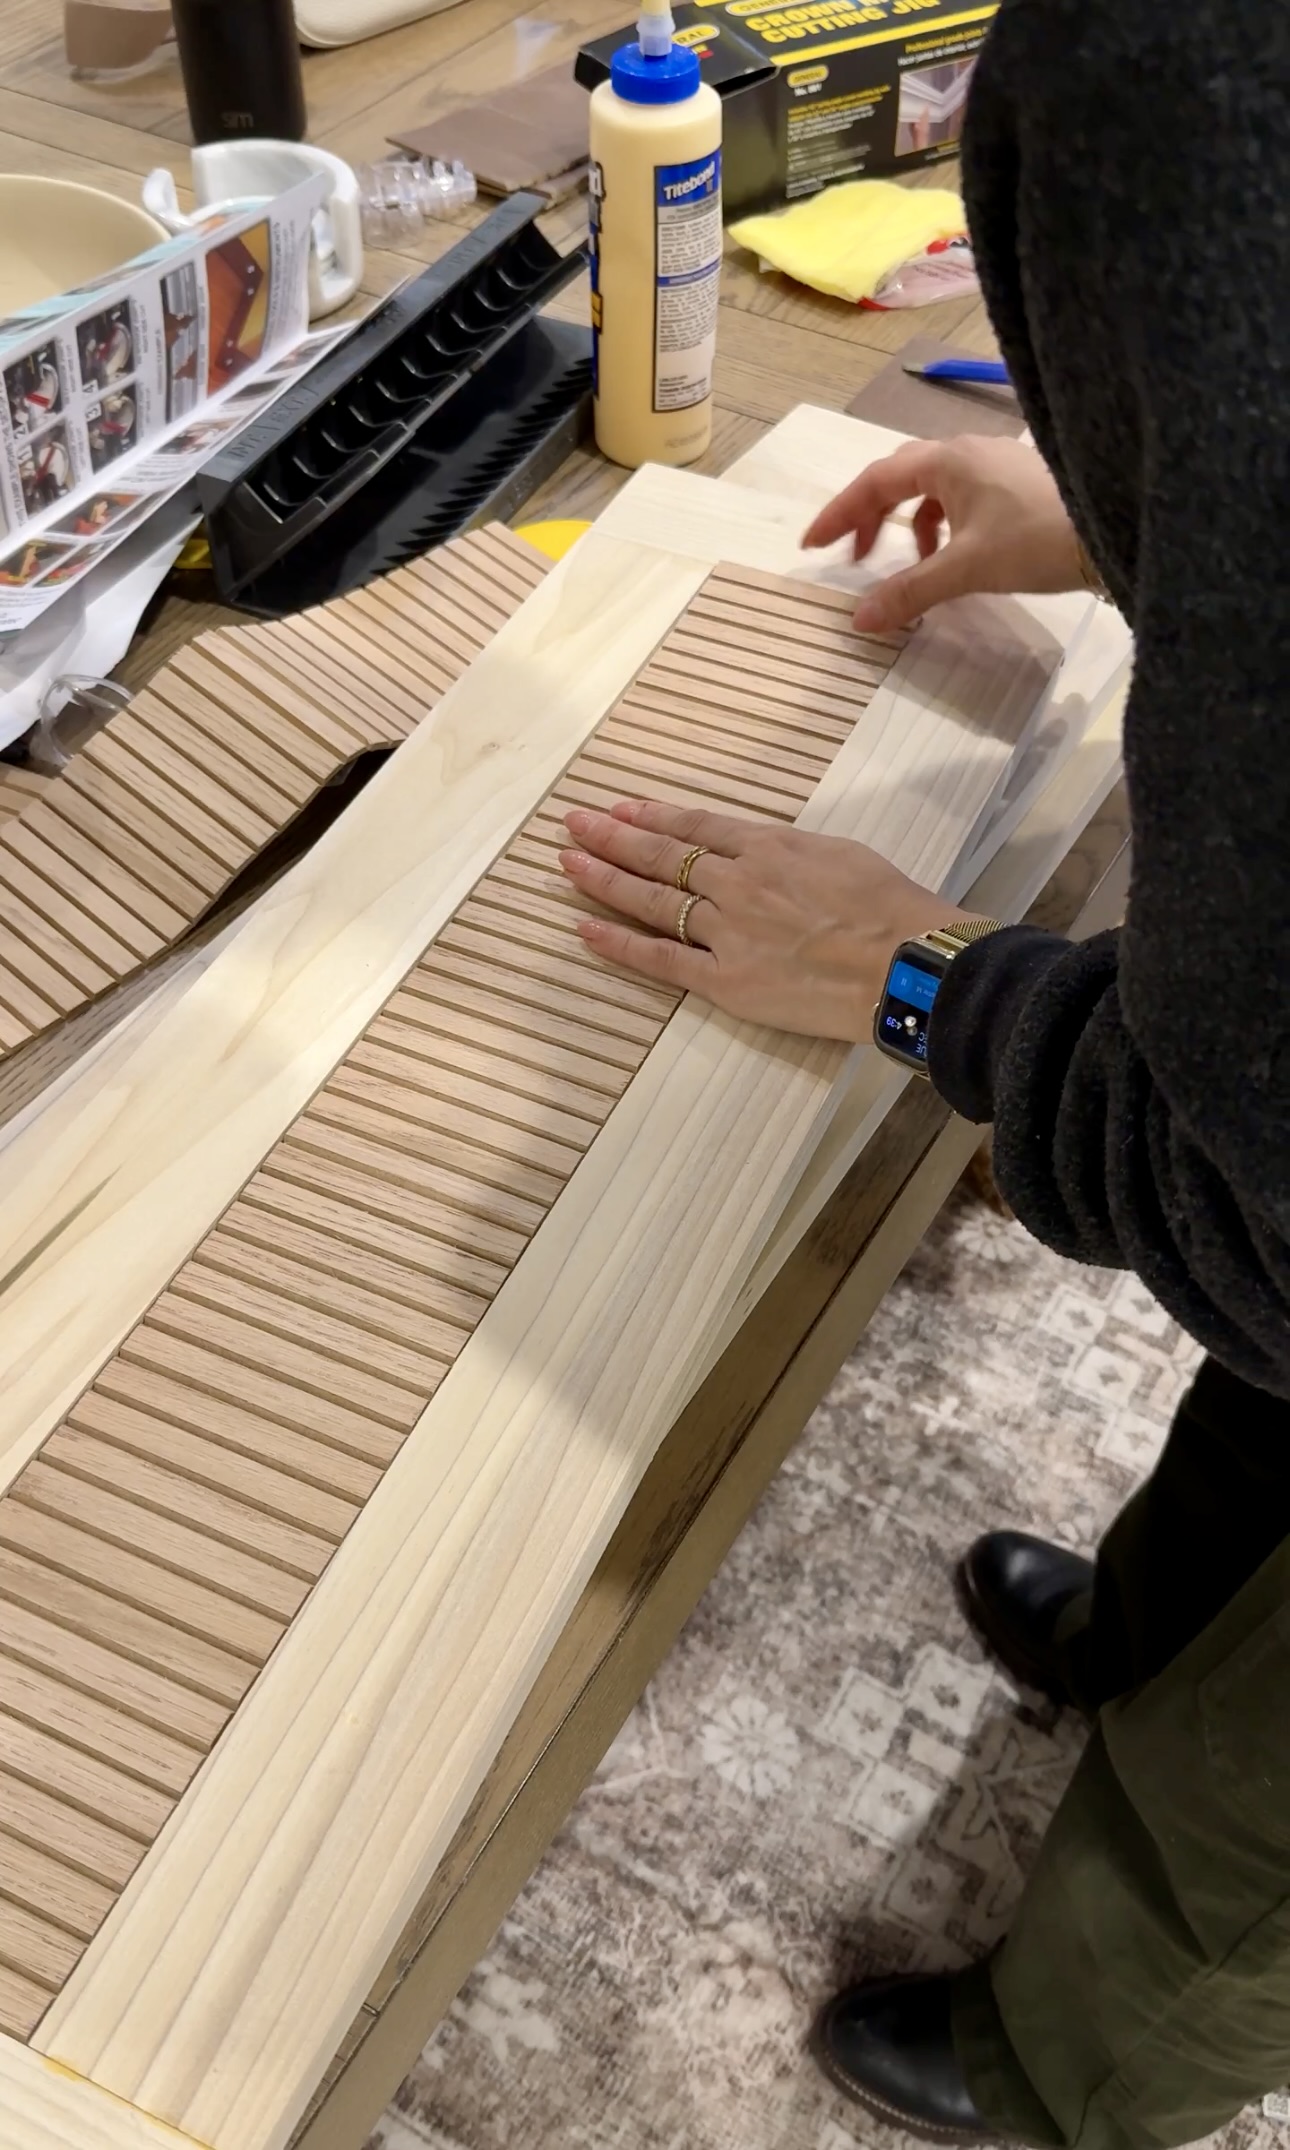
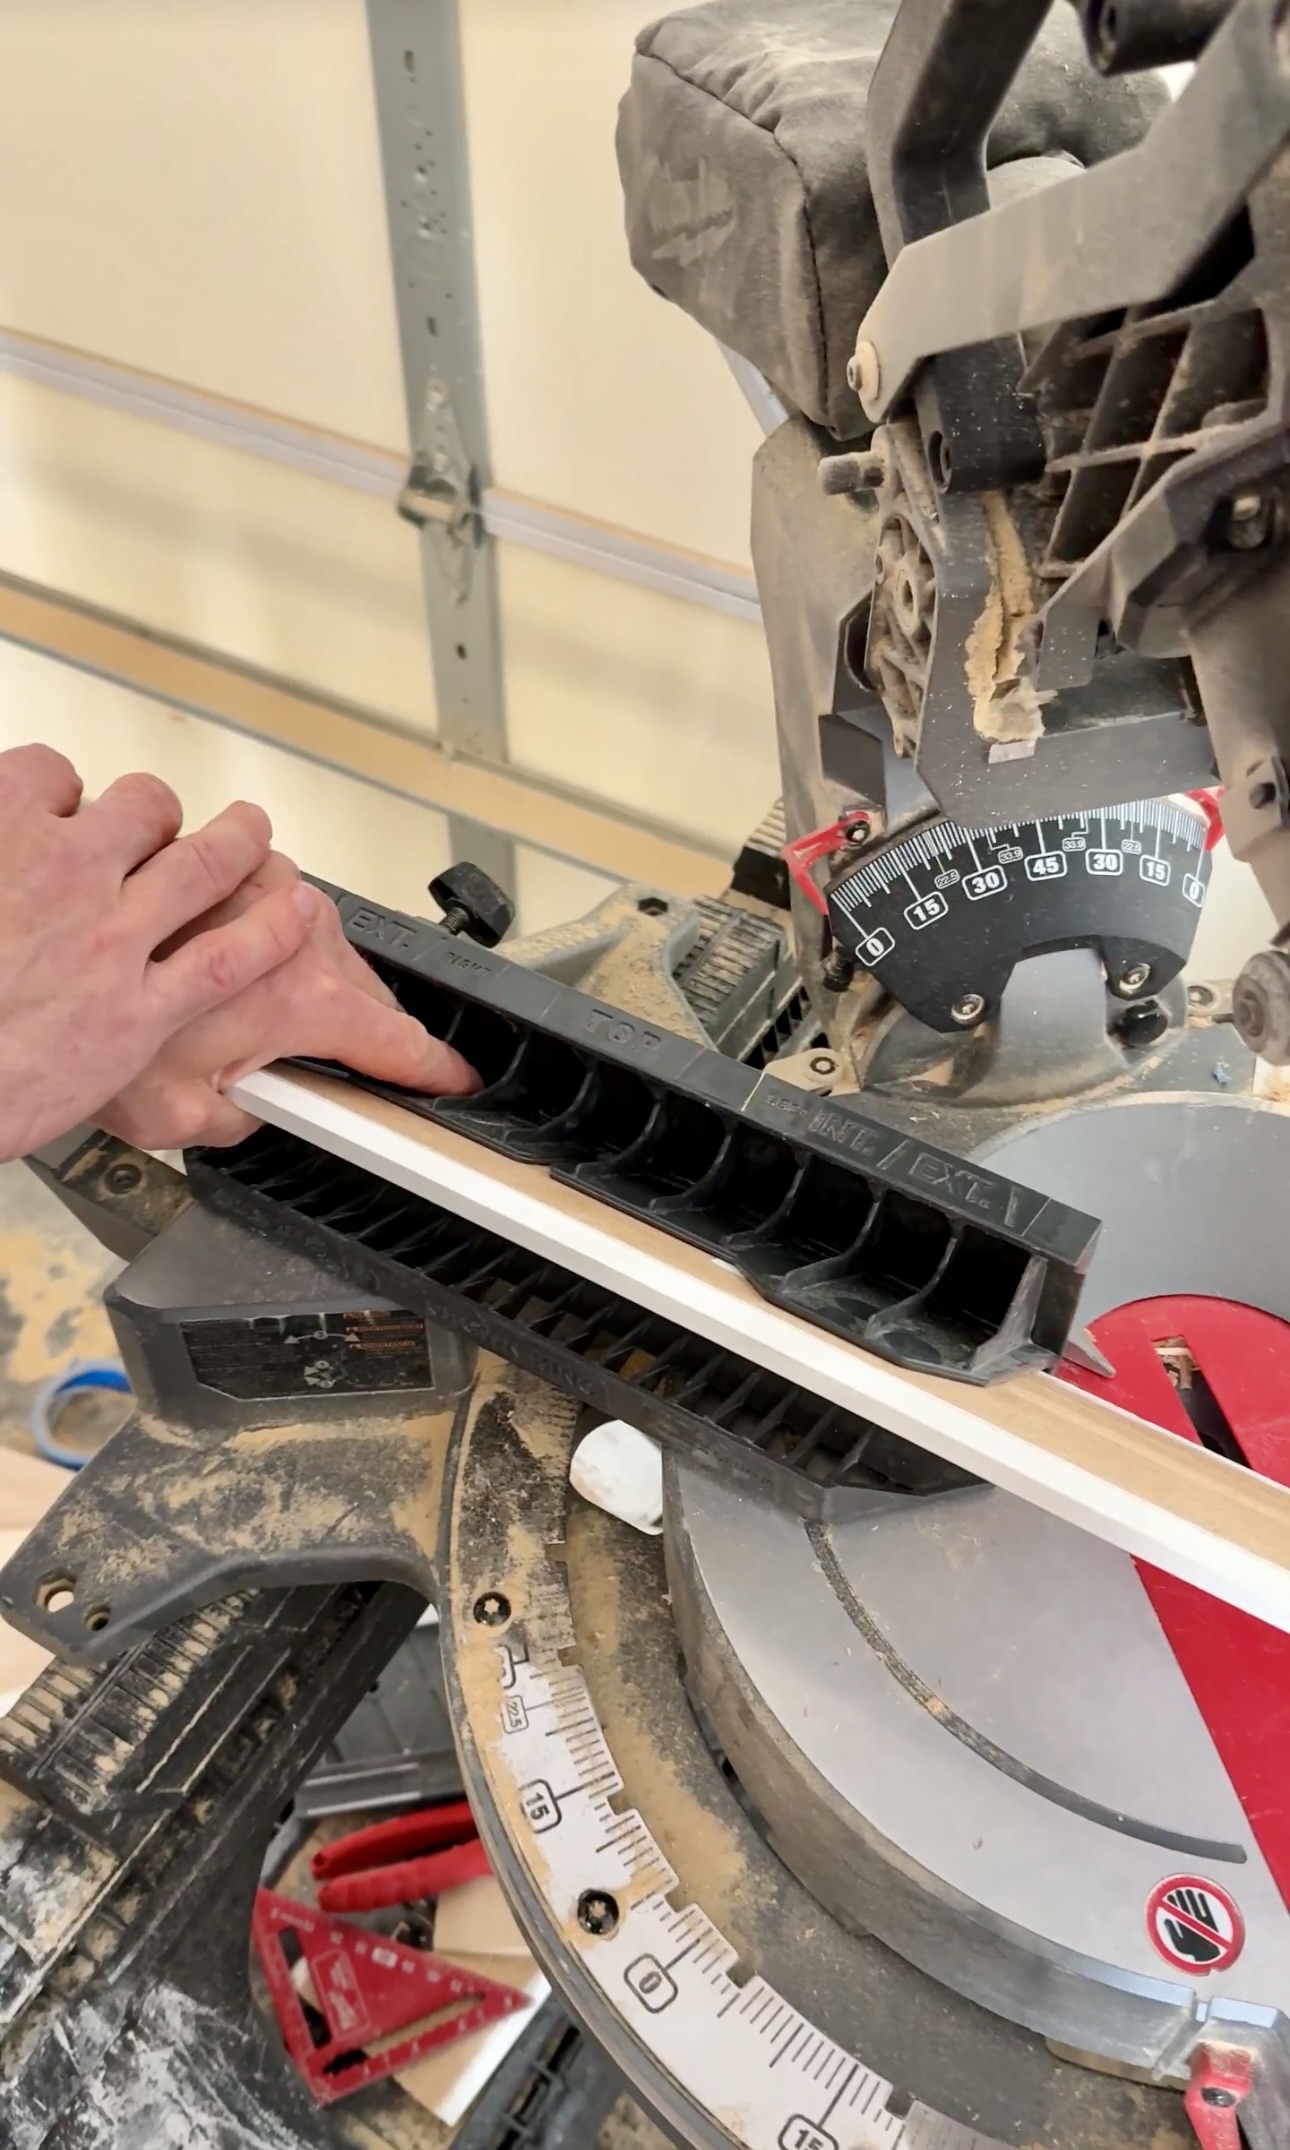
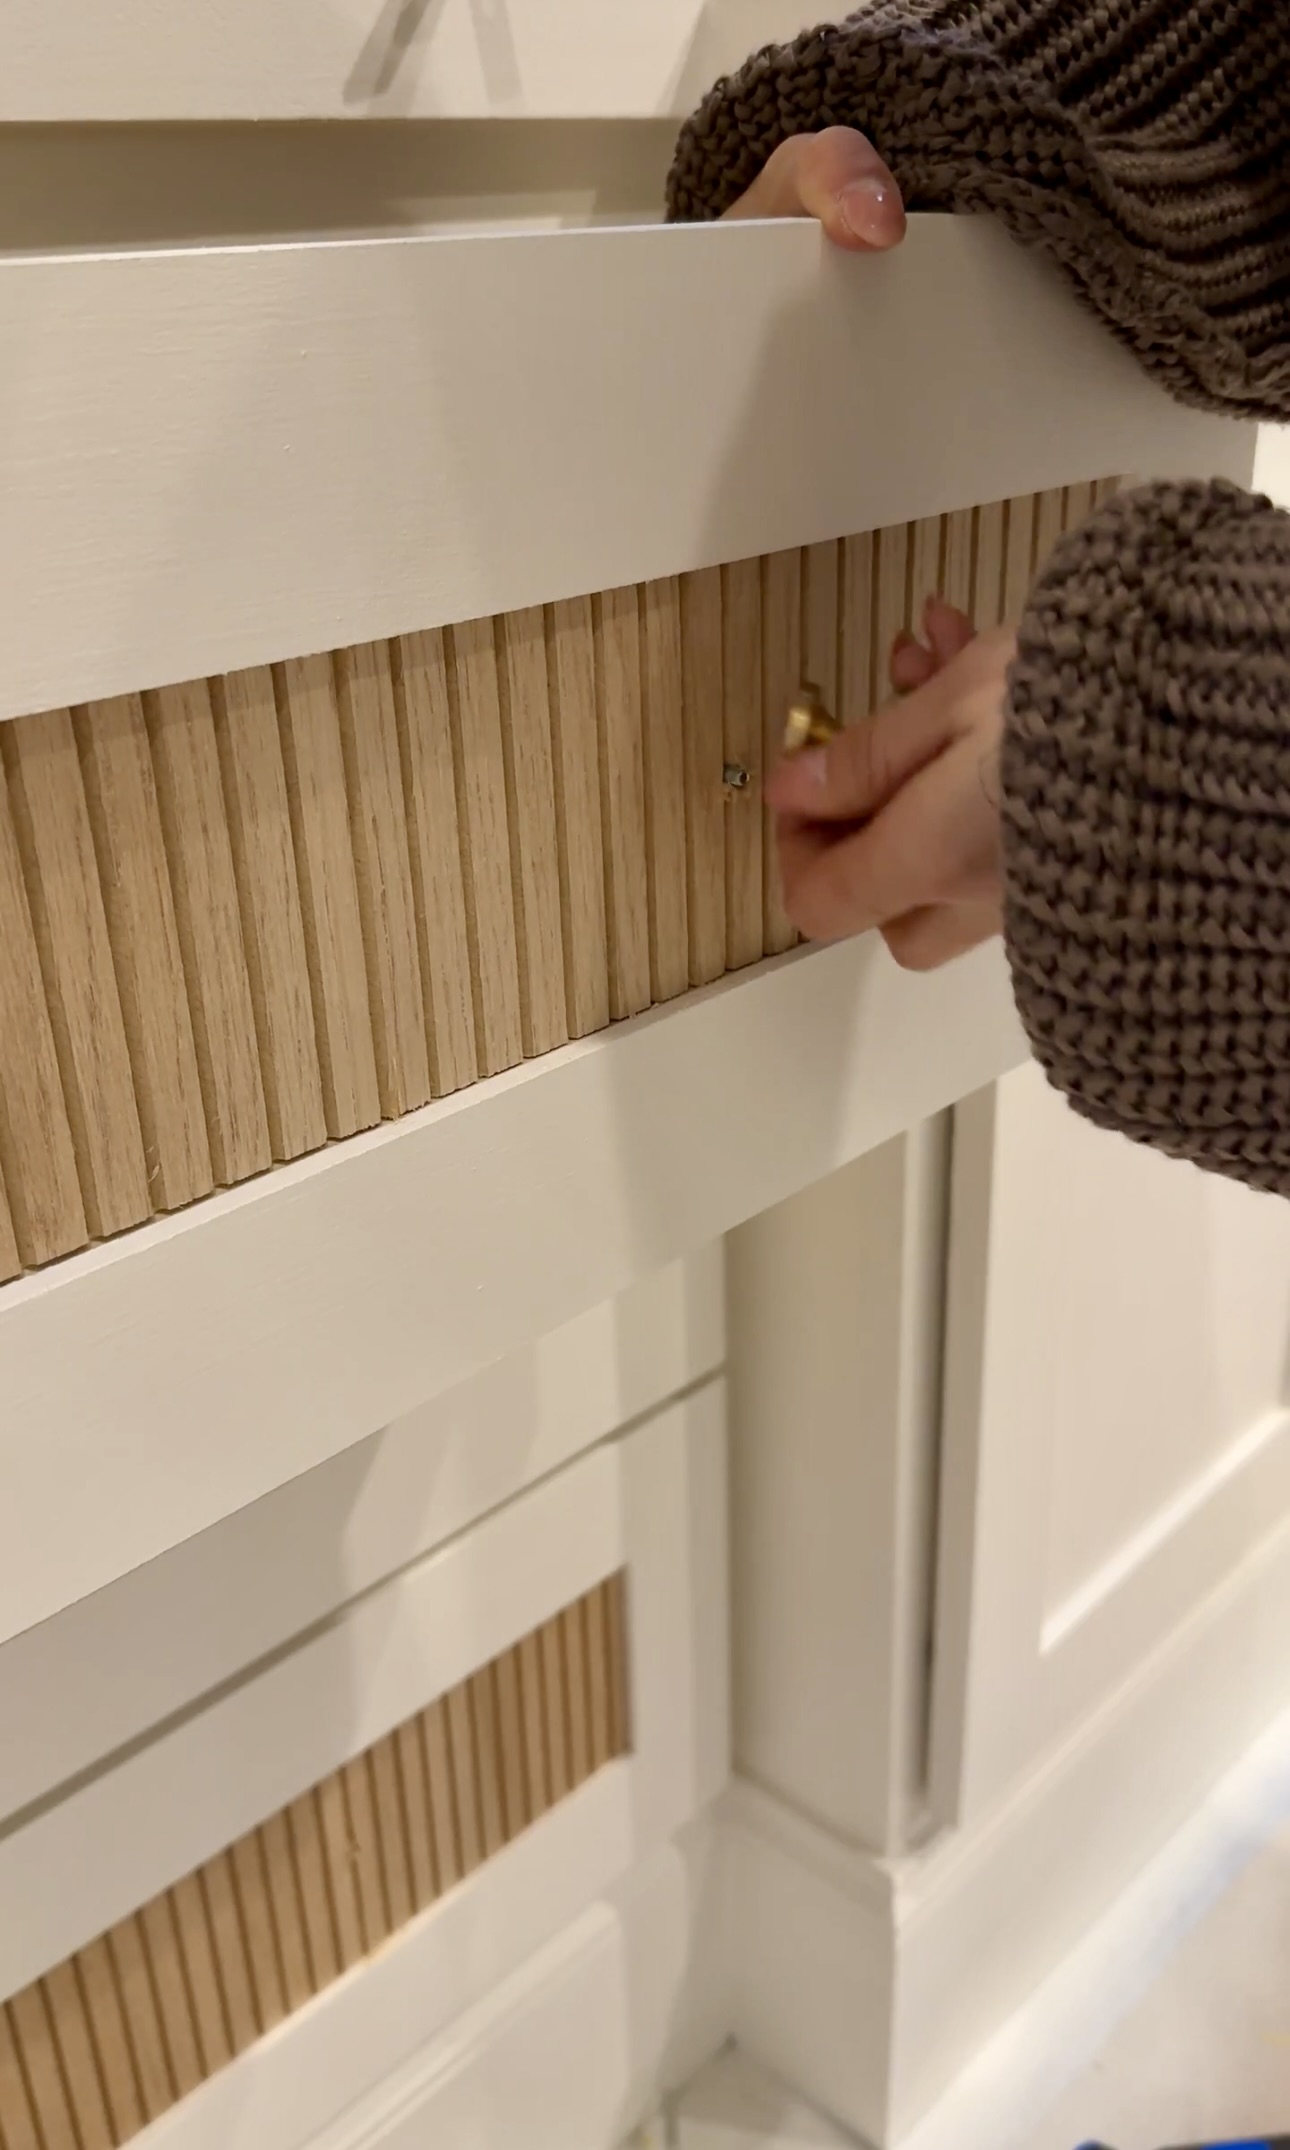
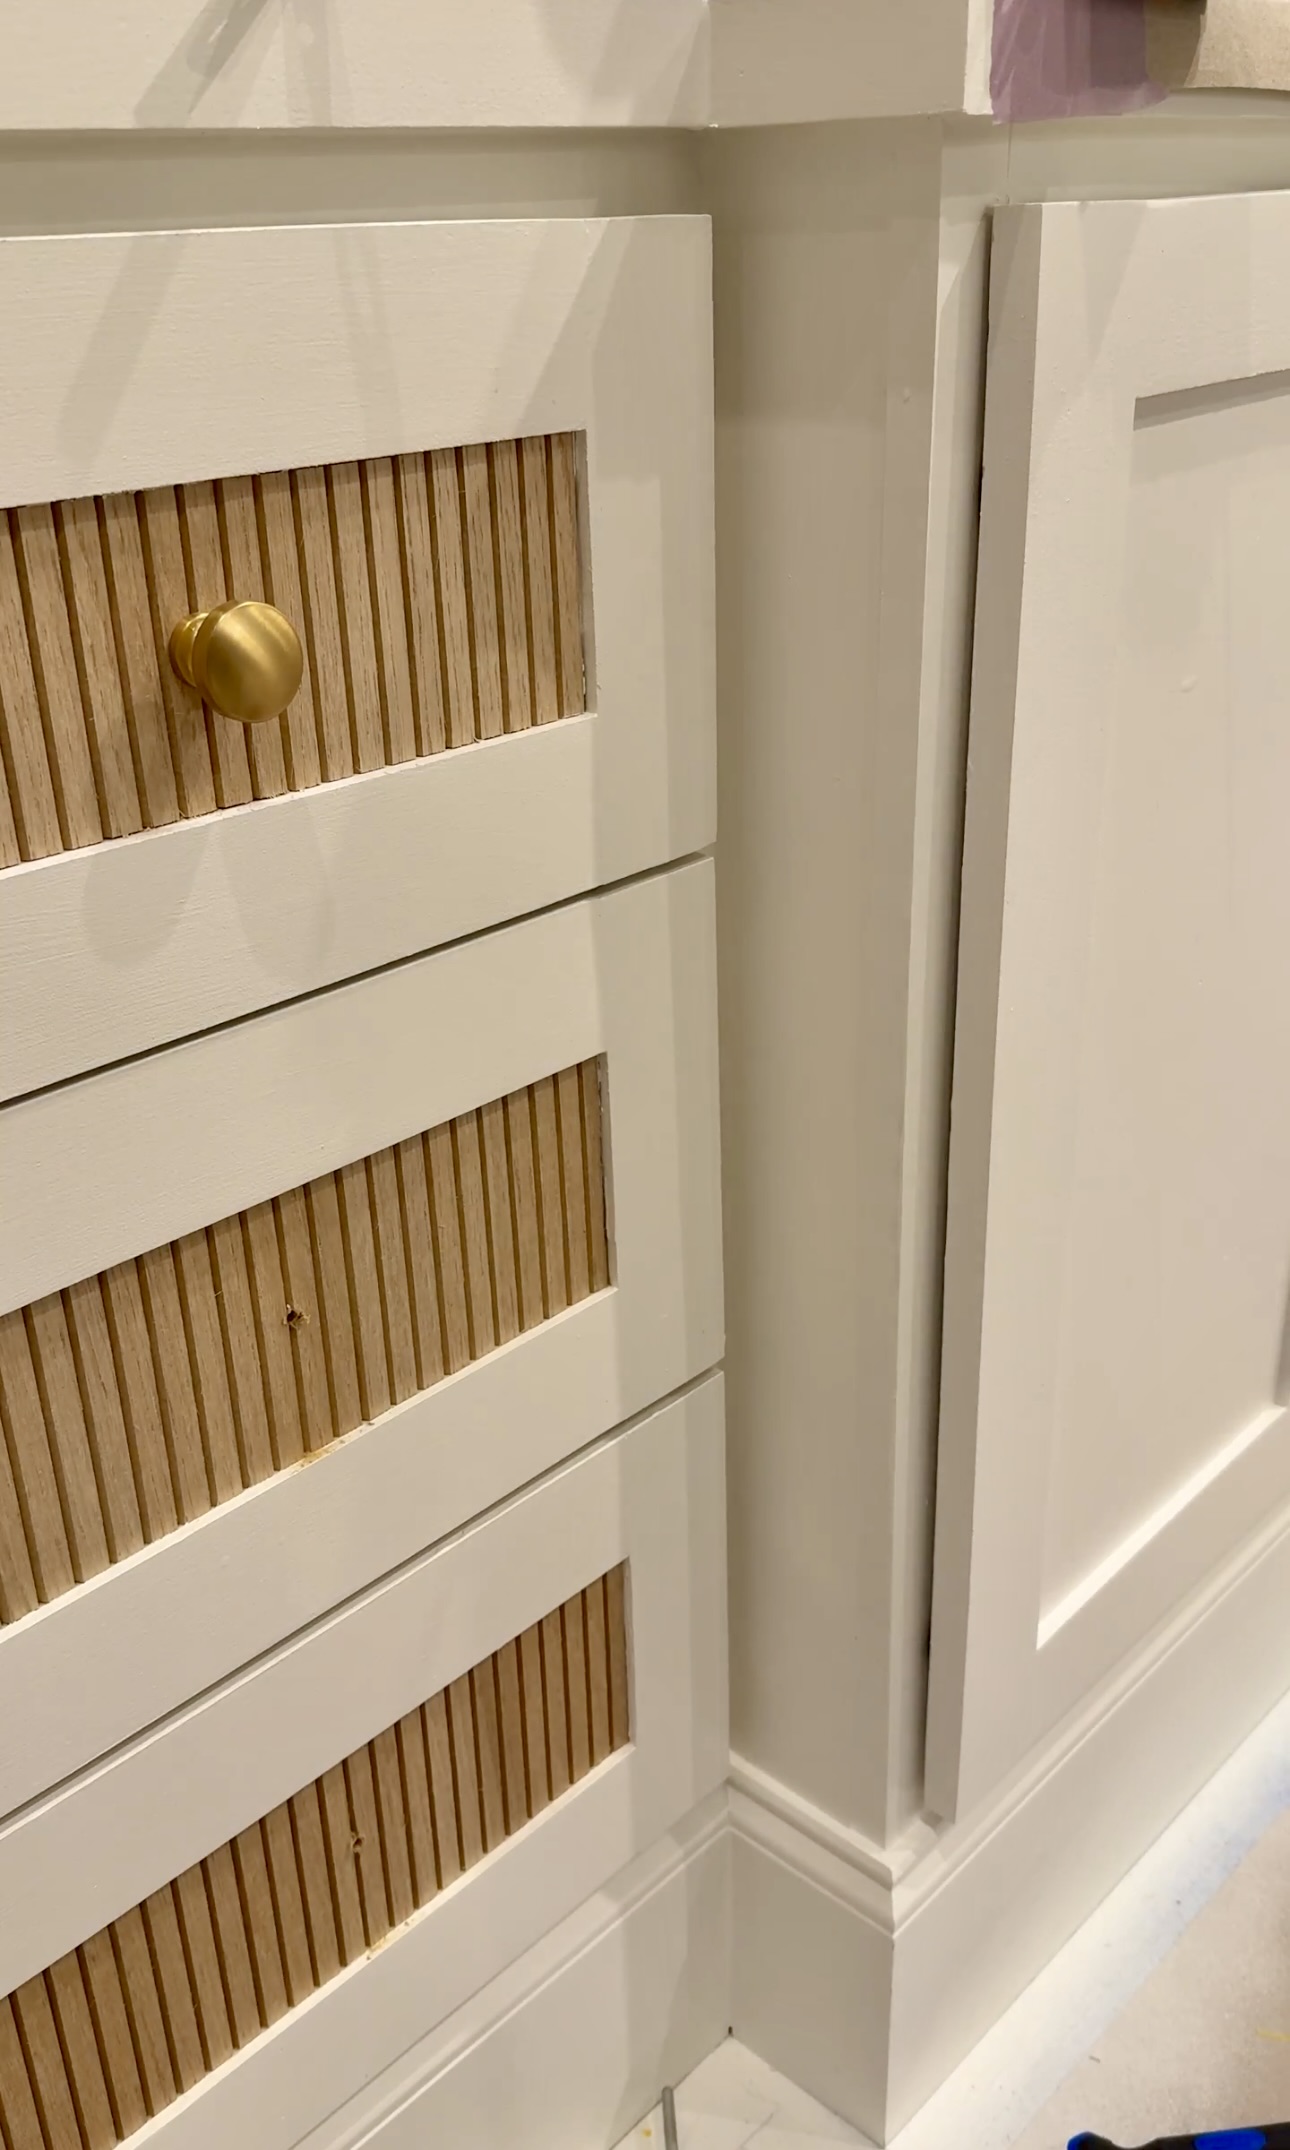
We got this pole wrap for the drawer fronts. I was so excited to put this stuff on! I went out and cut this stuff on my chop saw. Then, I wiped the drawer fronts down with a tack cloth. Finally, I installed the pole wrap with wood glue.
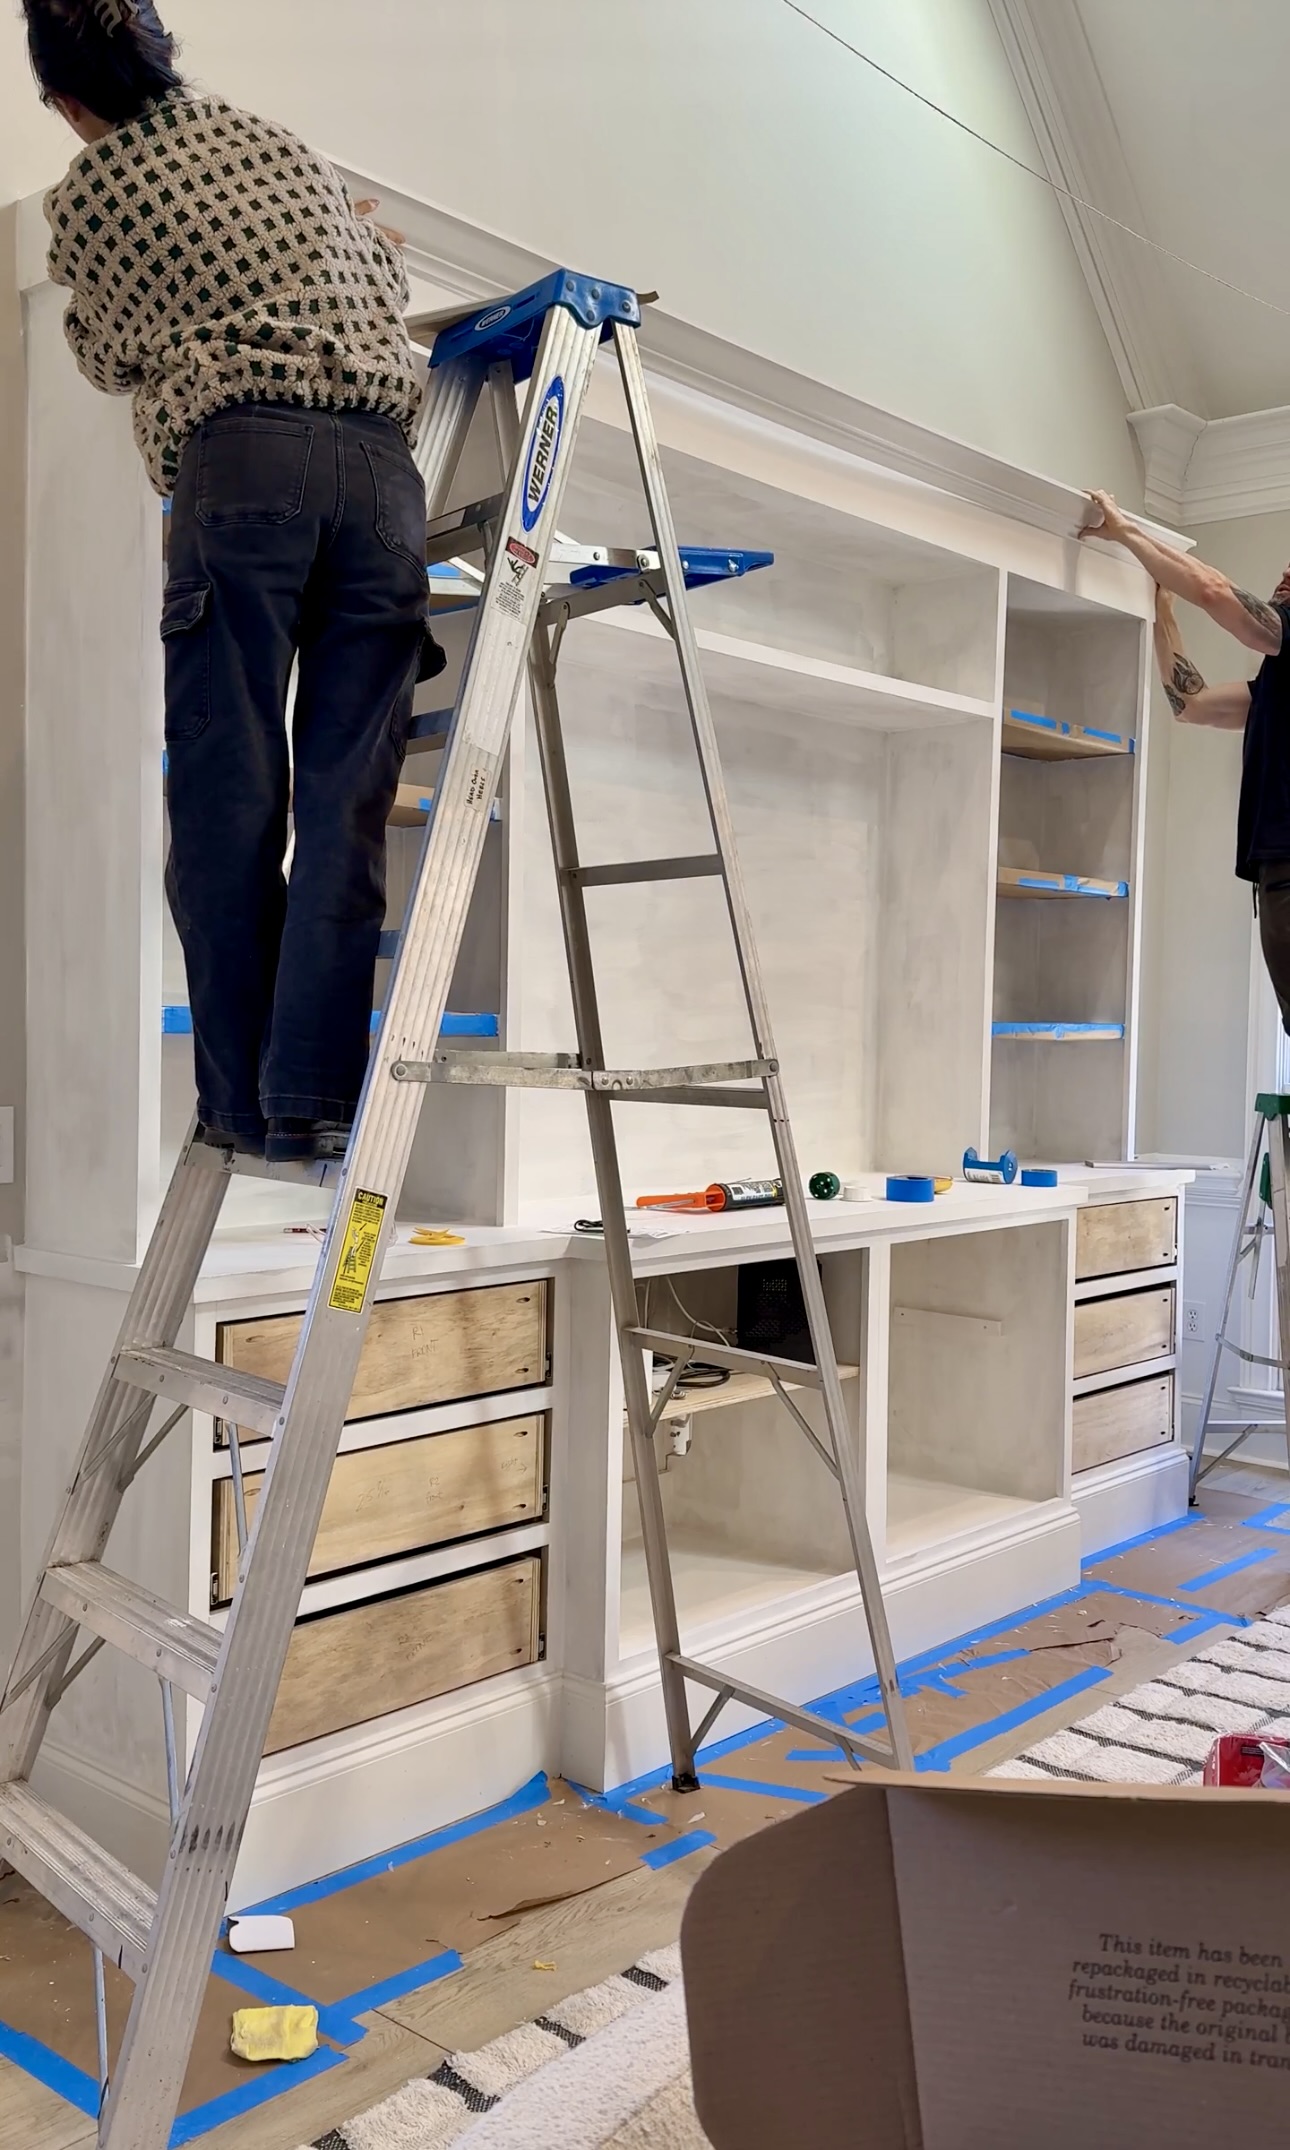
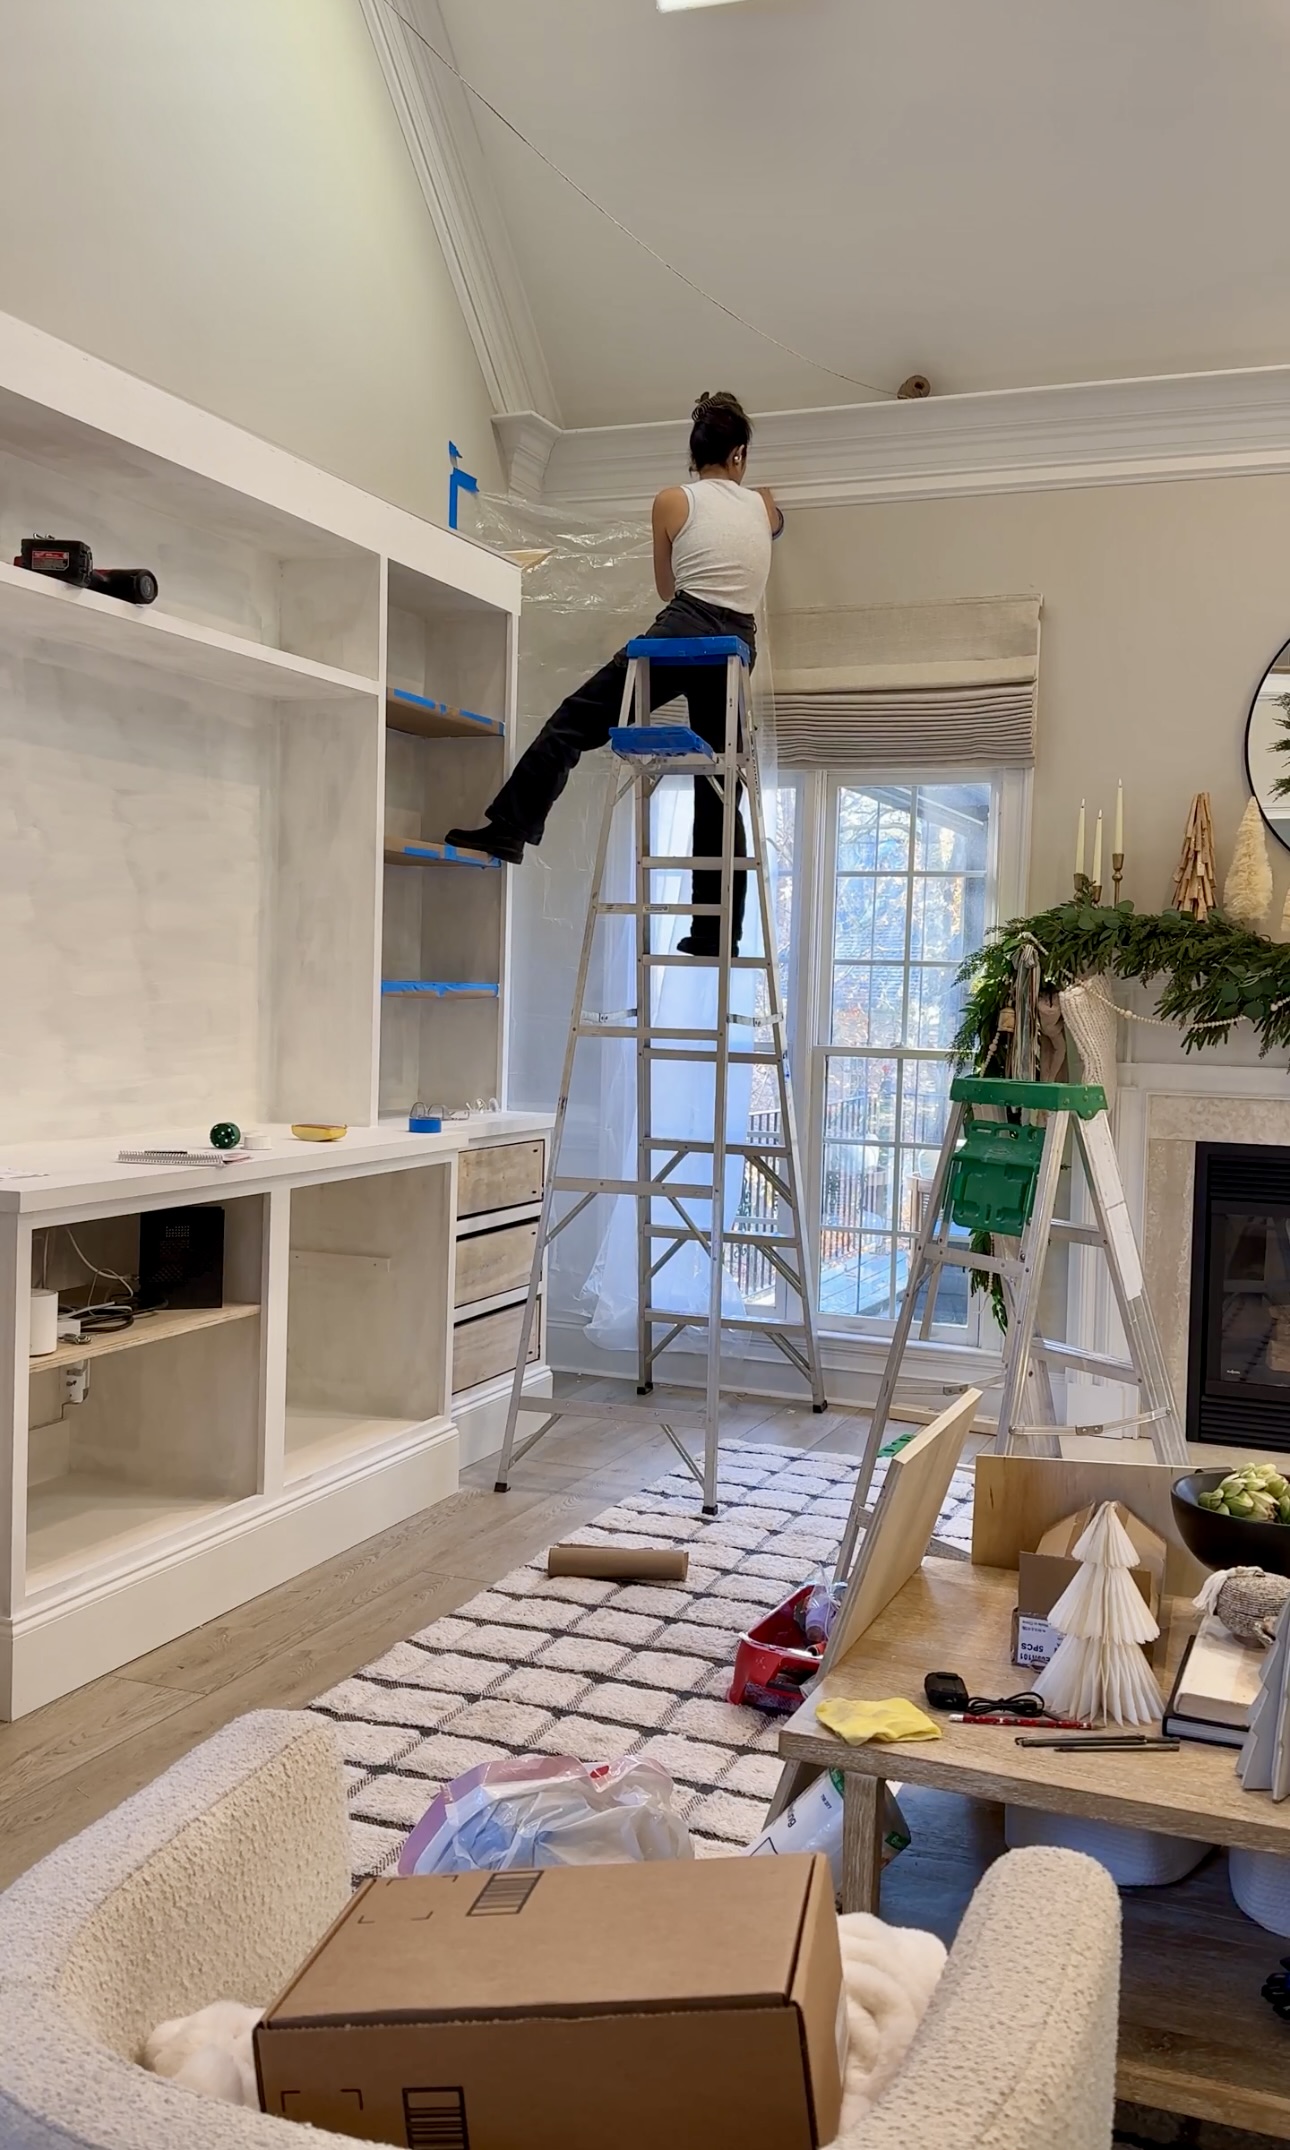
Crown Molding
Next, we installed baseboards and caulked! For crown molding, I got this crown king. This stuff can be intense, so it’s important to follow directions! This jig is amazing. After we made all of our confusing cuts (made easier with this jig), we installed the crown molding with our framing nailer.
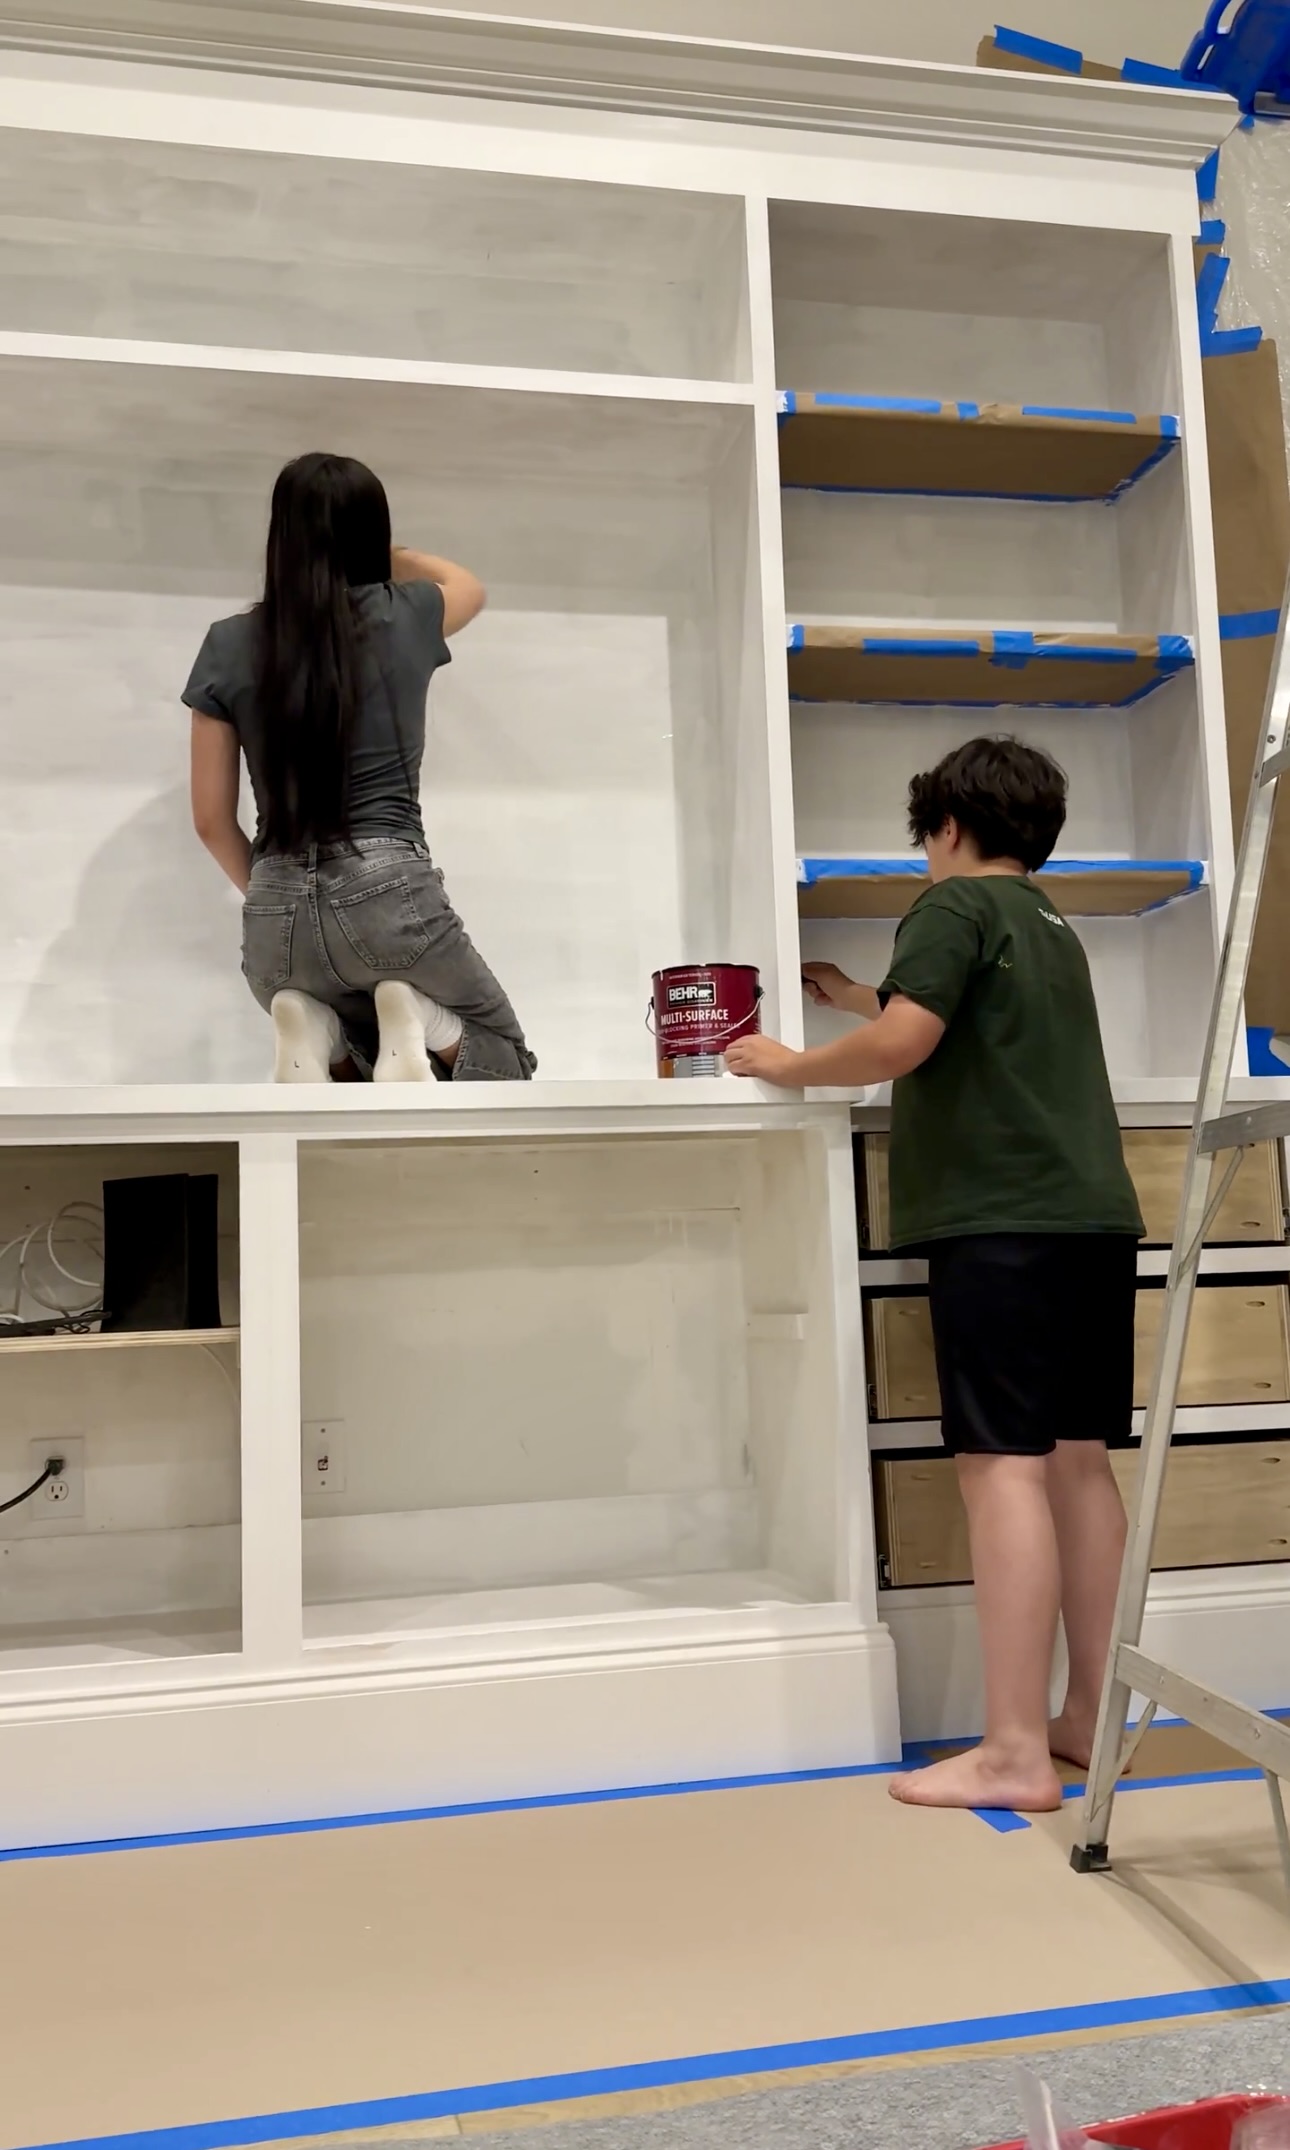
Paint
I primed the built ins with this Behr multi-surface primer! I cut in with a small, angled brush and then rolled the larger surfaces. Primer doesn’t need two coats, but the kids asked if they could help so I made up a job 🤣
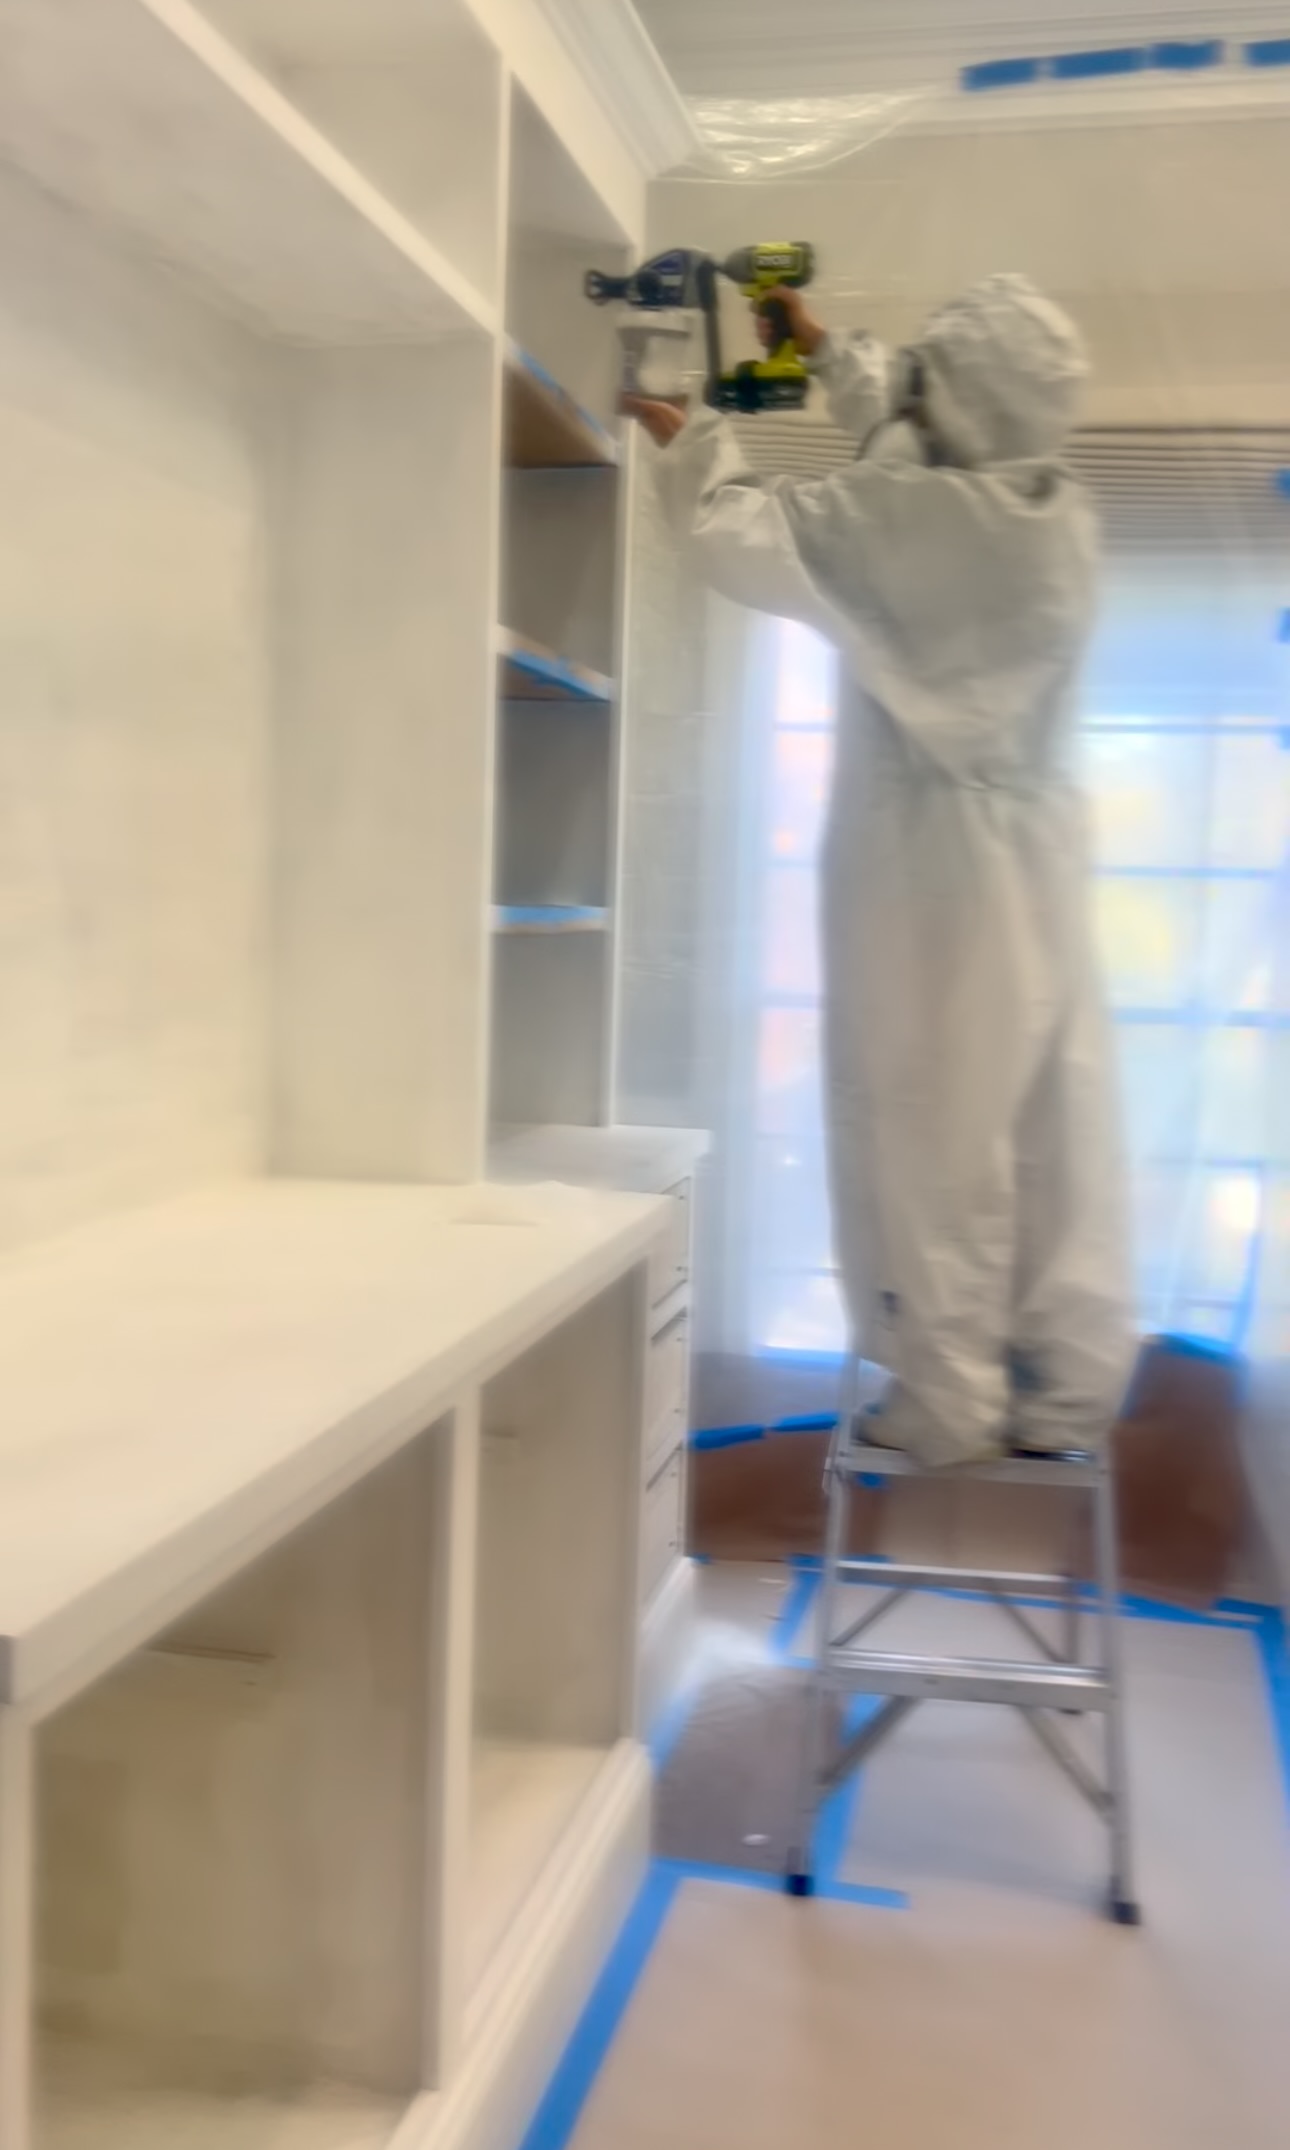
For the actual paint, I used Behr White Urethane Alkyd Satin Enamel Paint. I filled up my paint sprayer and sprayed my drawer and cabinet fronts first out in the garage.
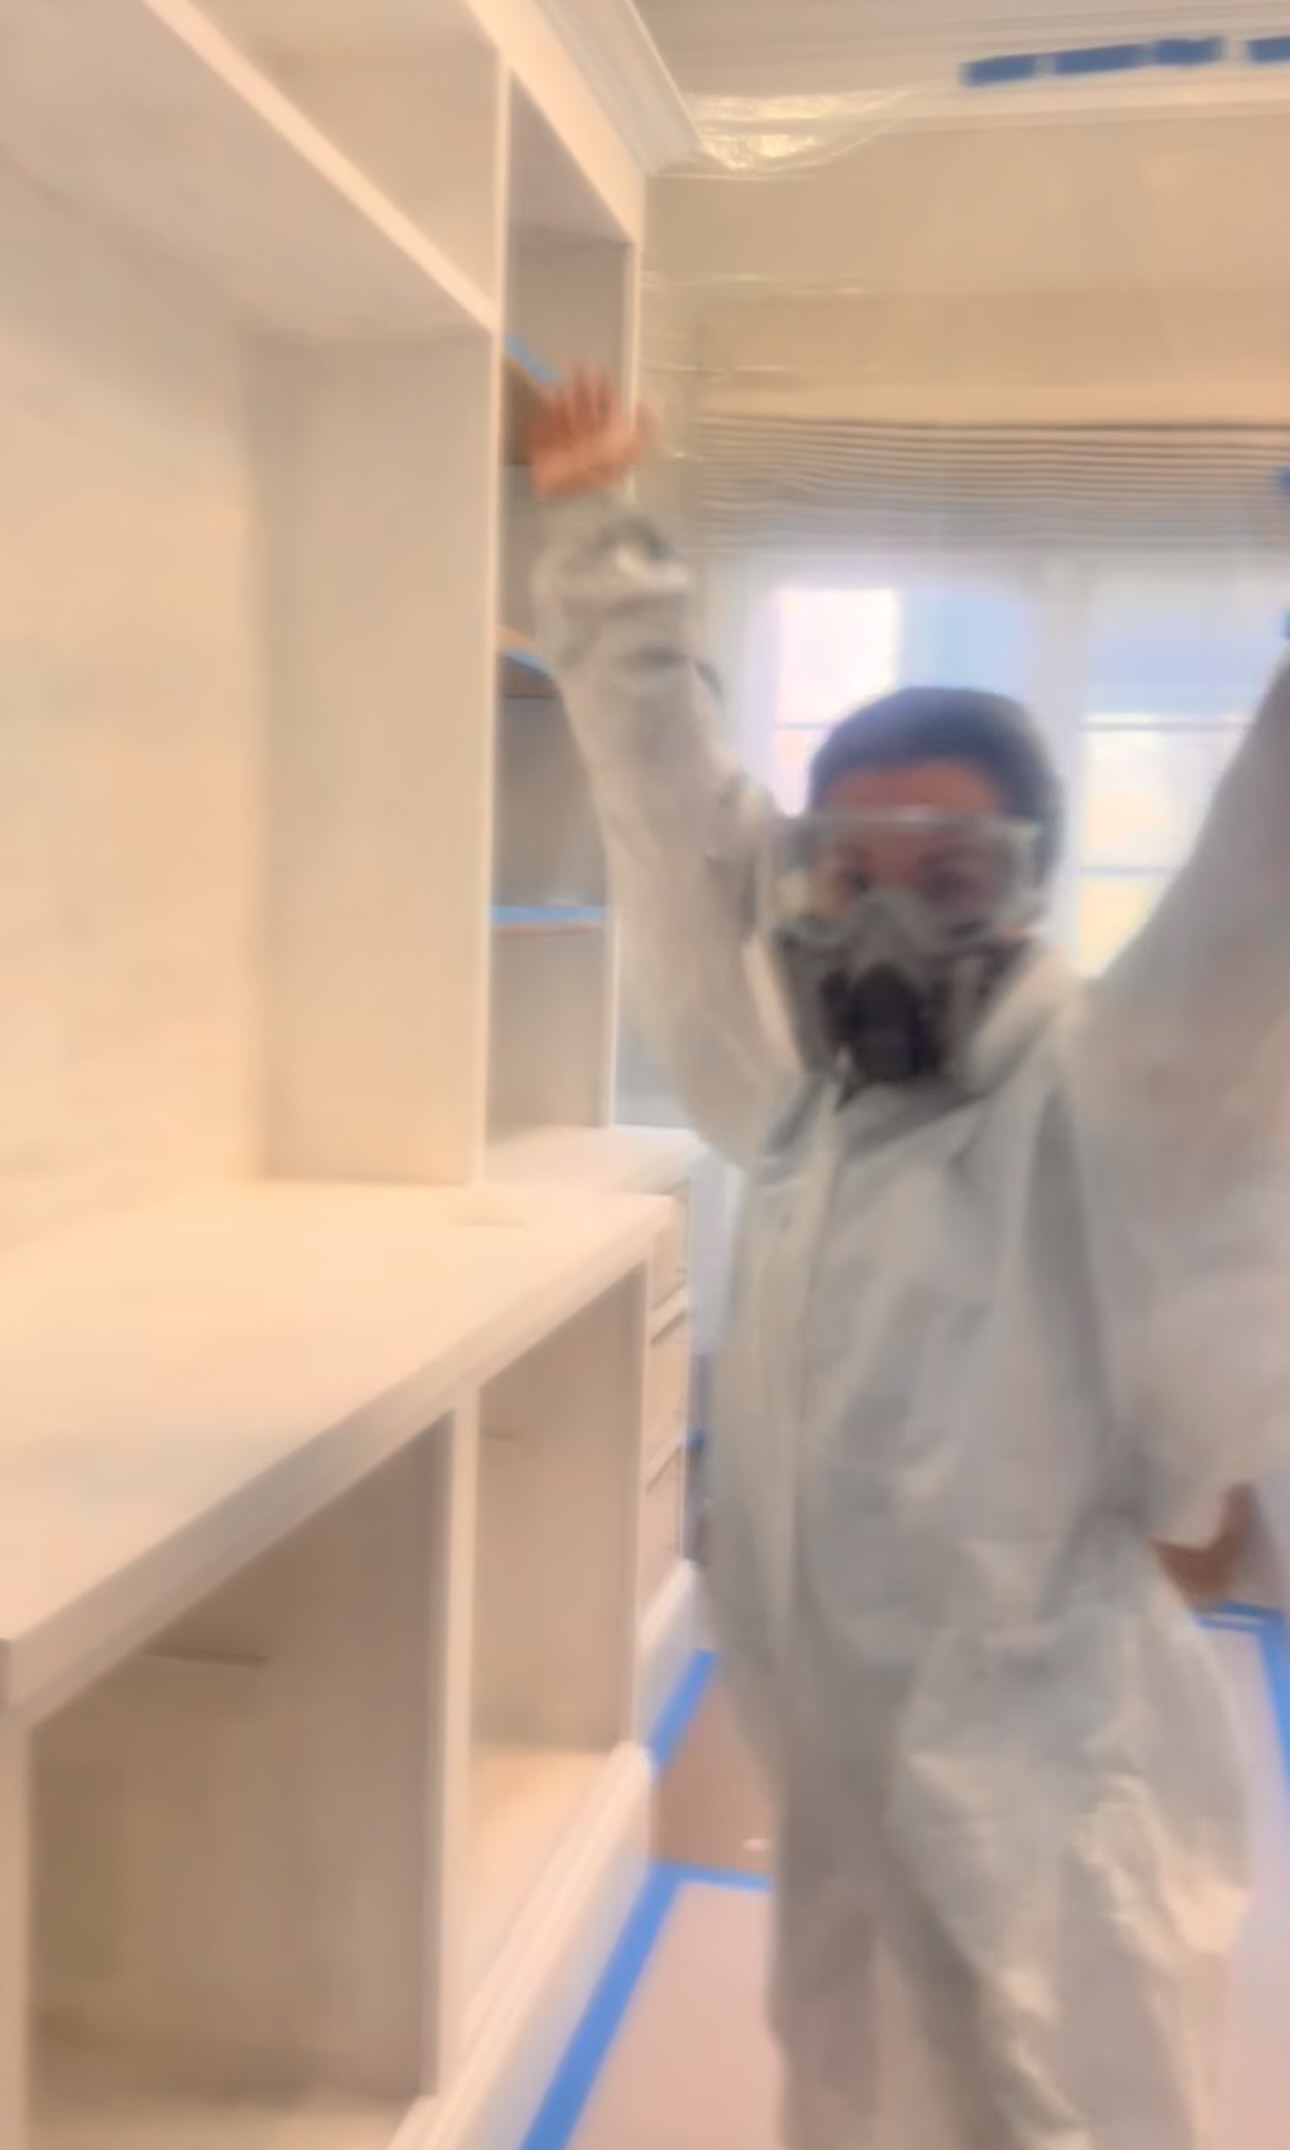
Then, I got all prepped to spray paint the built-ins! Cue sexy paint suit! 🤣
Hinges
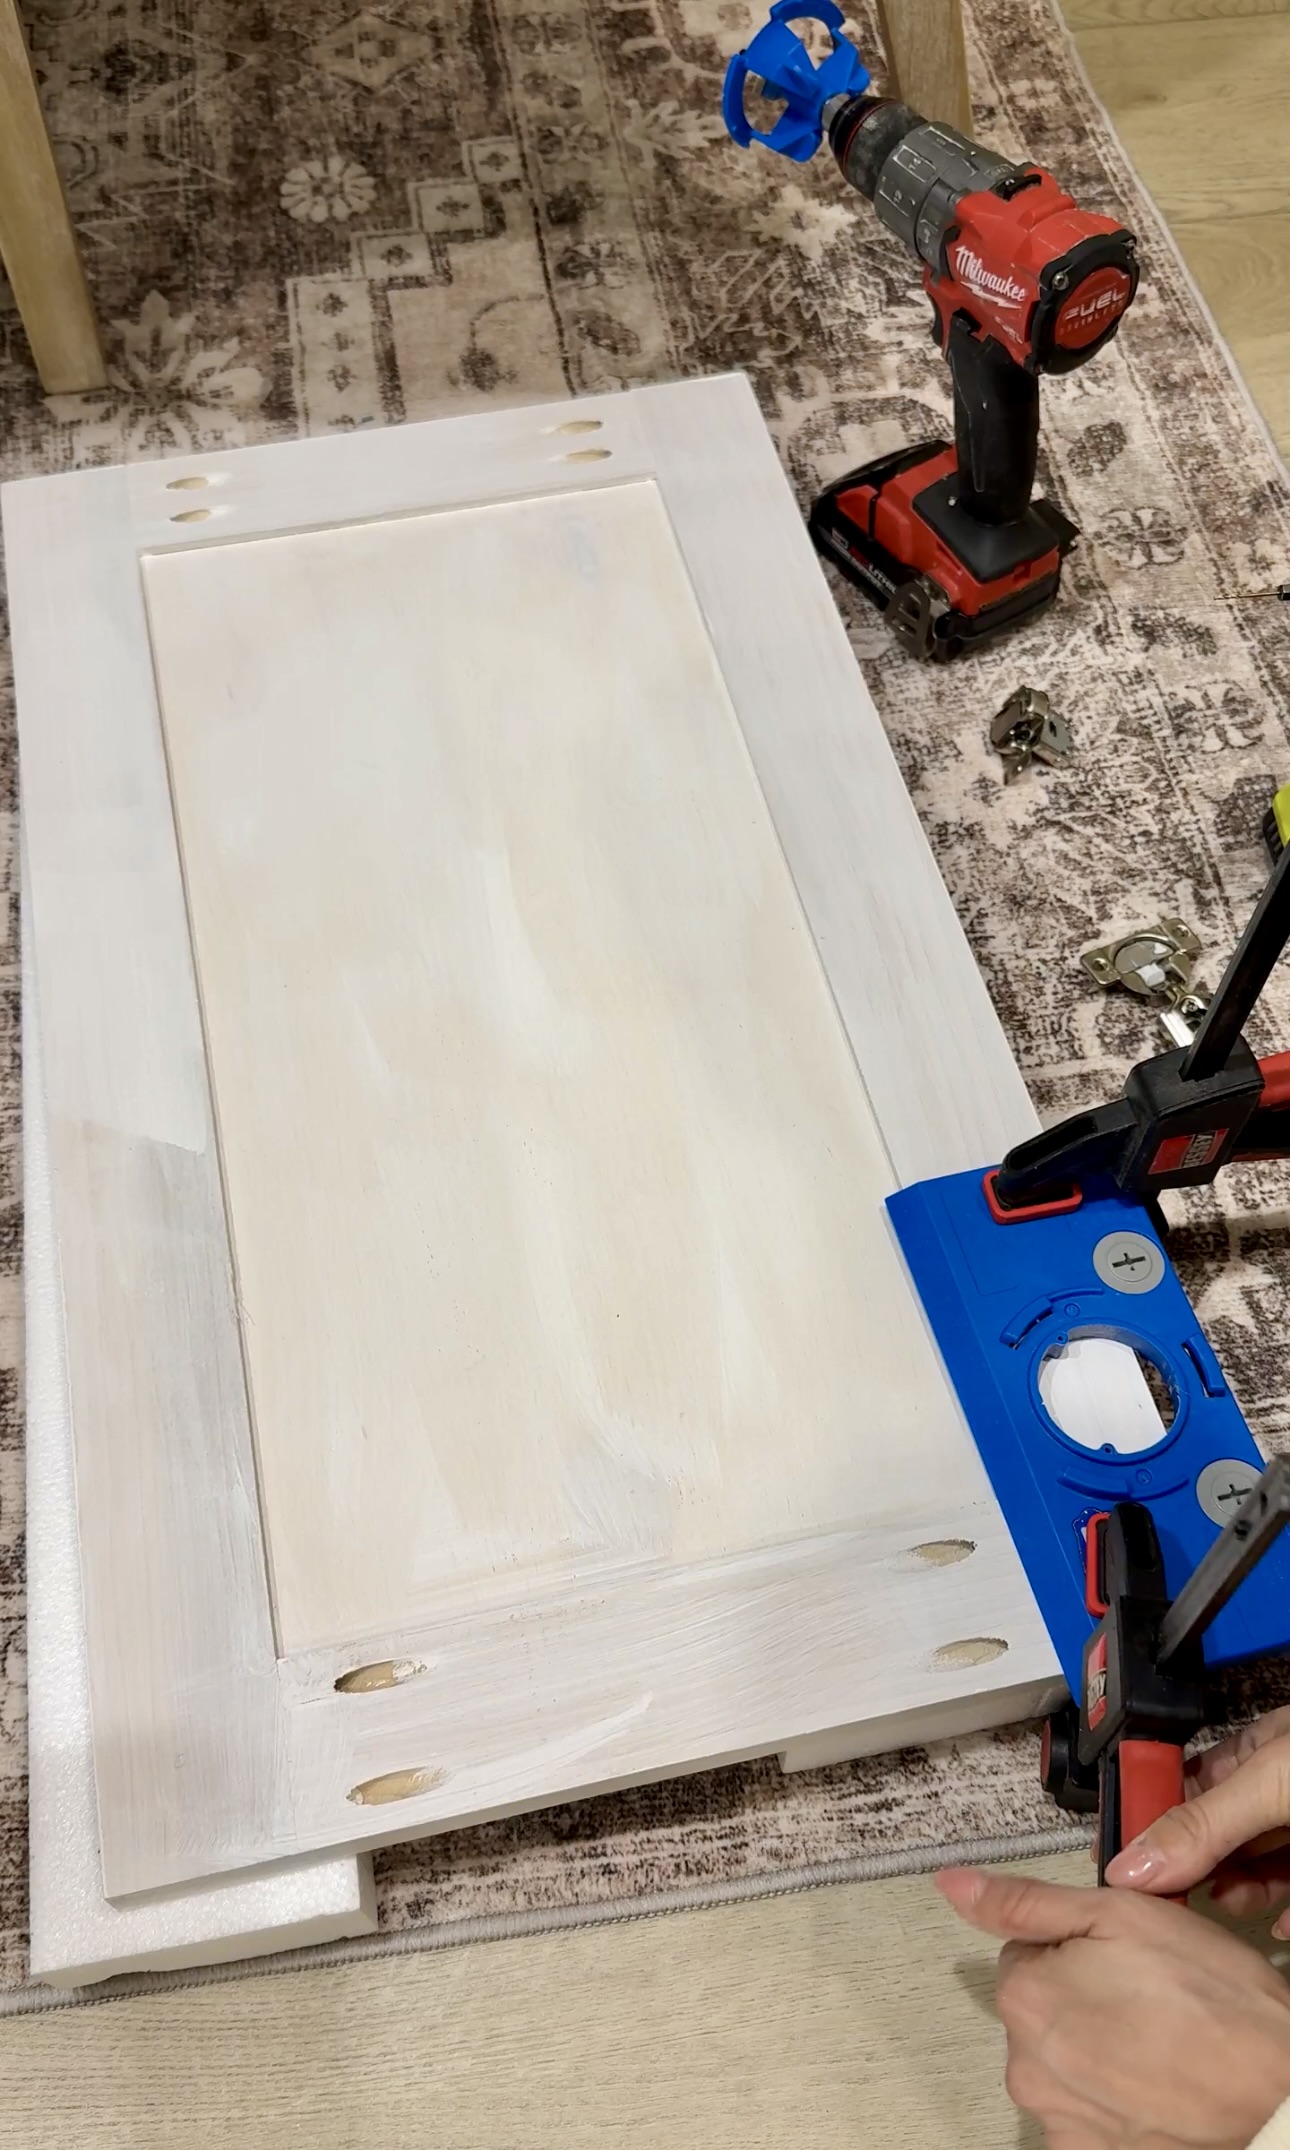
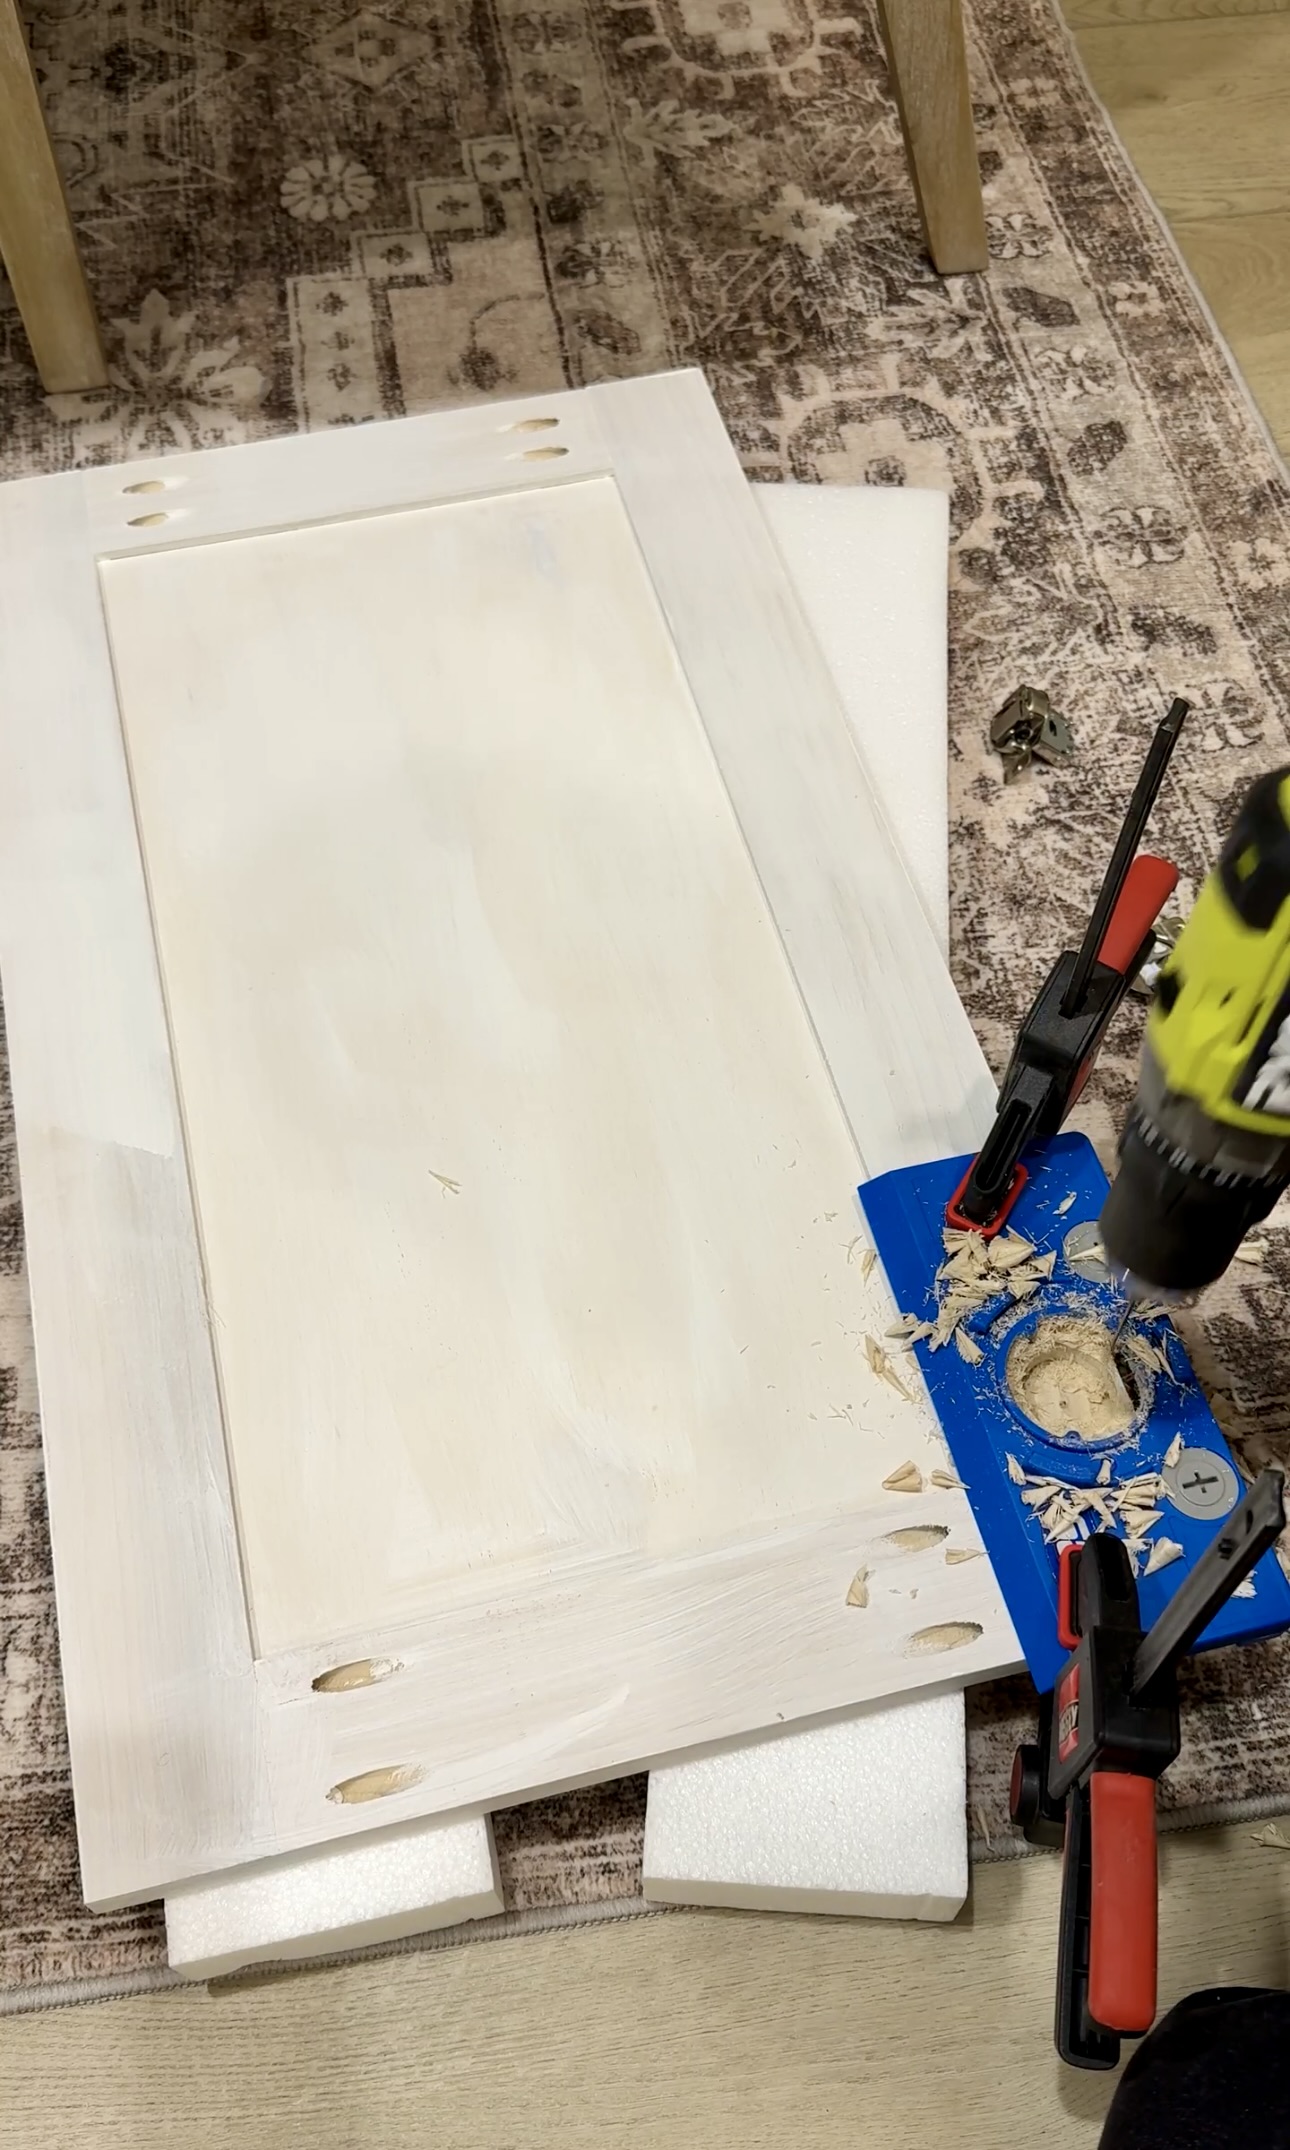
I put hinges on the back of my cabinet doors before I spray painted. I used this hinge jig and it’s awesome! It attaches to your drill and makes the hole for your hinges.
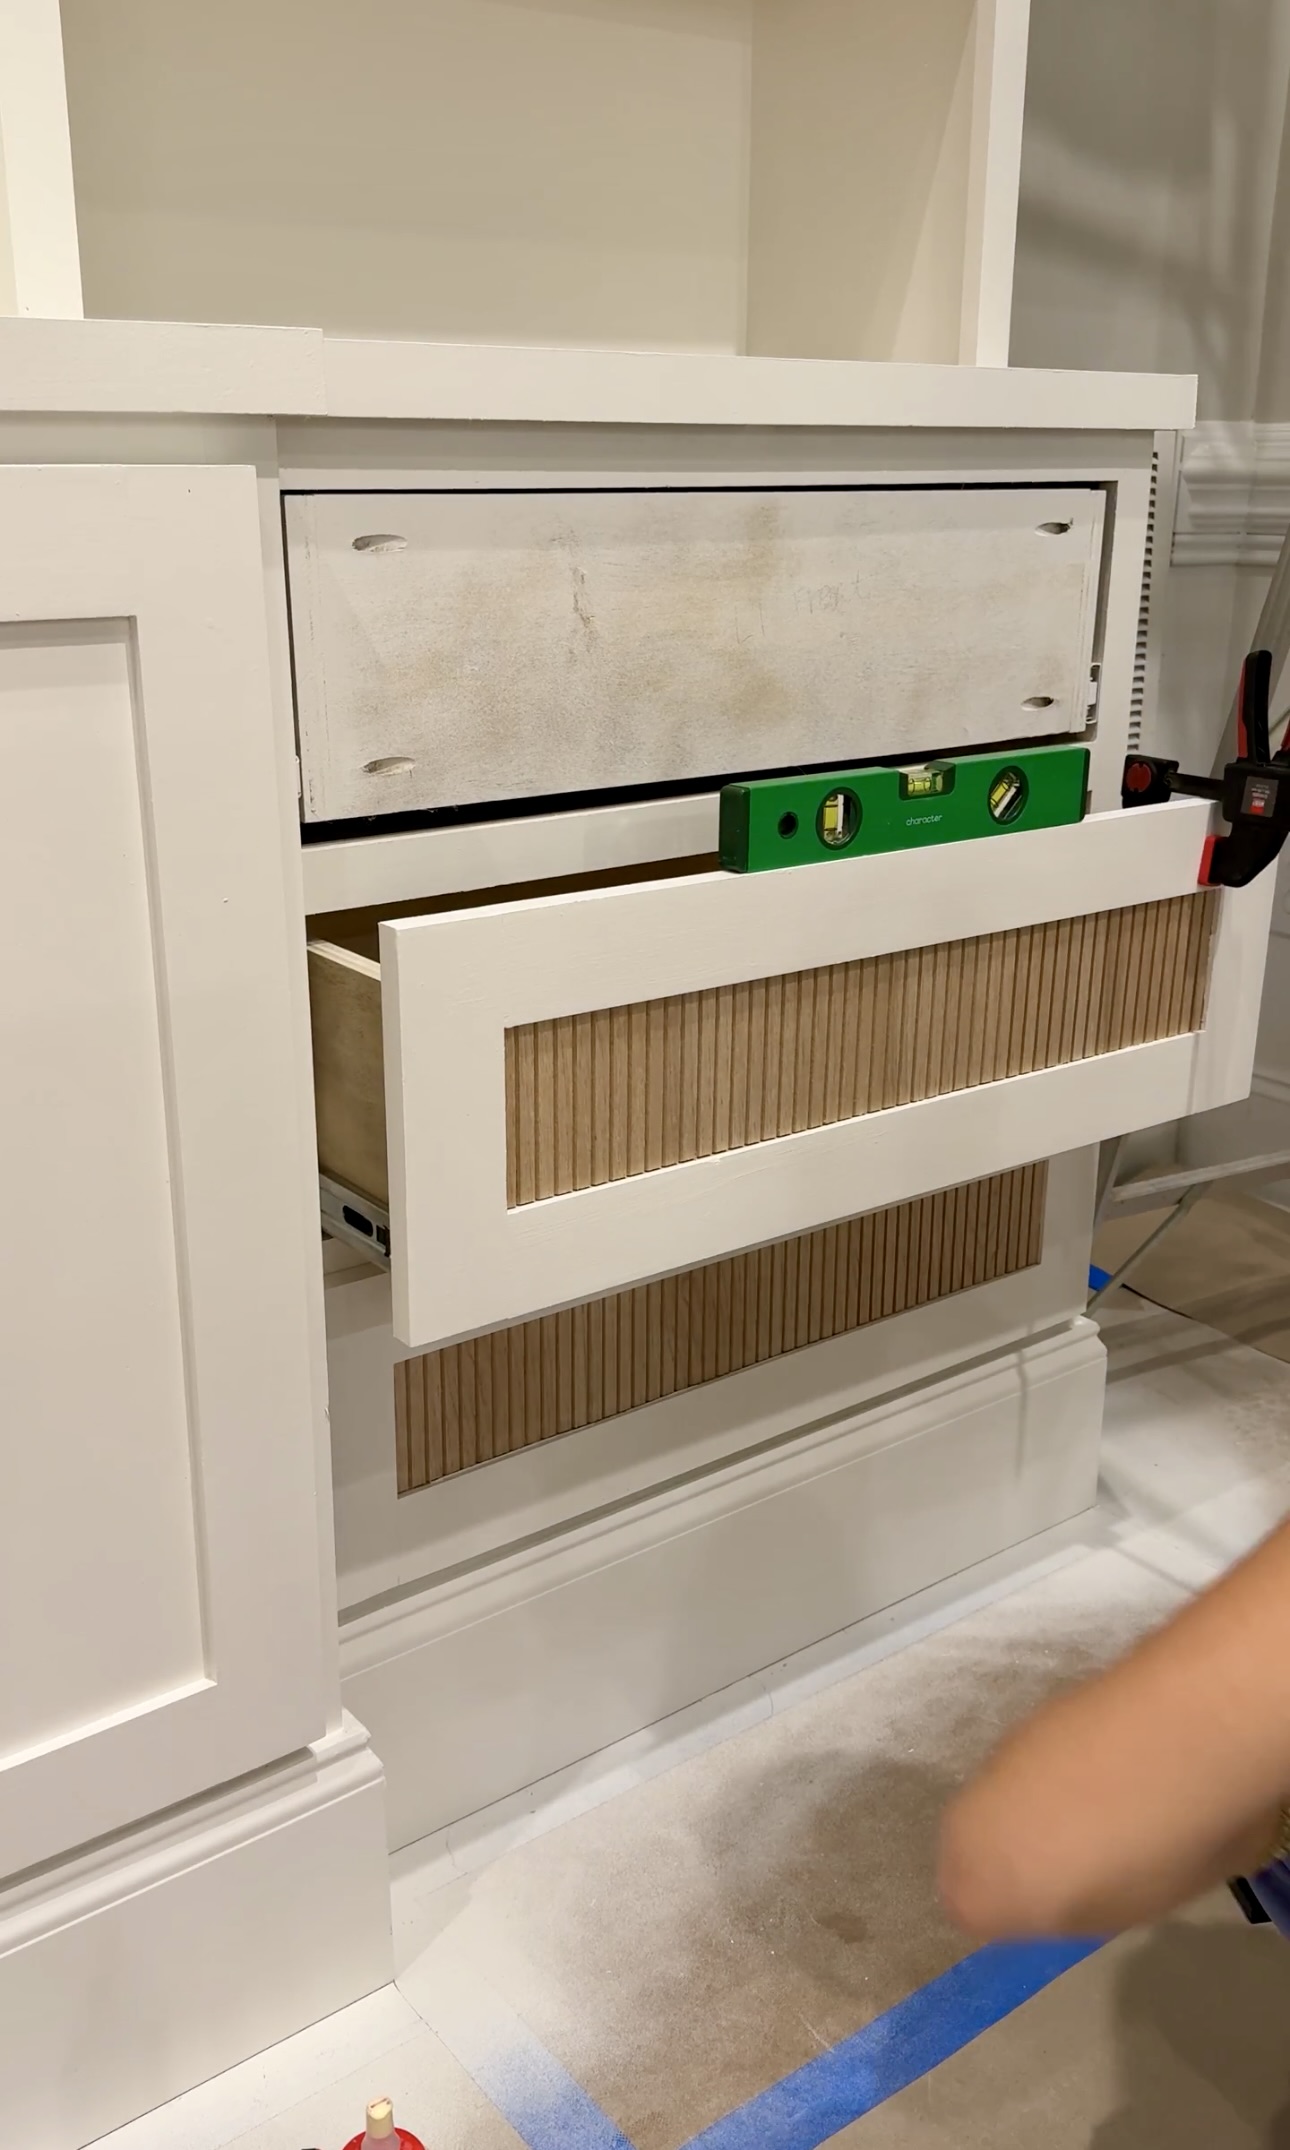
Drawer Front Installation
I made sure to line up the drawer fronts perfectly and then attached them with wood glue. I made sure they were level, then I clamped them to dry!
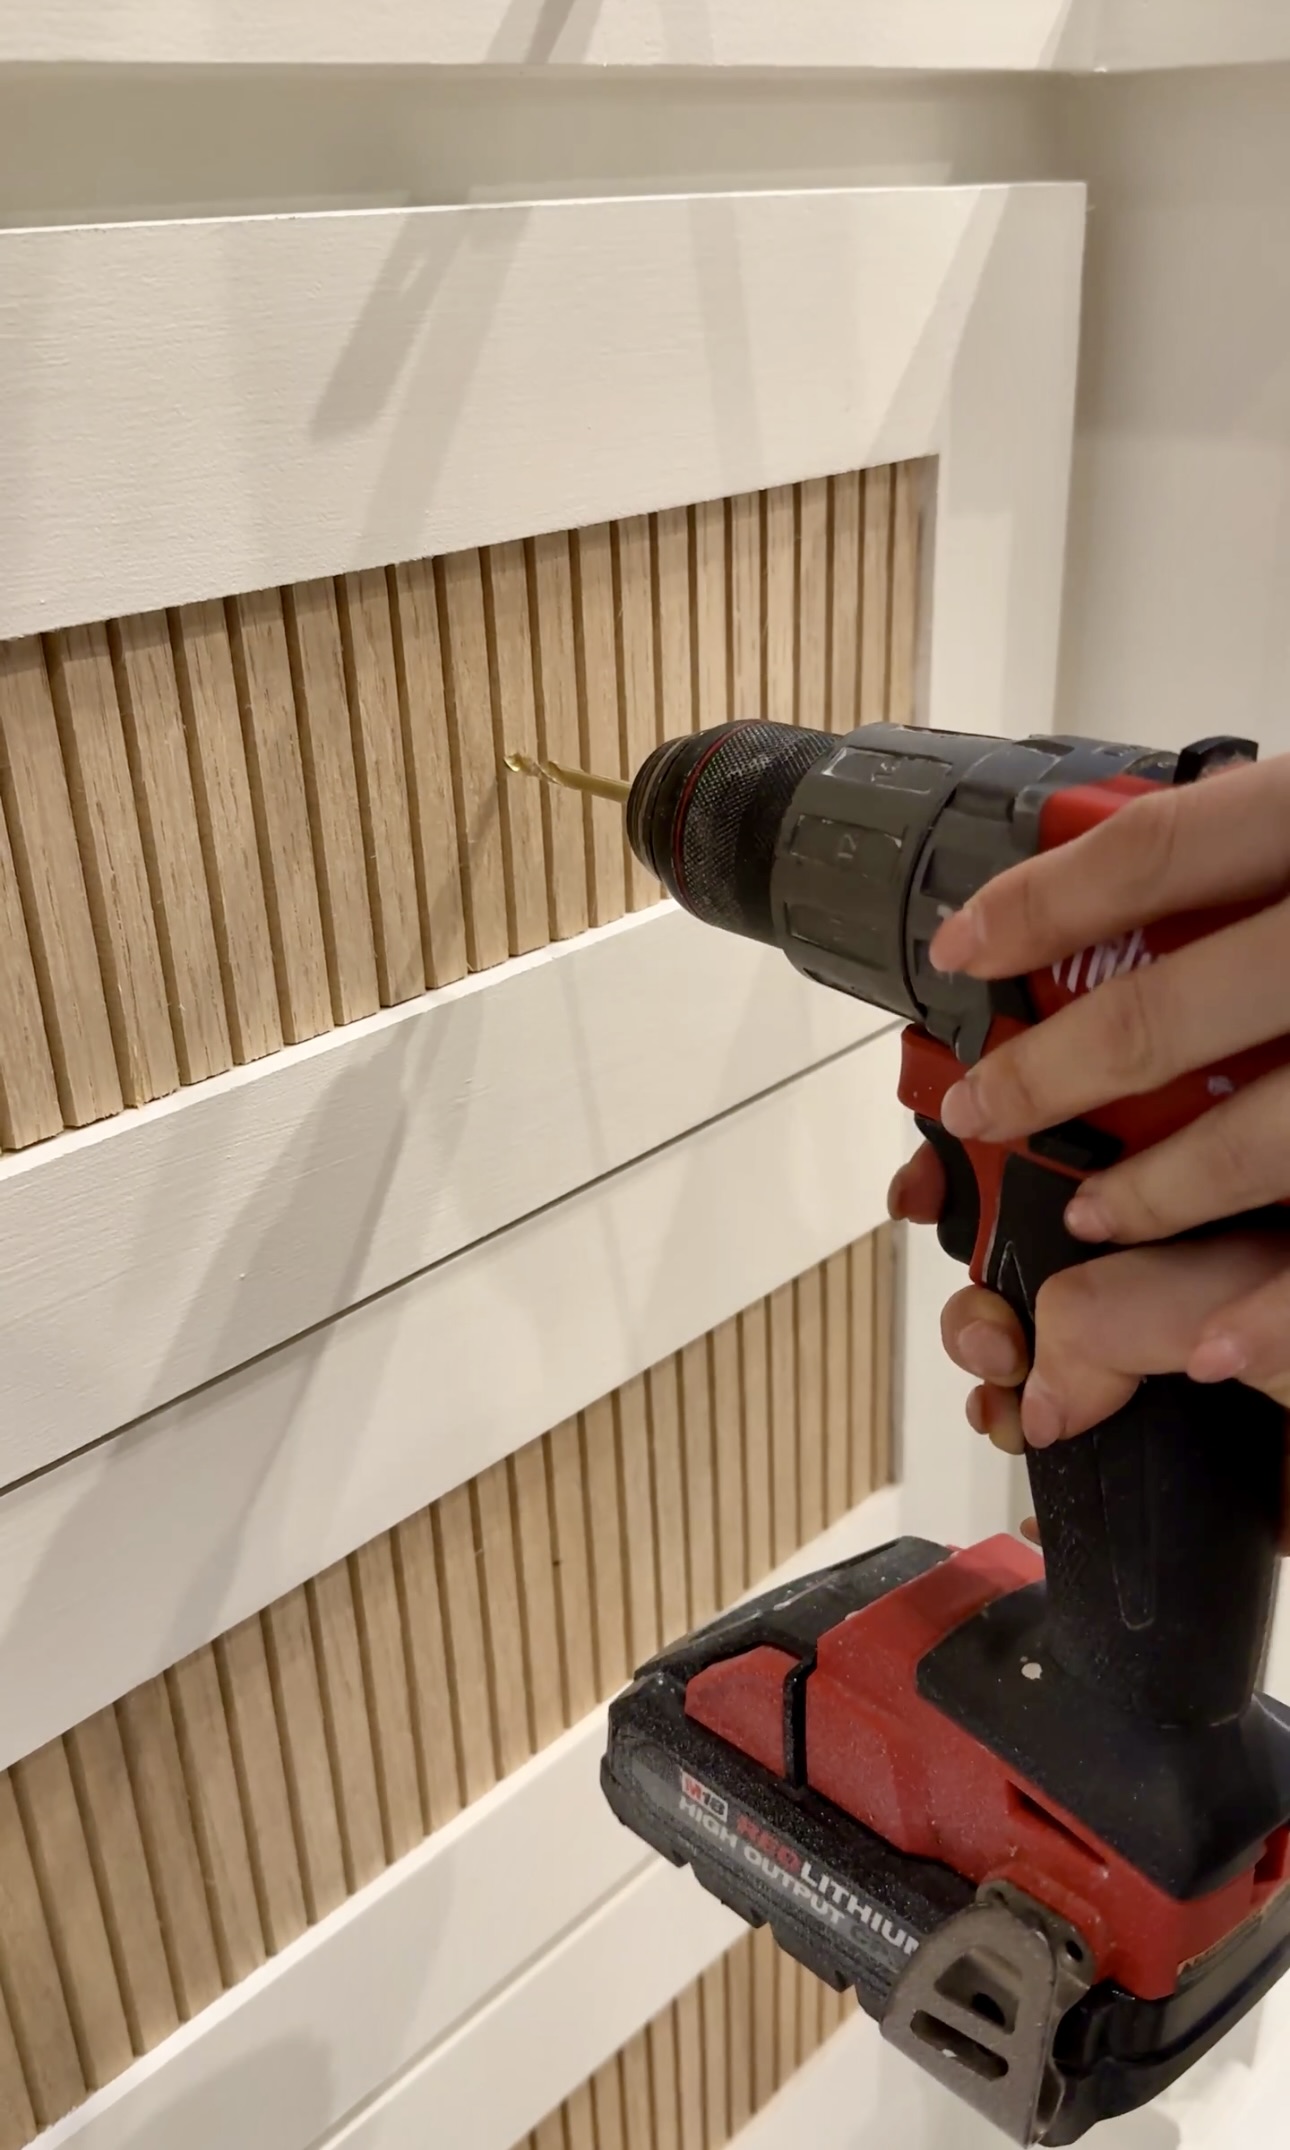
Hardware
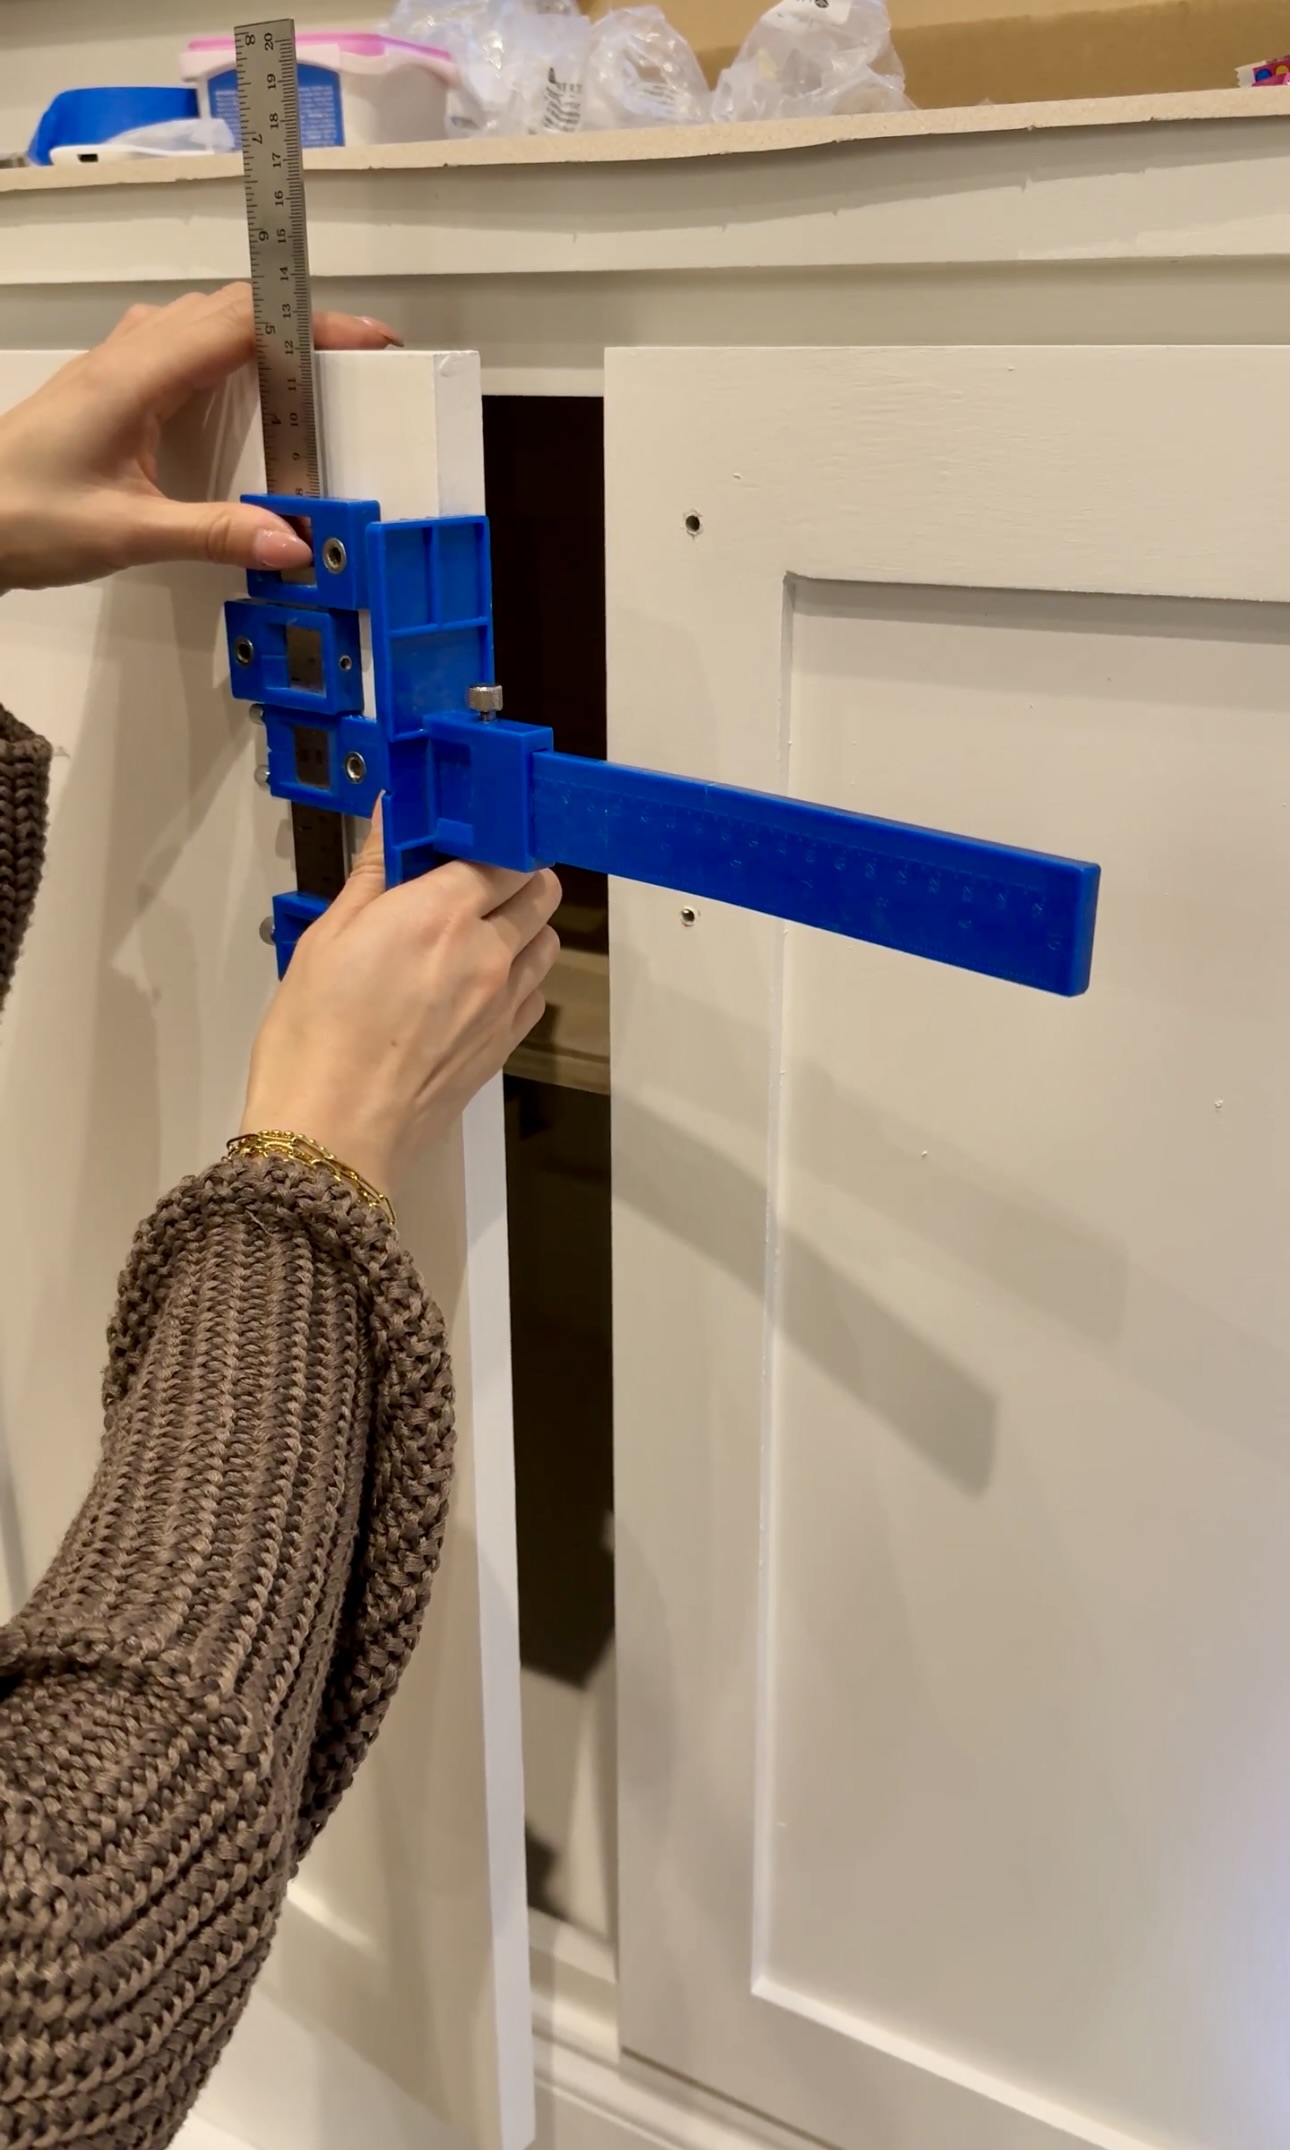
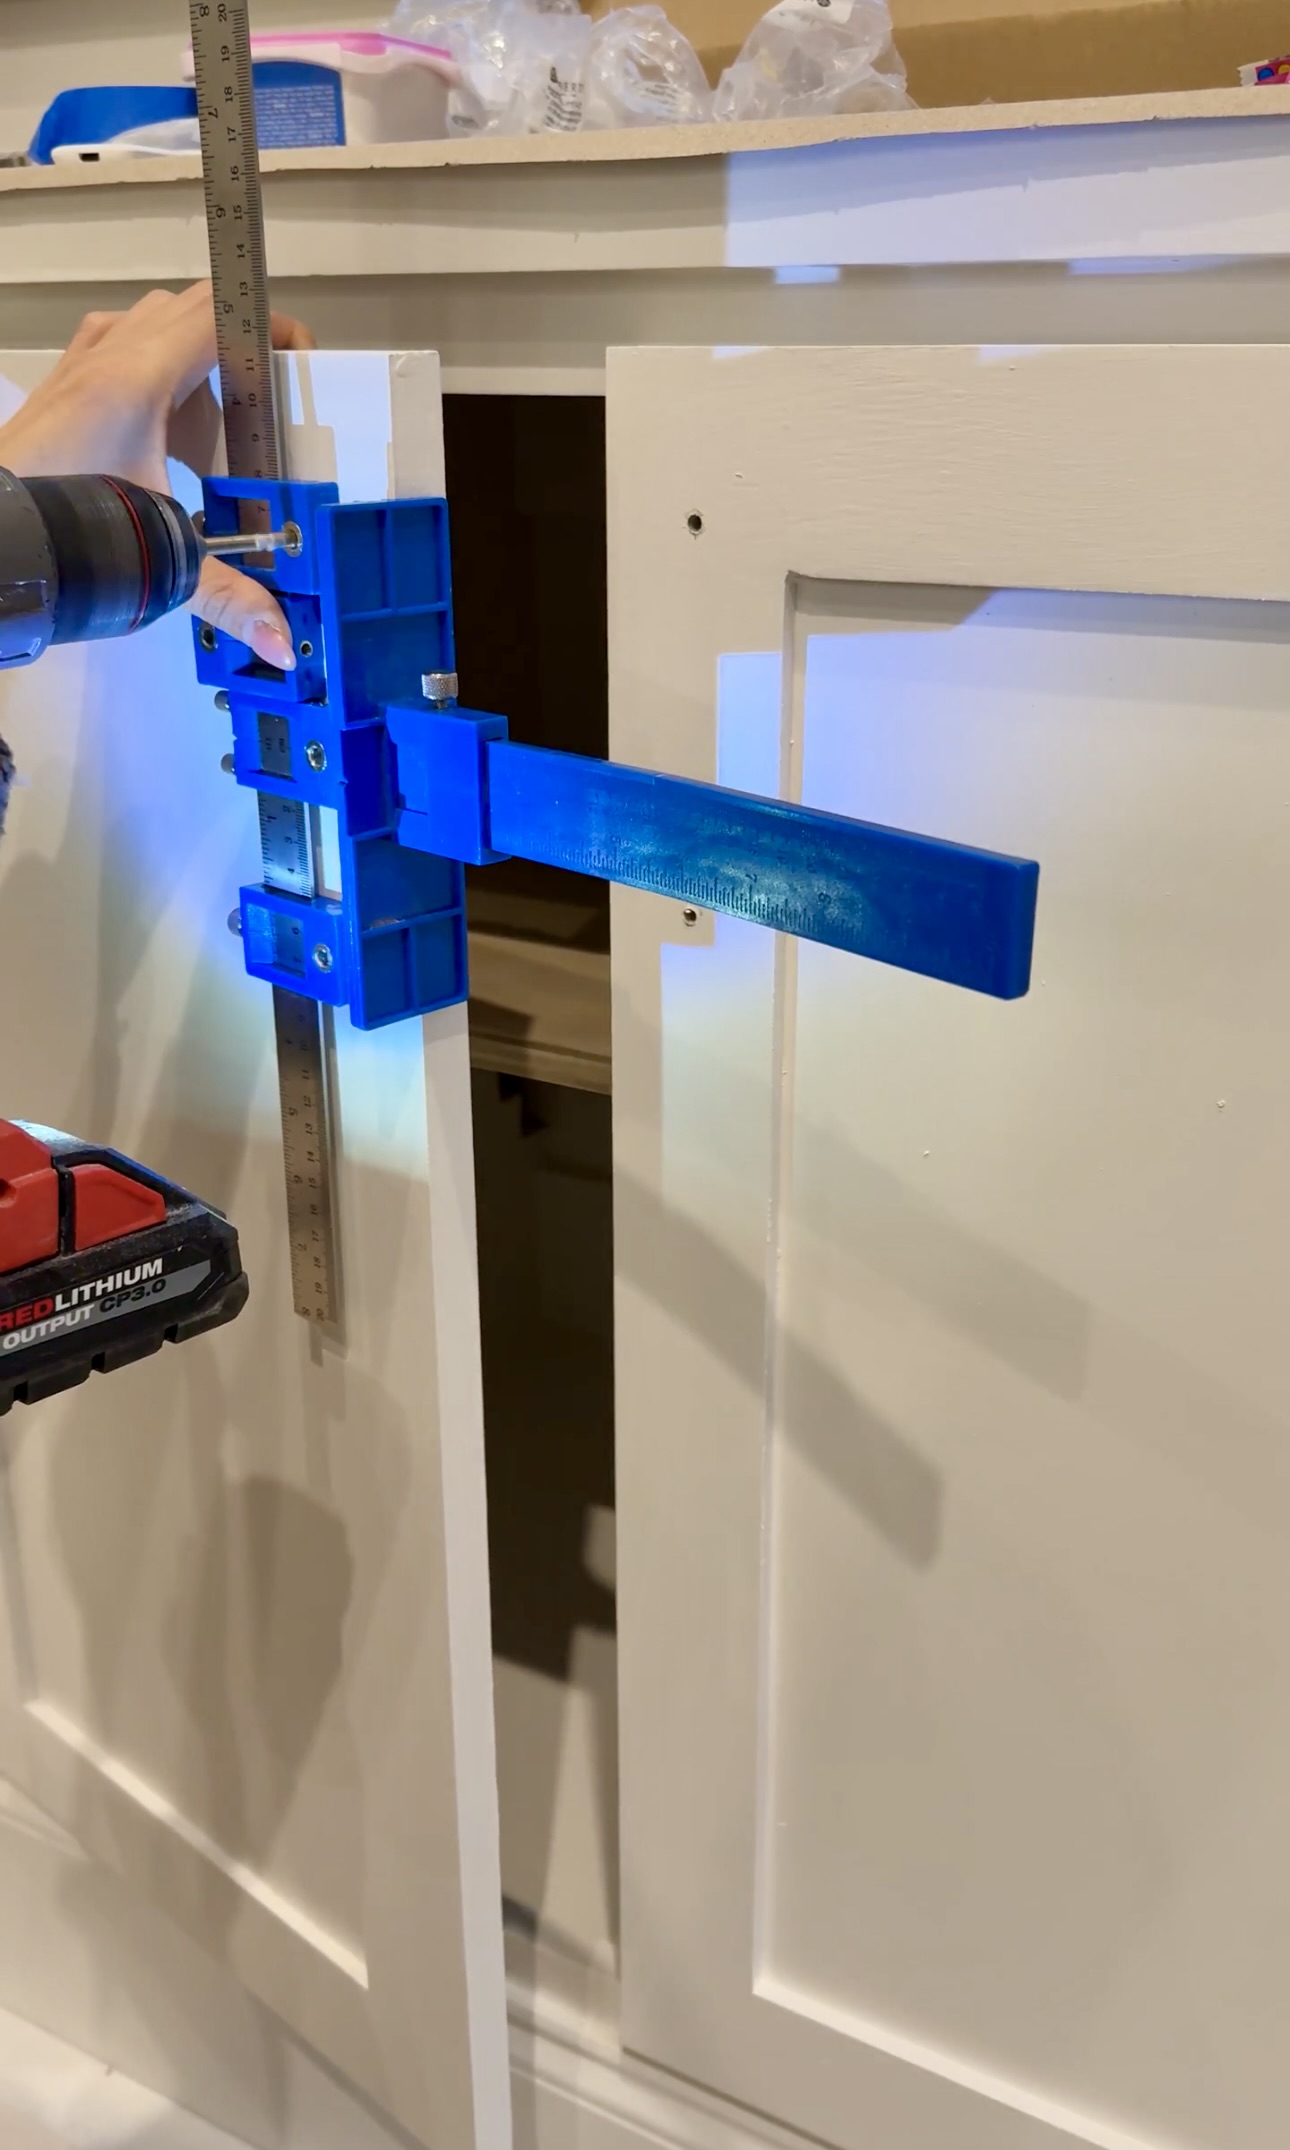
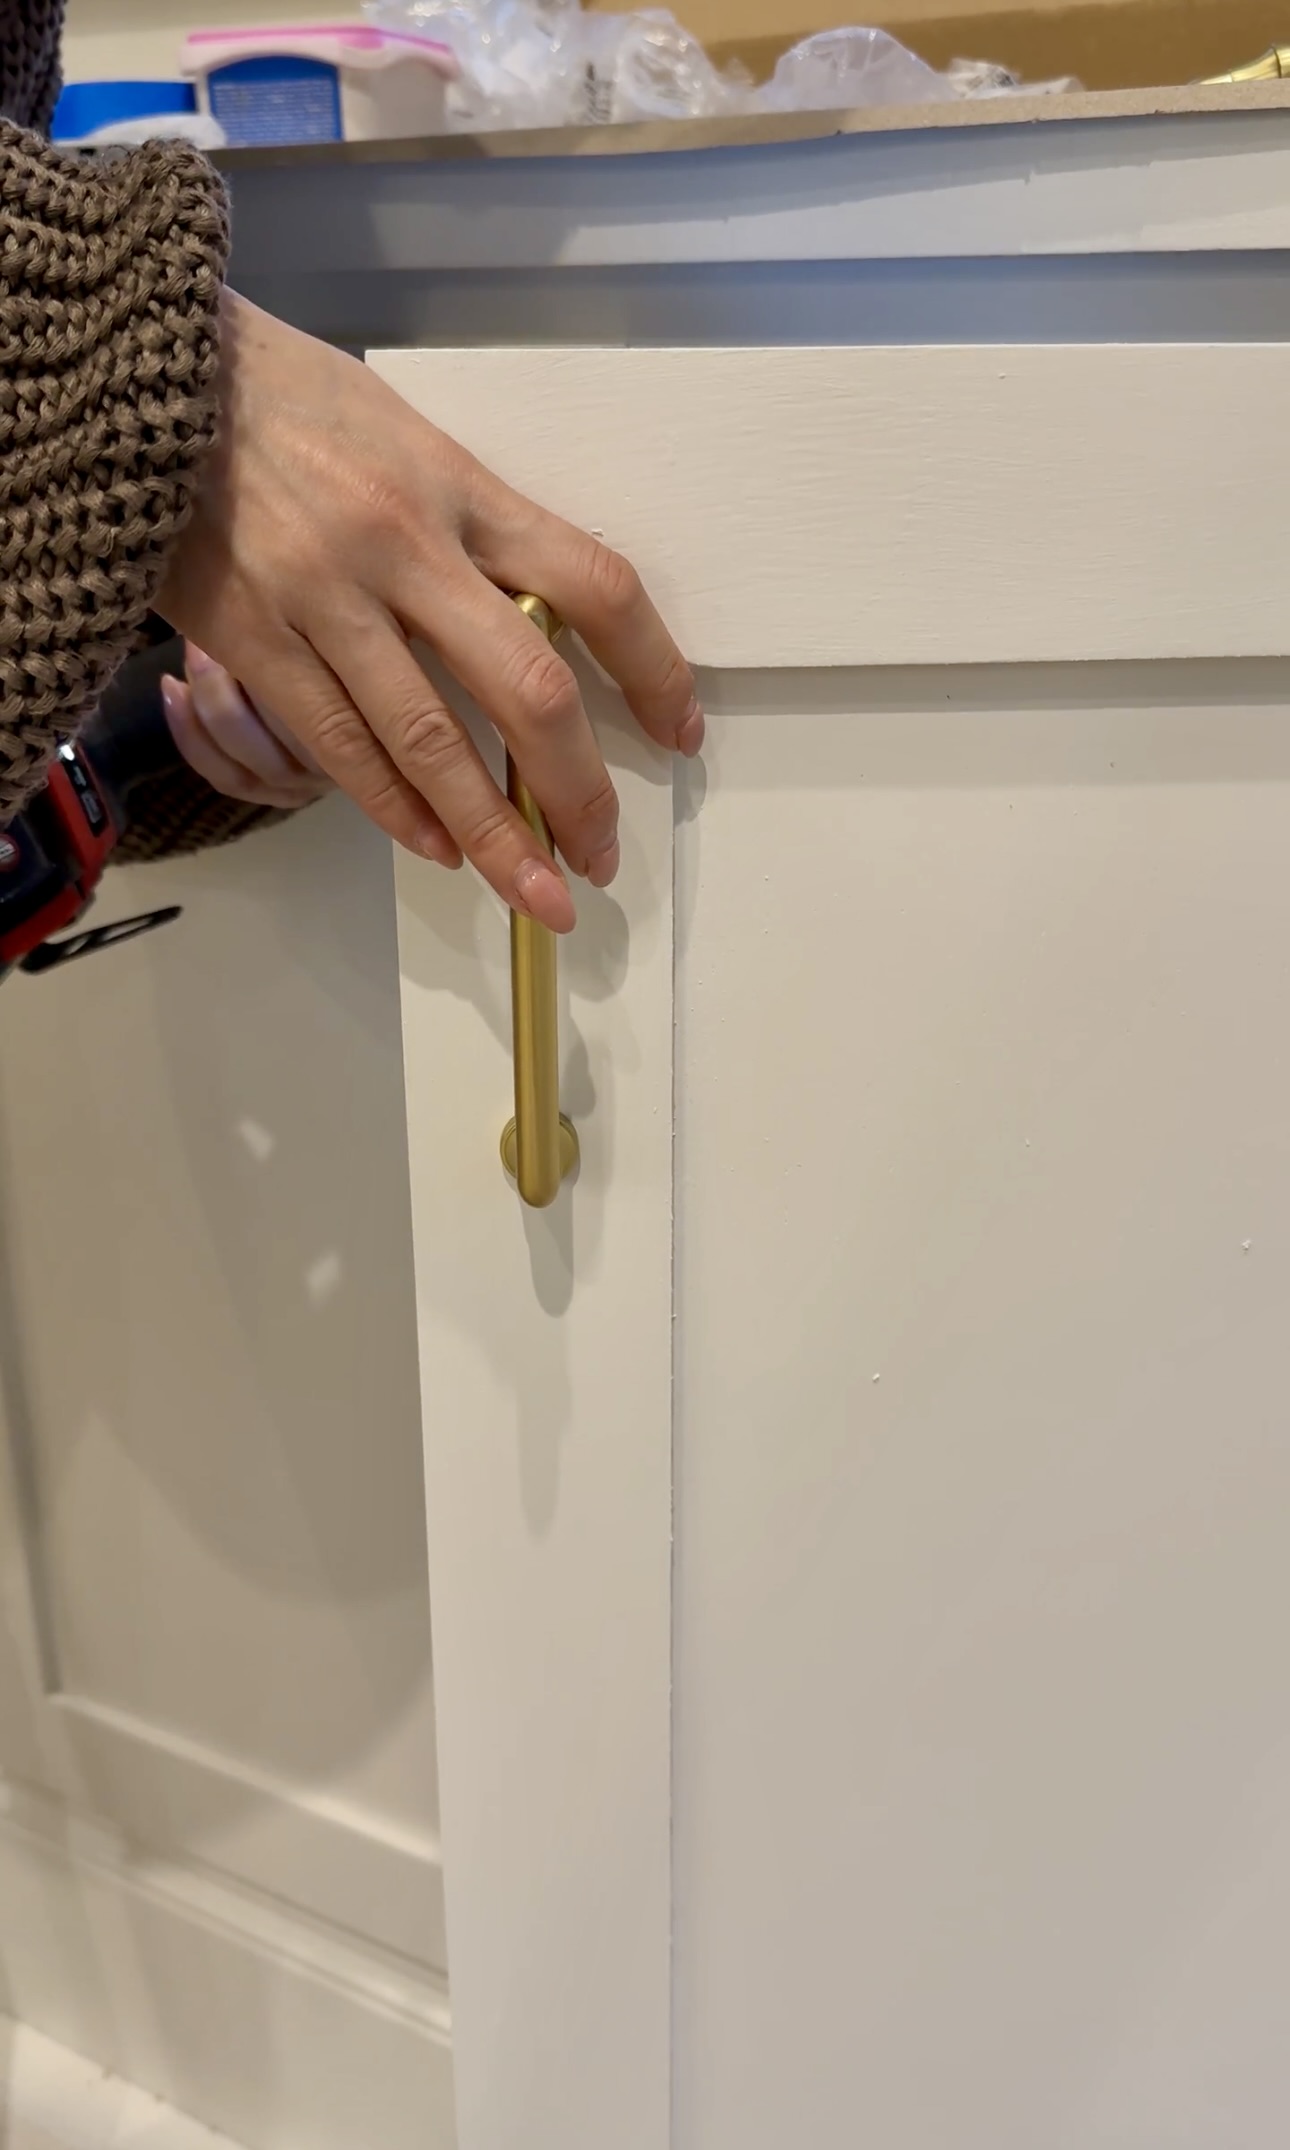
Finally, I installed the hardware for the cabinets and drawer fronts. For the drawer fronts, I used my laser level and made my marks. I drilled a small hole and then screwed in my hardware.
For the cabinet doors, I used this hardware jig. It keeps everything evenly spaced and level.
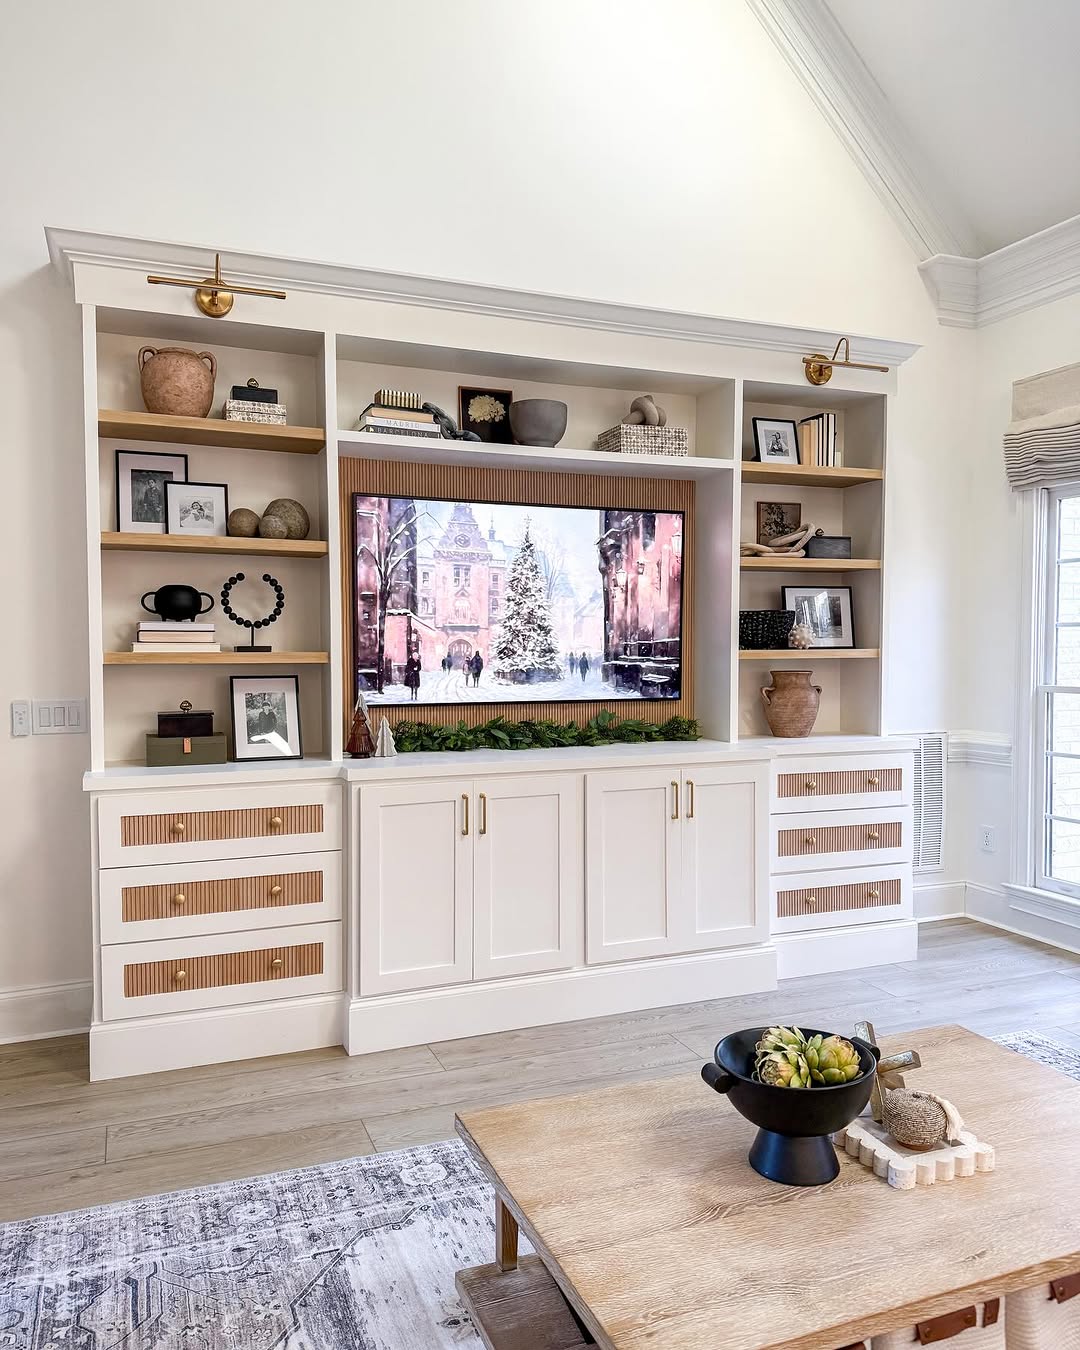
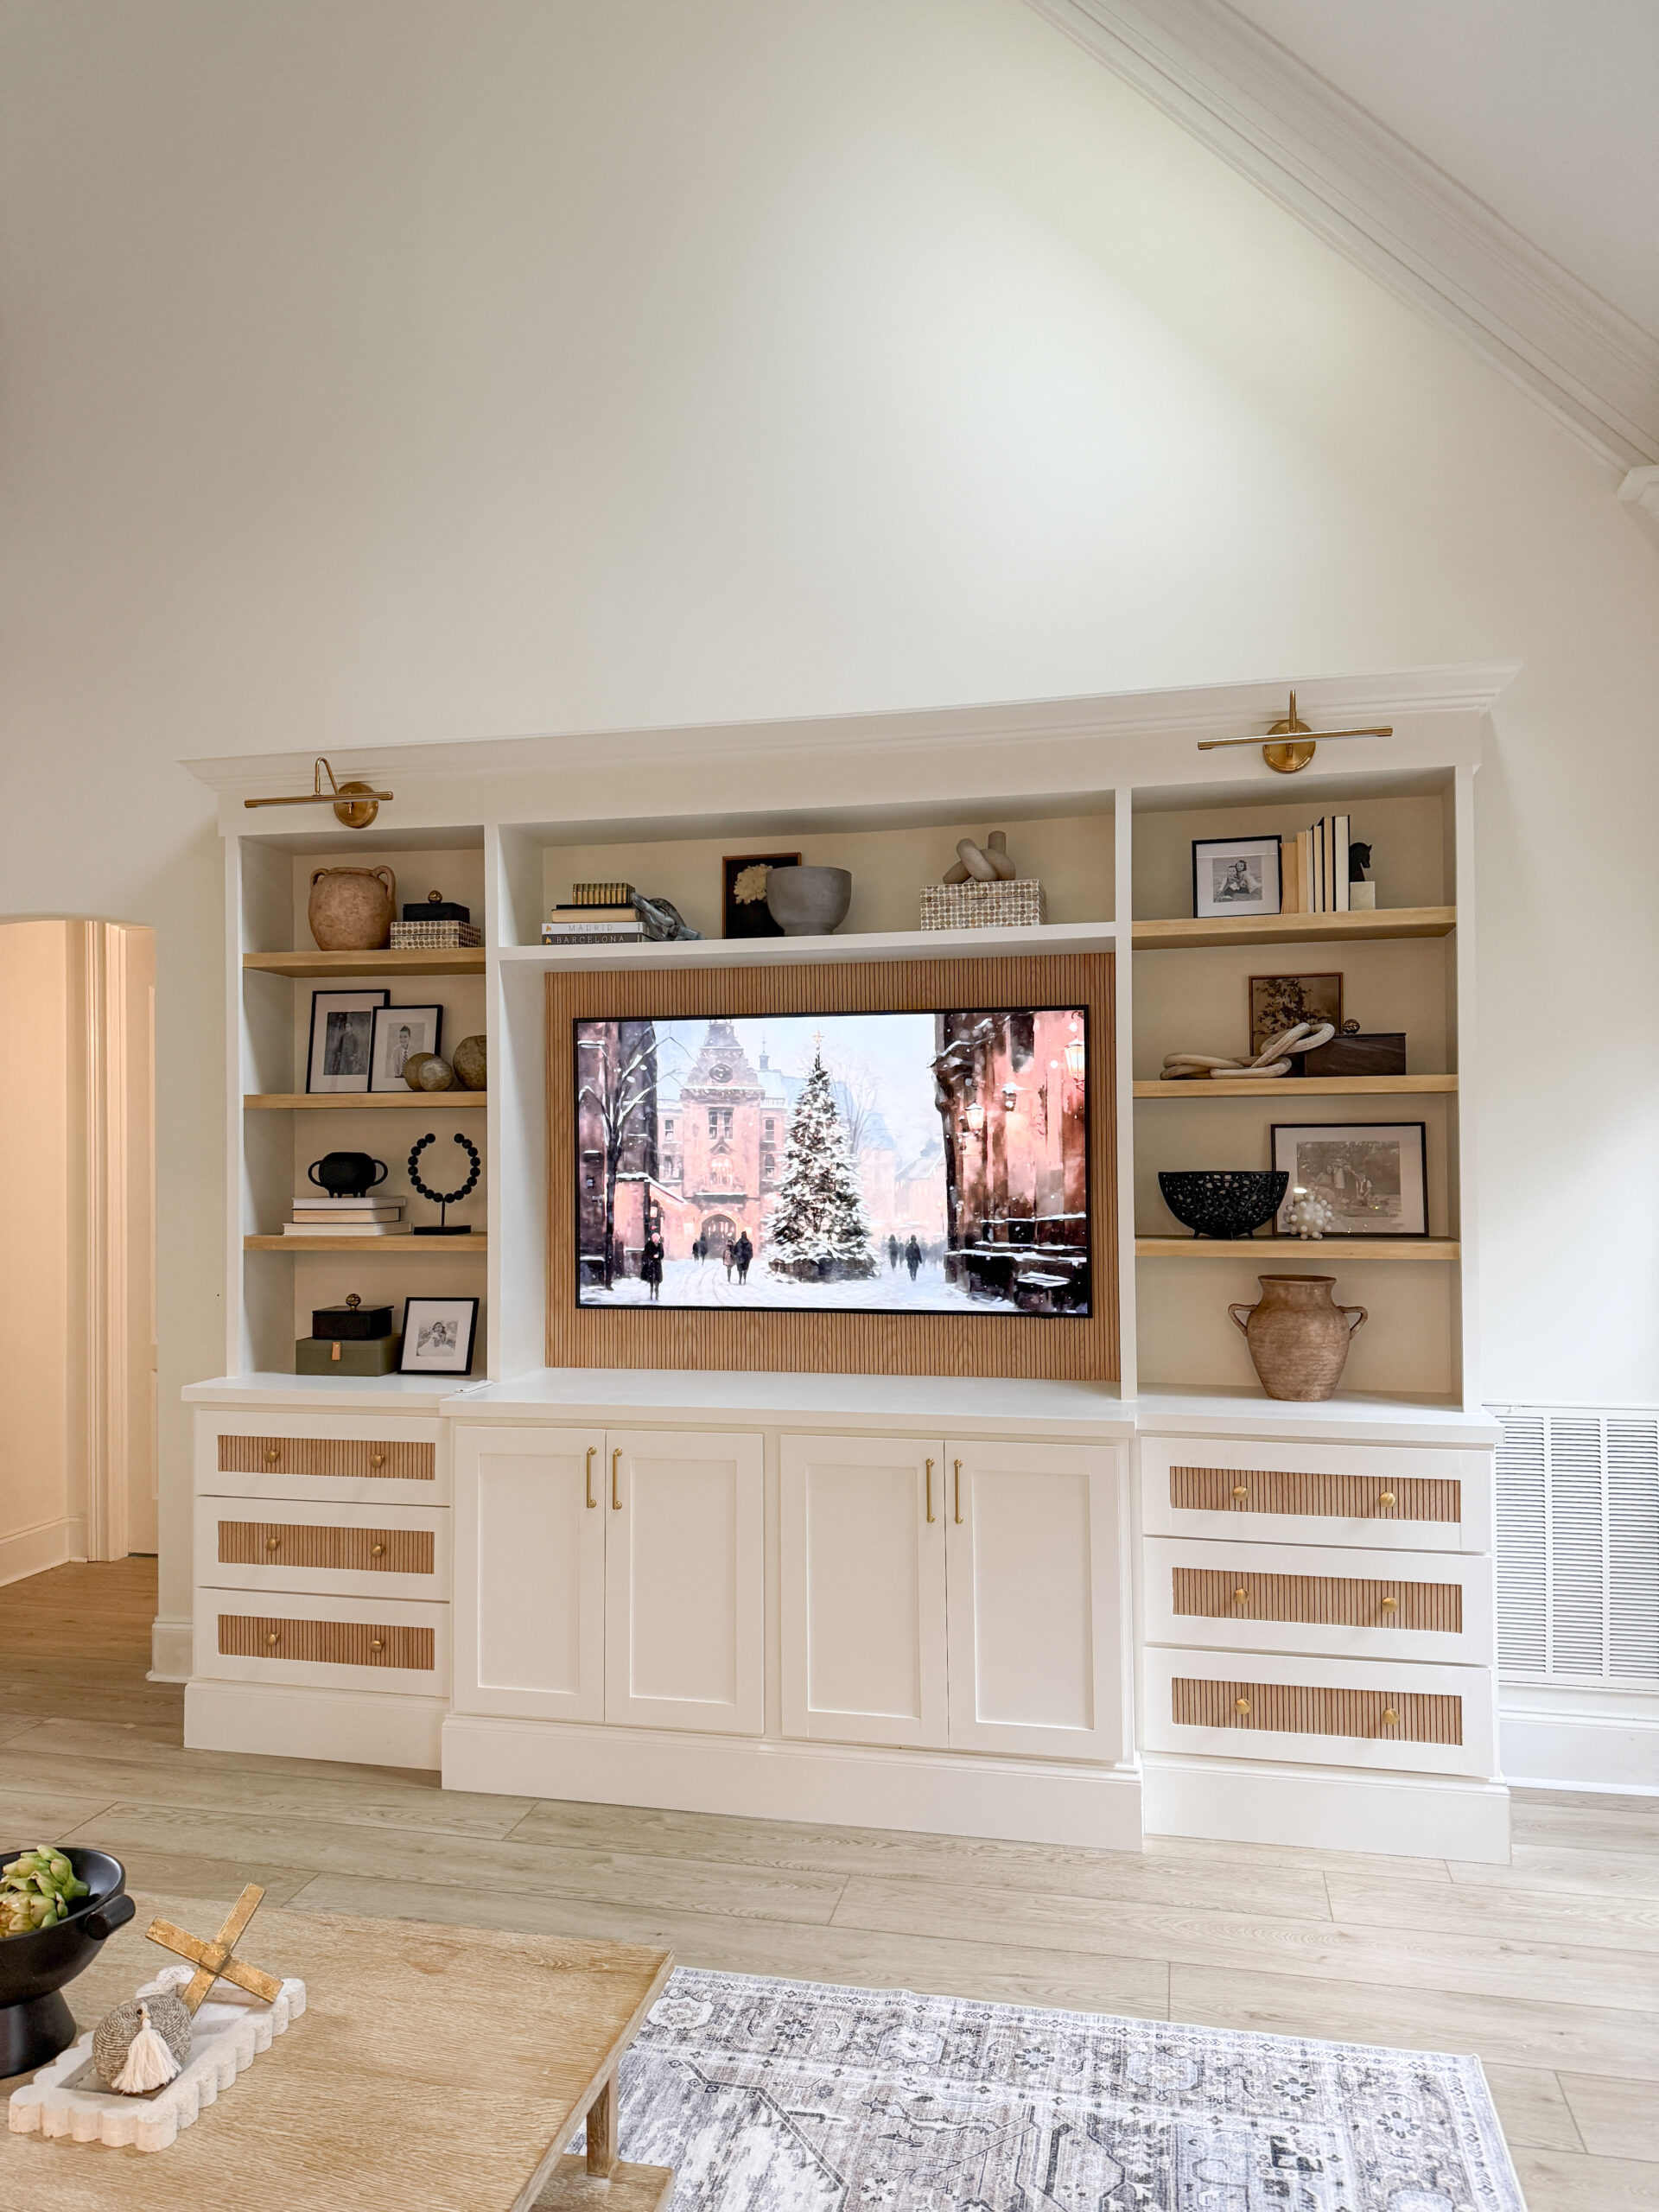
Oh my WORD this is looking so good. I’m so proud of us. I can’t believe we built ALL OF THIS from scratch!
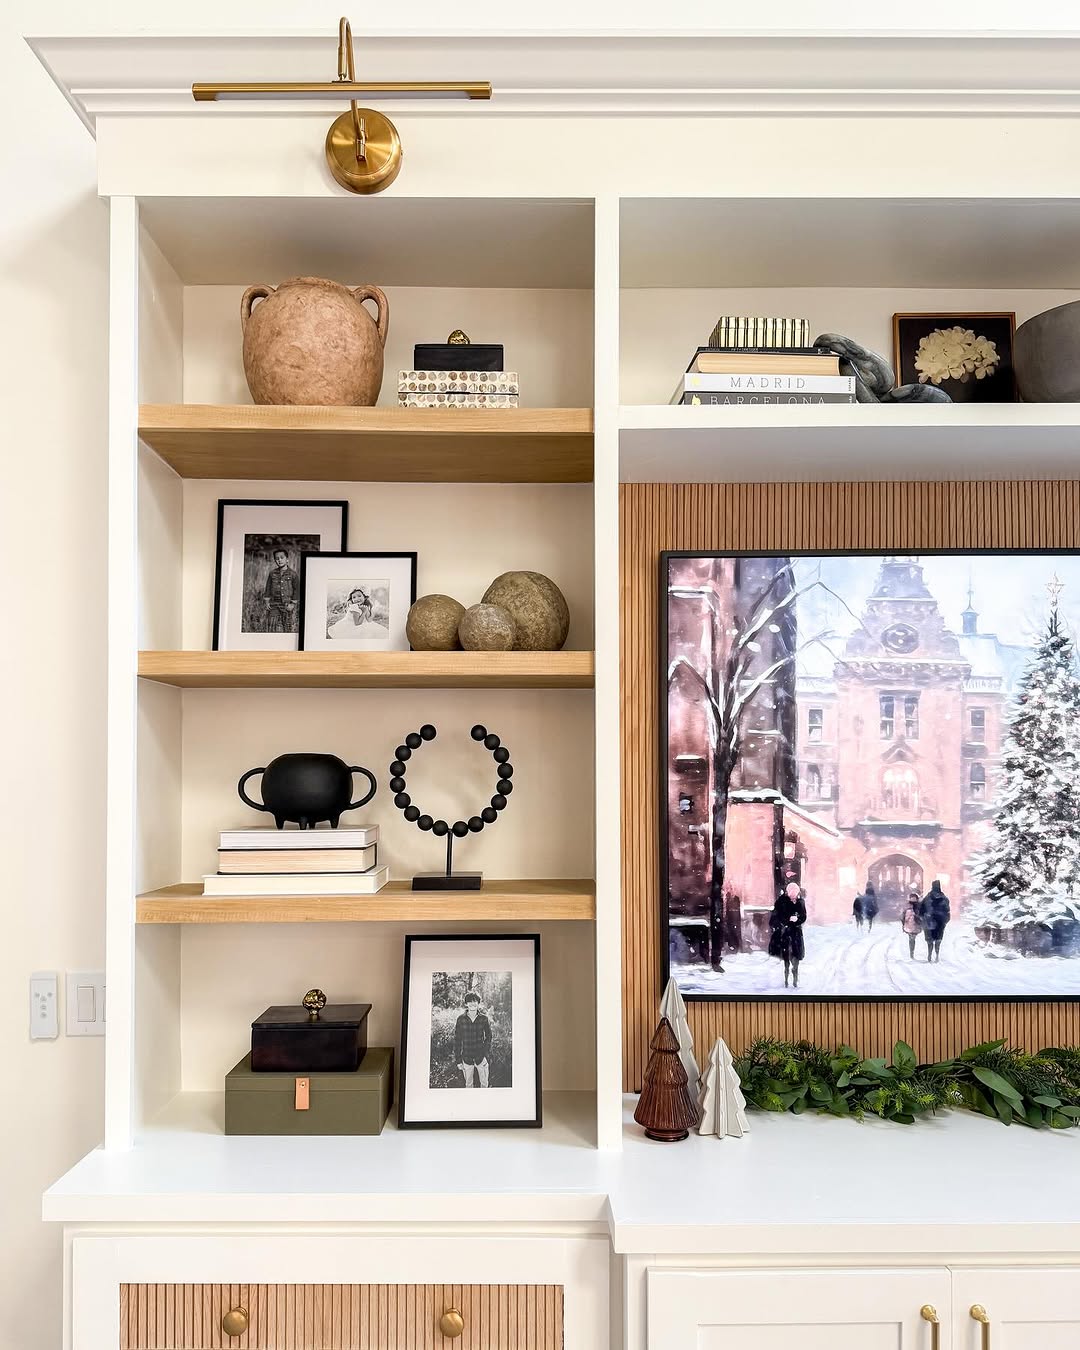
If you want to see the final reveal with all the decor, the walls painted, and our new chandelier hung, checkout this blog post!
Materials
- 16″ soft close slides
- Wood Glue
- 1″ screws
- Pocket Hole Clamps
- Pole Wrap
- Tack Cloth
- Behr Multi-Surface Primer
- Behr Urethane Alkyd Enamel Paint
- Paint Suit