Hi
I'm Bong
I'm just a girl who likes to DIY anything and everything. More than that, I love teaching people - especially women - how to pick up power tools and create the home of their dreams. Stop waiting for someone else and starting Doing It Yourself. I'll show you how!
diy projects
diy school
life hacks
categories
must have products
Hey everyone! Today I am going to teach you all about jigsaws. I wanted to go more in-depth about using Jigsaws because it is one of my top tools to use for DIY. Jigsaws are super versatile and can do so many different types of cuts. Keep reading to see which jigsaw is great for your skill level.
I want to take a moment and thank Hart Tools for sending this Jigsaw to me along with a few other tools. They have a great, reliable line of products and I definitely recommend them if you are looking to get some new tools! Also if you are new to using tools, such as the jigsaws, Hart’s tools are perfect to start off with.
First, I wanted to go over the logistics of Jigsaws and what all the different knobs and levers do along with some basics and then I will show you how to use your Jigsaw.
How do you remove and put on the blade?
You always want to make sure your battery is not on when your power tool is not in use. Then, you will want to find the lever on the front of your jigsaw and pull it counterclockwise. This way your blade should just come out. To put it back in, do the same thing and put the blade in facing forward, you will want to make sure that the blade goes inside the slit creating a clicking noise when it is secure.
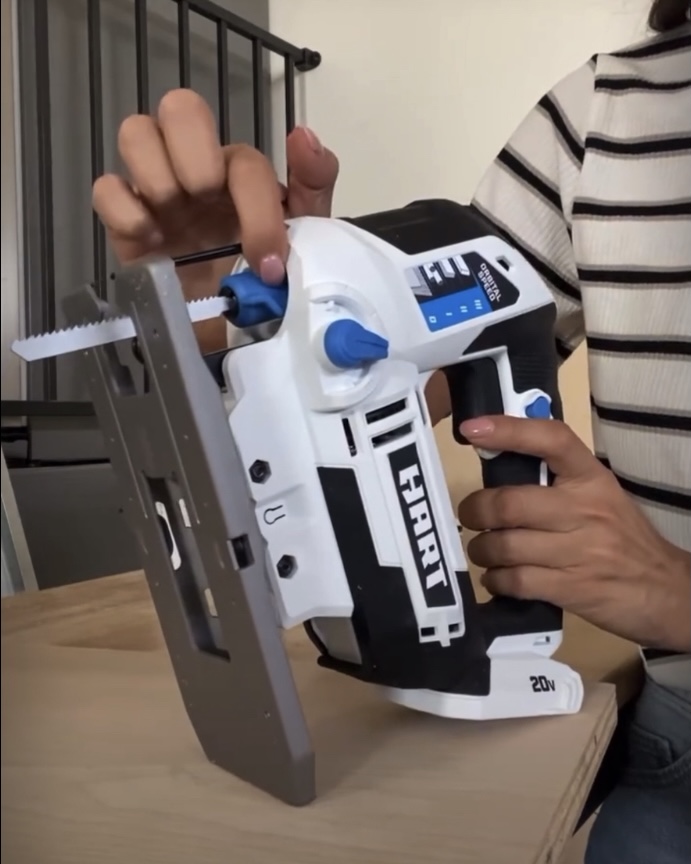
So now let’s talk about all of the other levers on your jigsaw and what they do.
I usually keep all my settings the same because I am usually cutting the same types of wood, in the same way when I use my jigsaw. However, if you are doing different projects, you will want to pay attention to what settings your jigsaw is on. I have a guide on my Hart Jigsaw, that tells me which orbital speed is good for what kind of wood. Typically, I use this to help me remember because I definitely don’t always remember what speed is good.
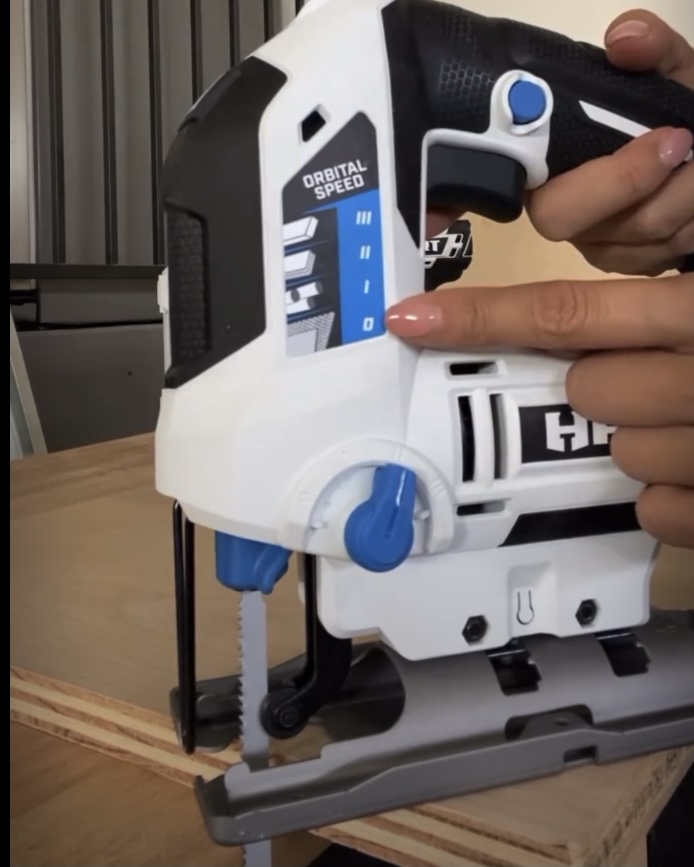
I use the guide as a reference, and use the circular knob adjacent to the blade to change the setting. Today I will have my orbital speed set to 2 because I will be working with plywood. Setting 3 is for hardwoods or solids. 1 would be used for plastic or PVC and 0 is used for laminate or countertops. The last lever on my Jigsaw; which I want to talk about before we get started, is on the very top of my jigsaw. This controls the speed, there is a minus sign and a plus sign designating which direction is for which speed. I recommend keeping your Jigsaw closer to a medium or high speed; because when you work at slower speeds, it can be really tough on your blade.
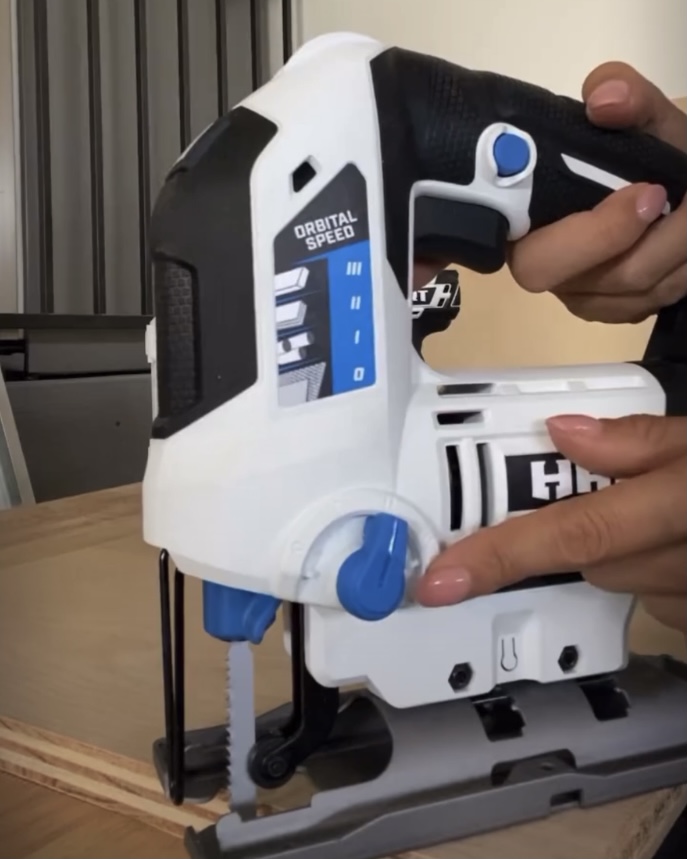
Now we can get into the best part which is using your Jigsaw for a DIY project.
Before I even start my project, safety is our #1 priority! If you want to dive deeper into all the key safety tips; I have a blog where I explain all the safety measures I take while working on projects. First, I am going to pull my hair back because it is so hot; but also because I really don’t want my hair to get caught in the blade! Then, I am going to put on my safety glasses and put on my noise-canceling headphones. Once I feel safe, I put my battery onto my jigsaw and am ready to start my project!
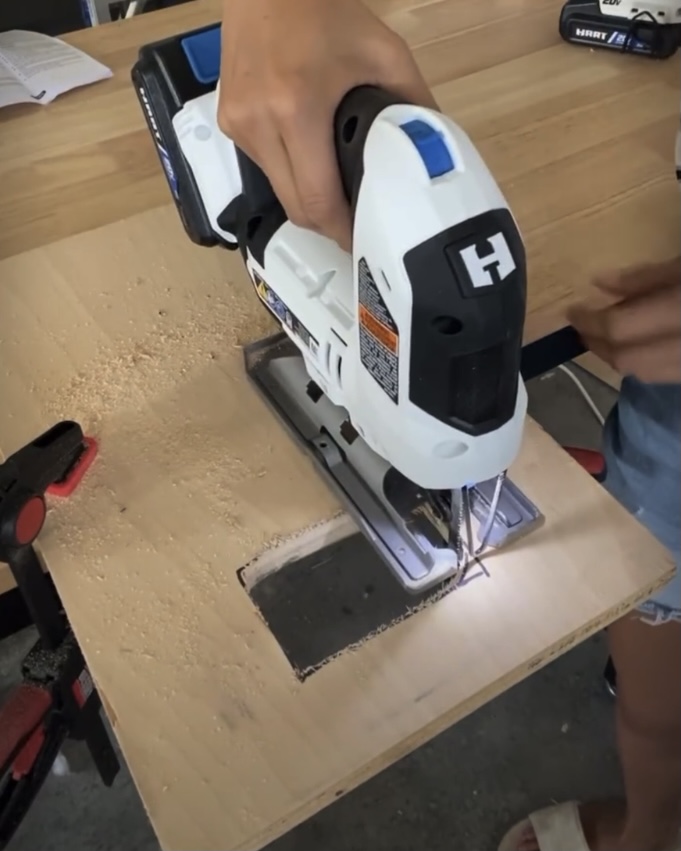
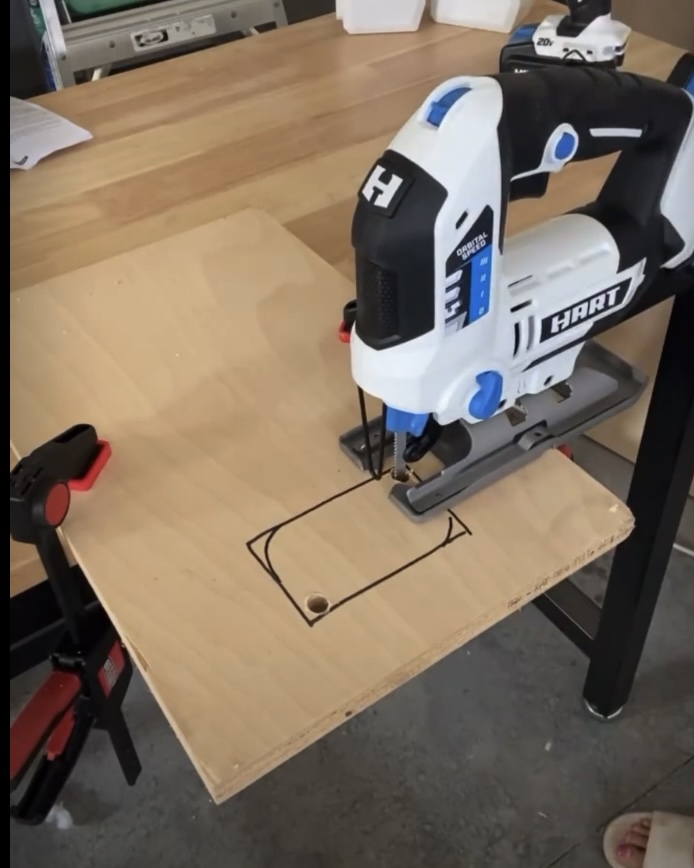
Today I will be using a piece of plywood. I drew a rectangle on my plywood that is about the same size as an outlet. However, once you learn the basics you can cut out any shape from any piece of wood, hardwood, PVC, etc.
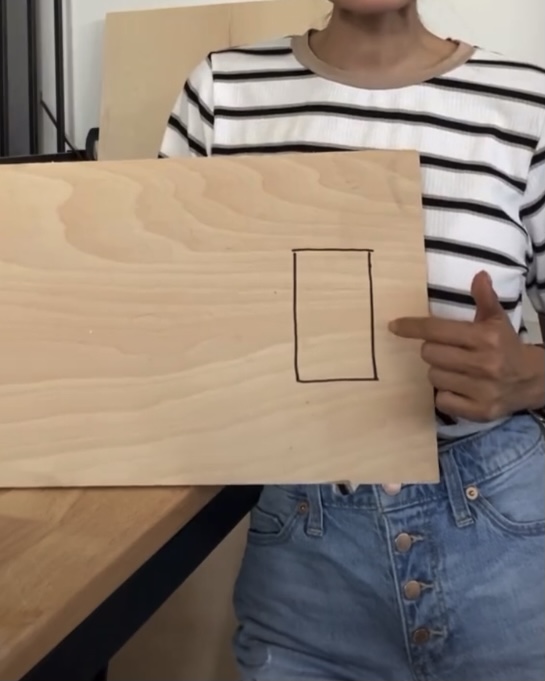
You will want to clamp your wood to something sturdy; so that you can have complete control of your jigsaw and where you are cutting. Once you are clamped down and secure, you will want to grab your drill and drill bit. This should be a little bit wider than your jigsaw blade. You will want to drill a hole inside the inner corner of your shape. You need to make sure that you stay on the inside so you do not cut out of your shape. Once you have found the corner you will drill down until you create a hole.
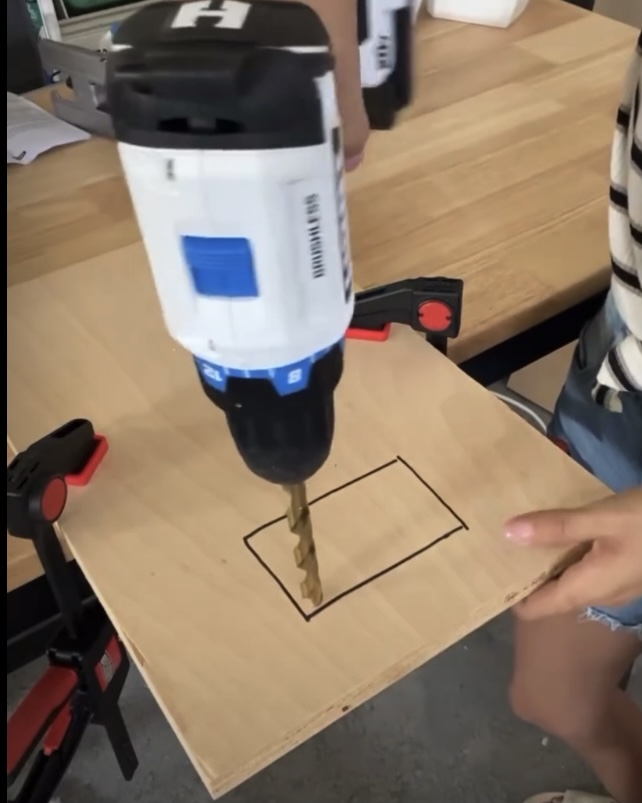
After drilling my first hole; technically, I can start cutting my shape out. However, it will be way easier if I drill another hole on a different corner. Now that I have created two holes, I can actually use my jigsaw, that fits nicely in the hole and cut out my shape.
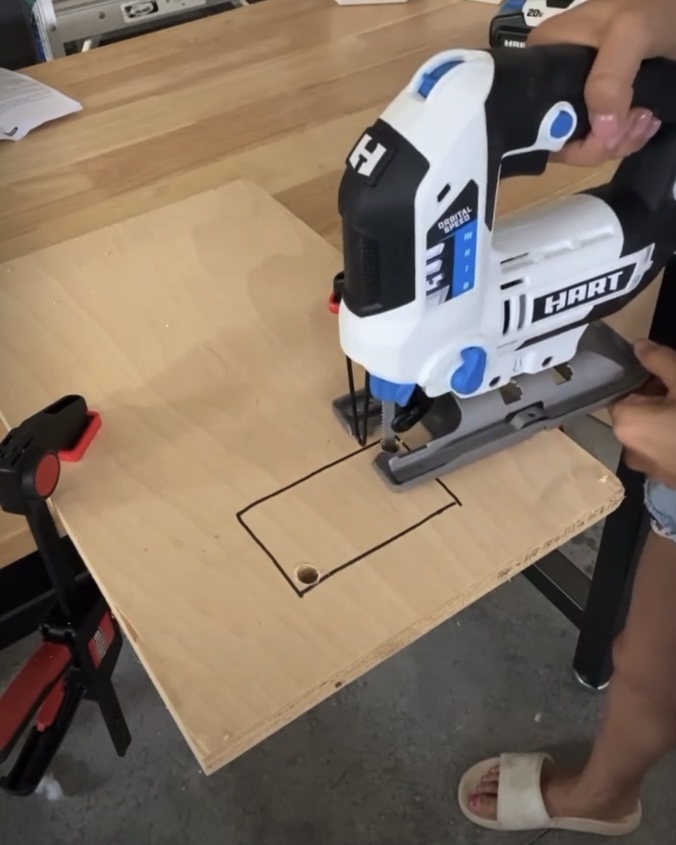
I will start pressing the lever and follow my straight lines very easily. Remember you control this Jigsaw it does not control you, be slow and steady especially if this is your first time because it does take practice.
While I am cutting my first straight line, I am going to stop before I get to the corner because I cannot use my jigsaw to cut out a 90-degree angle. So, I am going to draw a curved line inside my corner, showing me where I will continue cutting. I will then cut through the straight line and follow the curved line all the way around my shape.
Now that I have cut my shape out; you will see from my picture, I still have a little bit of cleaning up to do. However, now that my shape is almost formed it will be really easy to clean up. In order to get perfect corners, I will just use my jigsaw to cut two straight lines on each corner; to get those perfect lines.
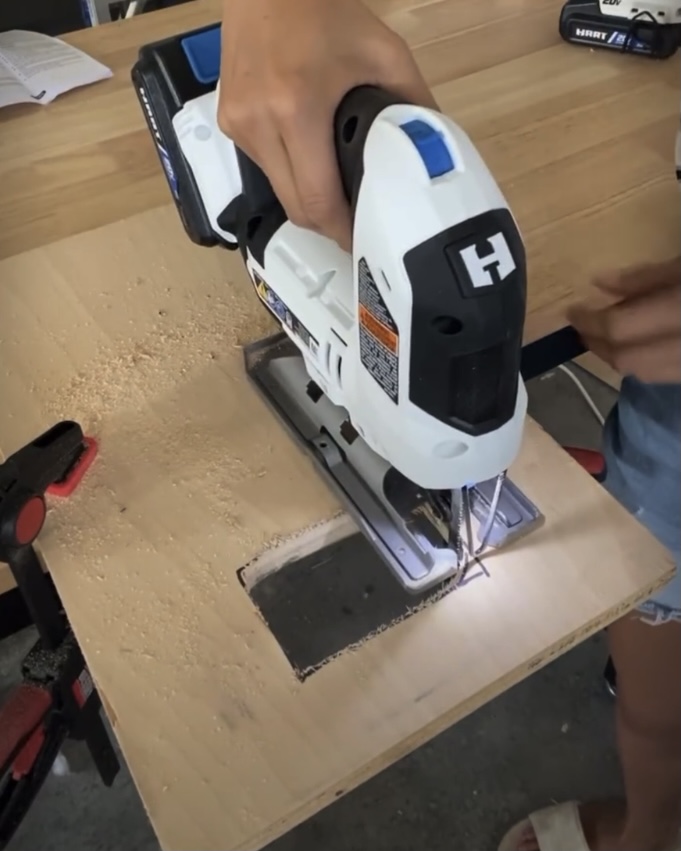
That’s it! I love Jigsaws because they are so helpful for cutting out holes, and shapes, or even creating rounded edges. As long as you go slow and are willing to clean up the edges with a sander, you can master a Jigsaw too!
