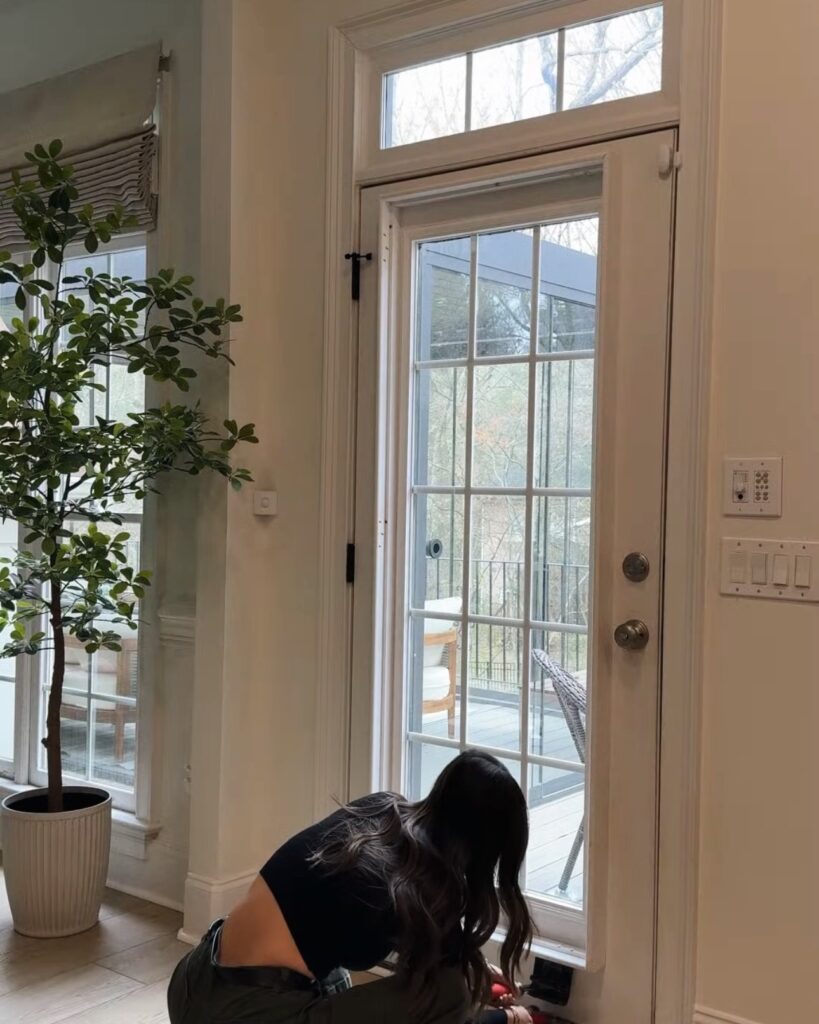
Are you ready for a new project? Because I sure was! It was finally time to tackle something that had bugged me for three years: the backdoor. Specifically, the plantation shutters that came with it. Time for a back door refresh!
Now, I know plantation shutters are beloved by many—especially here in the South—but I’ve just never been a fan. They felt bulky, outdated, and worst of all… they blocked so much natural light. So, we decided: out with the old, in with the light!
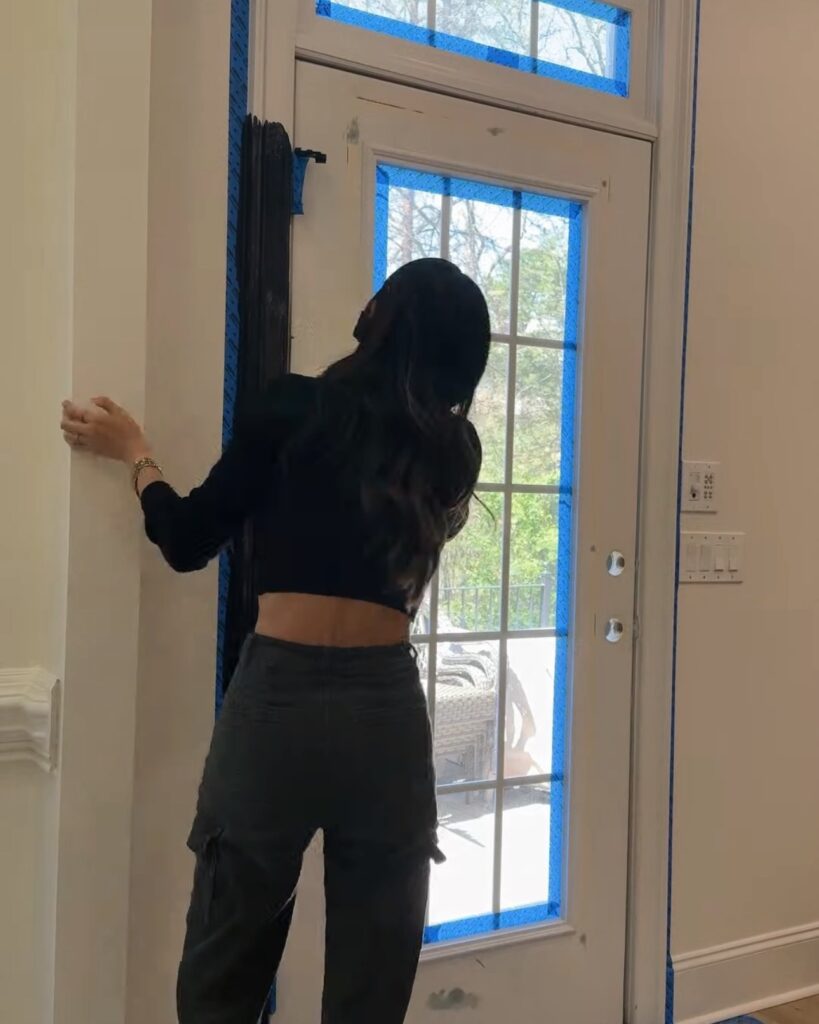
Step One: Shutter Removal
I’d removed plantation shutters from windows before, but never from a door. Time to learn something new!
The shutters themselves? Super easy—just a few screws and they were off. I noticed square holes along the trim, and after cycling through quite a few bits, I found the right one to remove the frame. Once we unscrewed all the way around the door and scored the caulk line with a utility knife, it was time for the fun part.

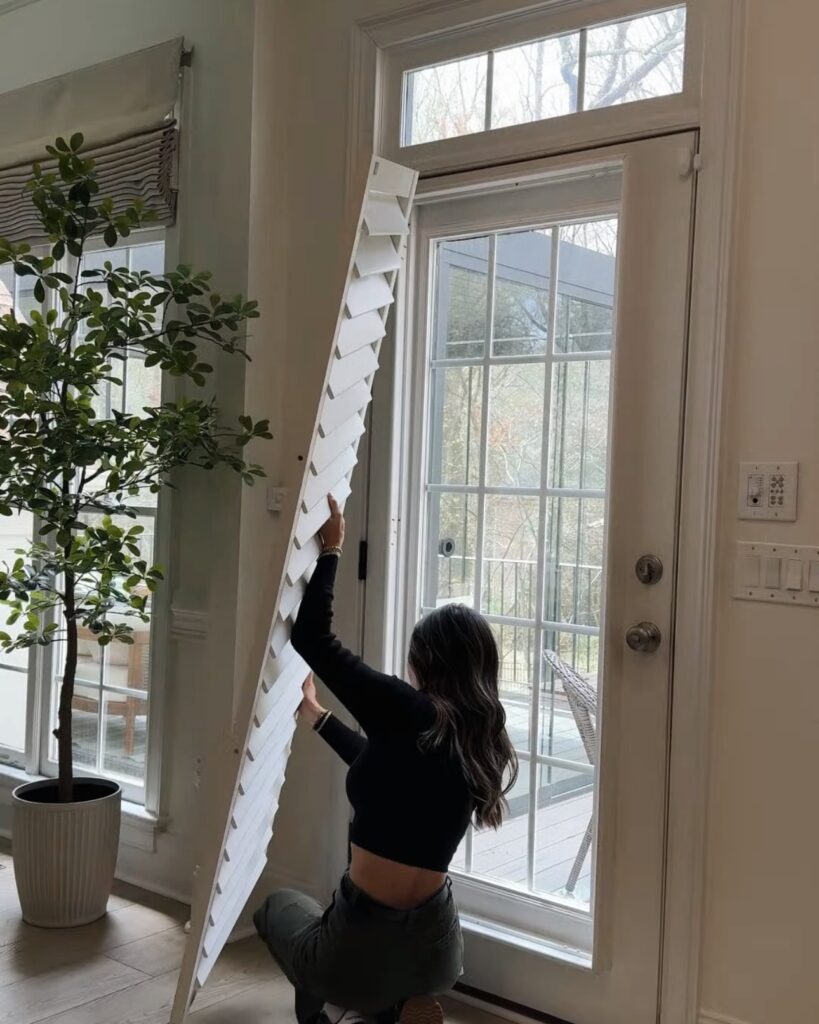
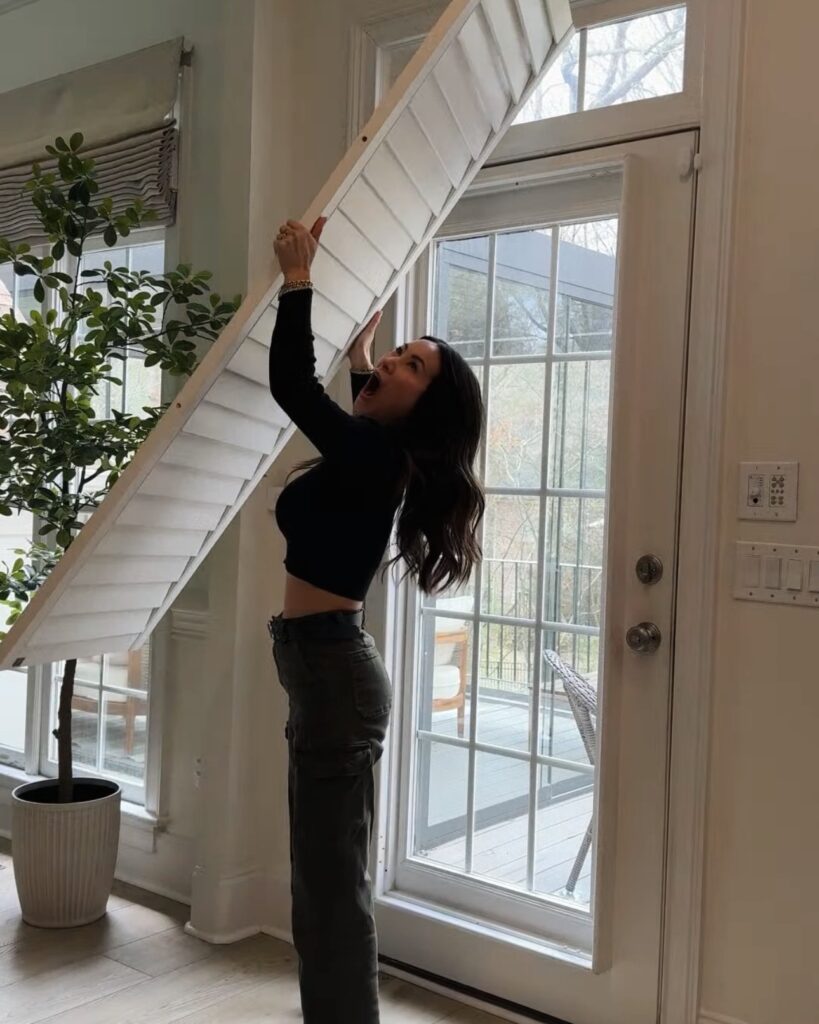
Using a trim puller and hammer, I gently pried off the frame. It left behind layers of old paint and adhesive (a true ‘90s time capsule), which we tackled with a scraper.

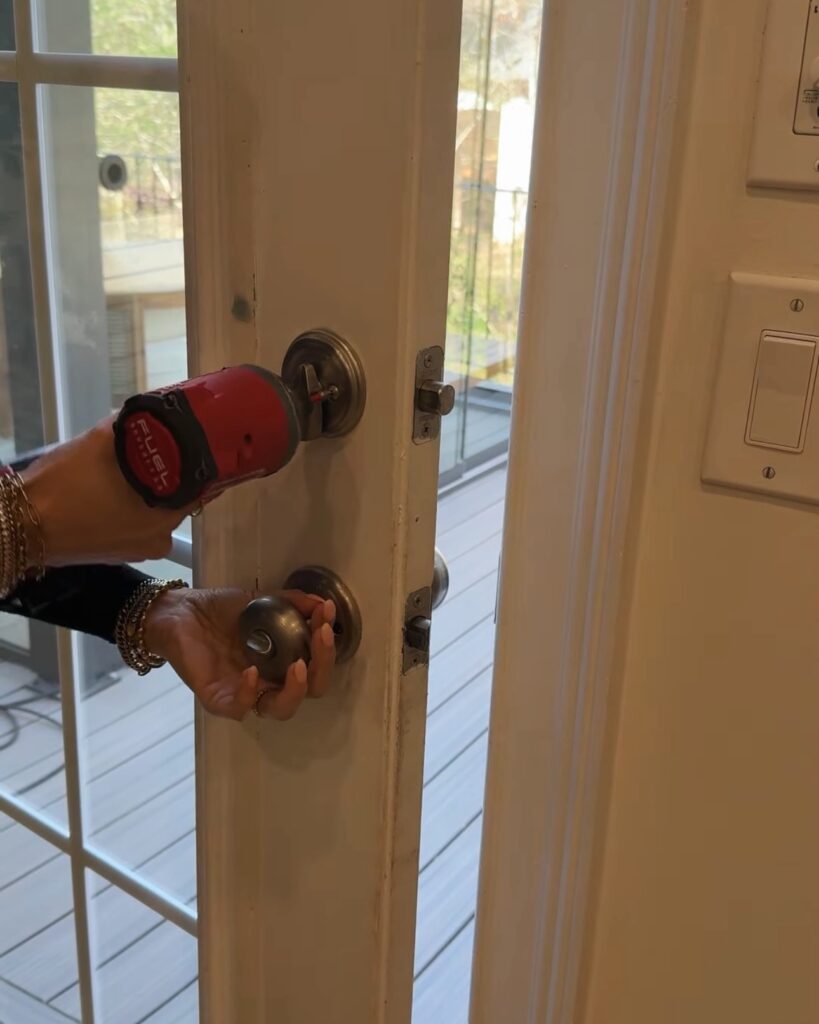
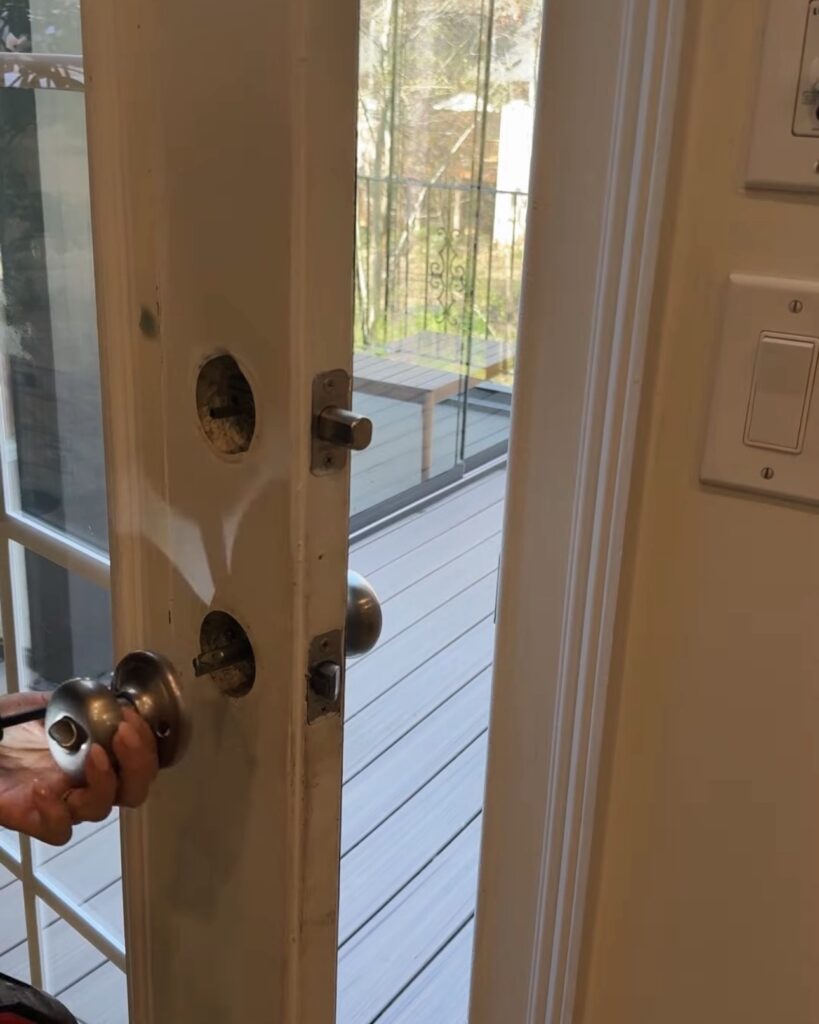
Out With the Old Hardware
Obviously we were not going to keep the ugly hardware from the 90’s! Replacing hardware is way easier than you think and makes such a big difference. You just unscrew the obvious screws, and everything just comes apart.
Painting Prep: The Key to a Smooth Finish
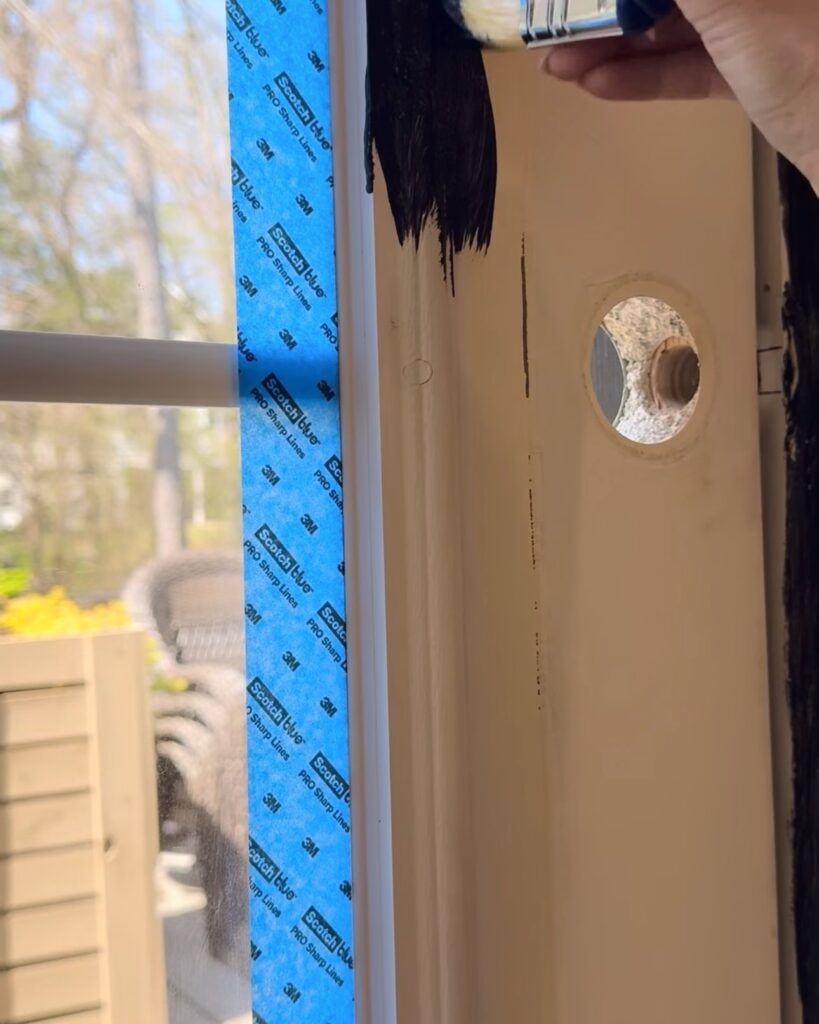
With everything removed, it was time to prep the door for paint. Here’s what I always do to make sure my paint job turns out crisp and clean:
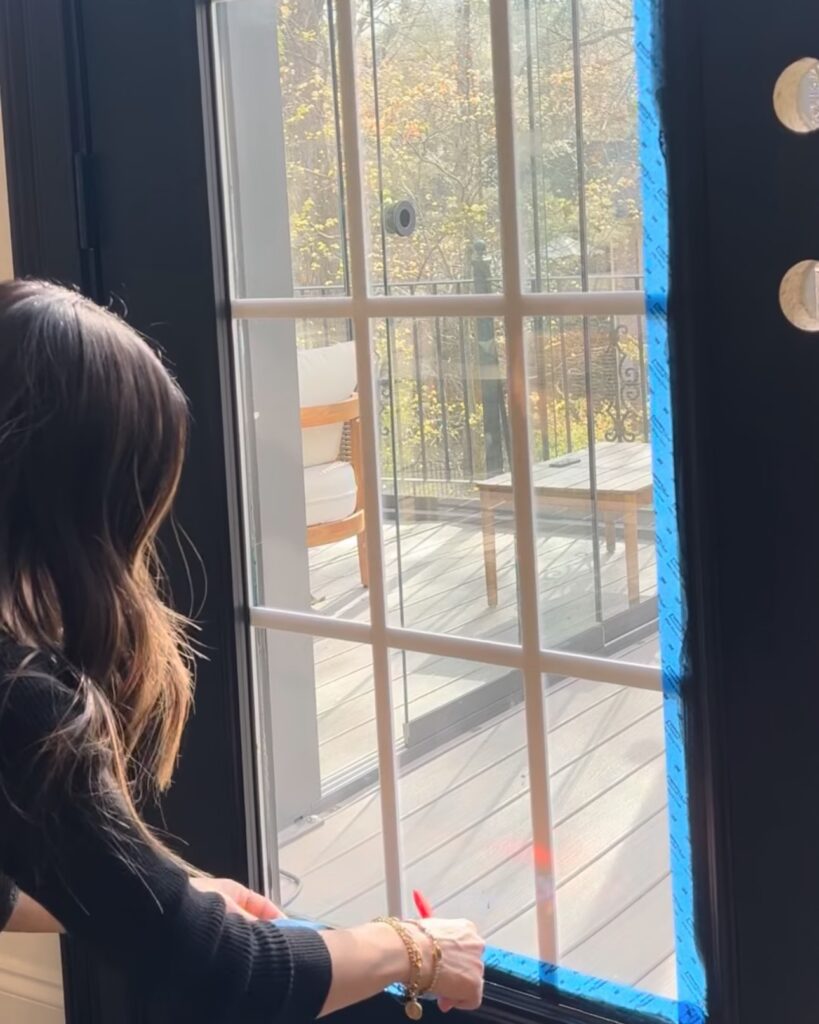
- Clean + dry your surface. No dust, no moisture.
- Lay down painter’s tape without stretching it—just press gently.
- Seal your tape edges with a credit card or spatula for that clean line.
- Wait 30–60 minutes before painting so your tape sets.
- Protect your floors! I love the 3M hand masker and masking film for this.
Paint Time
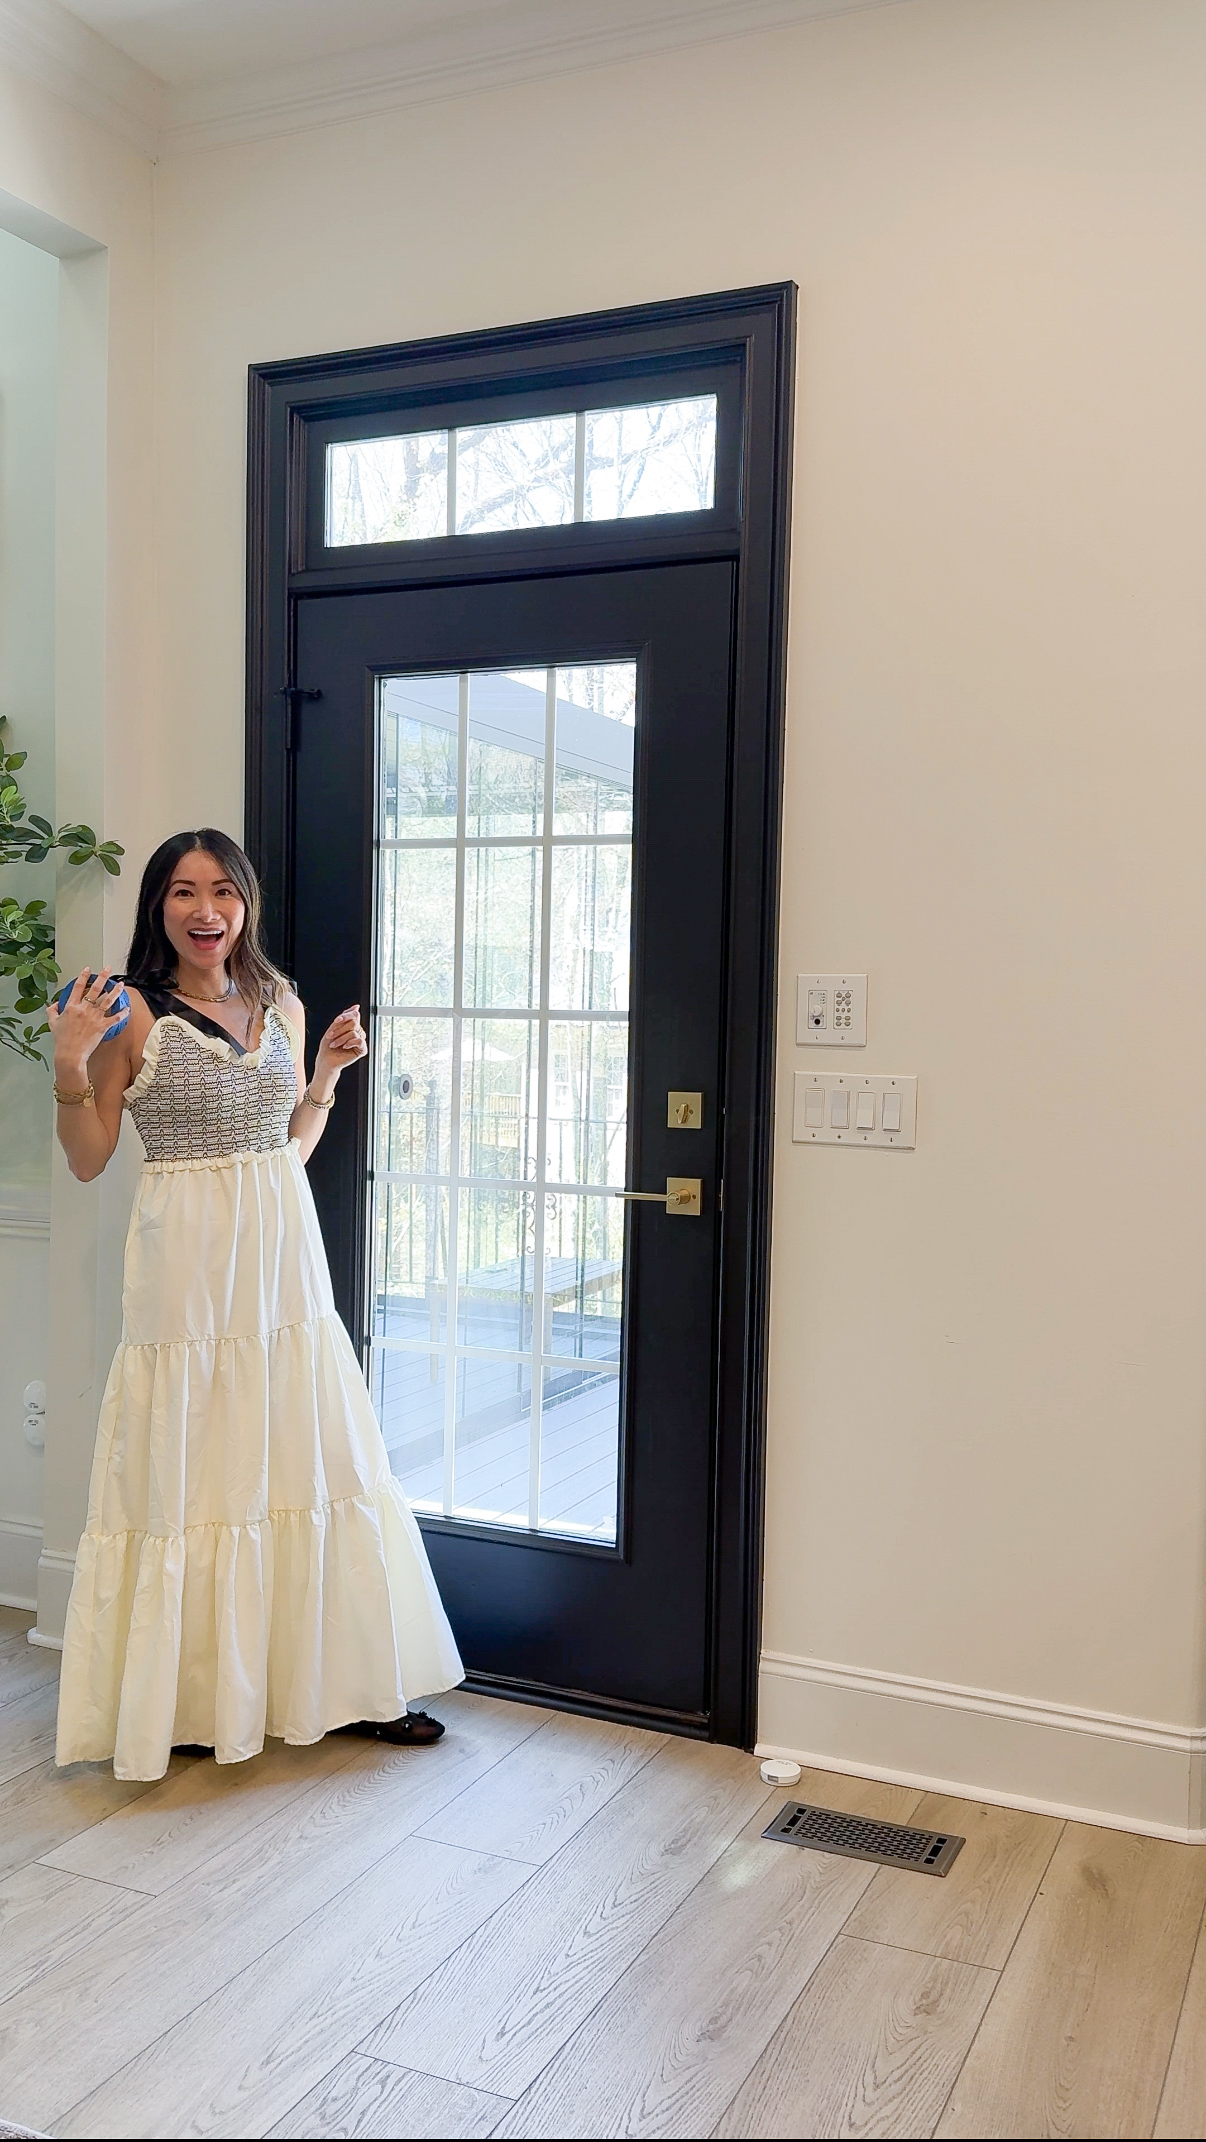
I used Sherwin-Williams Door & Trim Paint in Black Magic (satin sheen). The wall it’s on has zero depth, and a dark-colored door adds just the dimension it needed!
I started with an angled brush for the trim, then used the same brush plus a small roller for the flat surfaces. Remember: the first coat is always scary. It’ll look streaky and patchy. But trust the process—the second coat is where the magic happens.
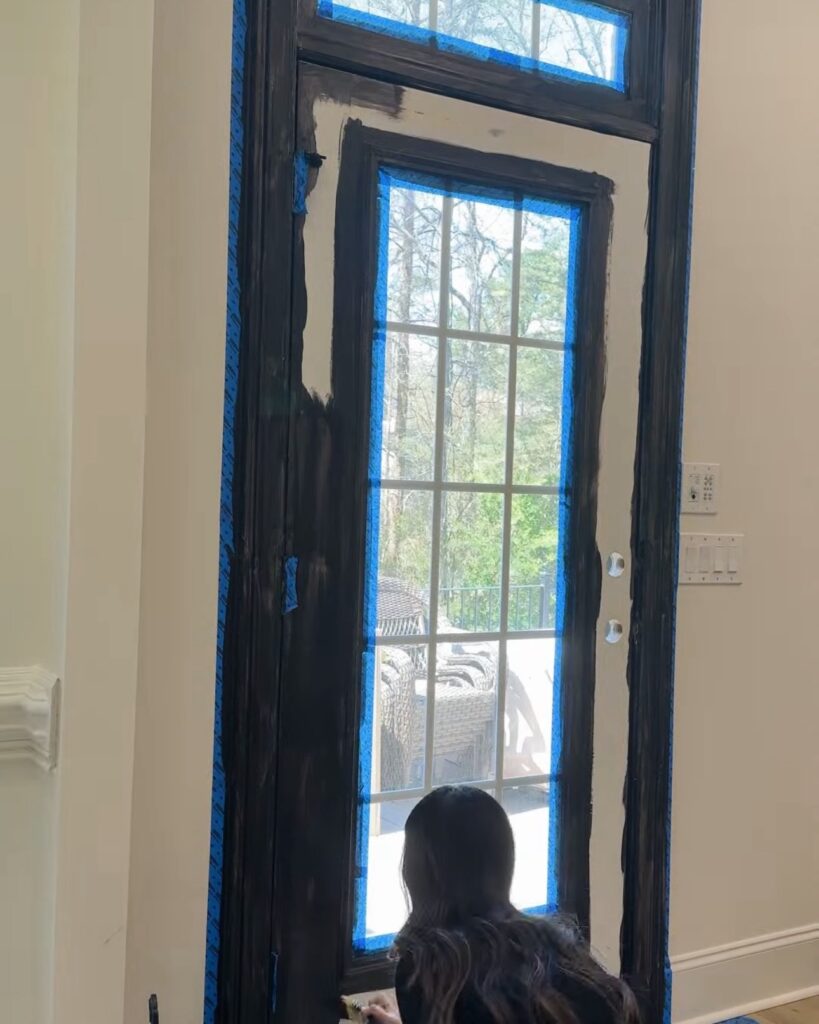
We let the first coat dry for about four hours while TJ and I ran some errands. Then it was time to come back and finish the job!
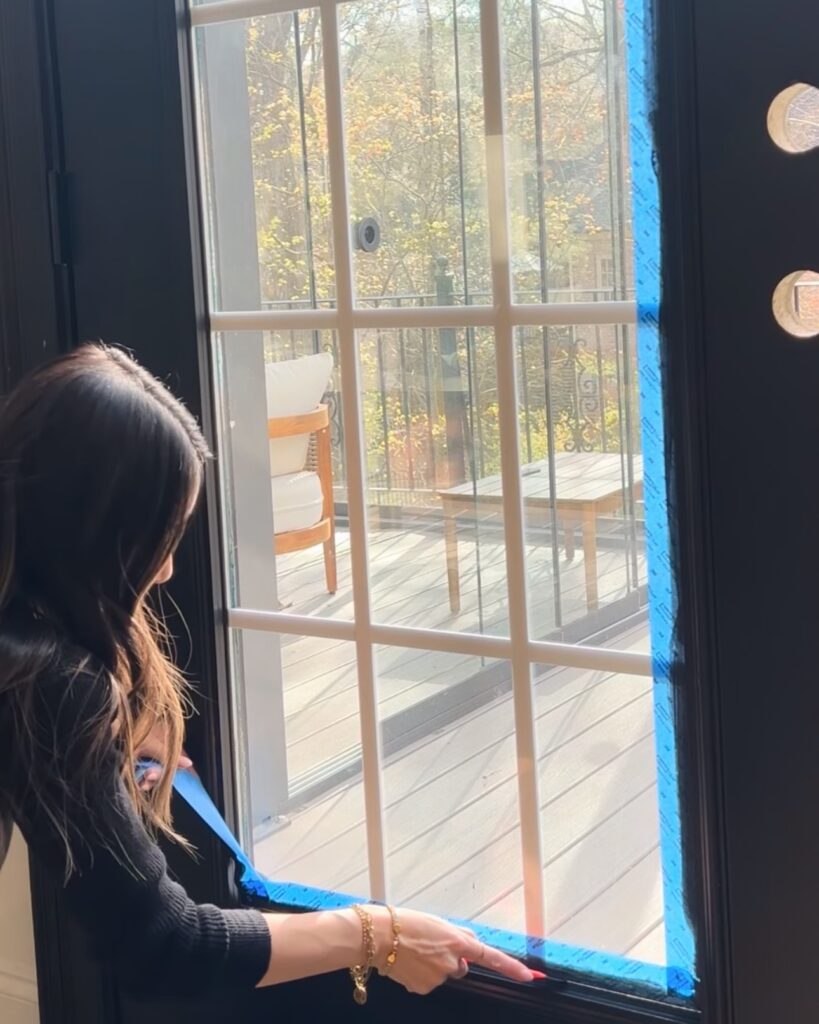
Once that second coat was dry to the touch, it was tape-peeling time—arguably the most satisfying moment in any paint project. I scored the edges with a utility knife and peeled the tape away at a 45-degree angle. Crisp, clean lines.
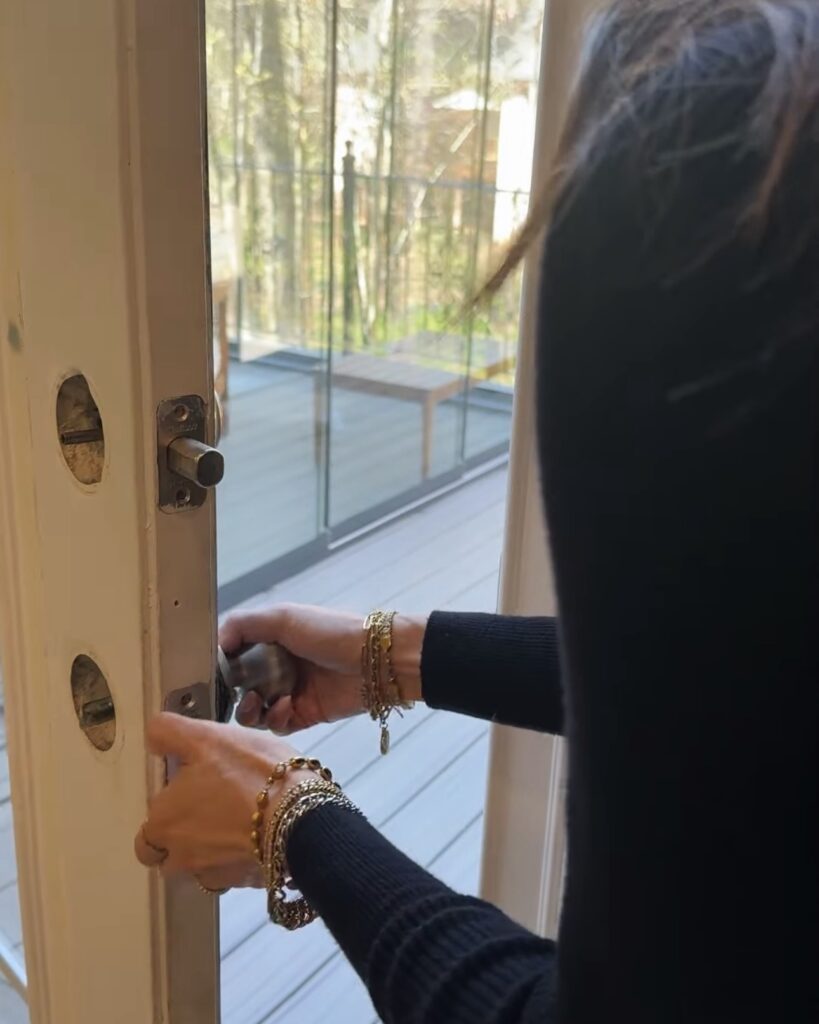
Replacing the Hardware
To finish it off, we installed a modern new door lever and deadbolt set. Such a small change, but wow—what a difference! It instantly elevated the whole look.
I’m seriously loving how this turned out. No more bulky shutters, no more ‘90s vibes—just a sleek, modern backdoor that lets in all the light. It feels like we finally gave this space the attention it deserved.