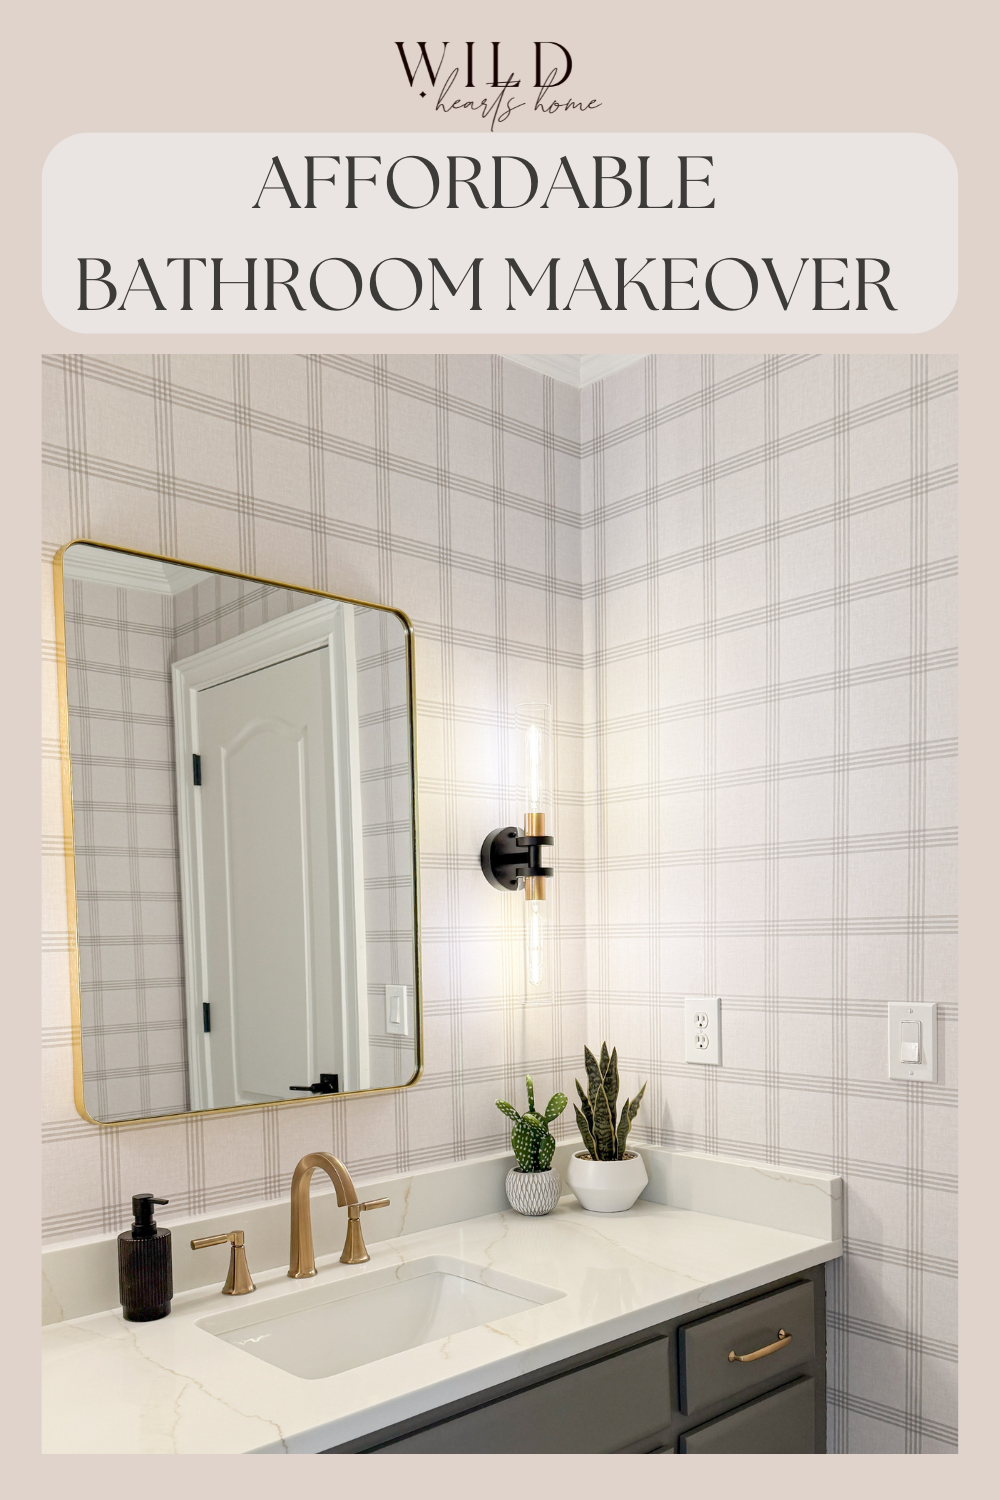
My next project is my boys’ jack & jill bathroom makeover! It’s so dated…so 90’s. I wanted to make this room better without spending a ton of money.
My plan is to keep the vanity, prime and paint the cabinet, replace the hardware, and give it a new countertop! Here’s what this bathroom looked like before we got started:
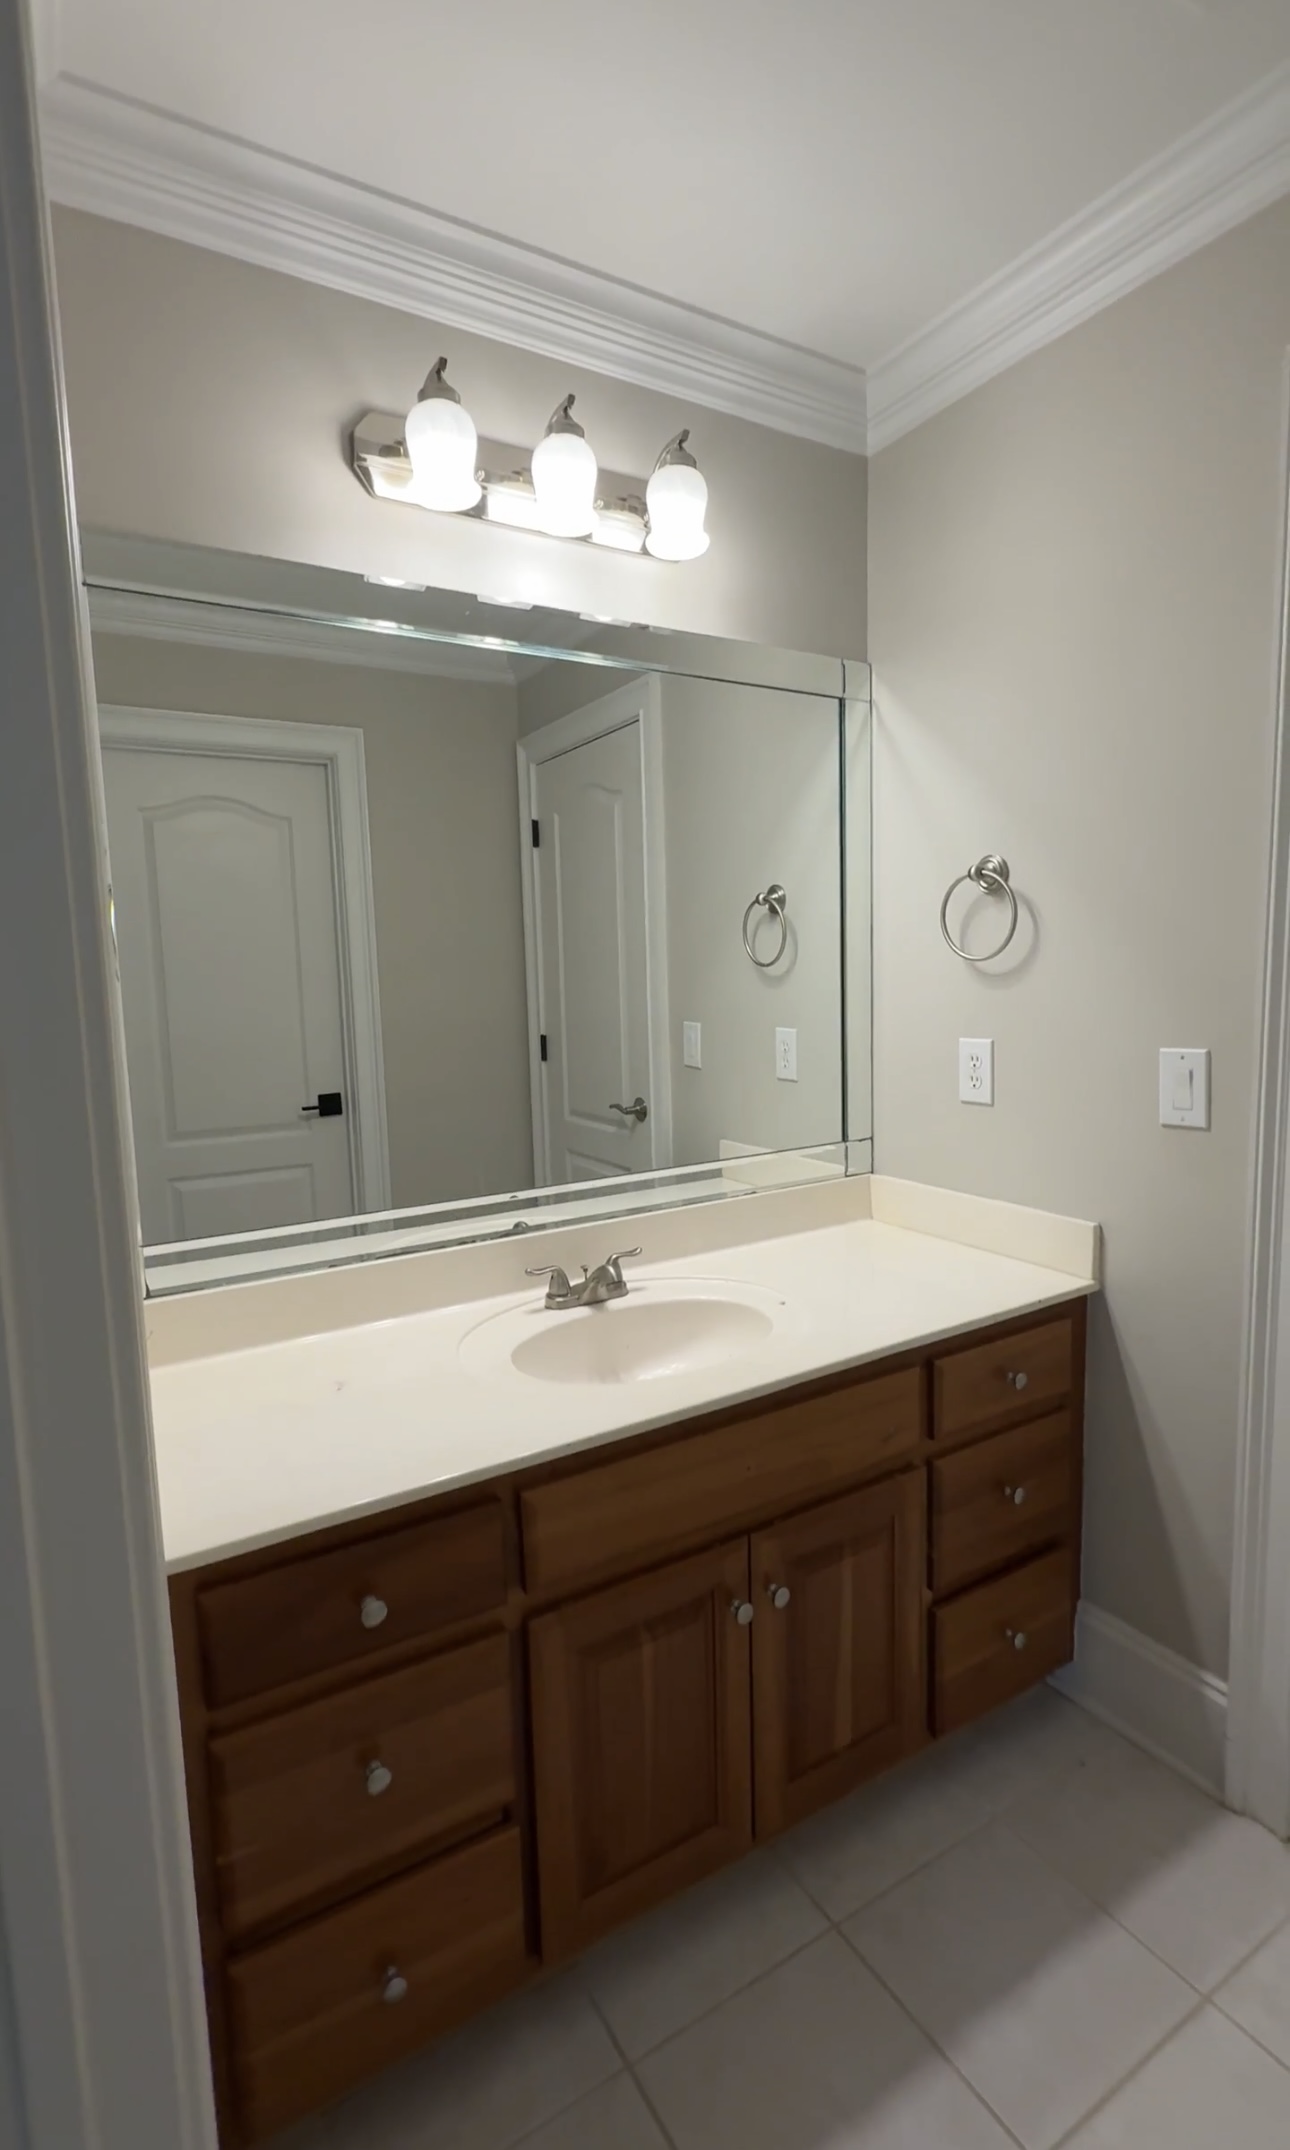
What I’m keeping:
- Cabinets (new paint)
- Floor Tile
- Crown molding
- Baseboards
- Doors
What I’ll be updating:
- Faucet
- Sink
- Countertop
- Lights
- Mirrors
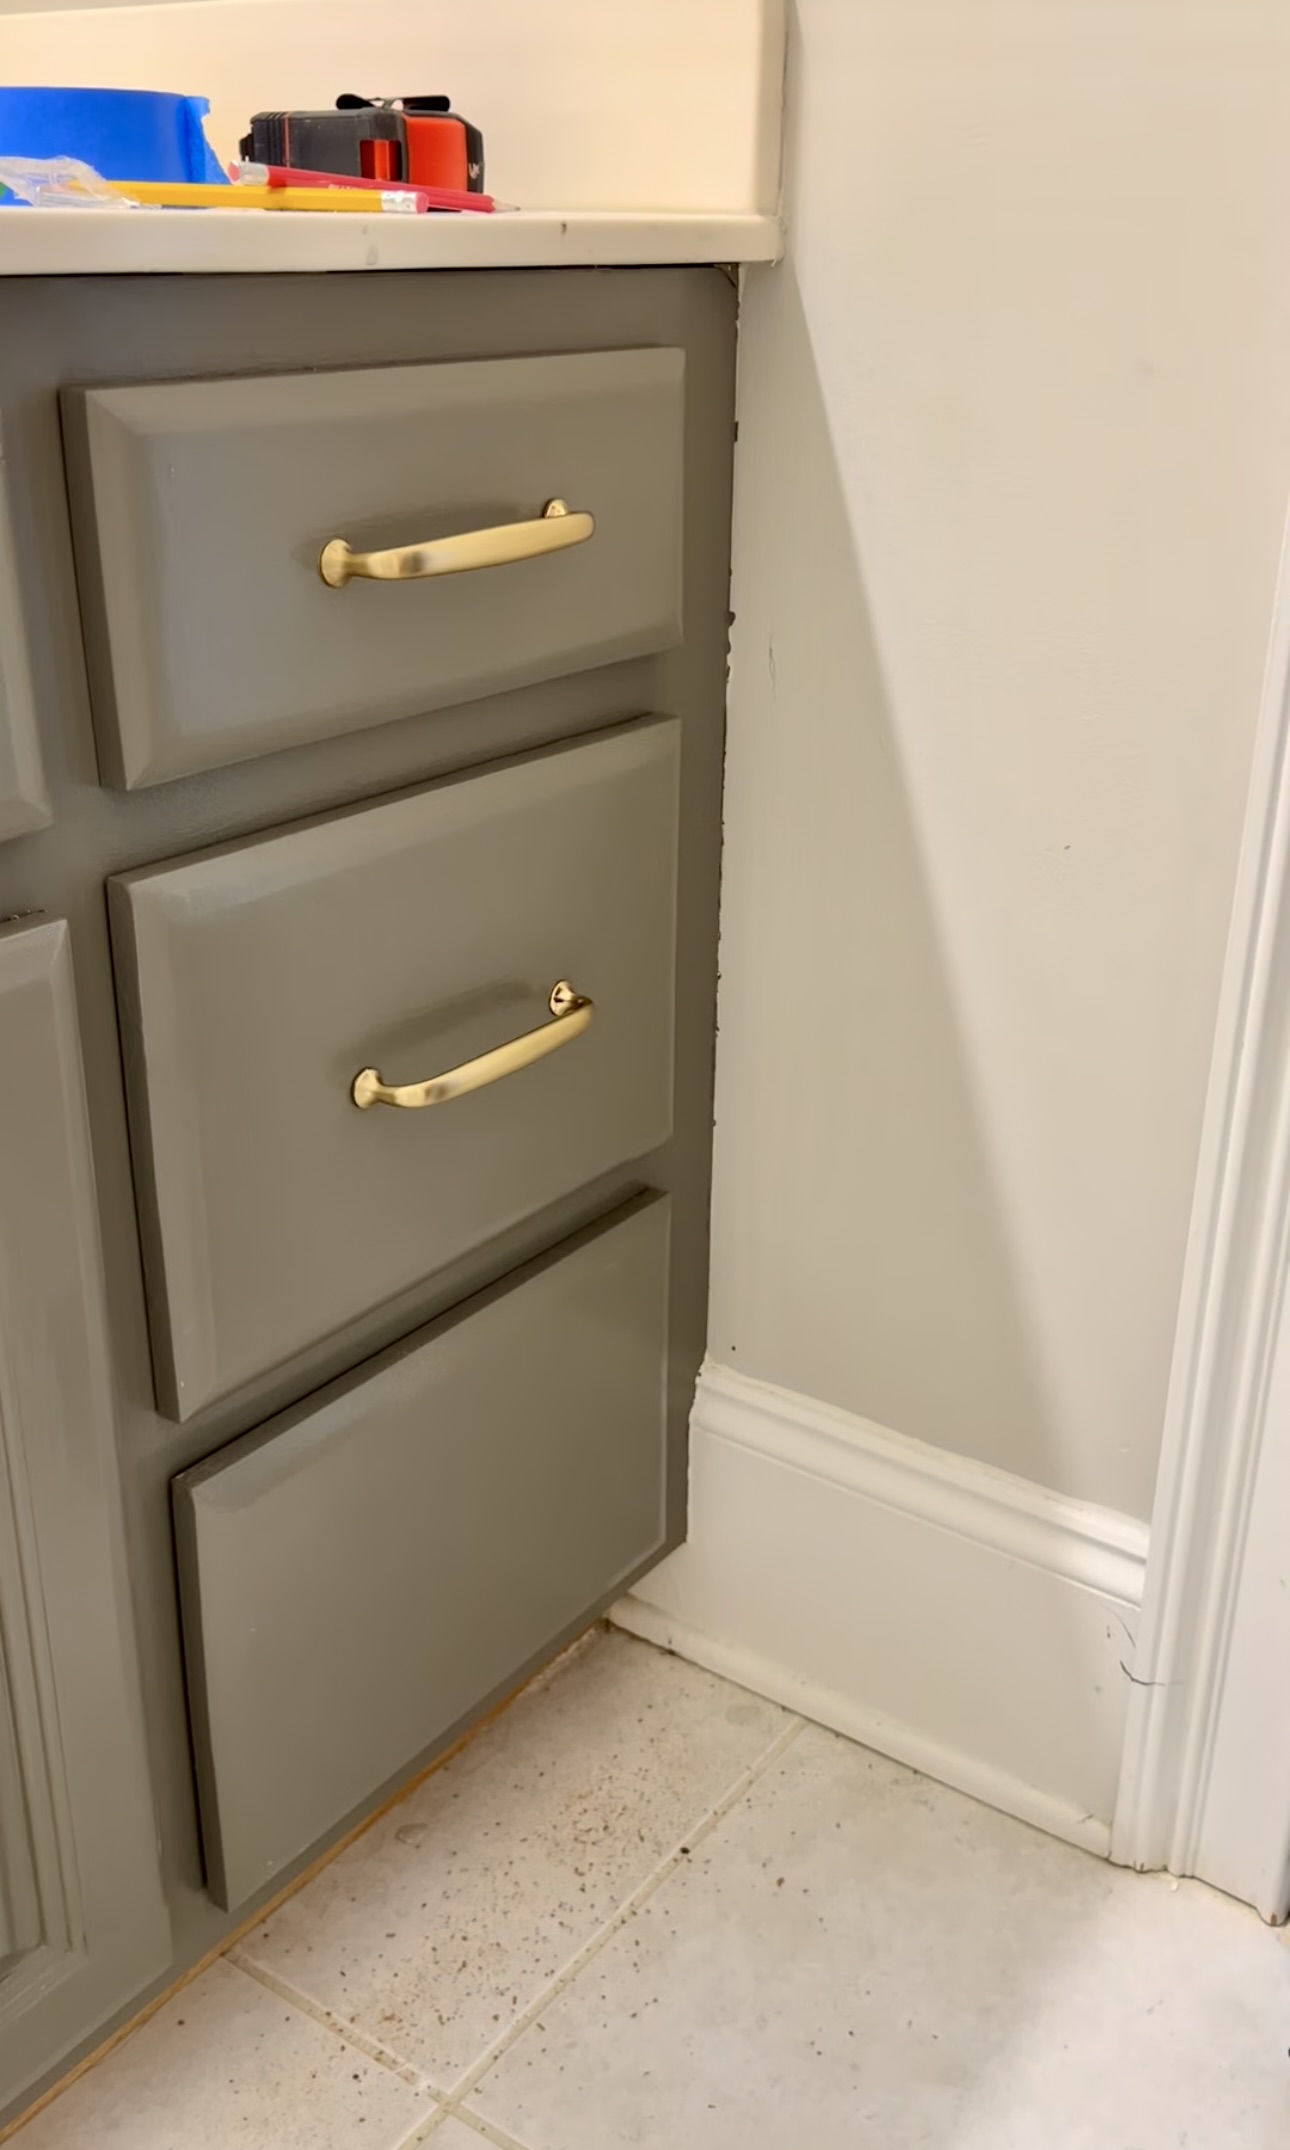
- Cabinet Pulls
- Drawer Knobs
- Wallpaper
- Towel Hardware
- Switch plates
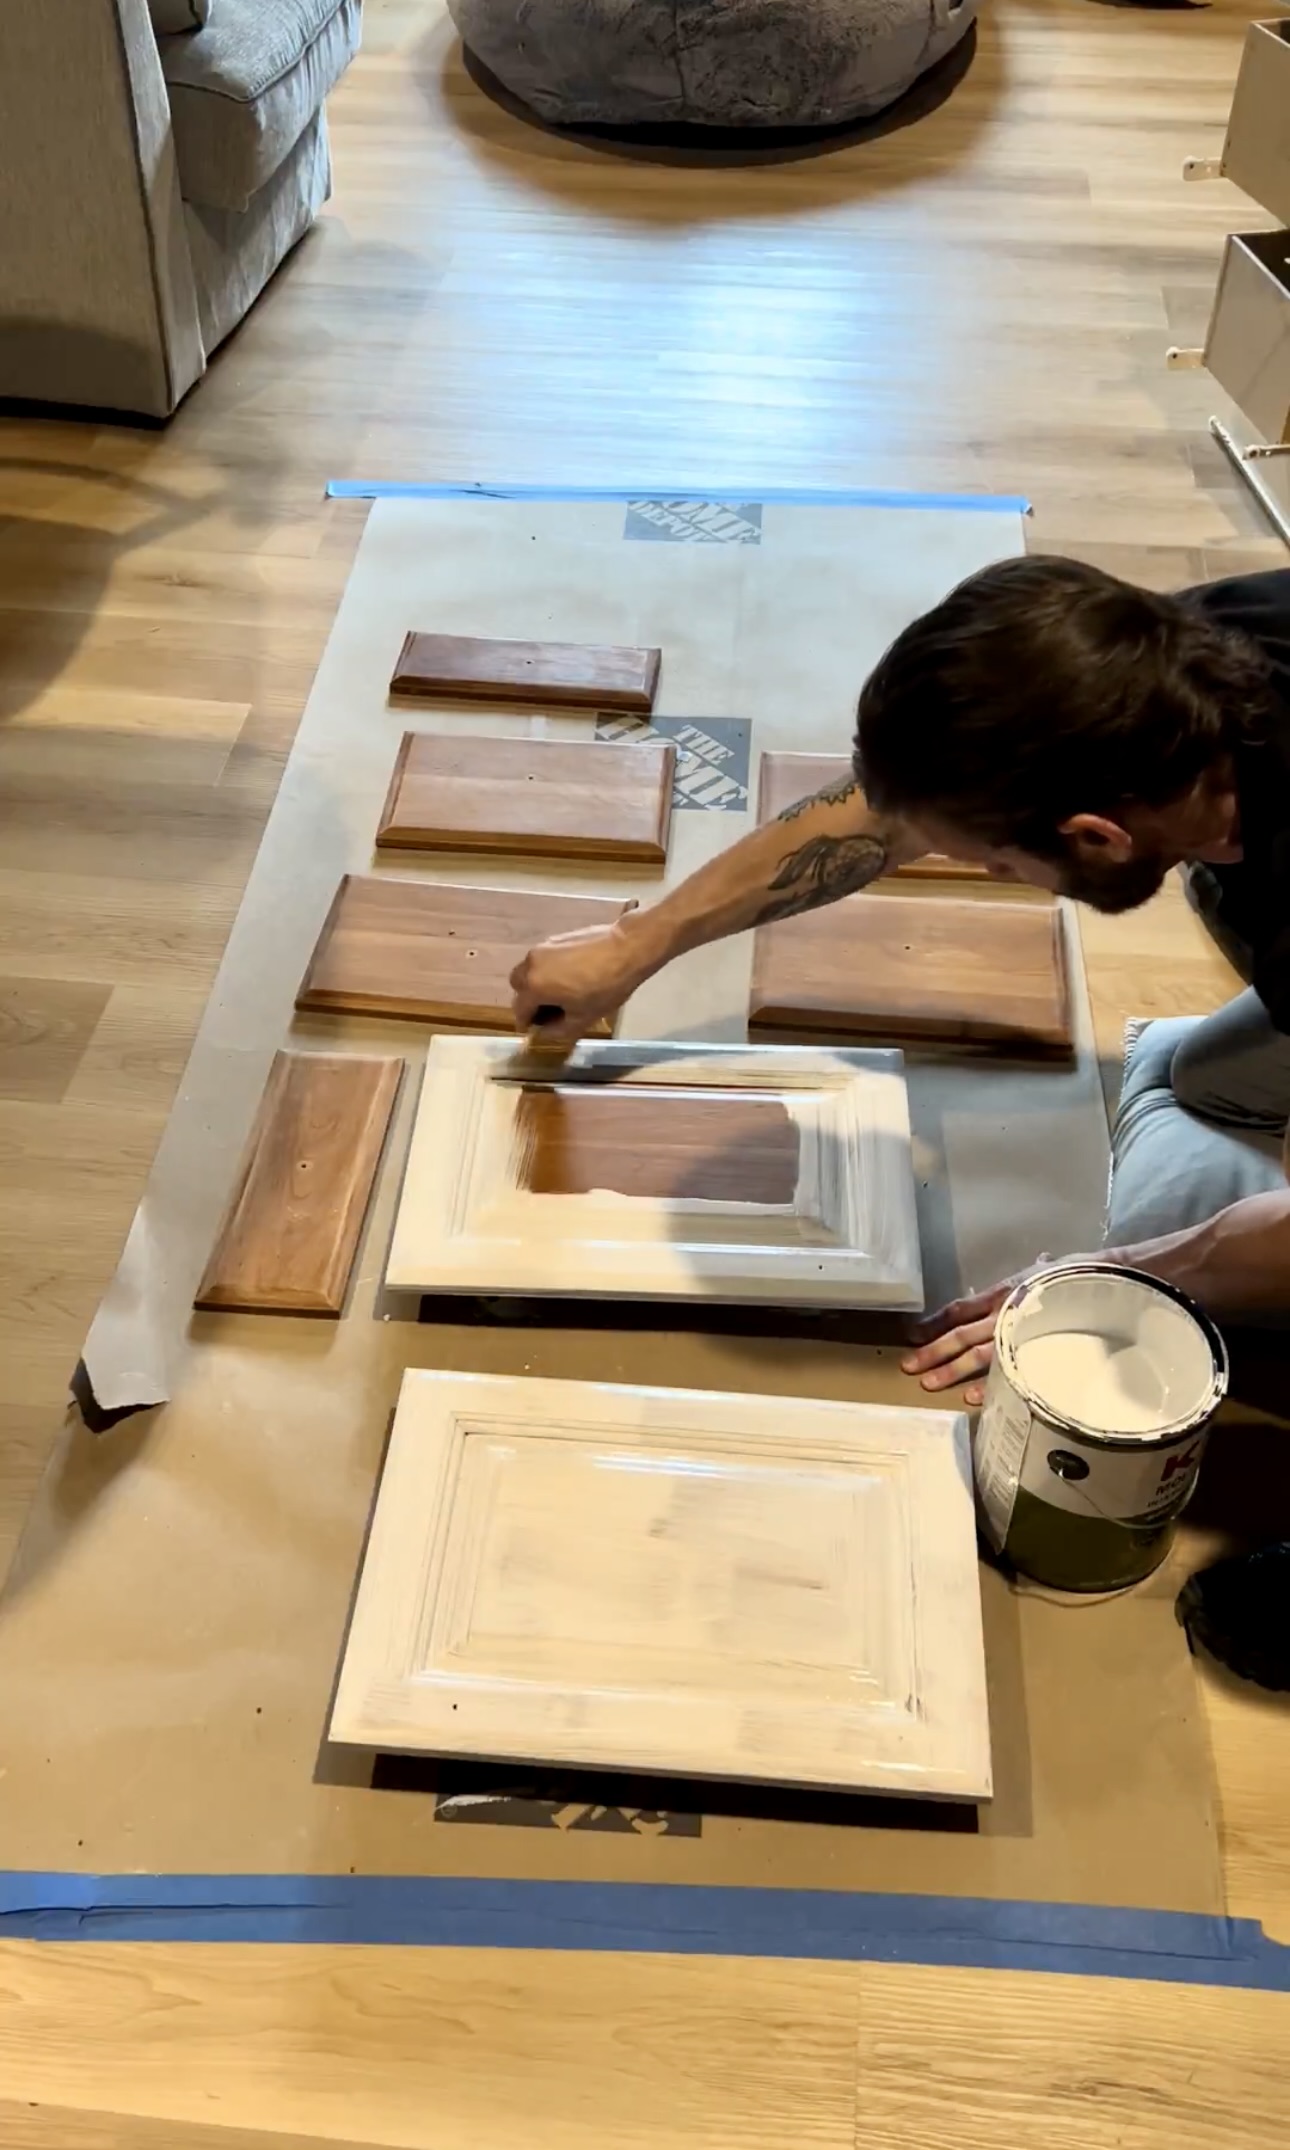
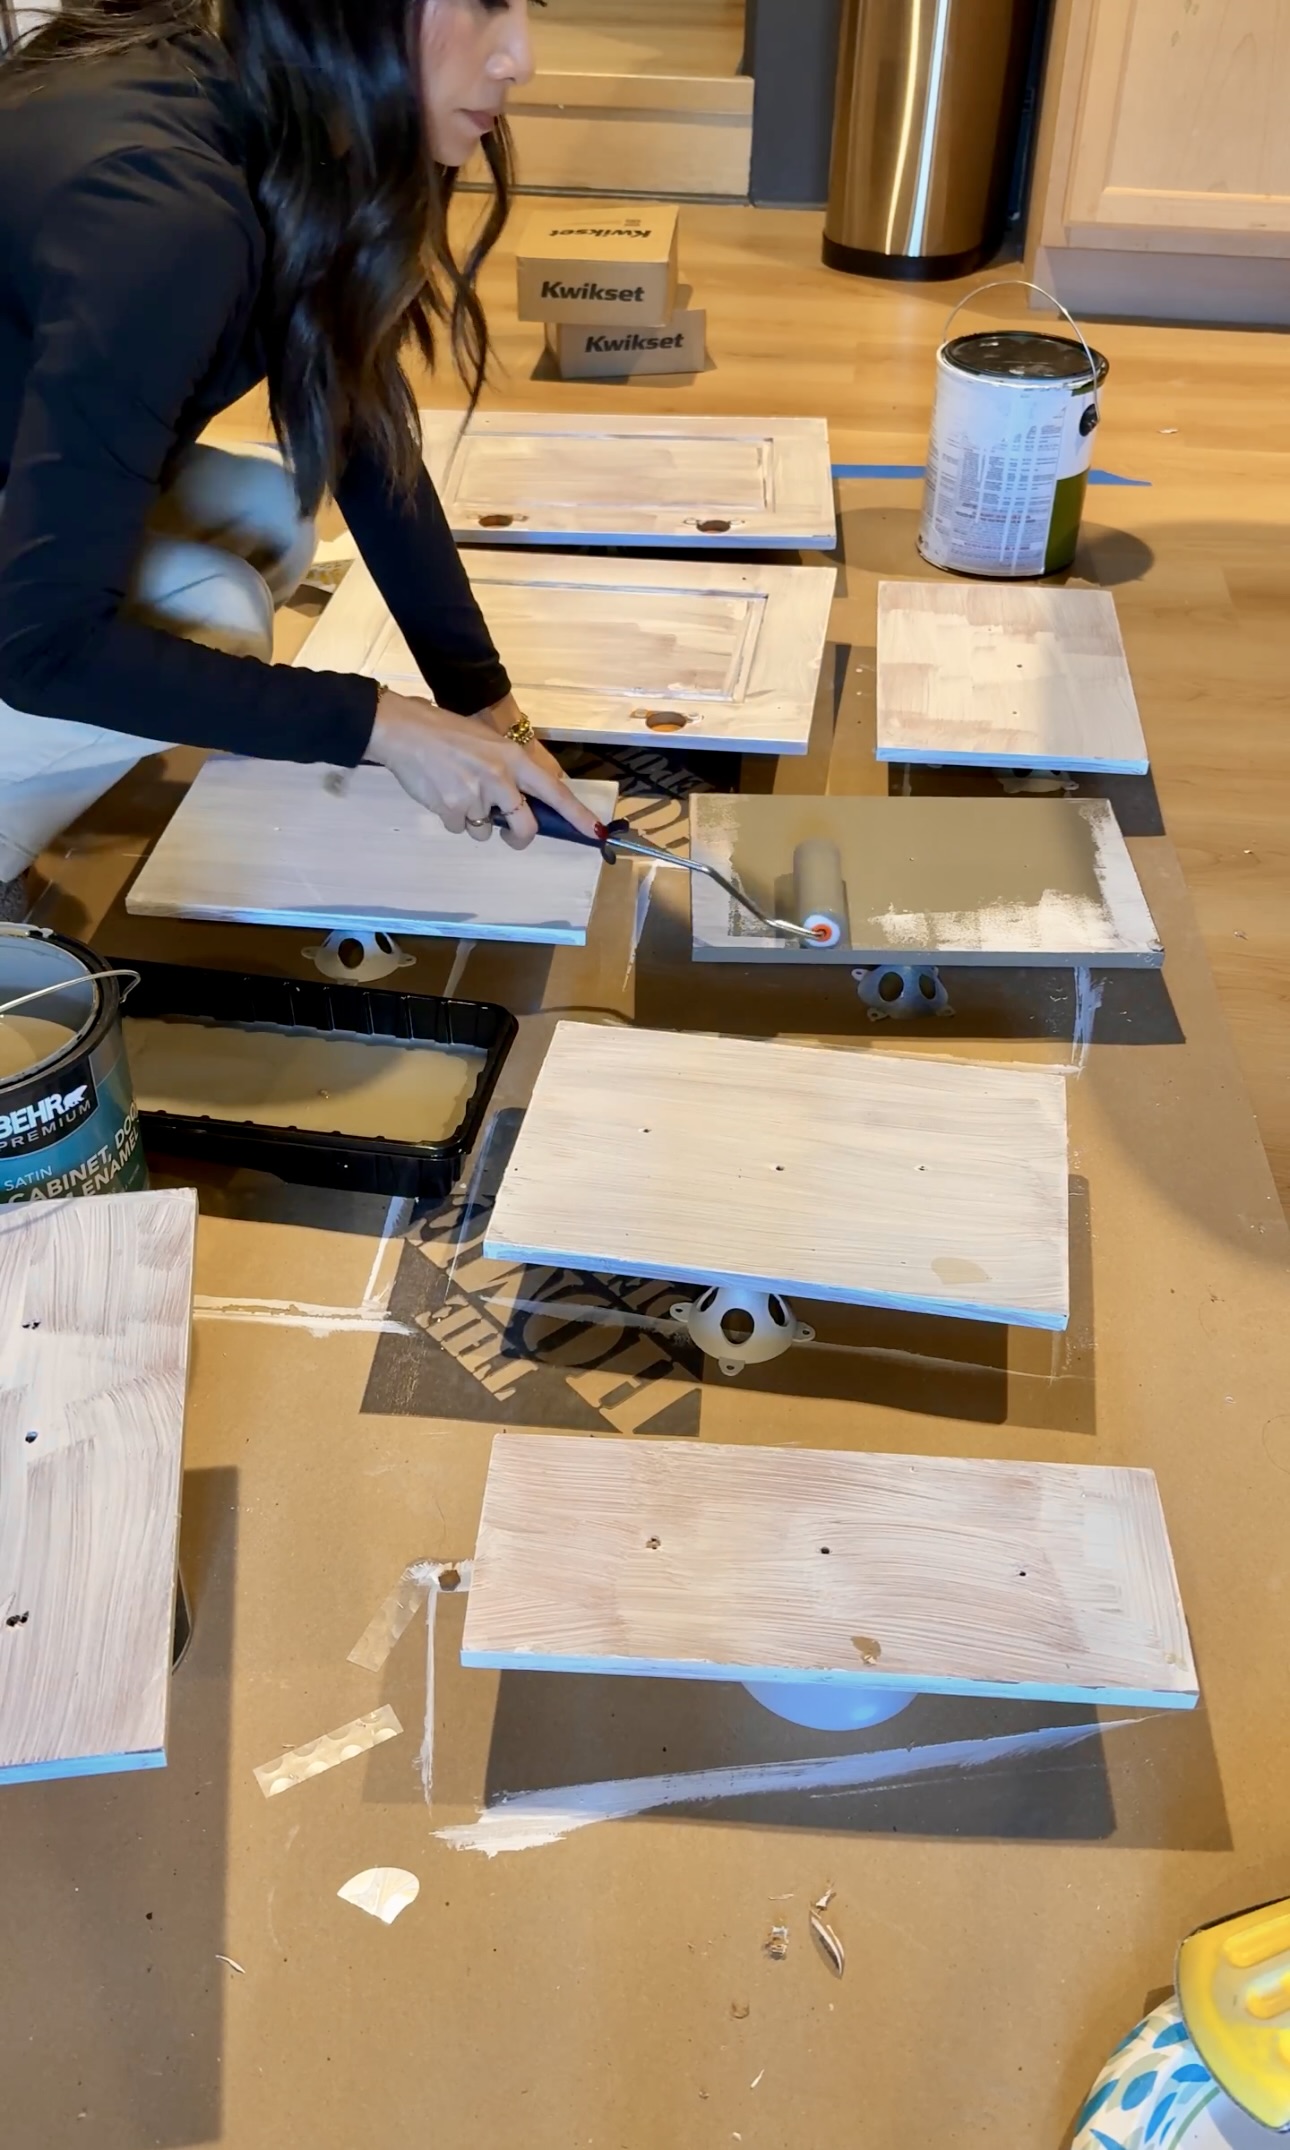
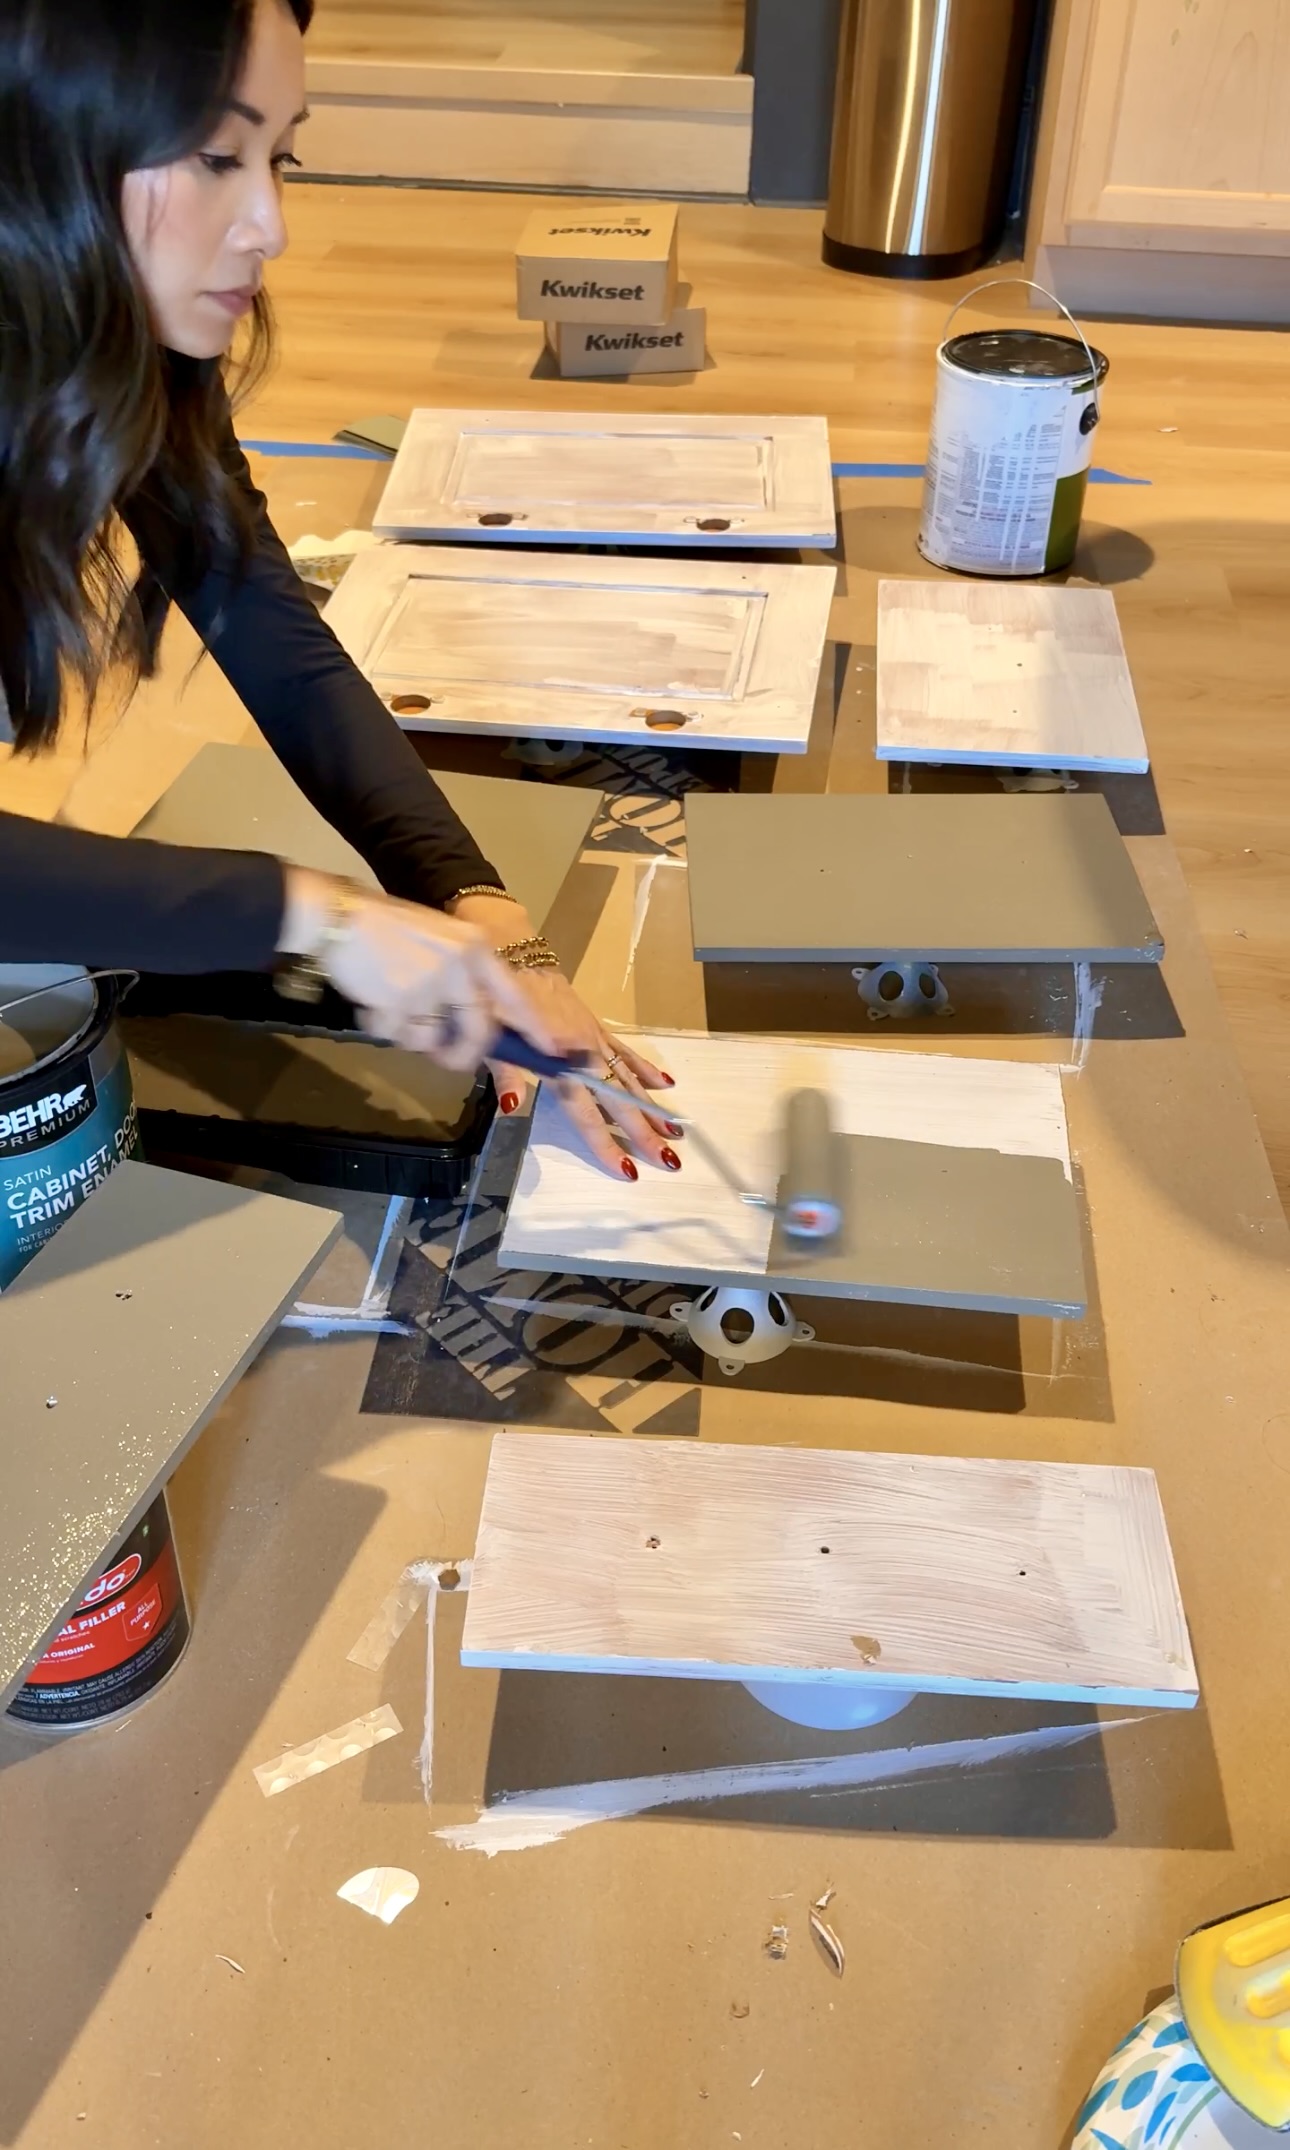
Priming the Cabinets
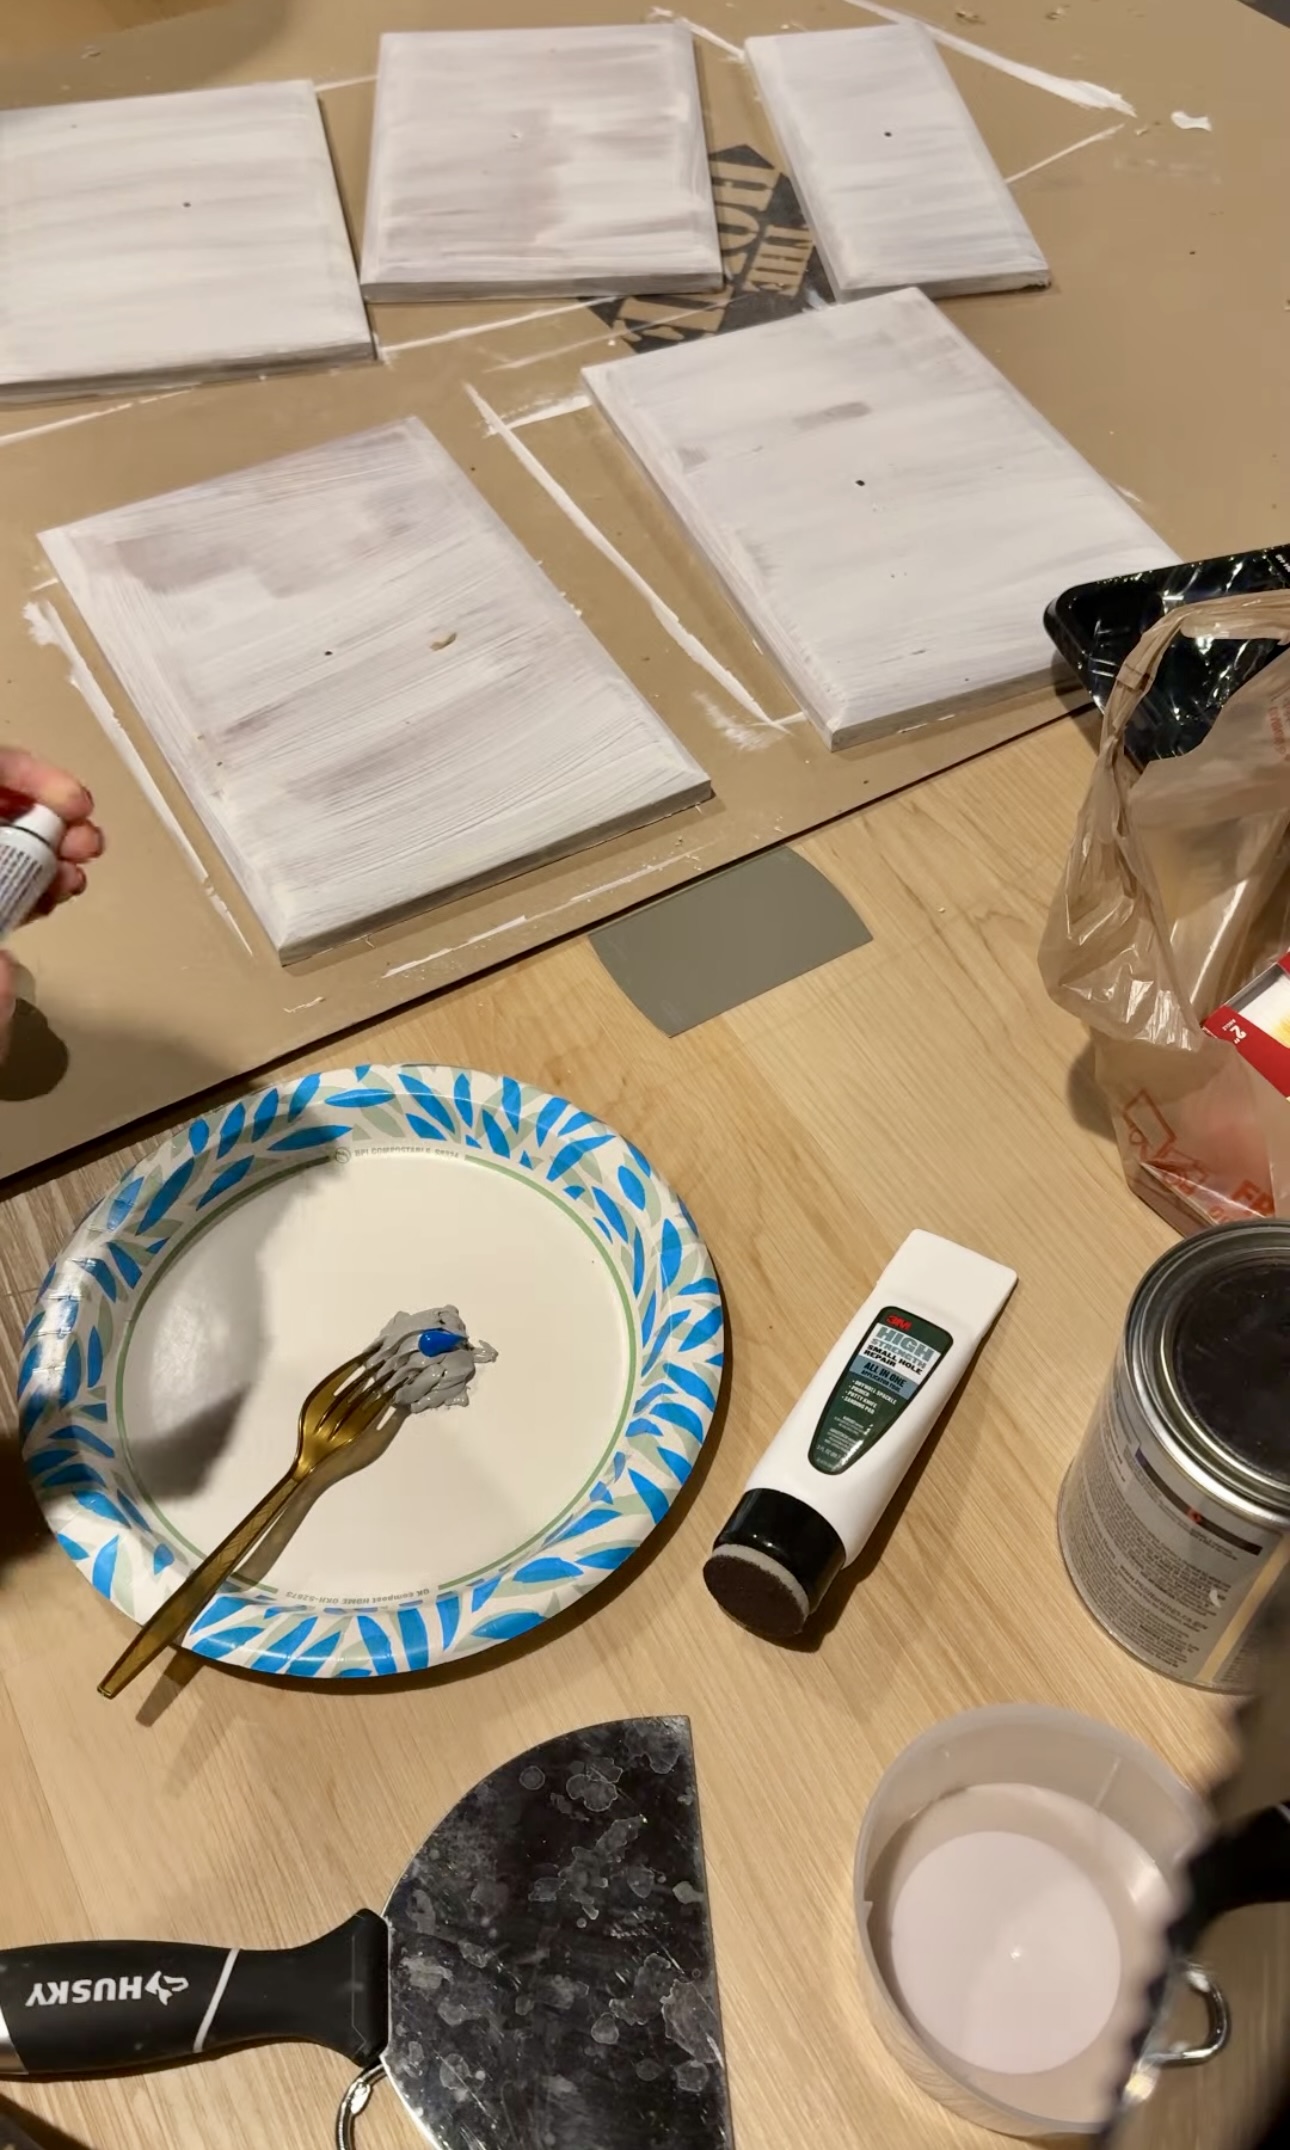
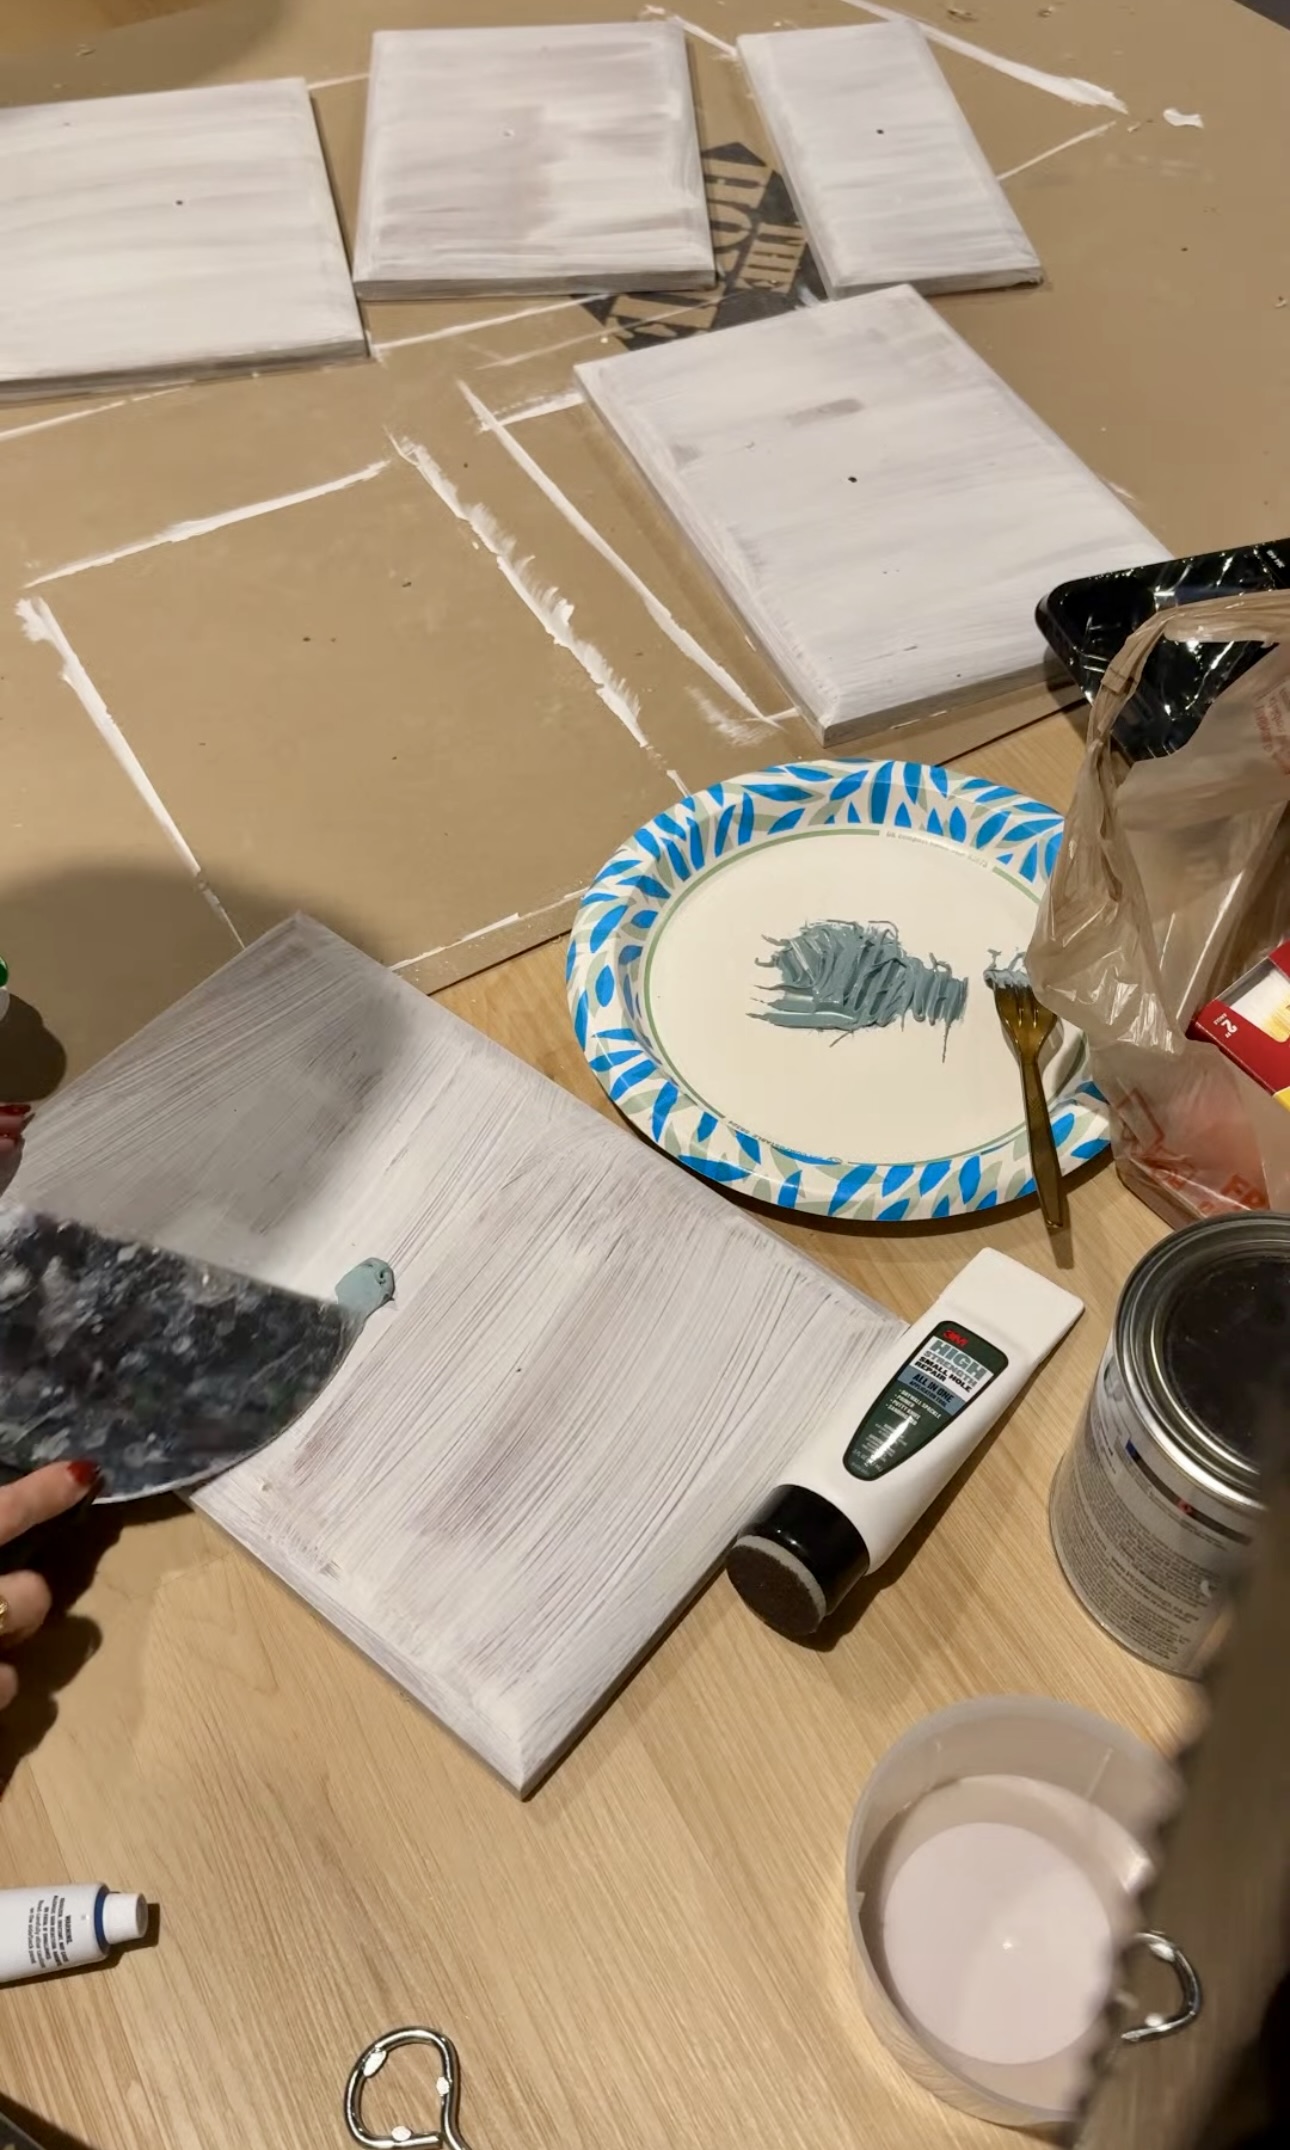
I started off by removing all the drawers and doors off of the vanity. I took off all the hardware and sanded them down with 80 grit sandpaper. We sanded the body of the vanity as well.
To prime the cabinets and the vanity frame, we used KILZ Mold & Mildew Primer. We had it leftover from an older project, but you can use any KILZ, Zinsser, or Behr primer for this!

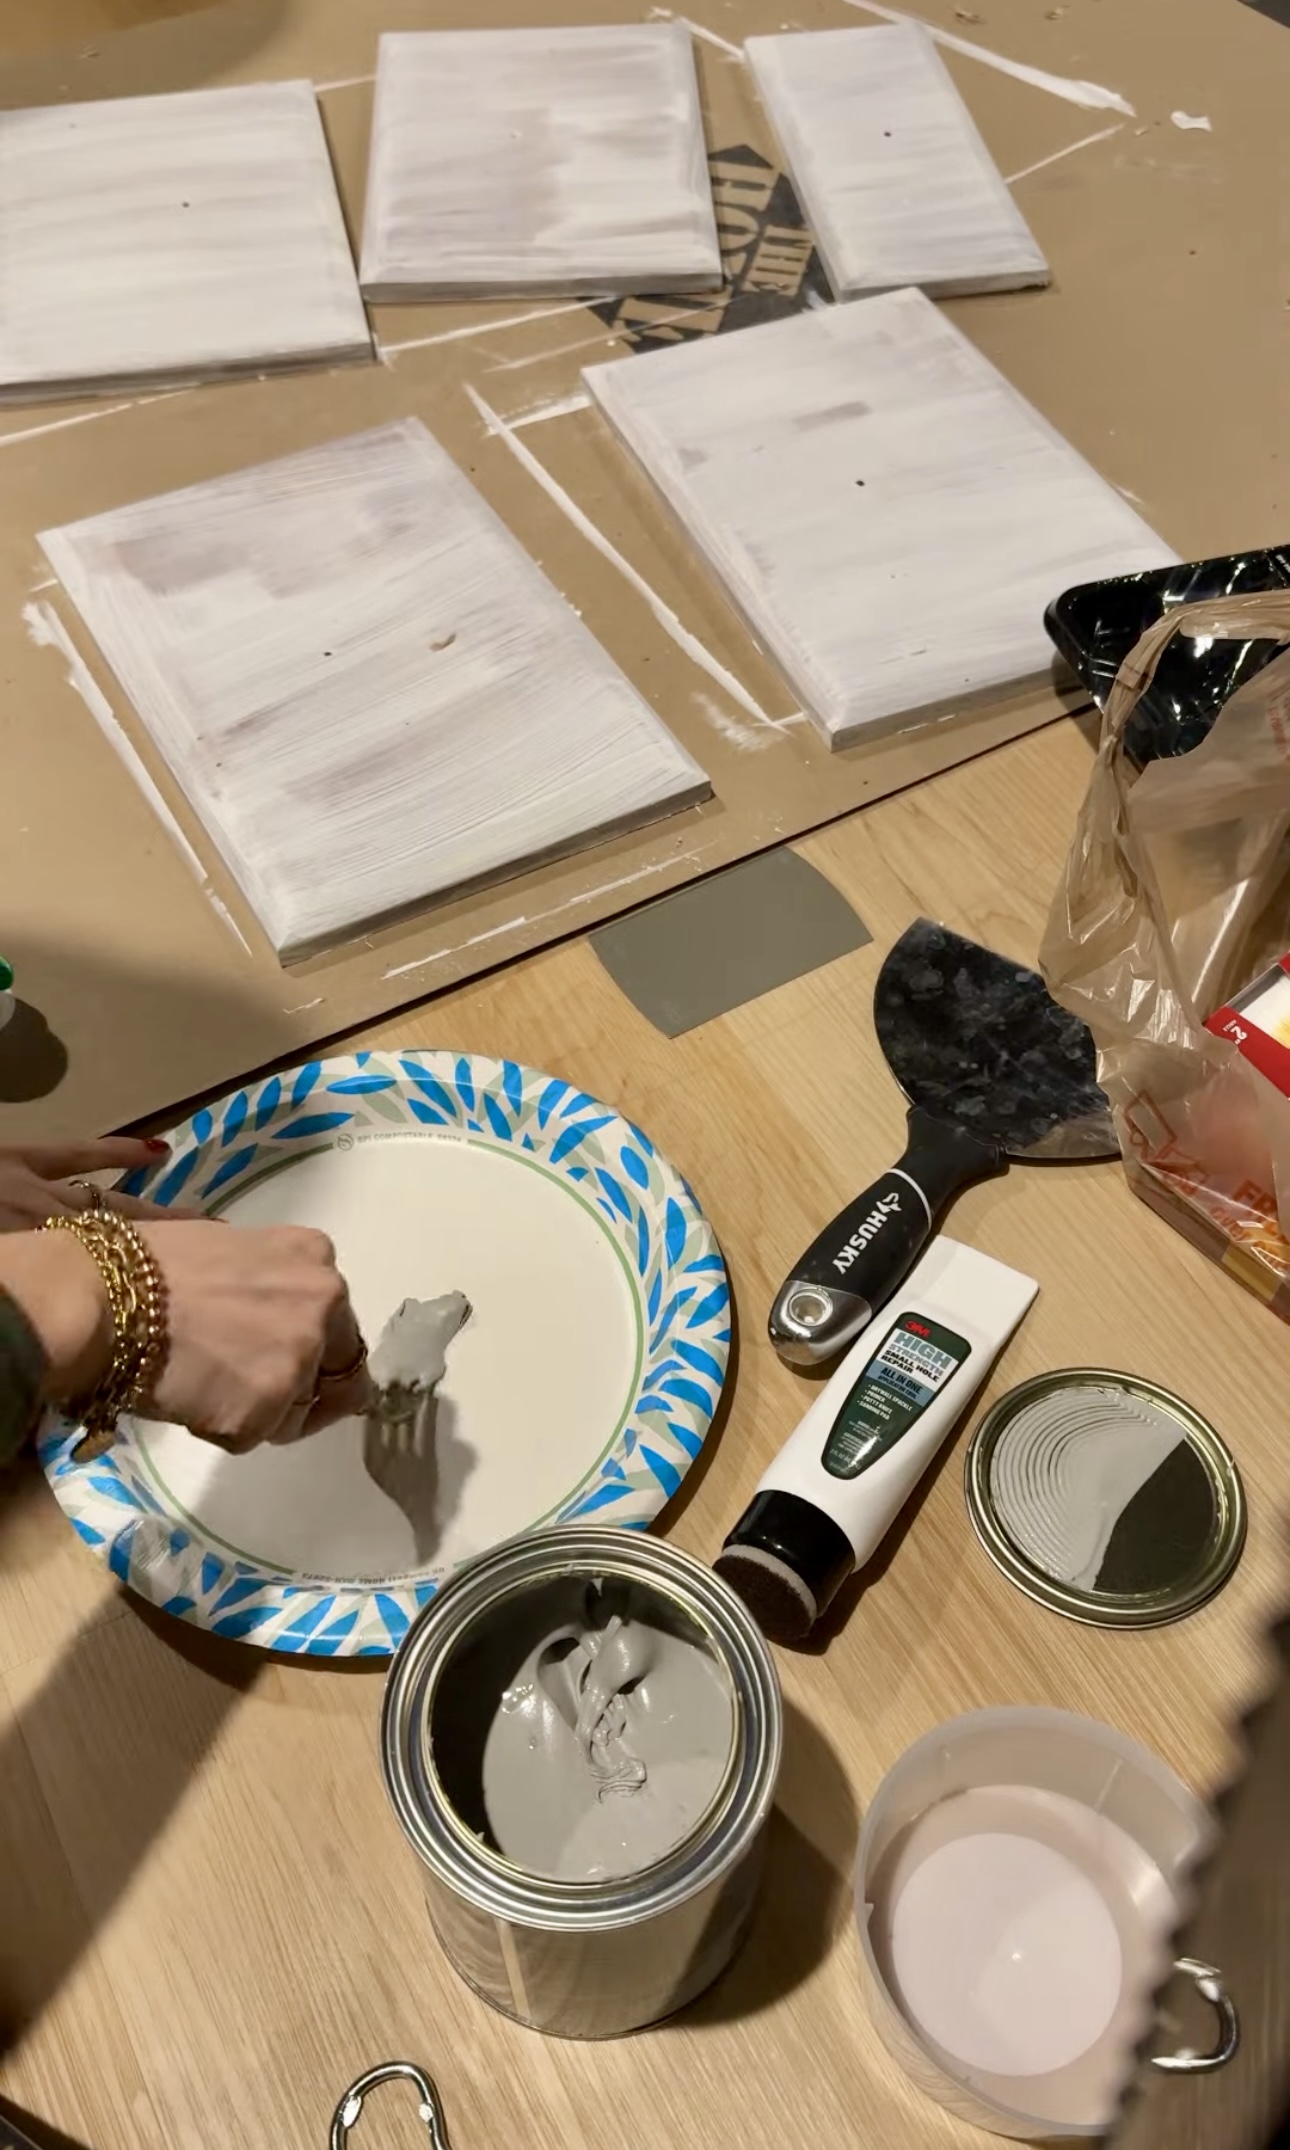
To fill the holes from the old hardware, I used Bondo. Bondo is a 2-part system. I took a scoop of the gray stuff and added a tiny baby bit of the hardener. It’s important to only work with a little bit at a time – this stuff hardens quickly! I mixed it together and then applied it to the old hardware holes. Once it dried, I sanded it down!
Removing the Mirror
Then I removed the mirror in here. I literally always use blue tape for this. Blue tape is used in case the mirror shatters during removal so you don’t get pieces of mirror everywhere. I’ve removed a few mirrors in my lifetime and none of them have ever broken. You just have to take your time and not force it! I always go overkill on the blue tape…better safe than sorry!
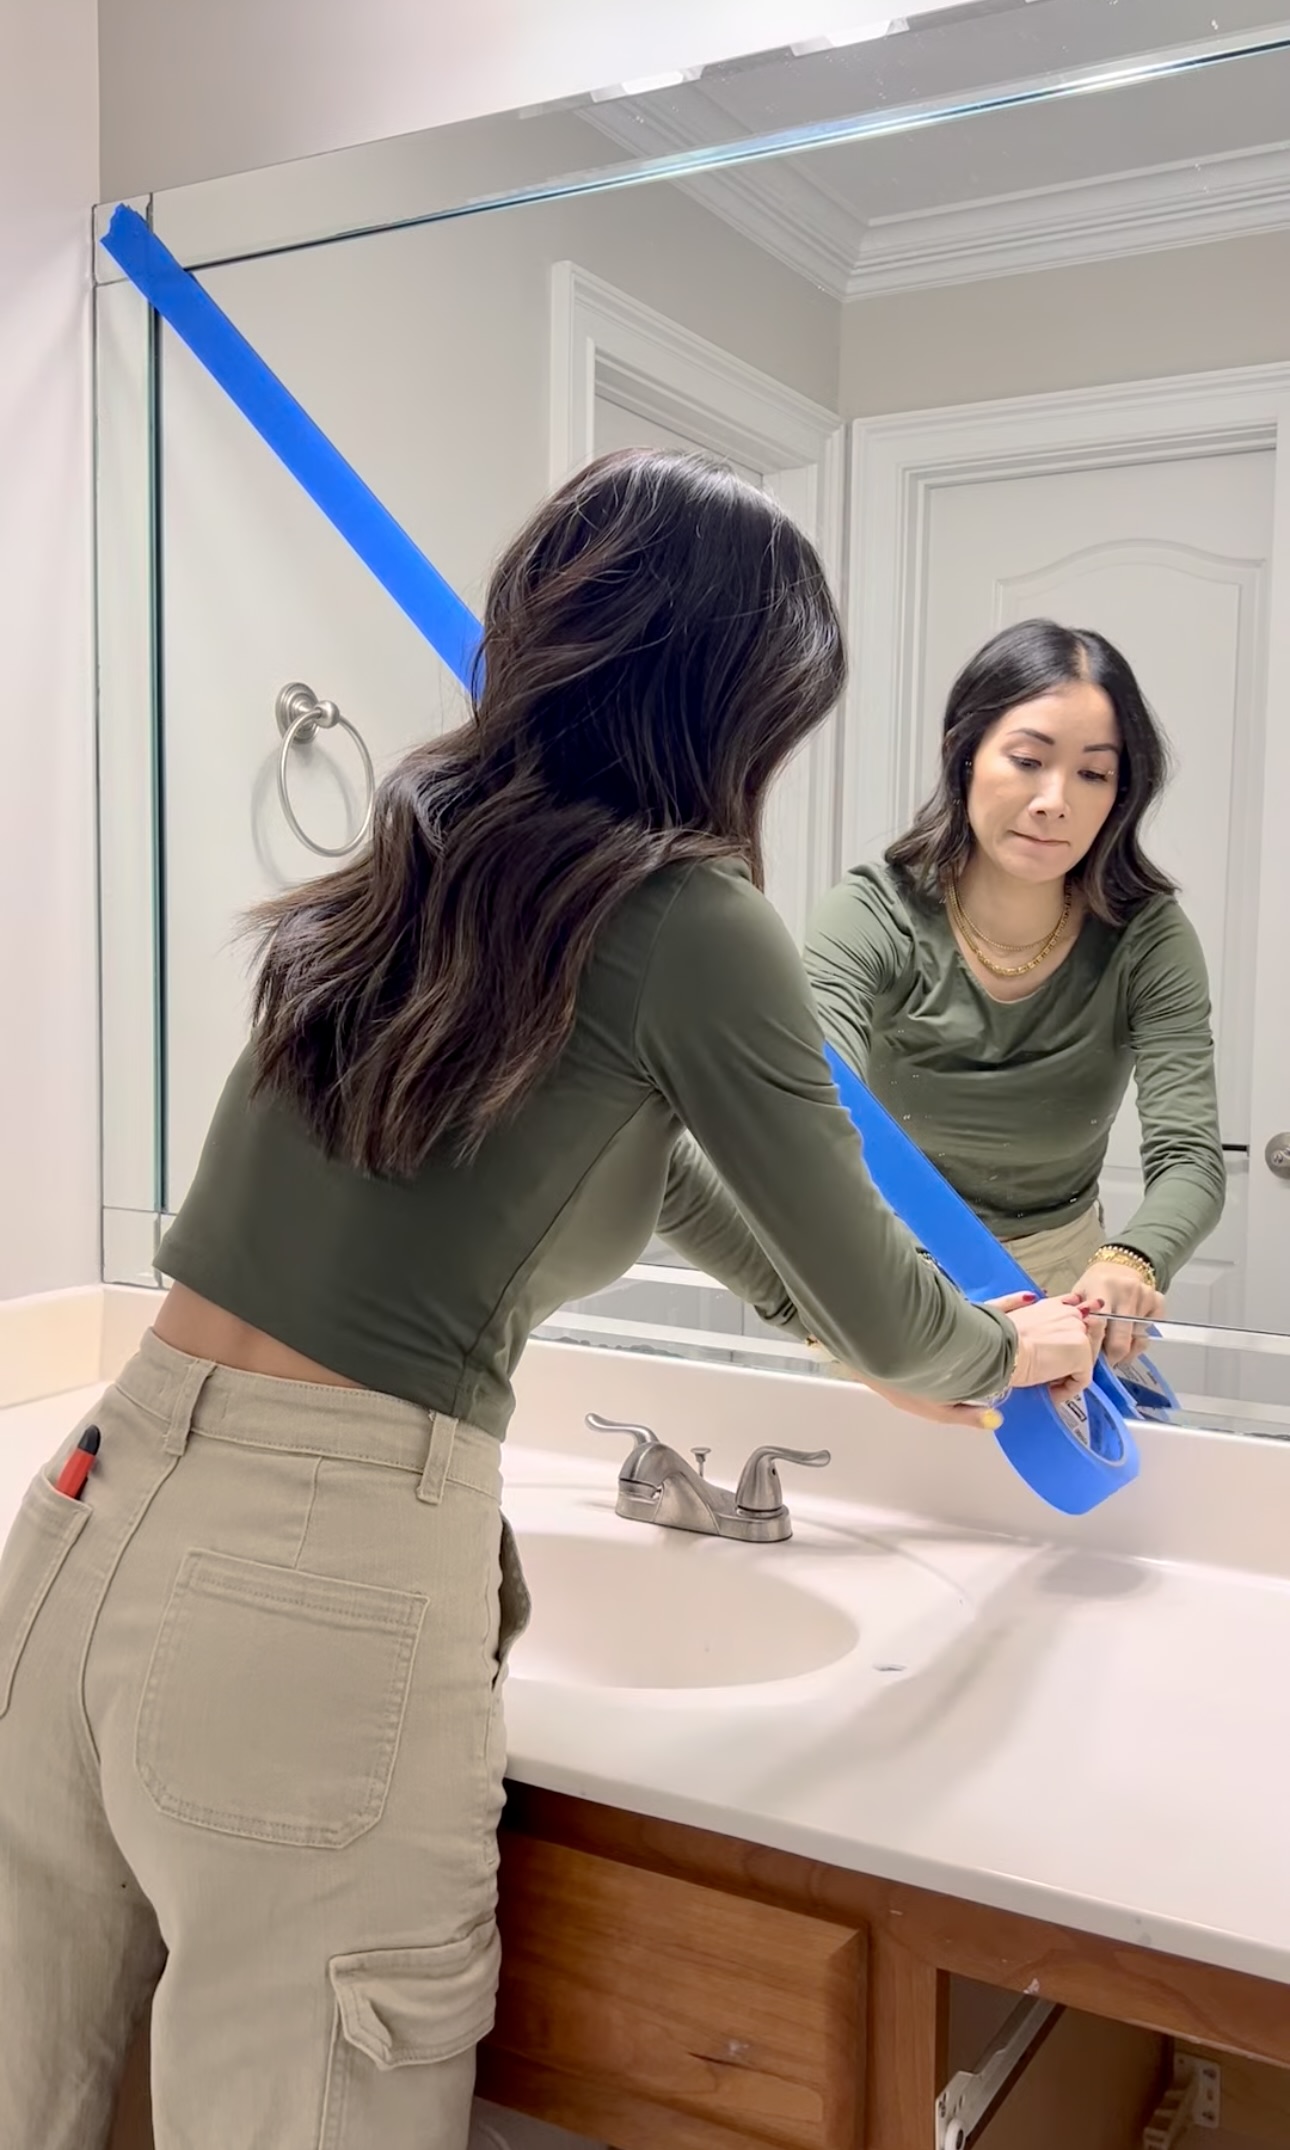
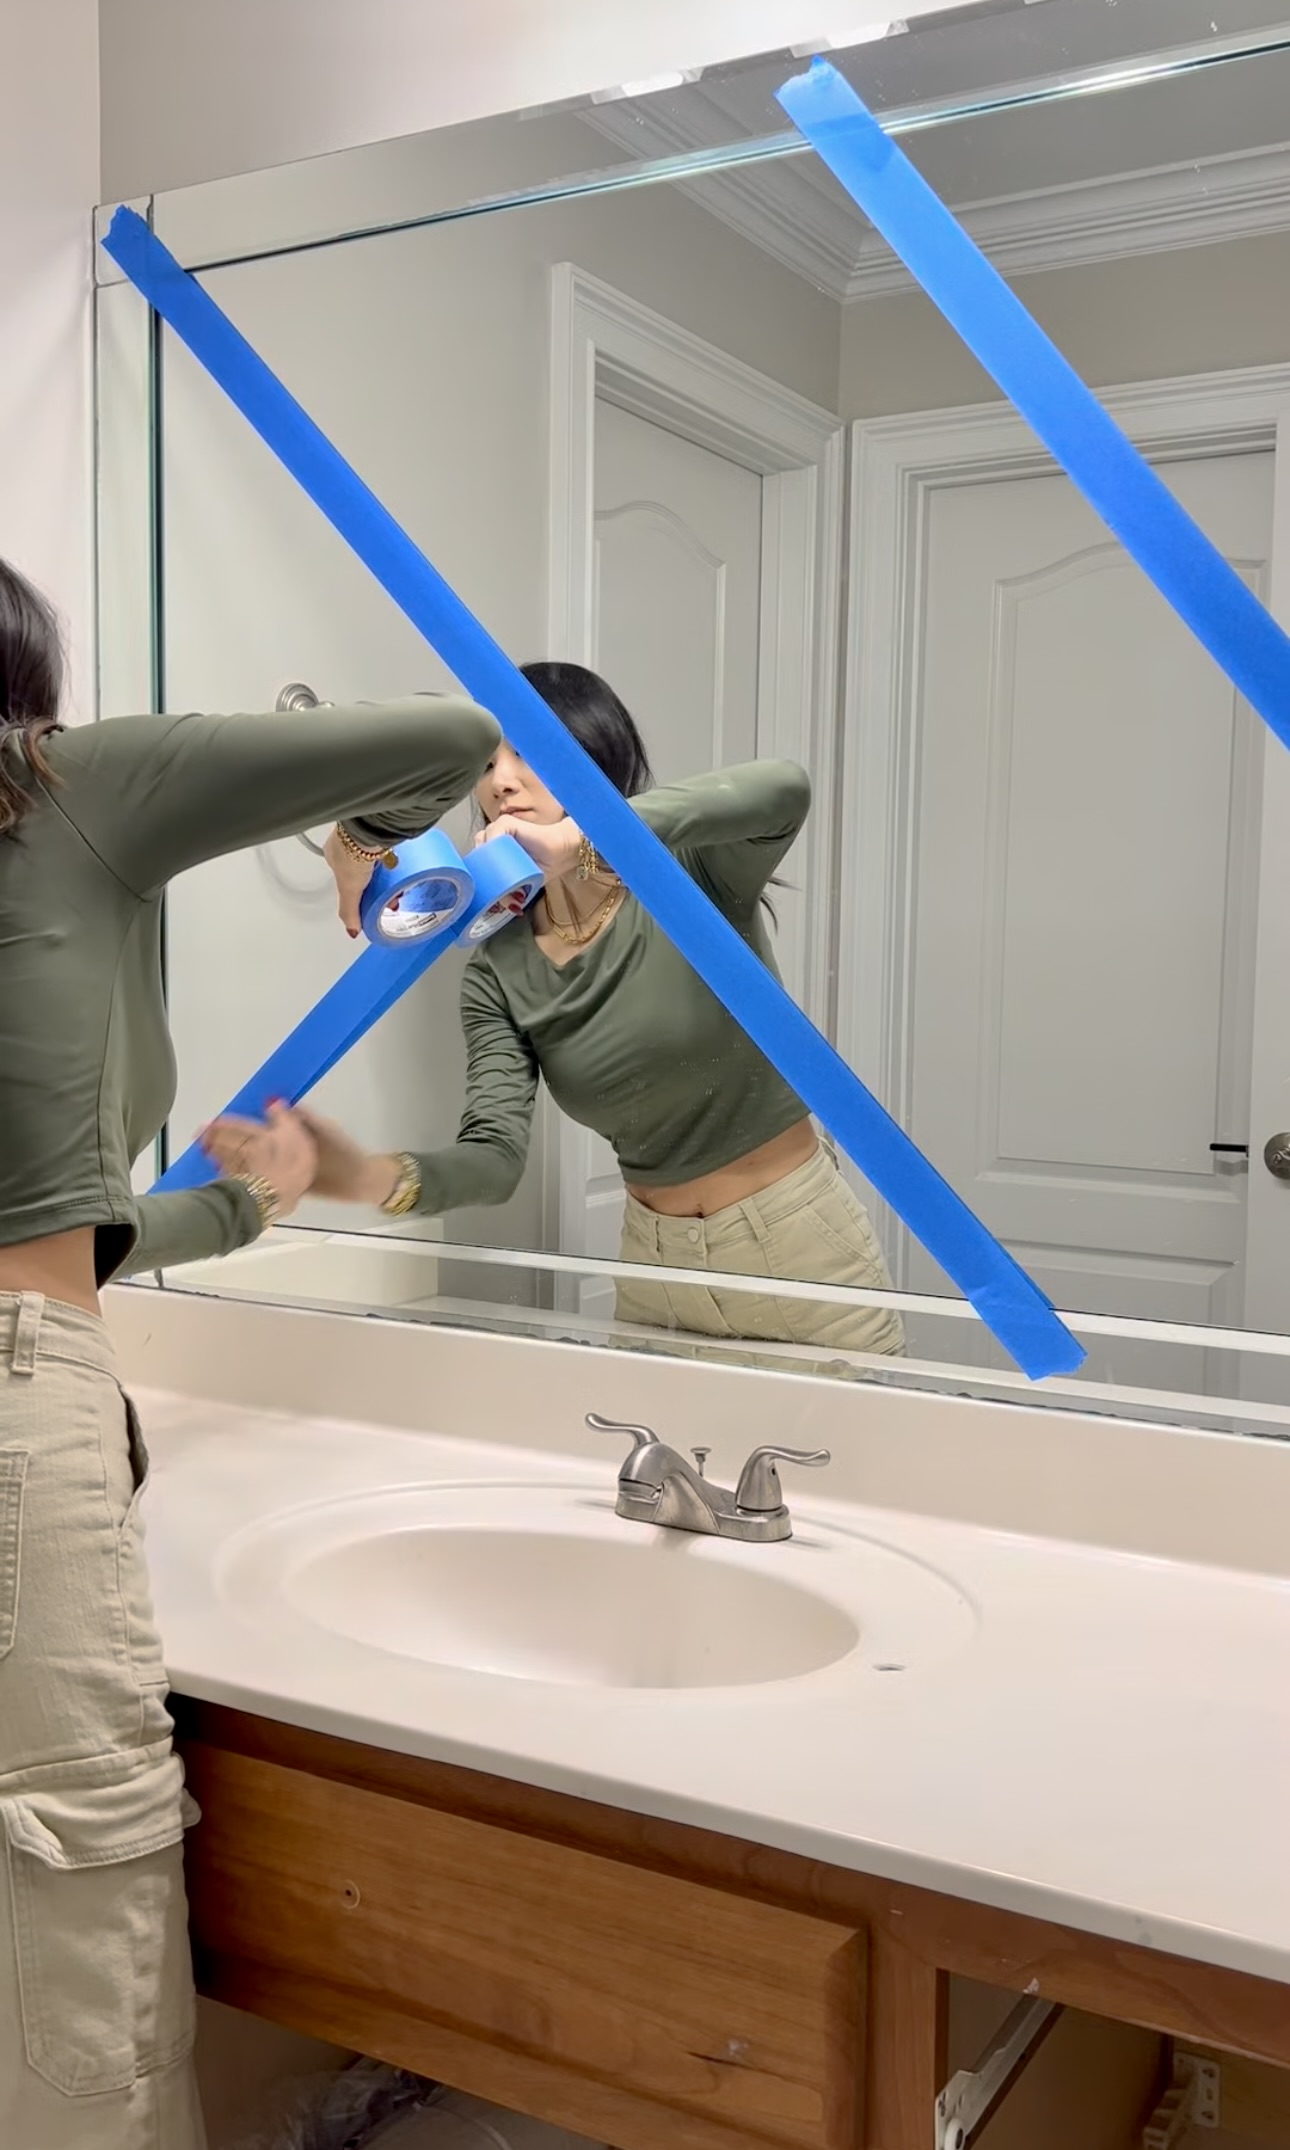
To actually remove the mirror, we used a crow bar and a hammer. You tap all around the edges of the mirror to break the adhesive. It’s important to take your time and not be heavy handed!
Paint
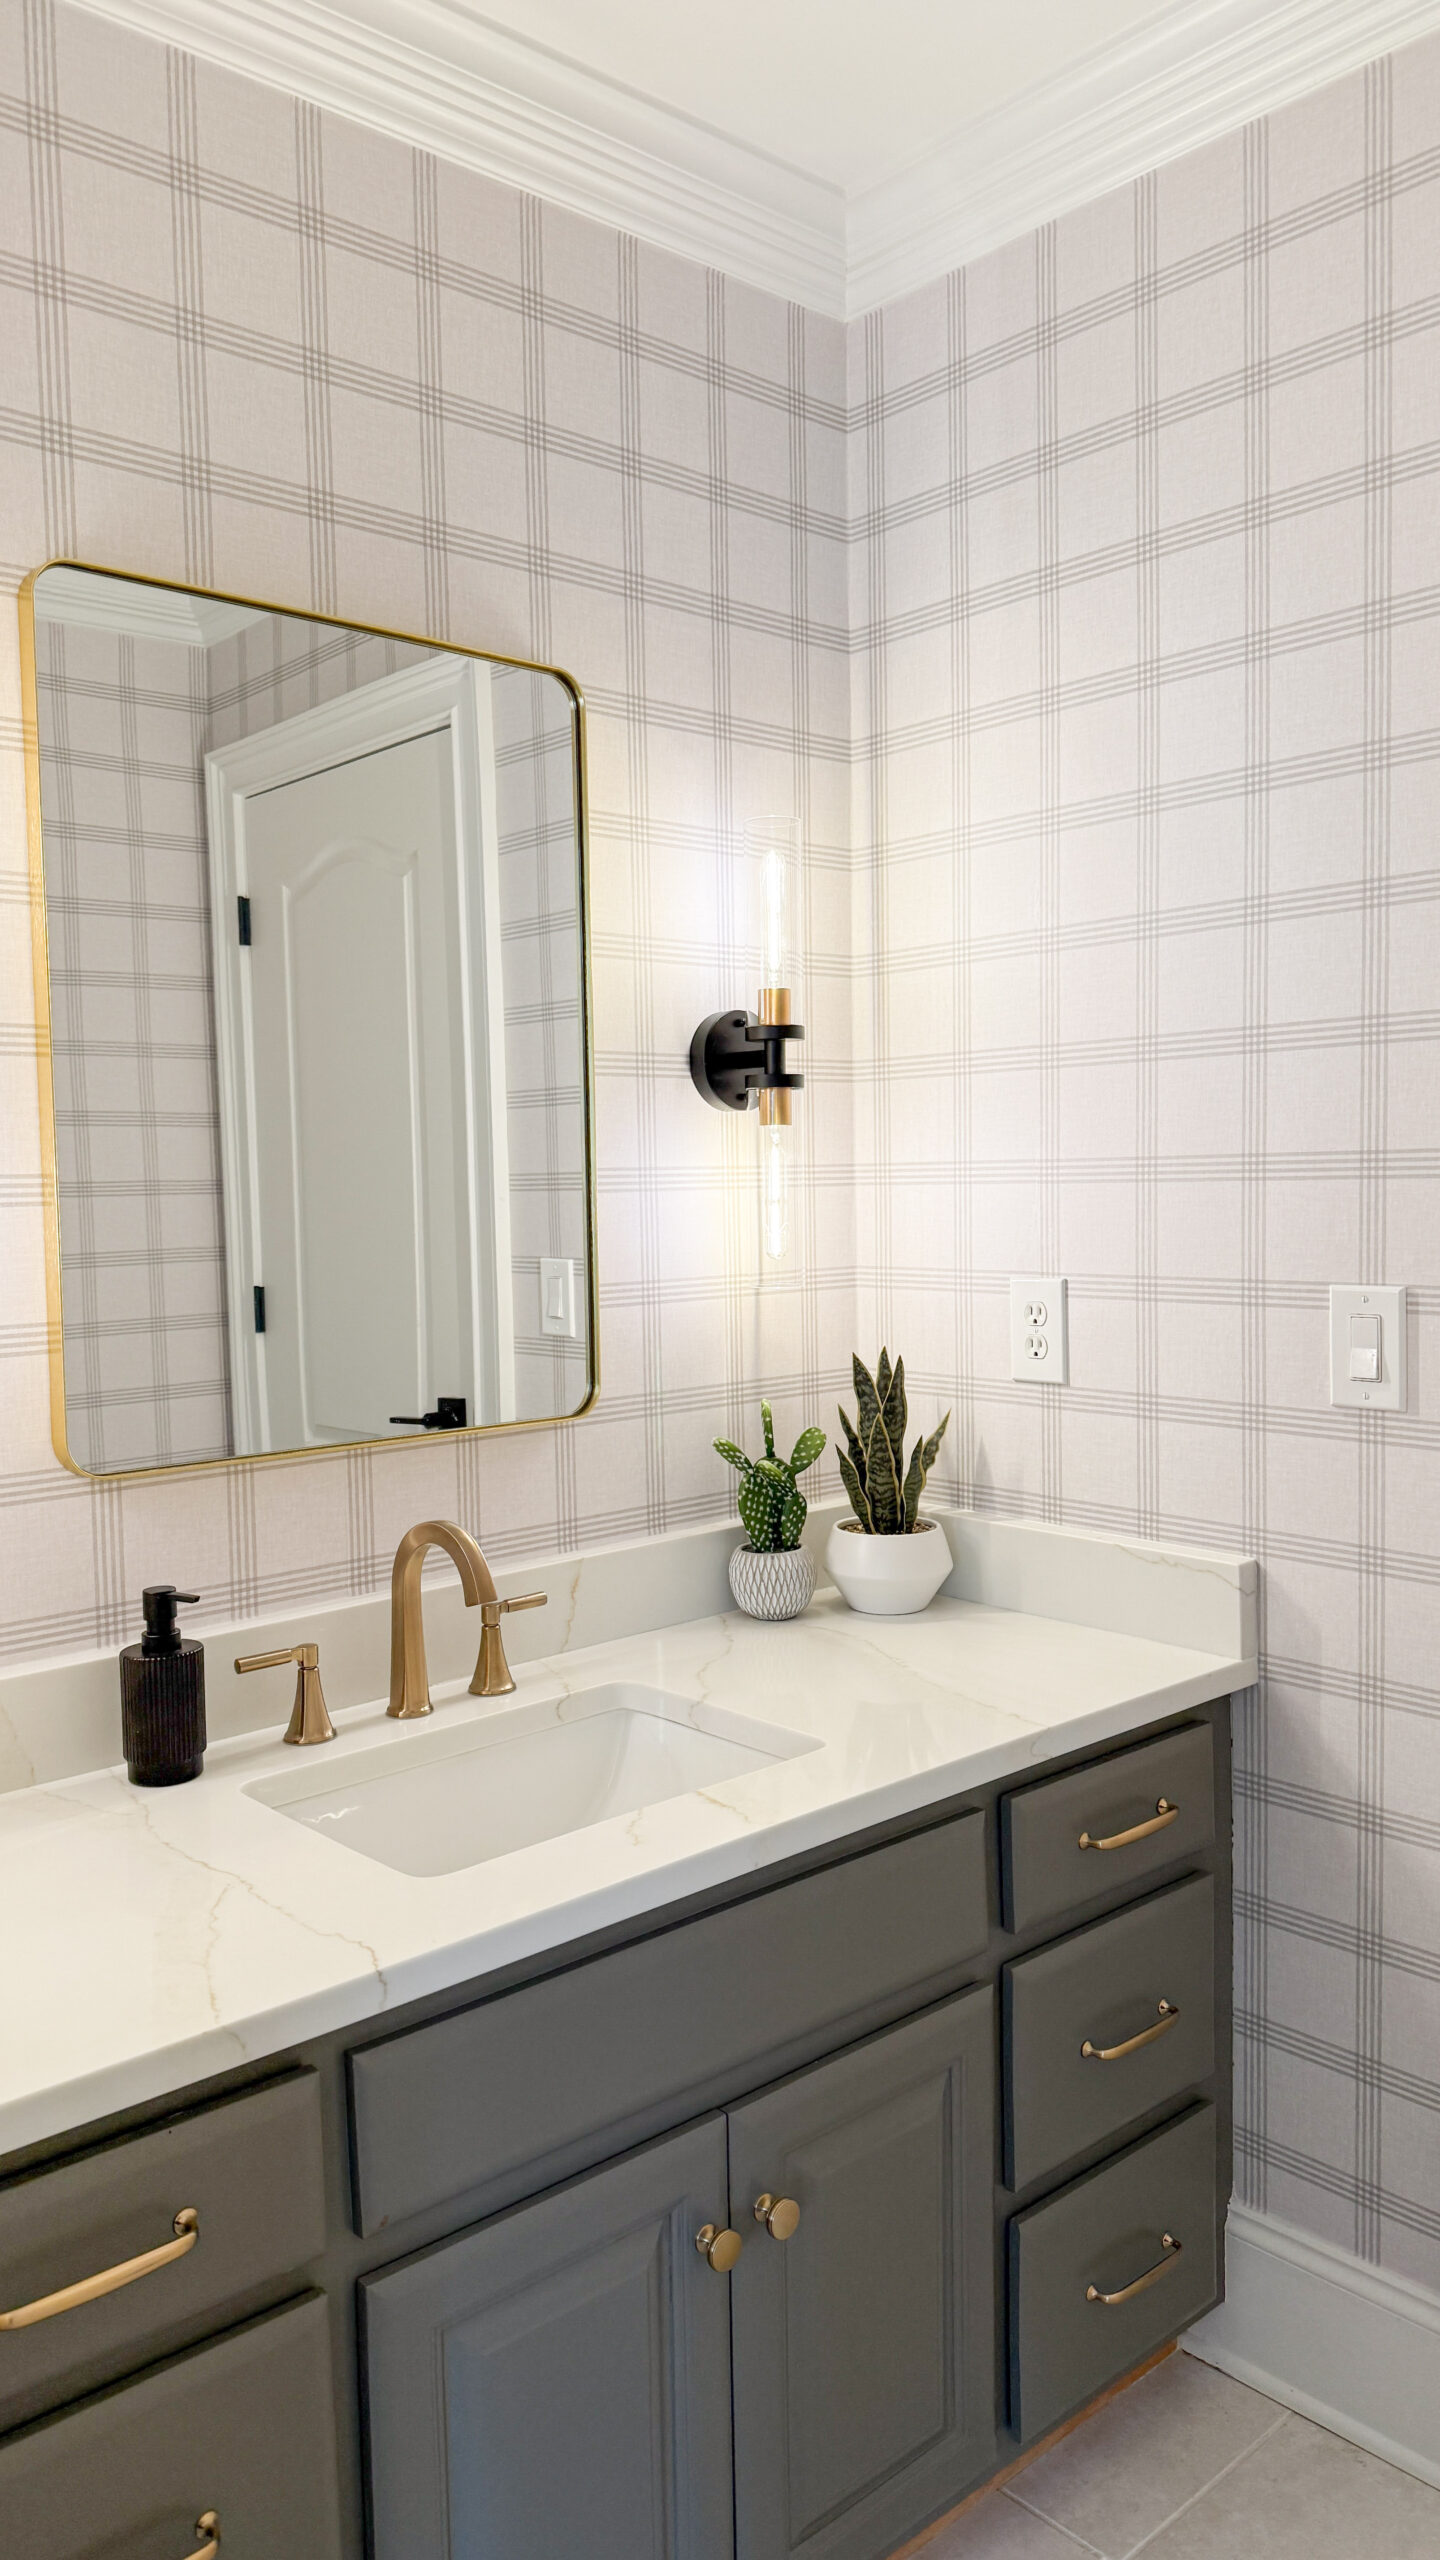
Time for the first coat of paint! I decided to use Behr Cabinet, Door, and Trim paint in satin. The paint color is called Slippery Shale! I rolled my paint on with a foam roller. I painted the first coat, let it dry for 2 hours and then applied the second coat.
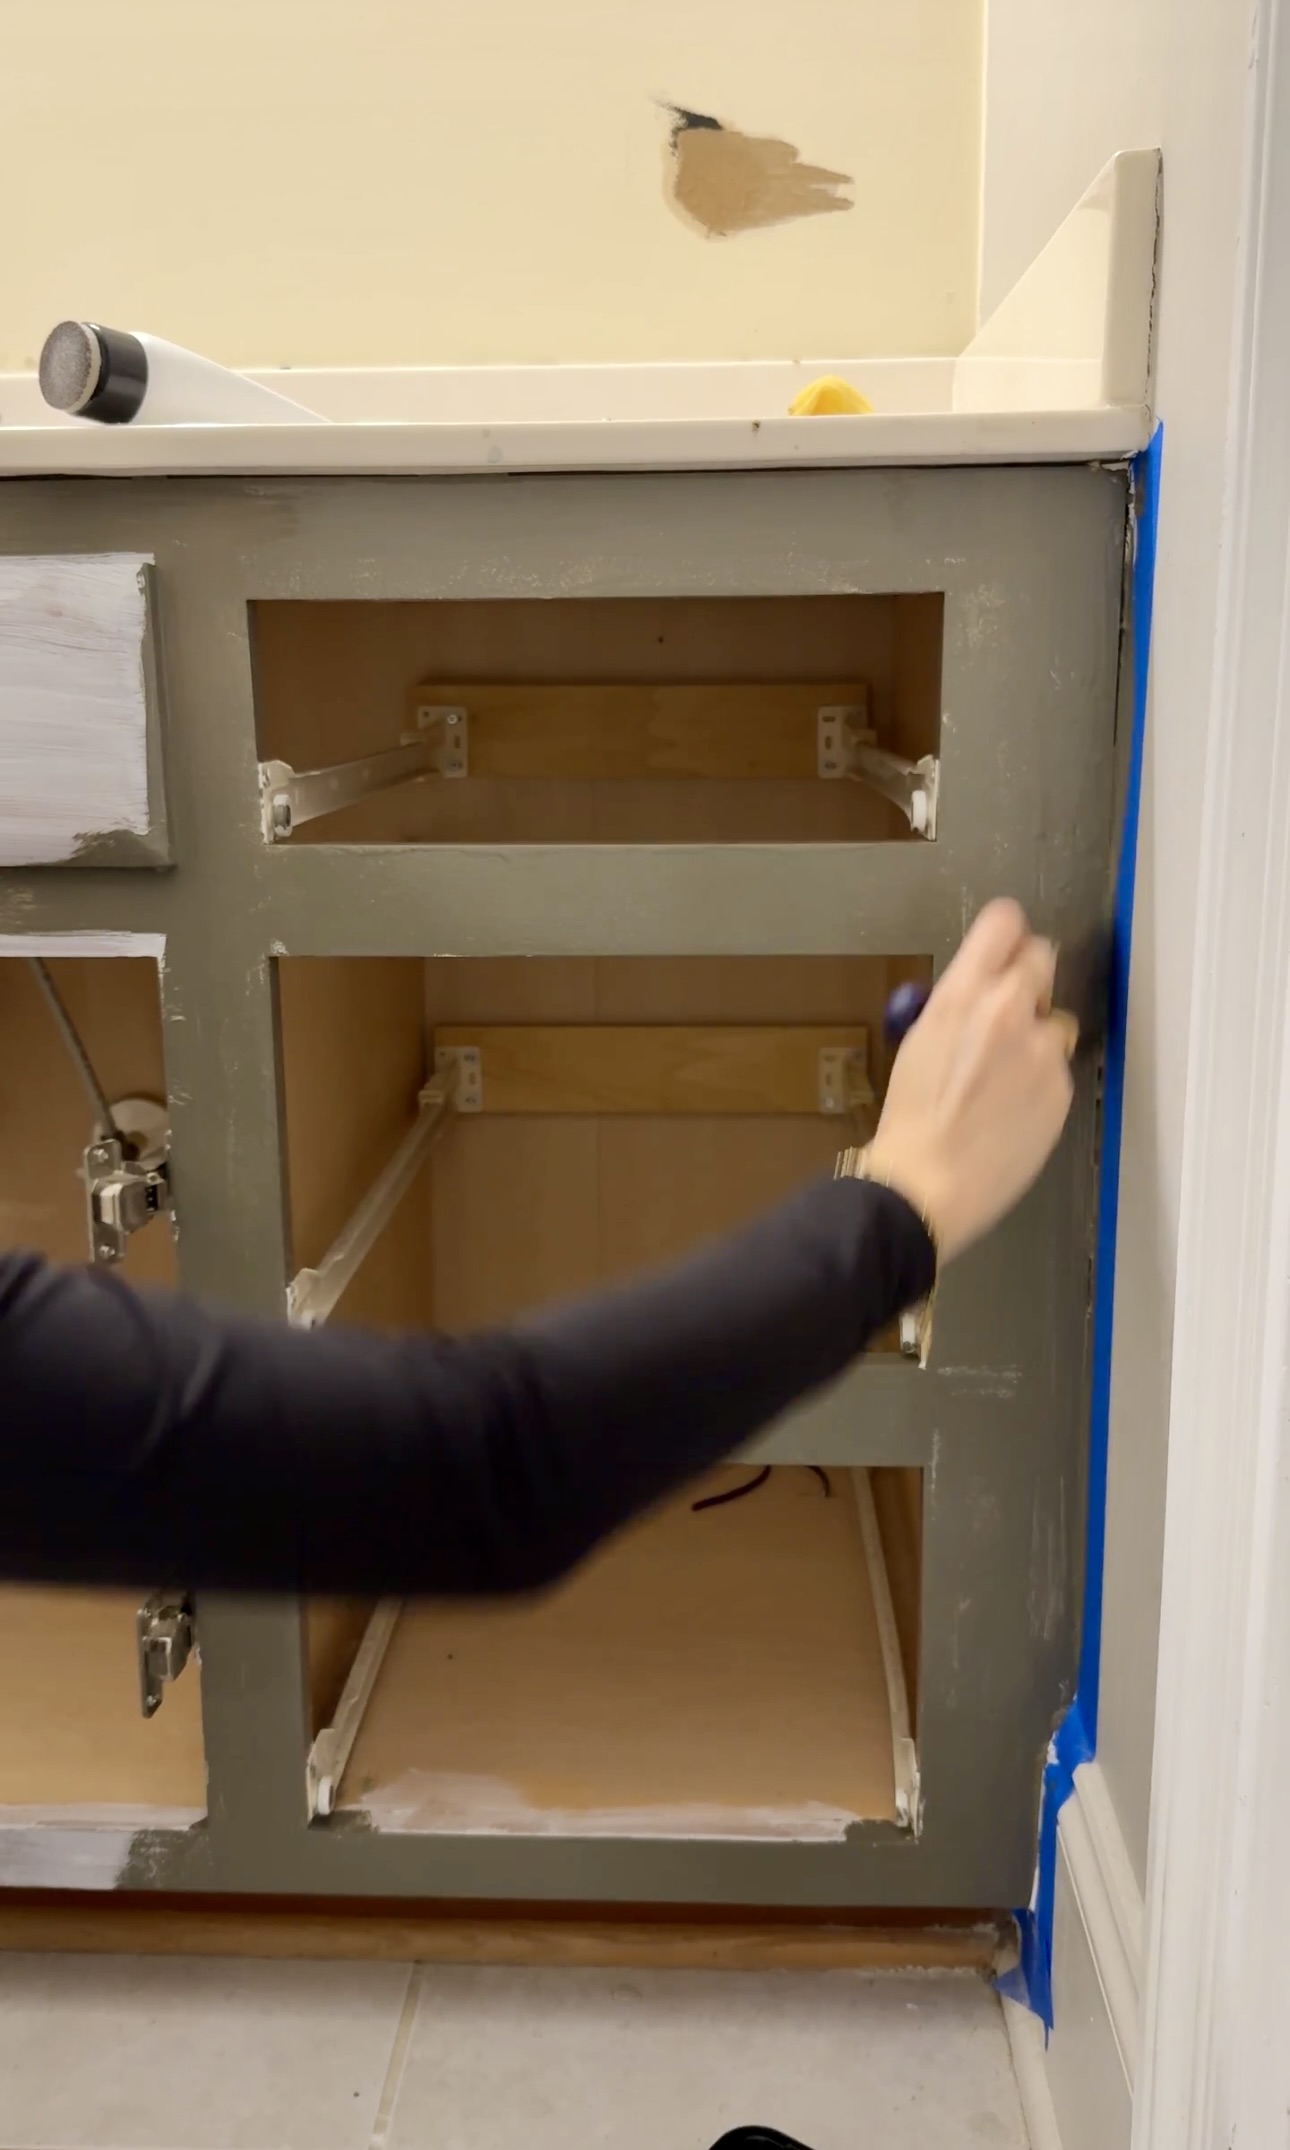
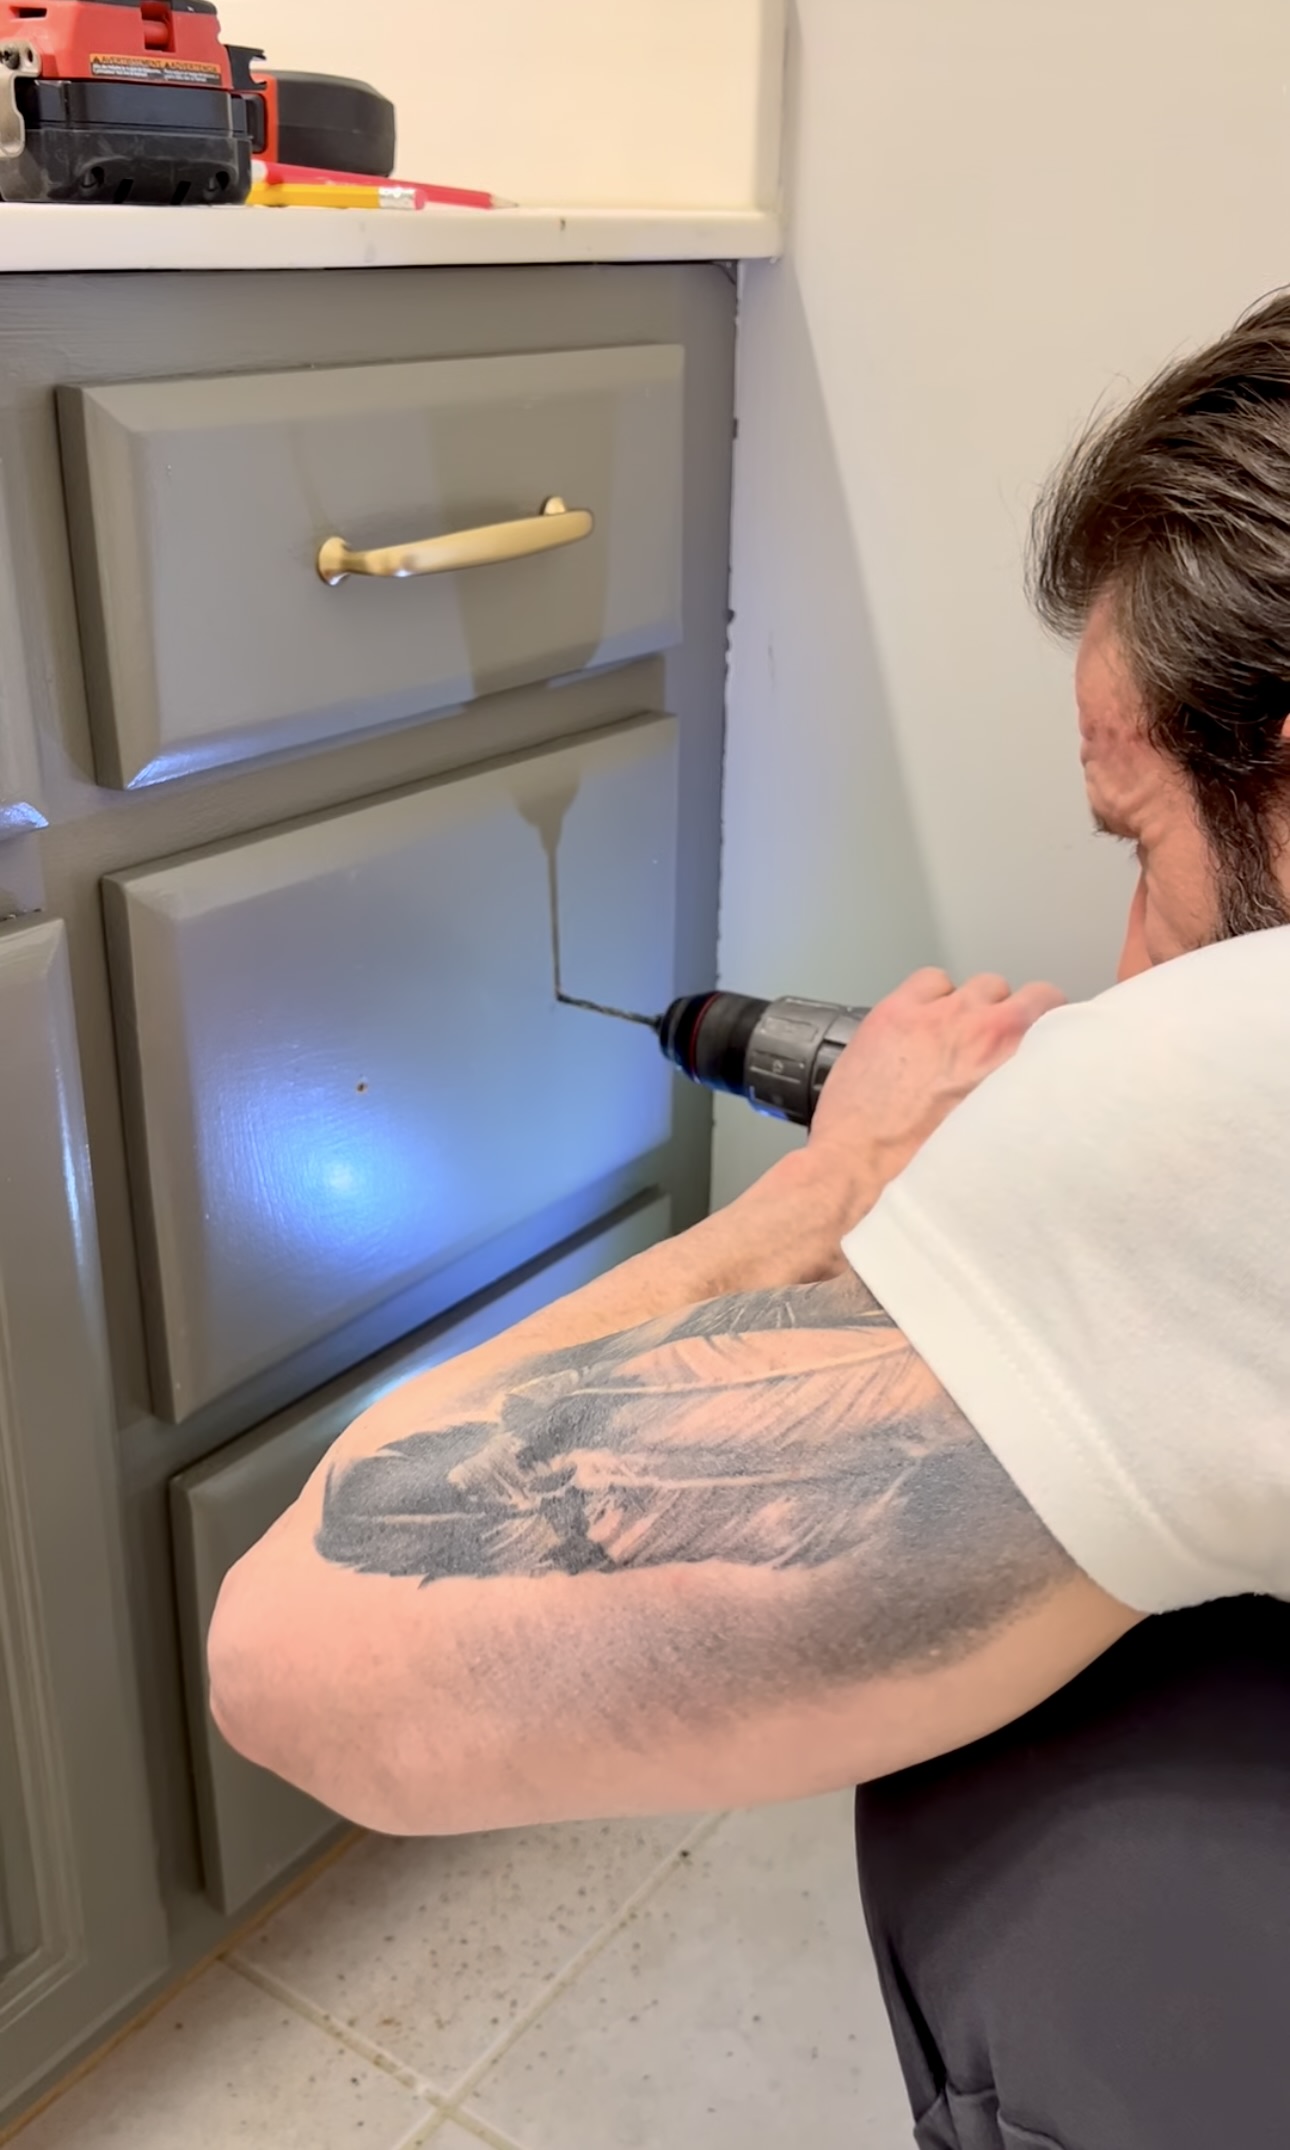
Then, we reinstalled the drawer and cabinet fronts.
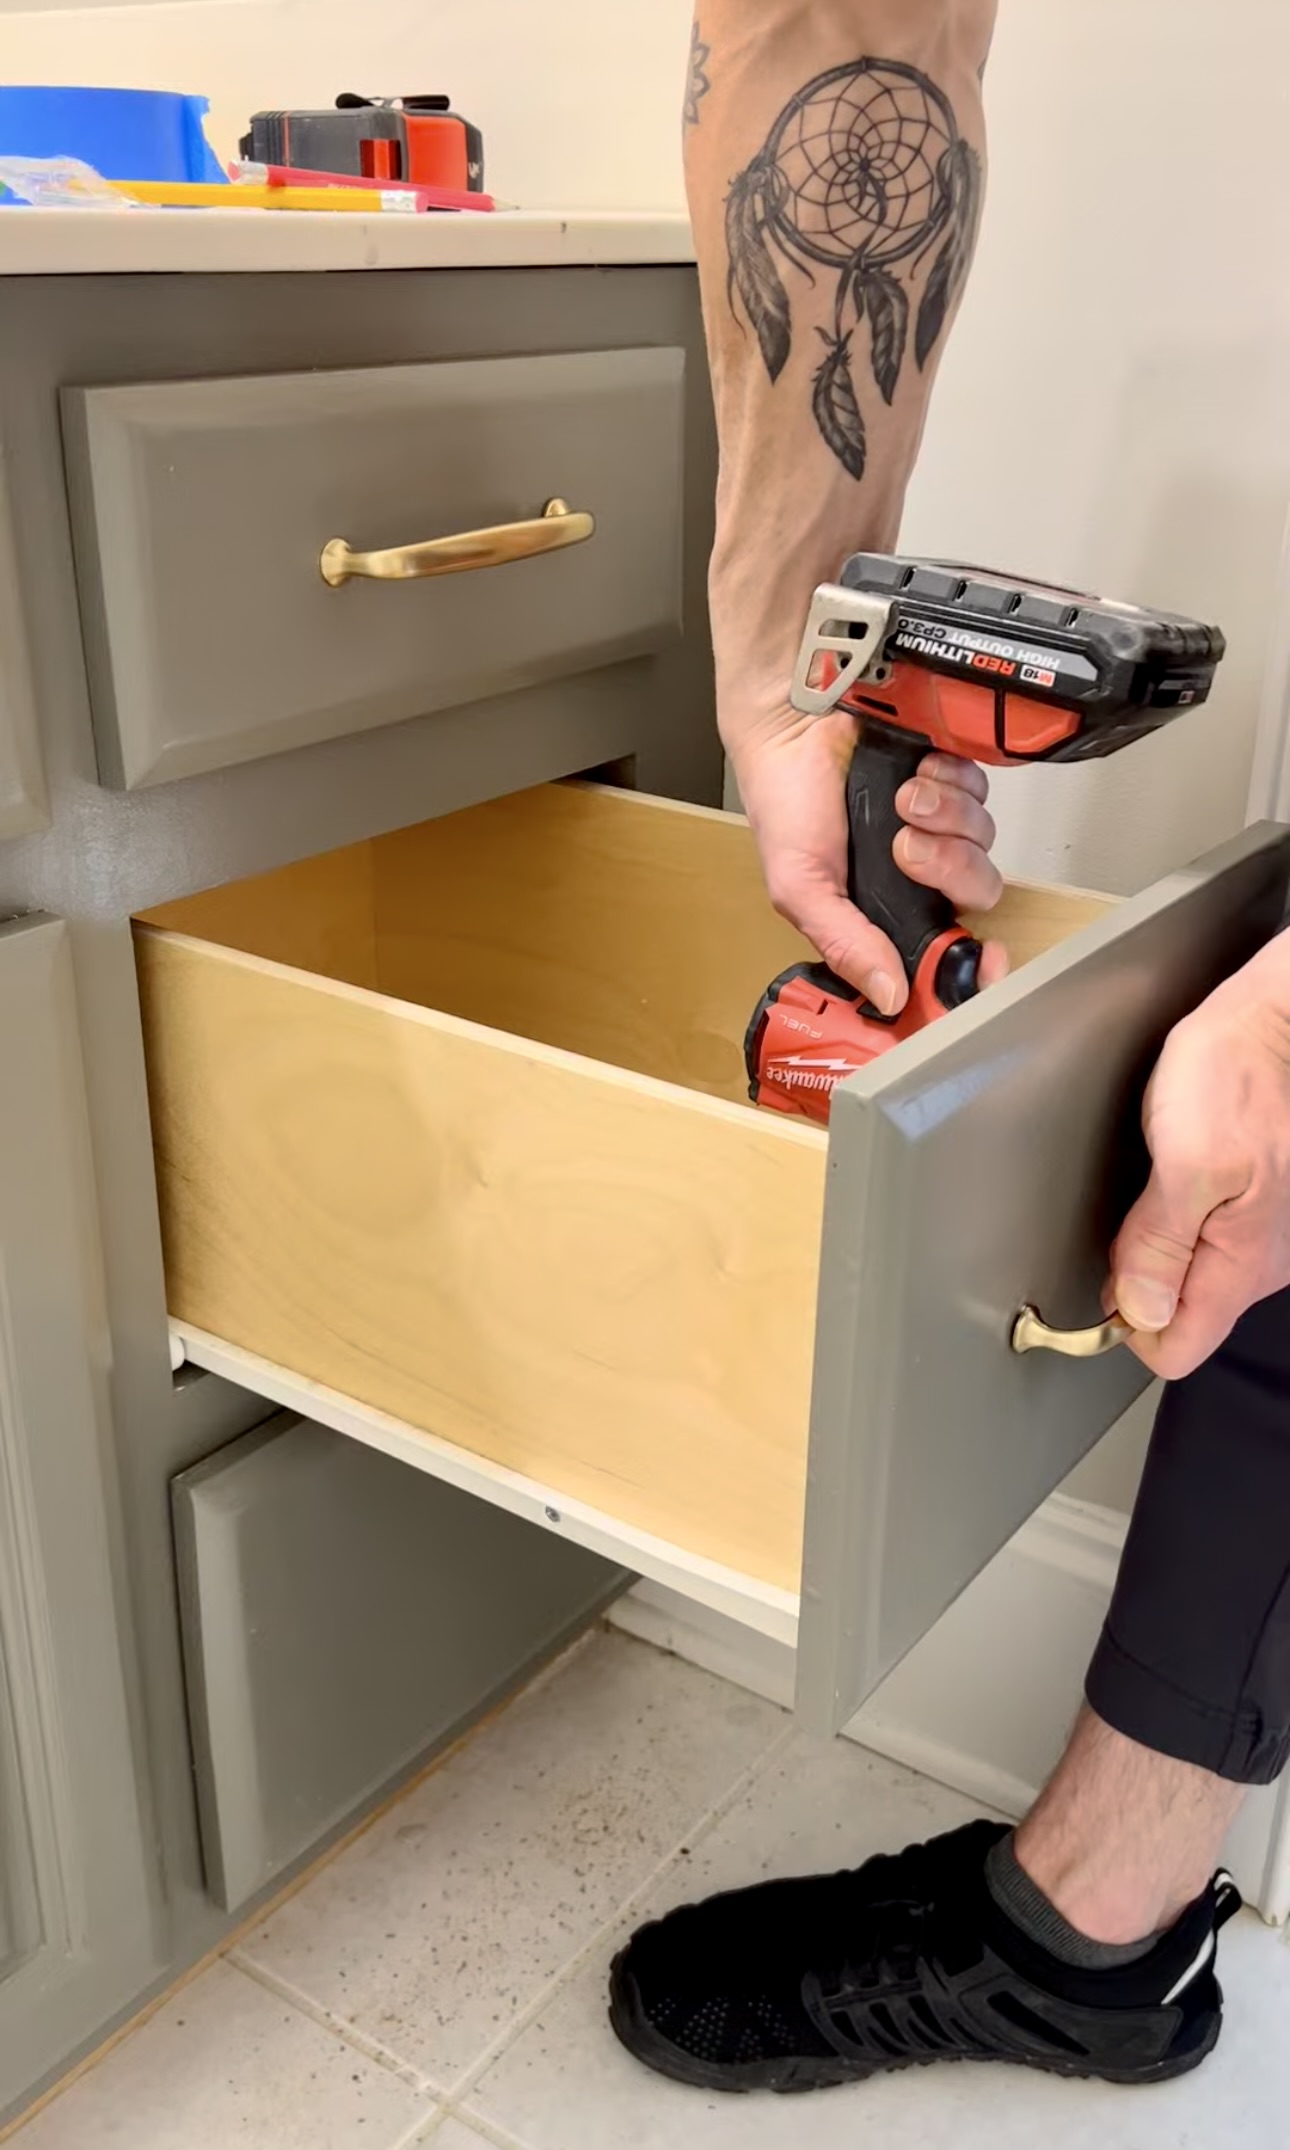
Hardware
Once the drawer and cabinets fronts were installed, we put the new drawer pulls and cabinet knobs on! We used this hardware jig (life saver) to make sure everything was evenly spaced.

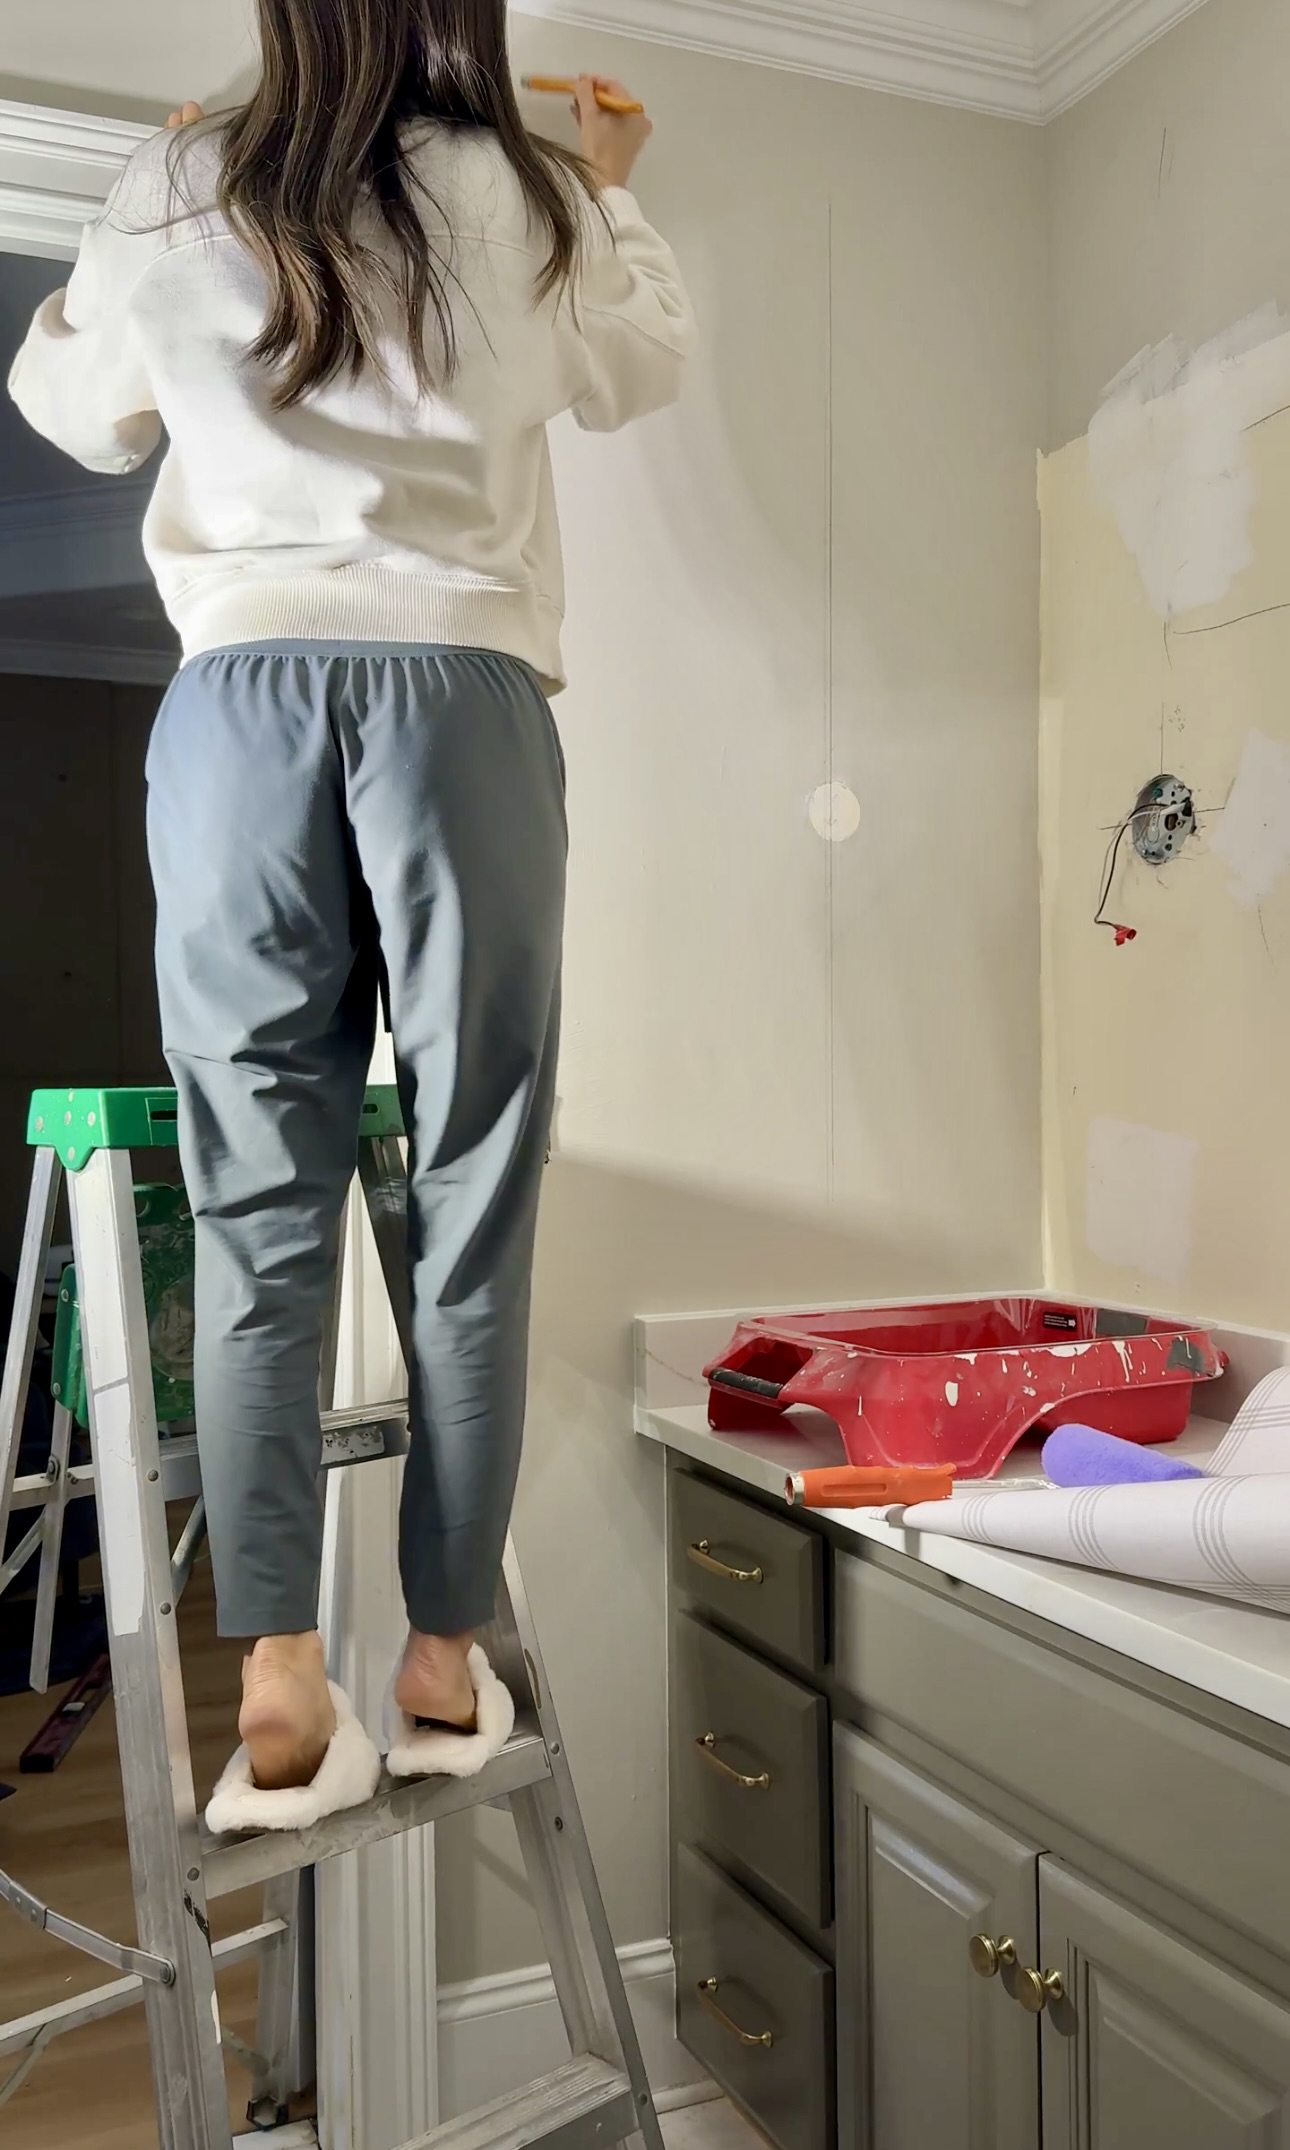
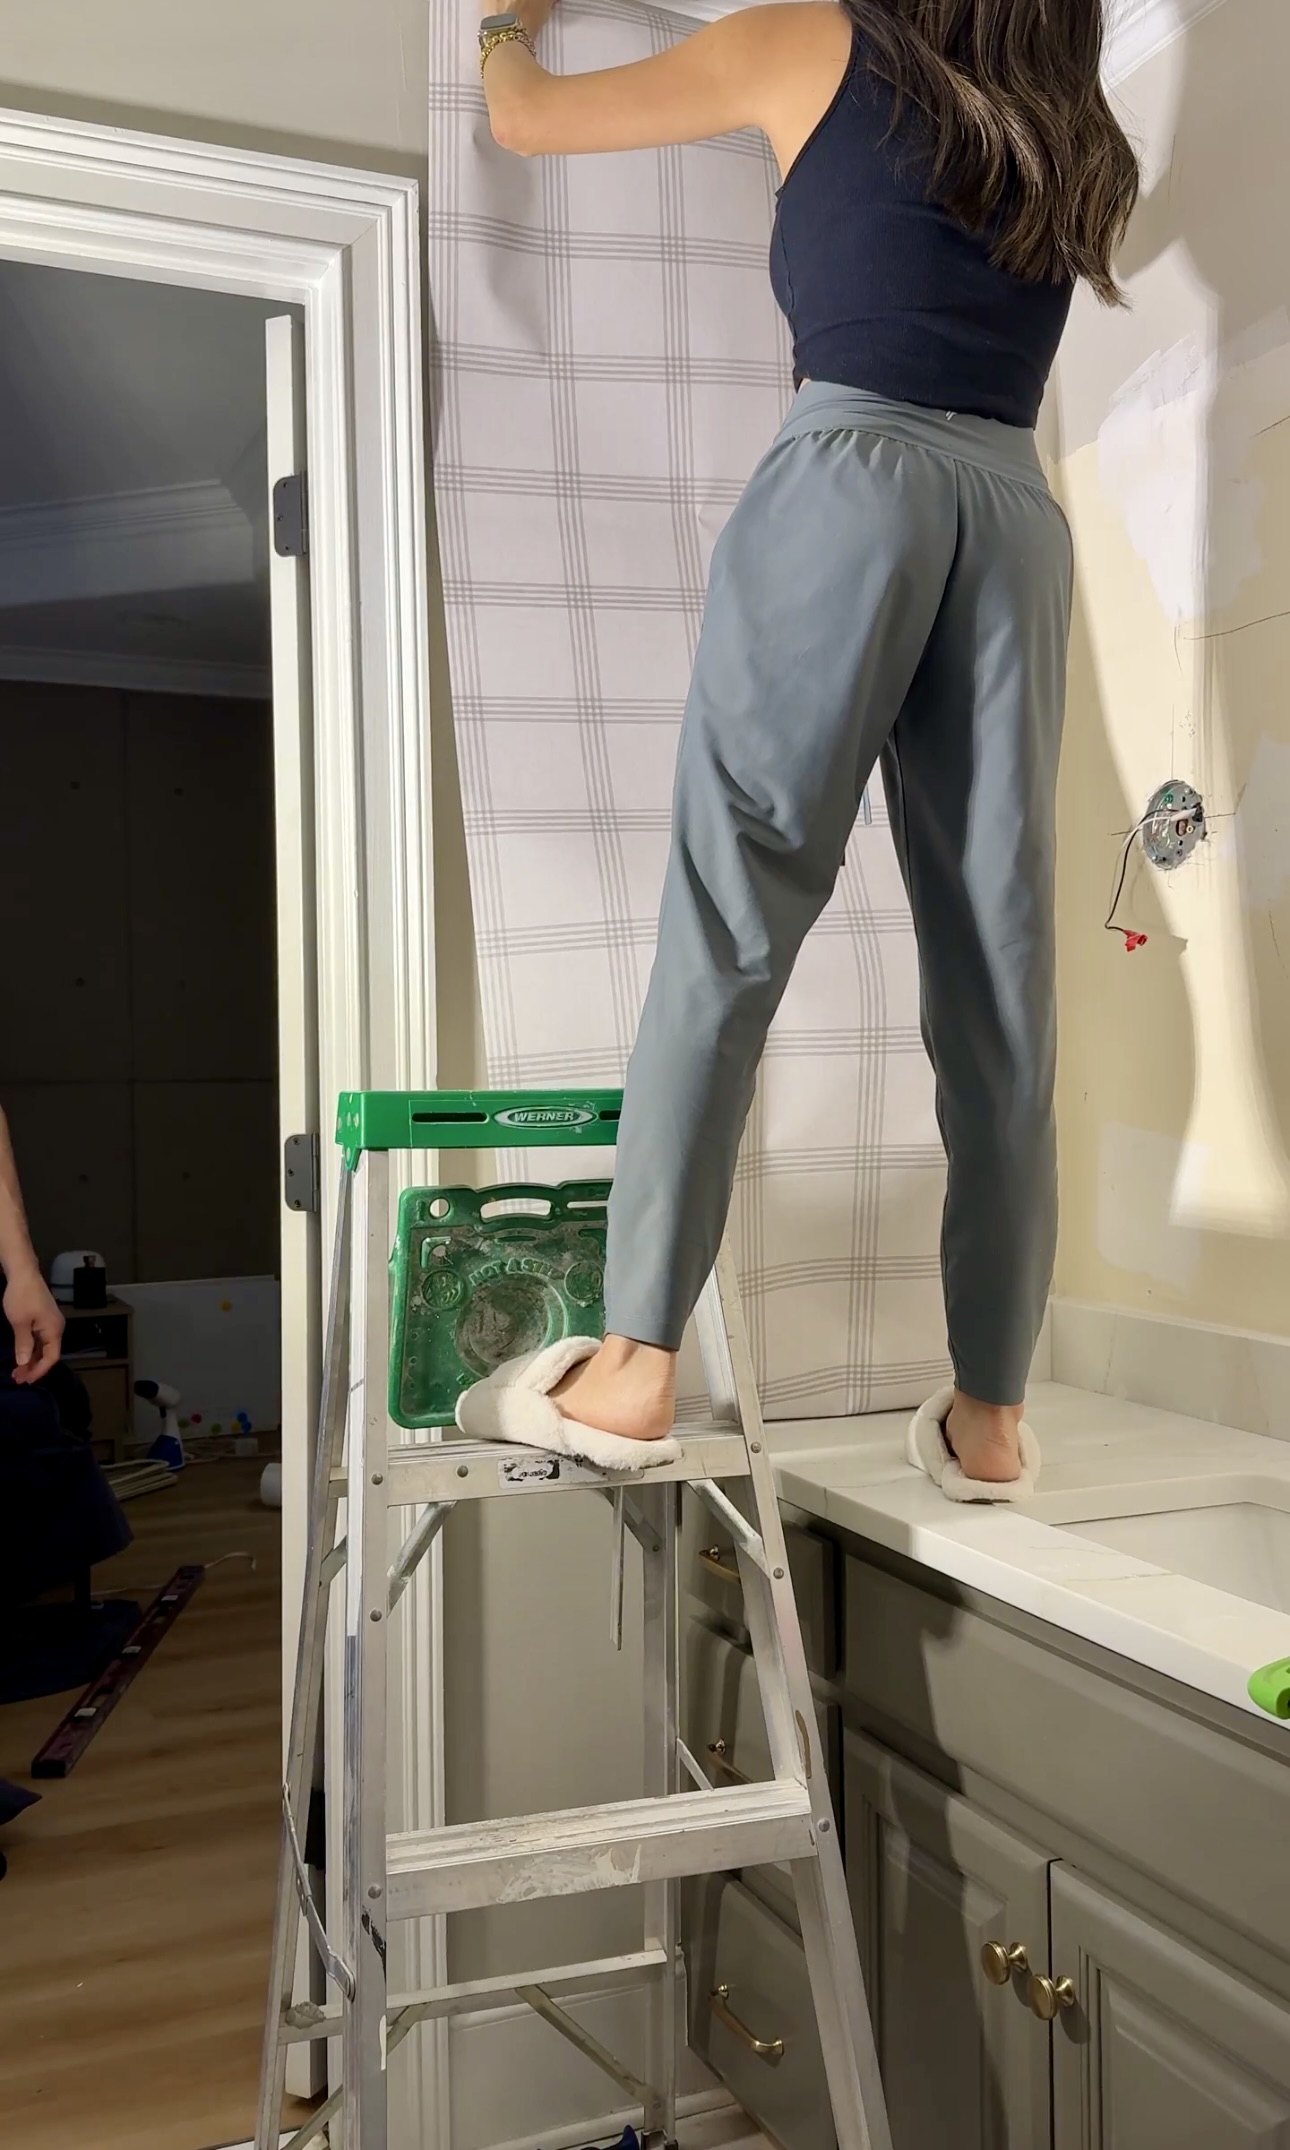
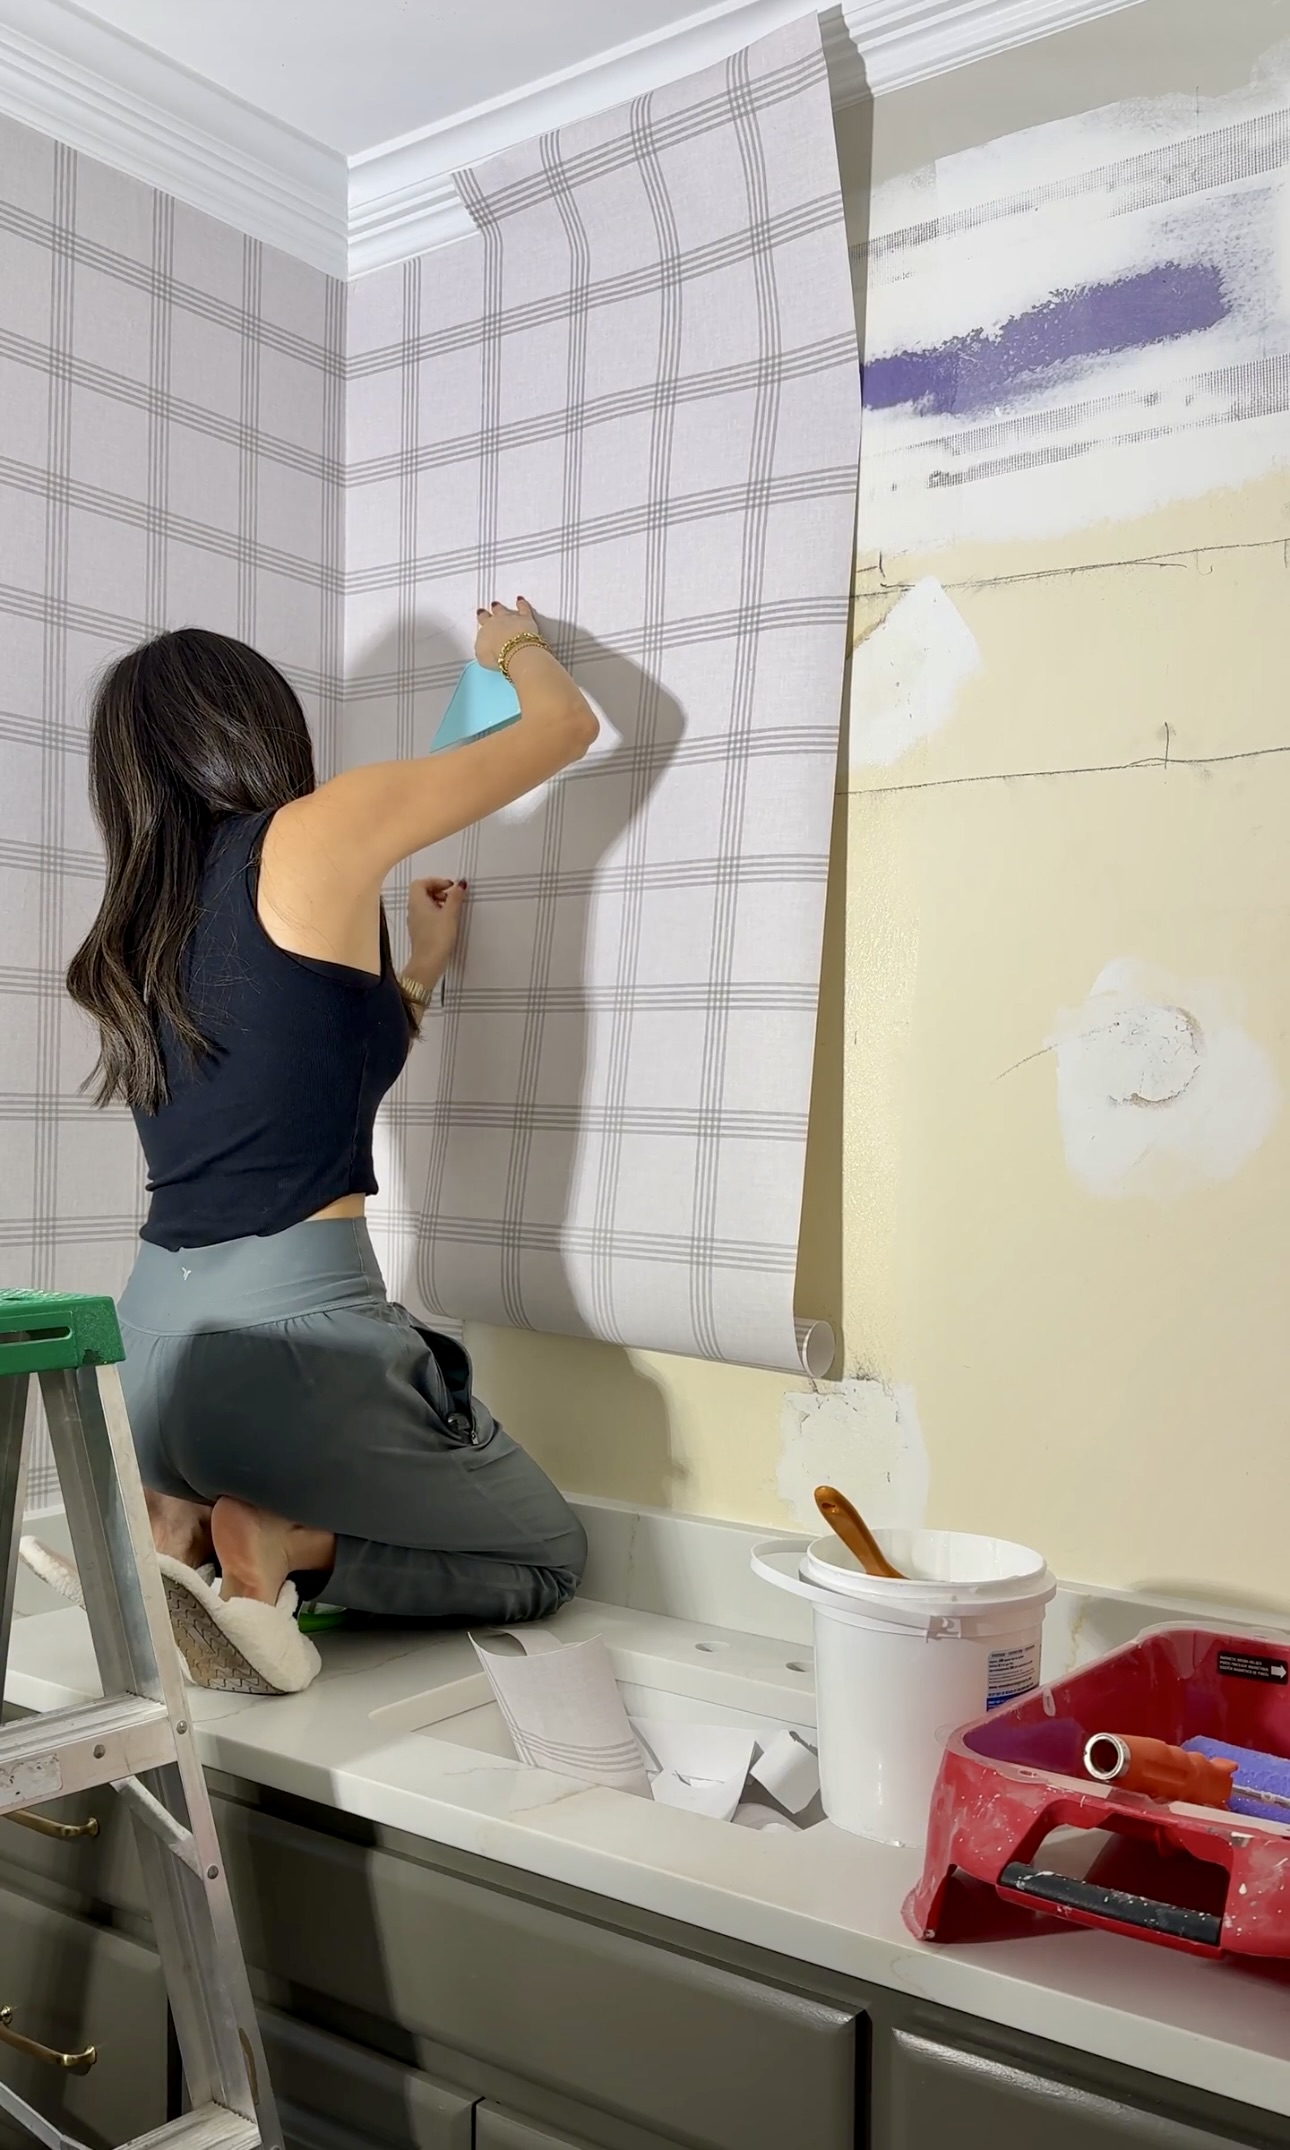
Wallpaper
I’ve done wallpaper a few different times. I actually prefer pasted wall paper over peel & stick since you can’t adjust that as much. When you’re starting wallpaper, you want to work left to right and start in the least noticeable corner. Draw a line and make sure you’re line is level – since trim lines usually aren’t perfectly level.
I poured the paste into my tray and got working. You want to make sure you have excess paper when you cut just in case. I put the paste on the edges with a brush and then used a roller for the rest of the wall. Then, you hang your wallpaper following the line you drew!
This is Chesapeake Twain Plaid wallpaper in the shade Dove.
I also recently installed some wallpaper in my daughter Tatum’s bathroom and it looks so good. Check it out here in this blog post!
Then we installed new lighting, new mirrors, and new faucets!
Bathroom renovations don’t have to be expensive, and they don’t have to take months to do!
Tools & materials I used for this DIY bathroom makeover: