
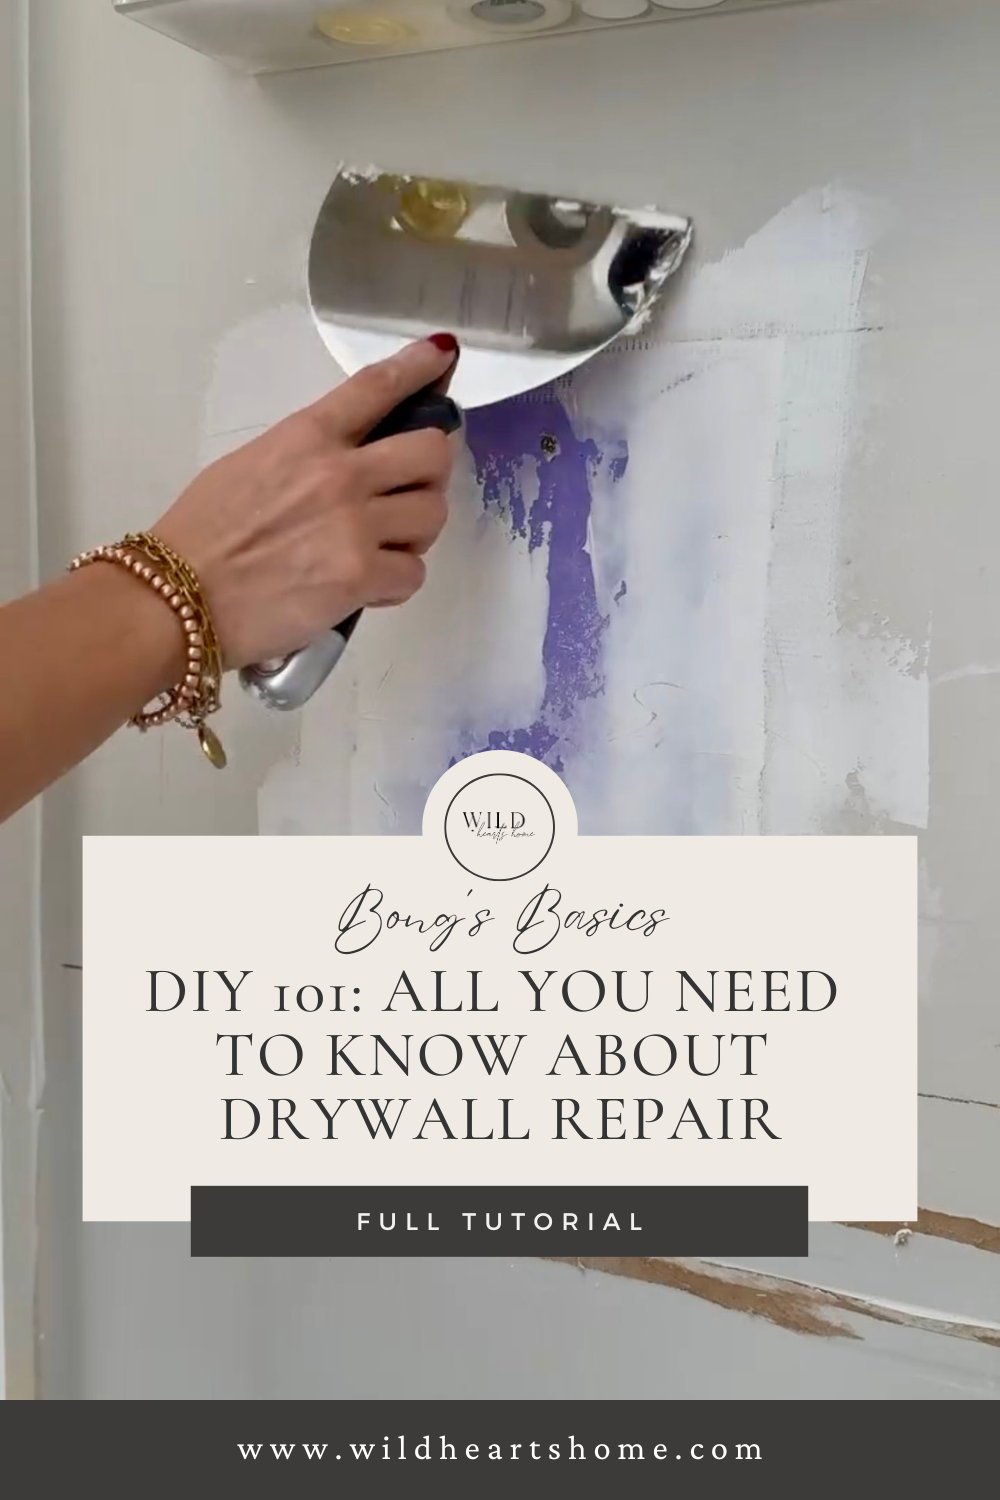
Ever wondered how to fill a gaping hole in your wall with drywall? I’ll show you how! Here’s everything you need to know about drywall repair!
Here’s what you’ll need:
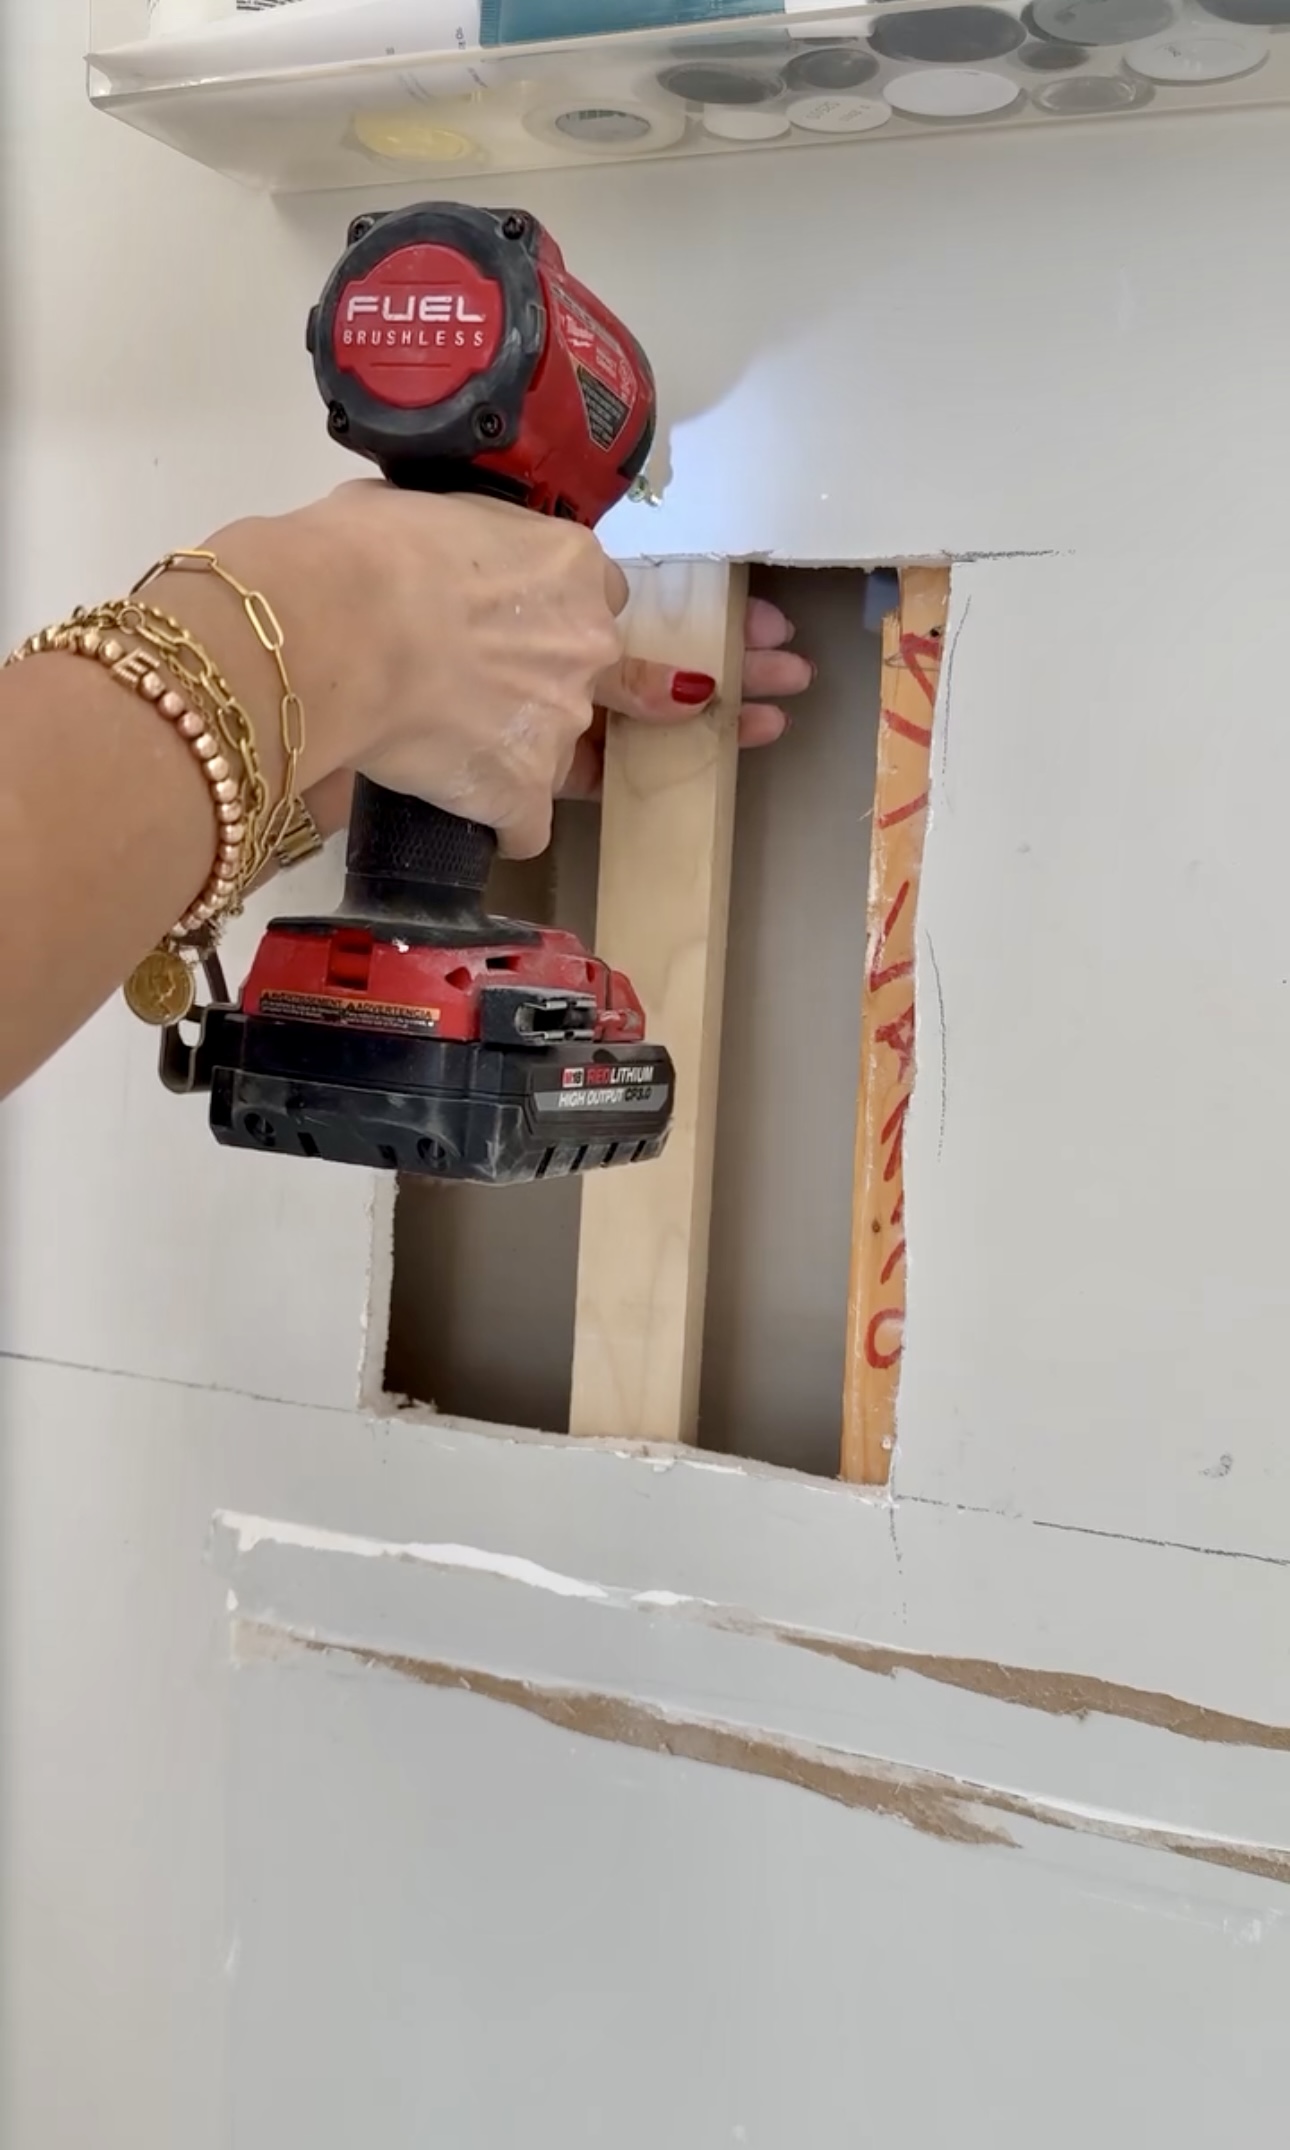
The new drywall needs support from the back. I used scrap wood that I found and secured it with screws from the outside on the top and bottom. You will want to hold the wood in place while you screw it.

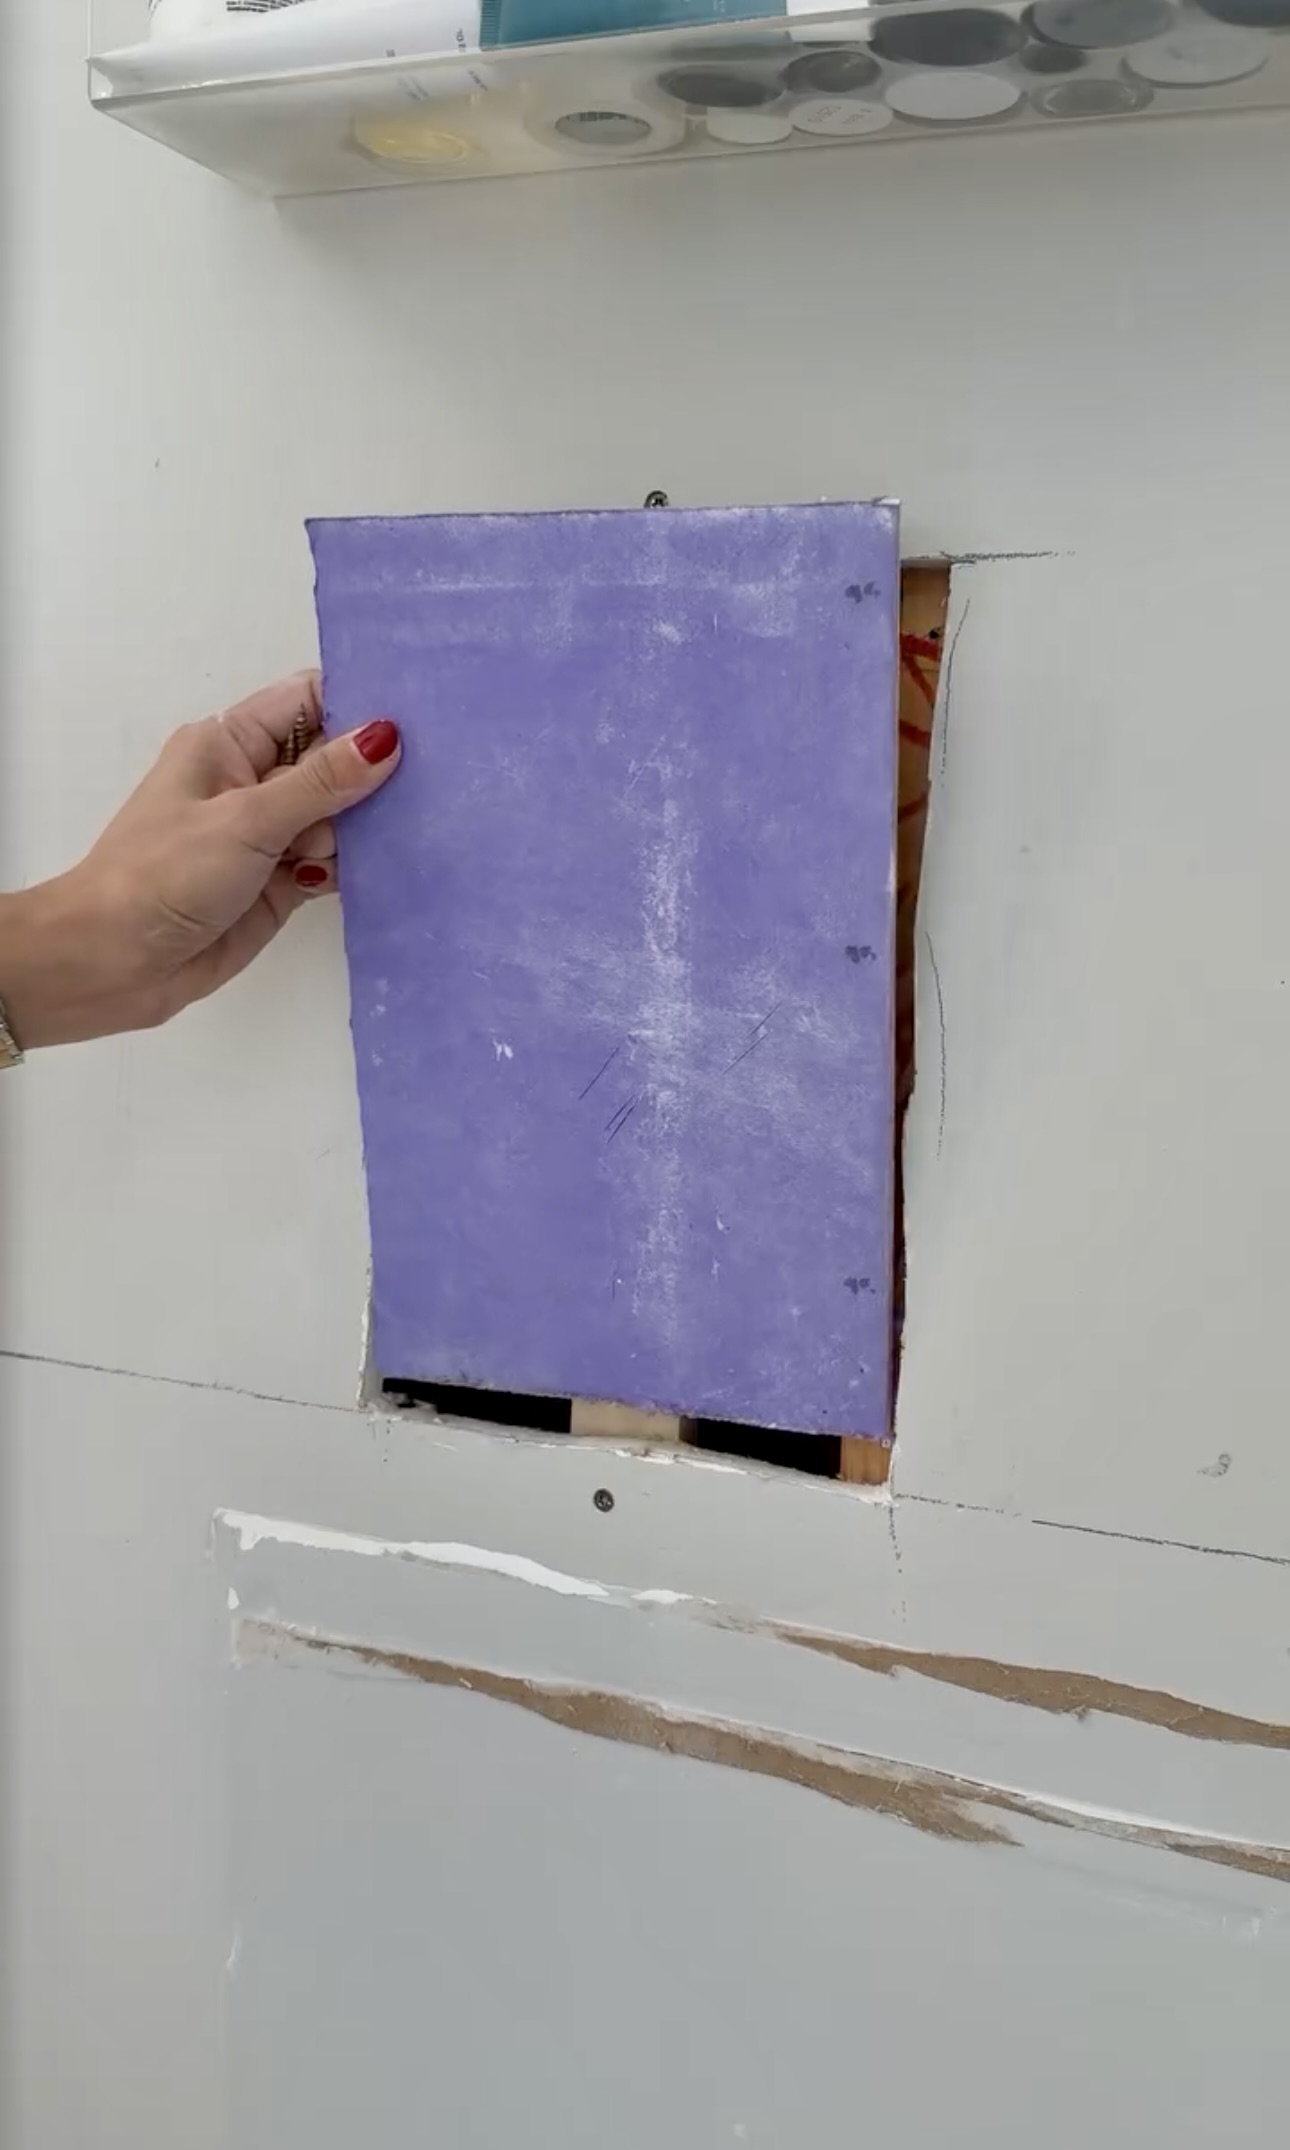
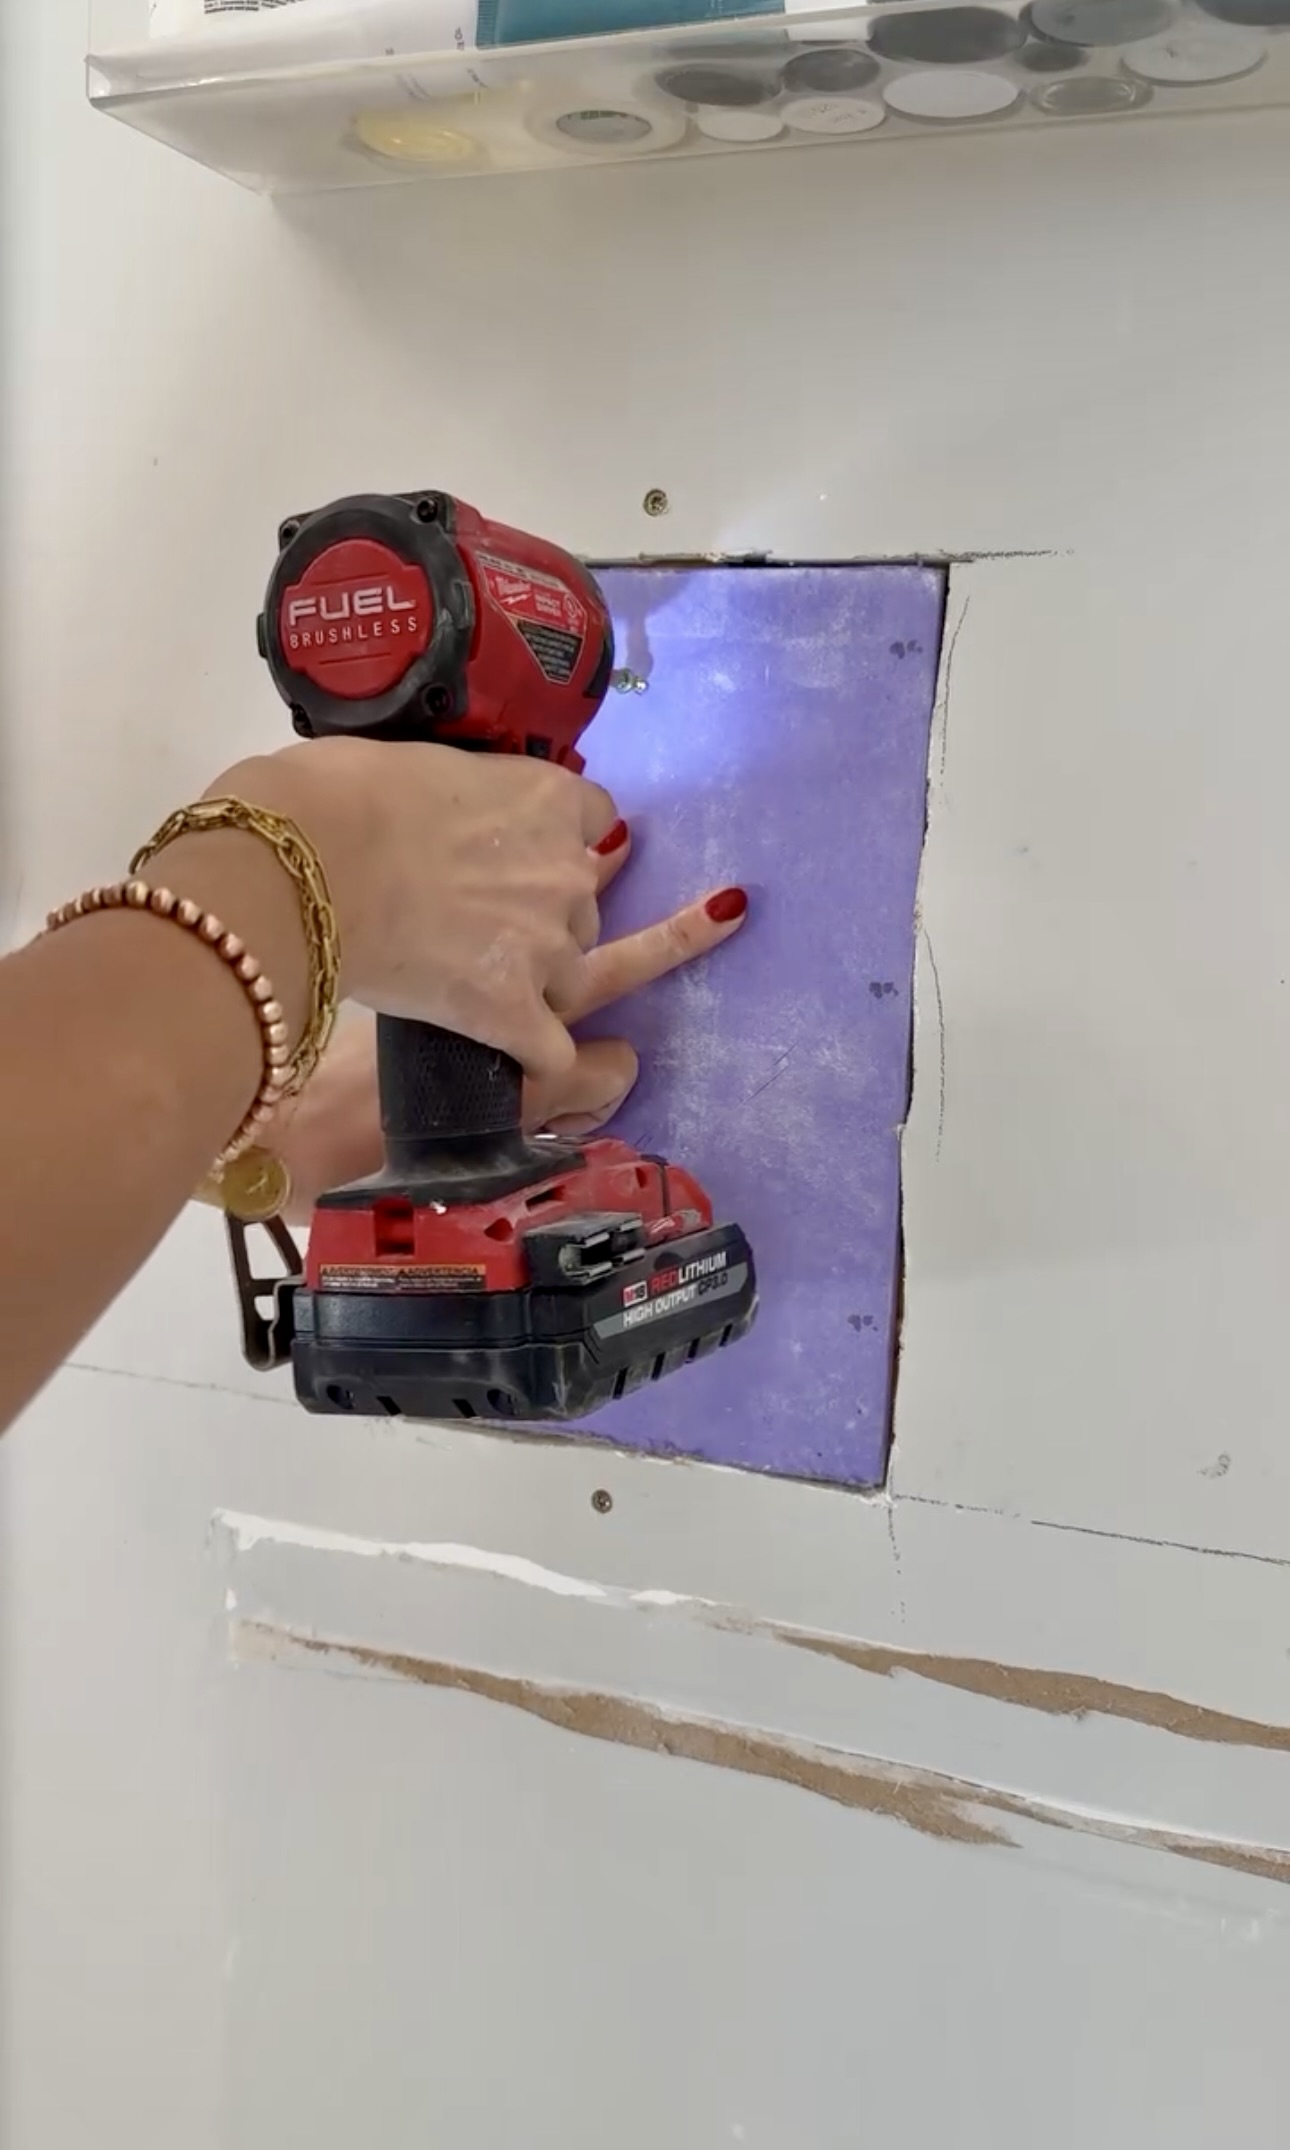
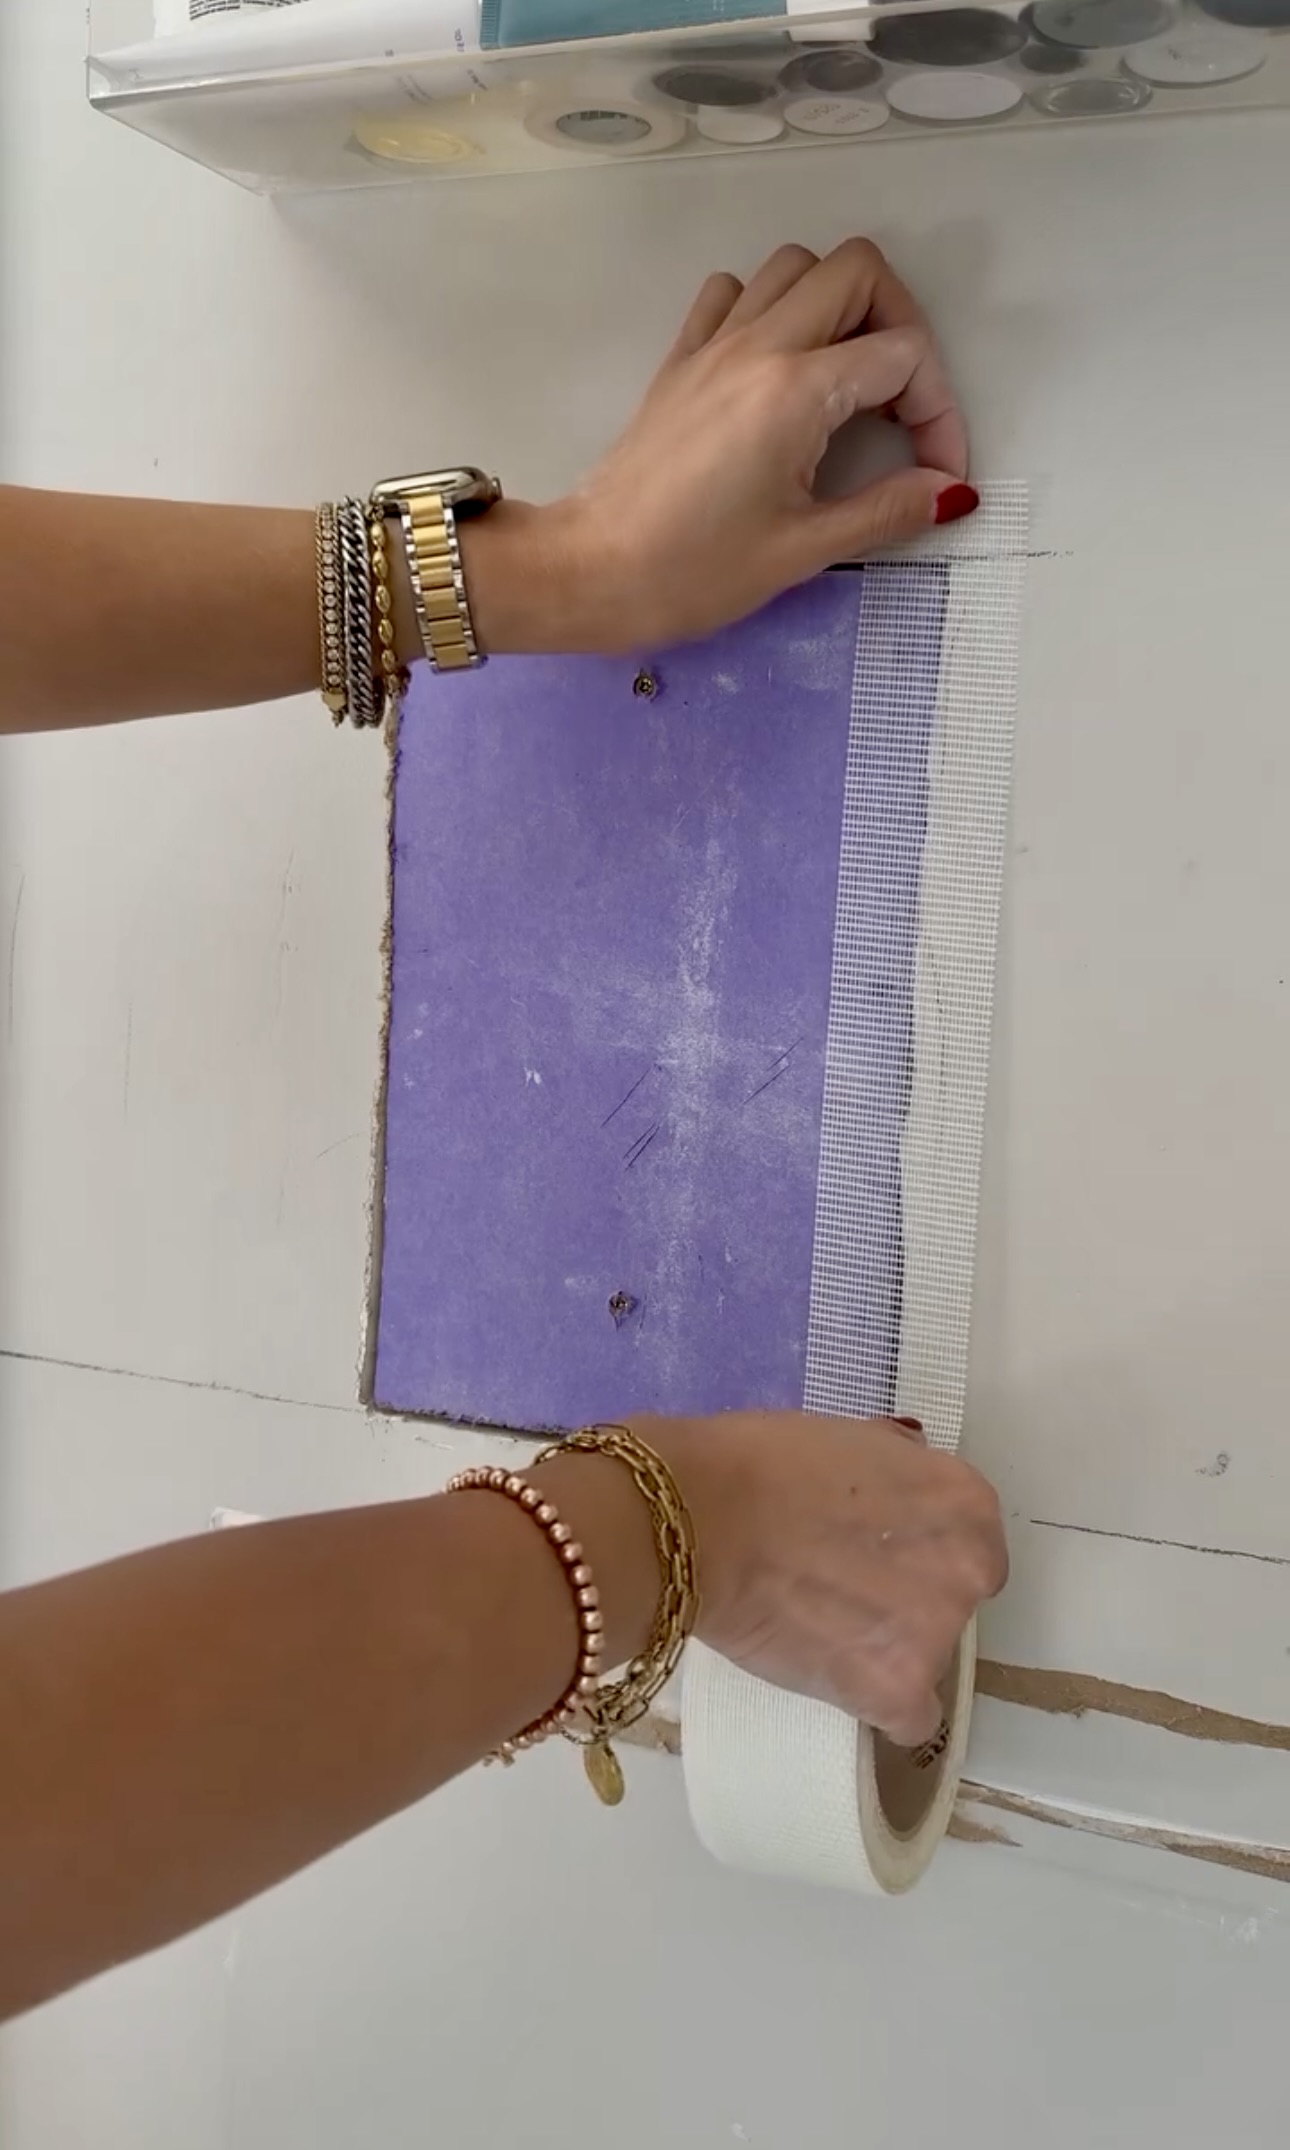
Then, I grabbed a new piece of drywall and cut it to size! Just so you know, you’ll probably need to make minor adjustments once you start fitting it to the wall. I then used a couple of drywall screws to secure the new piece into place.
The drywall tape I used is already tacky on the back so I didn’t need to use any joint compound to adhere it to the wall. I put drywall tape on all of the seams and made sure it was flat to the wall.
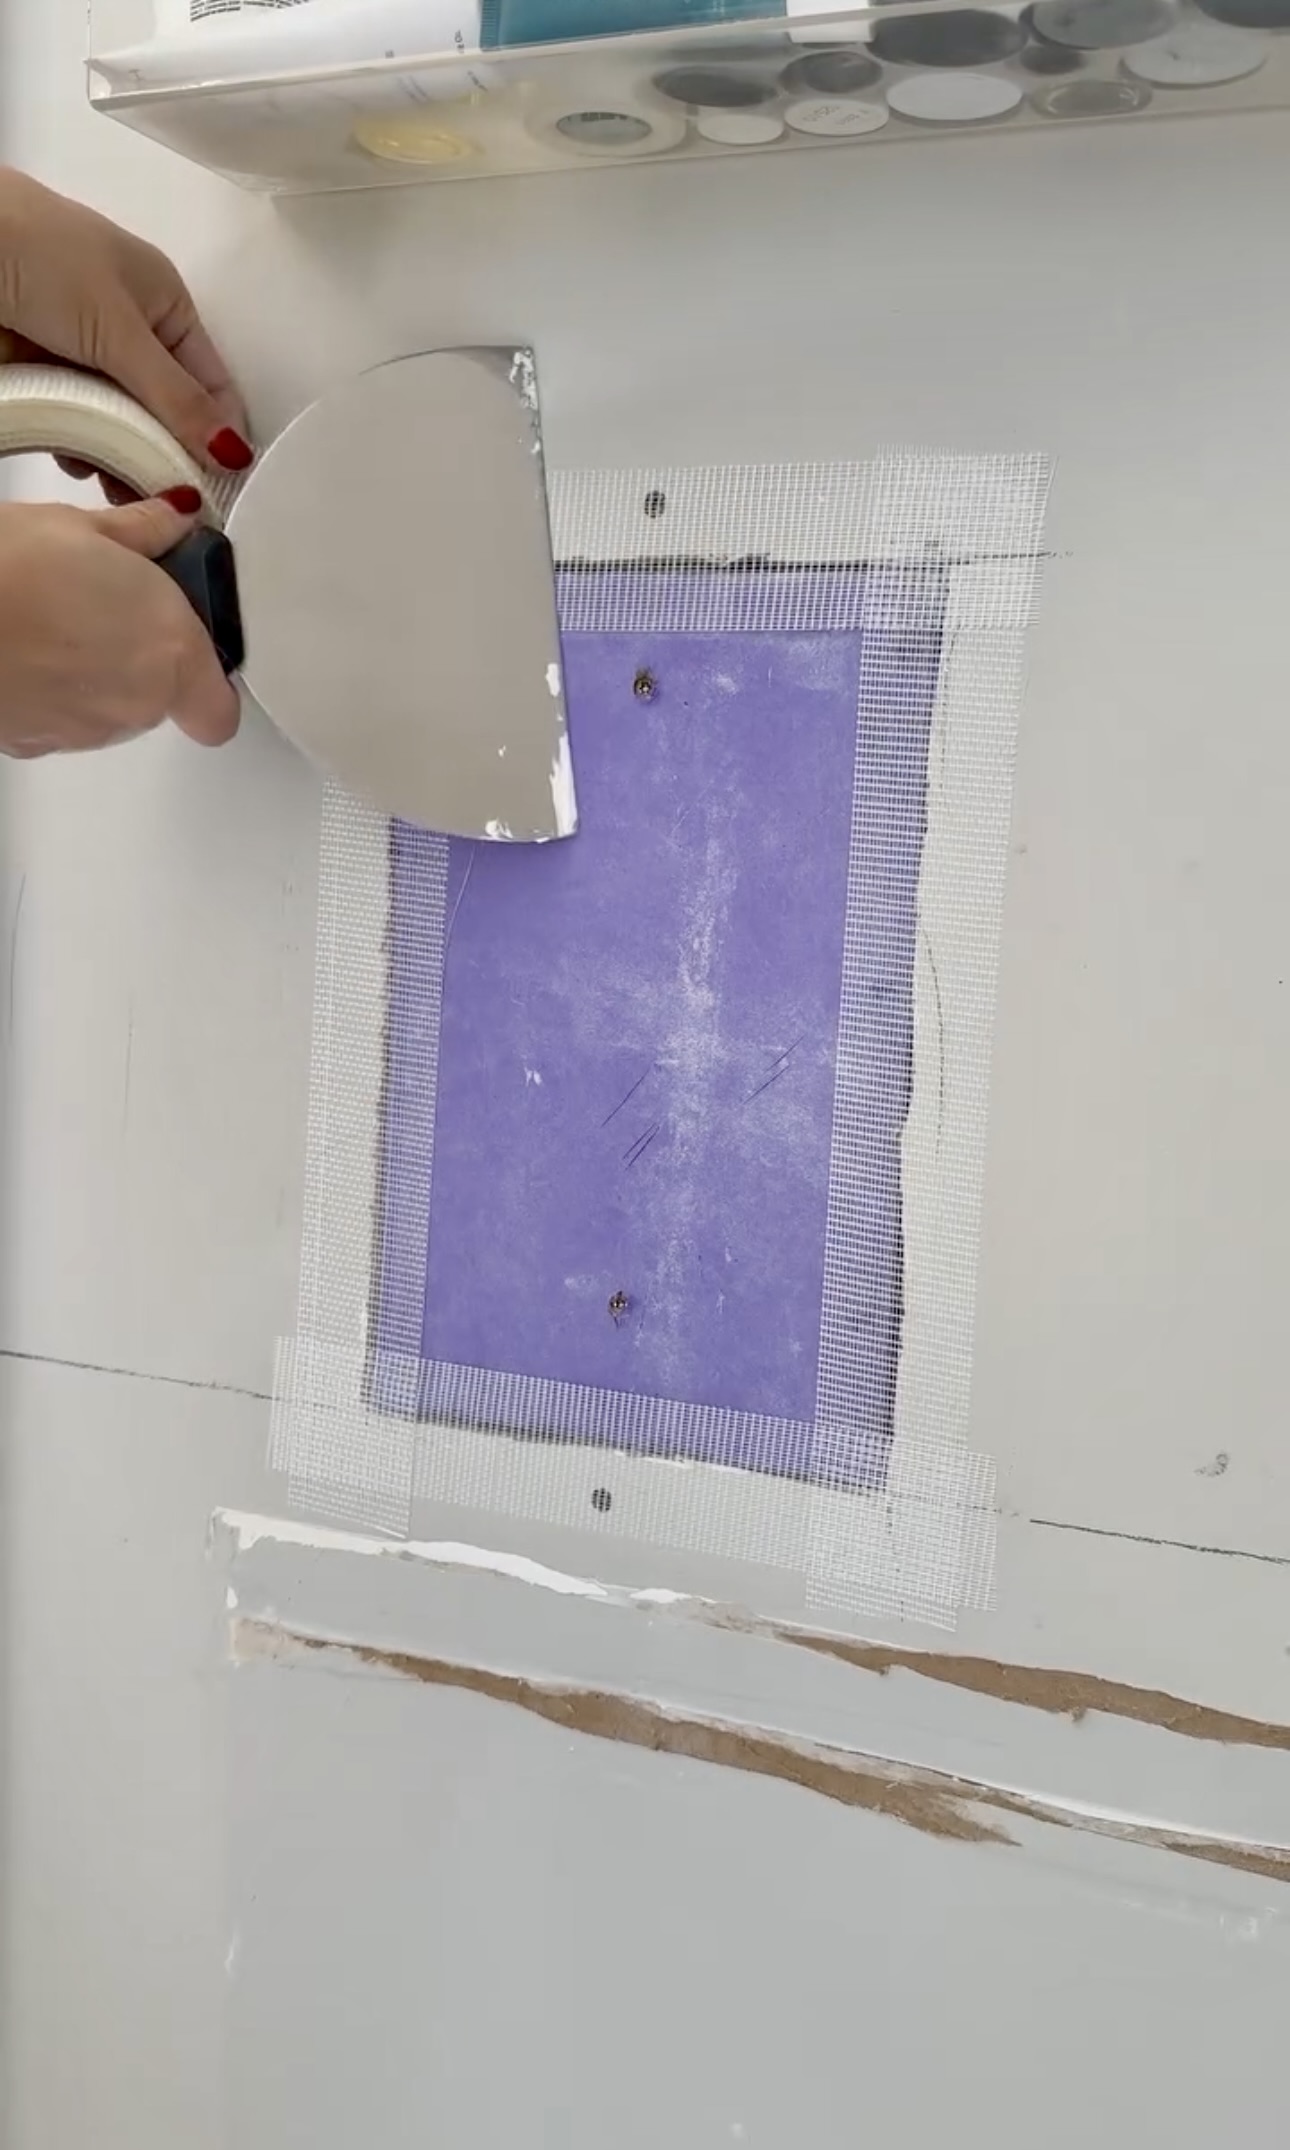
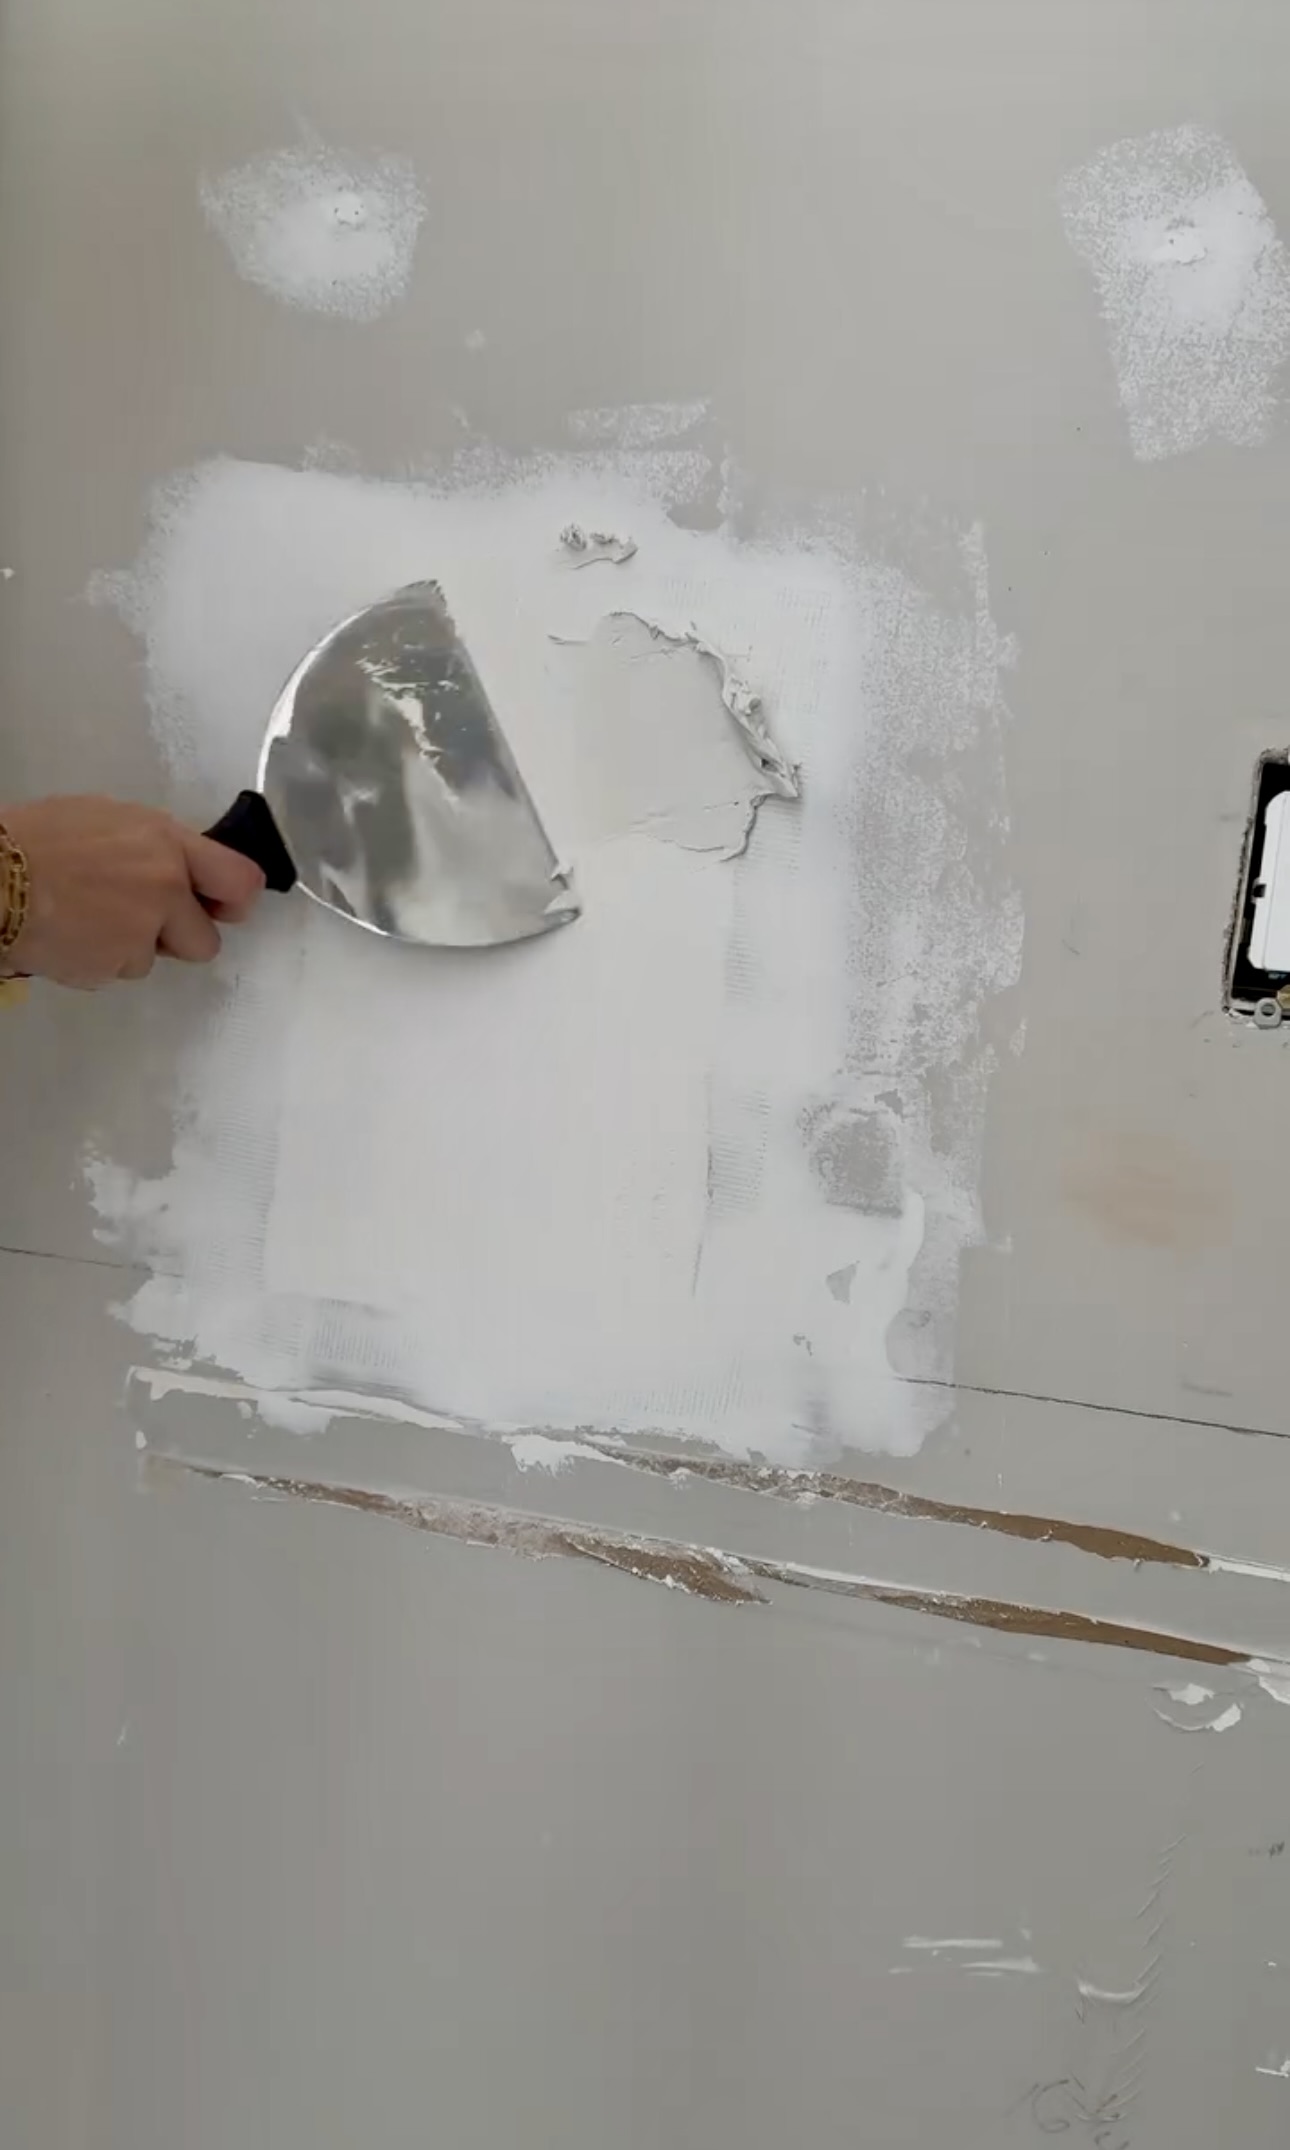
Next, I applied my first layer of joint compound, also known as mud. I applied it with my joint knife. Warning, this layer is going to look messy and not very good…and that’s okay! It’s part of the process. I covered all of the seams and made my way around to cover the entire patch with mud. Once the entire area was dry, I started sanding in circular motions with 180 grit sand paper.
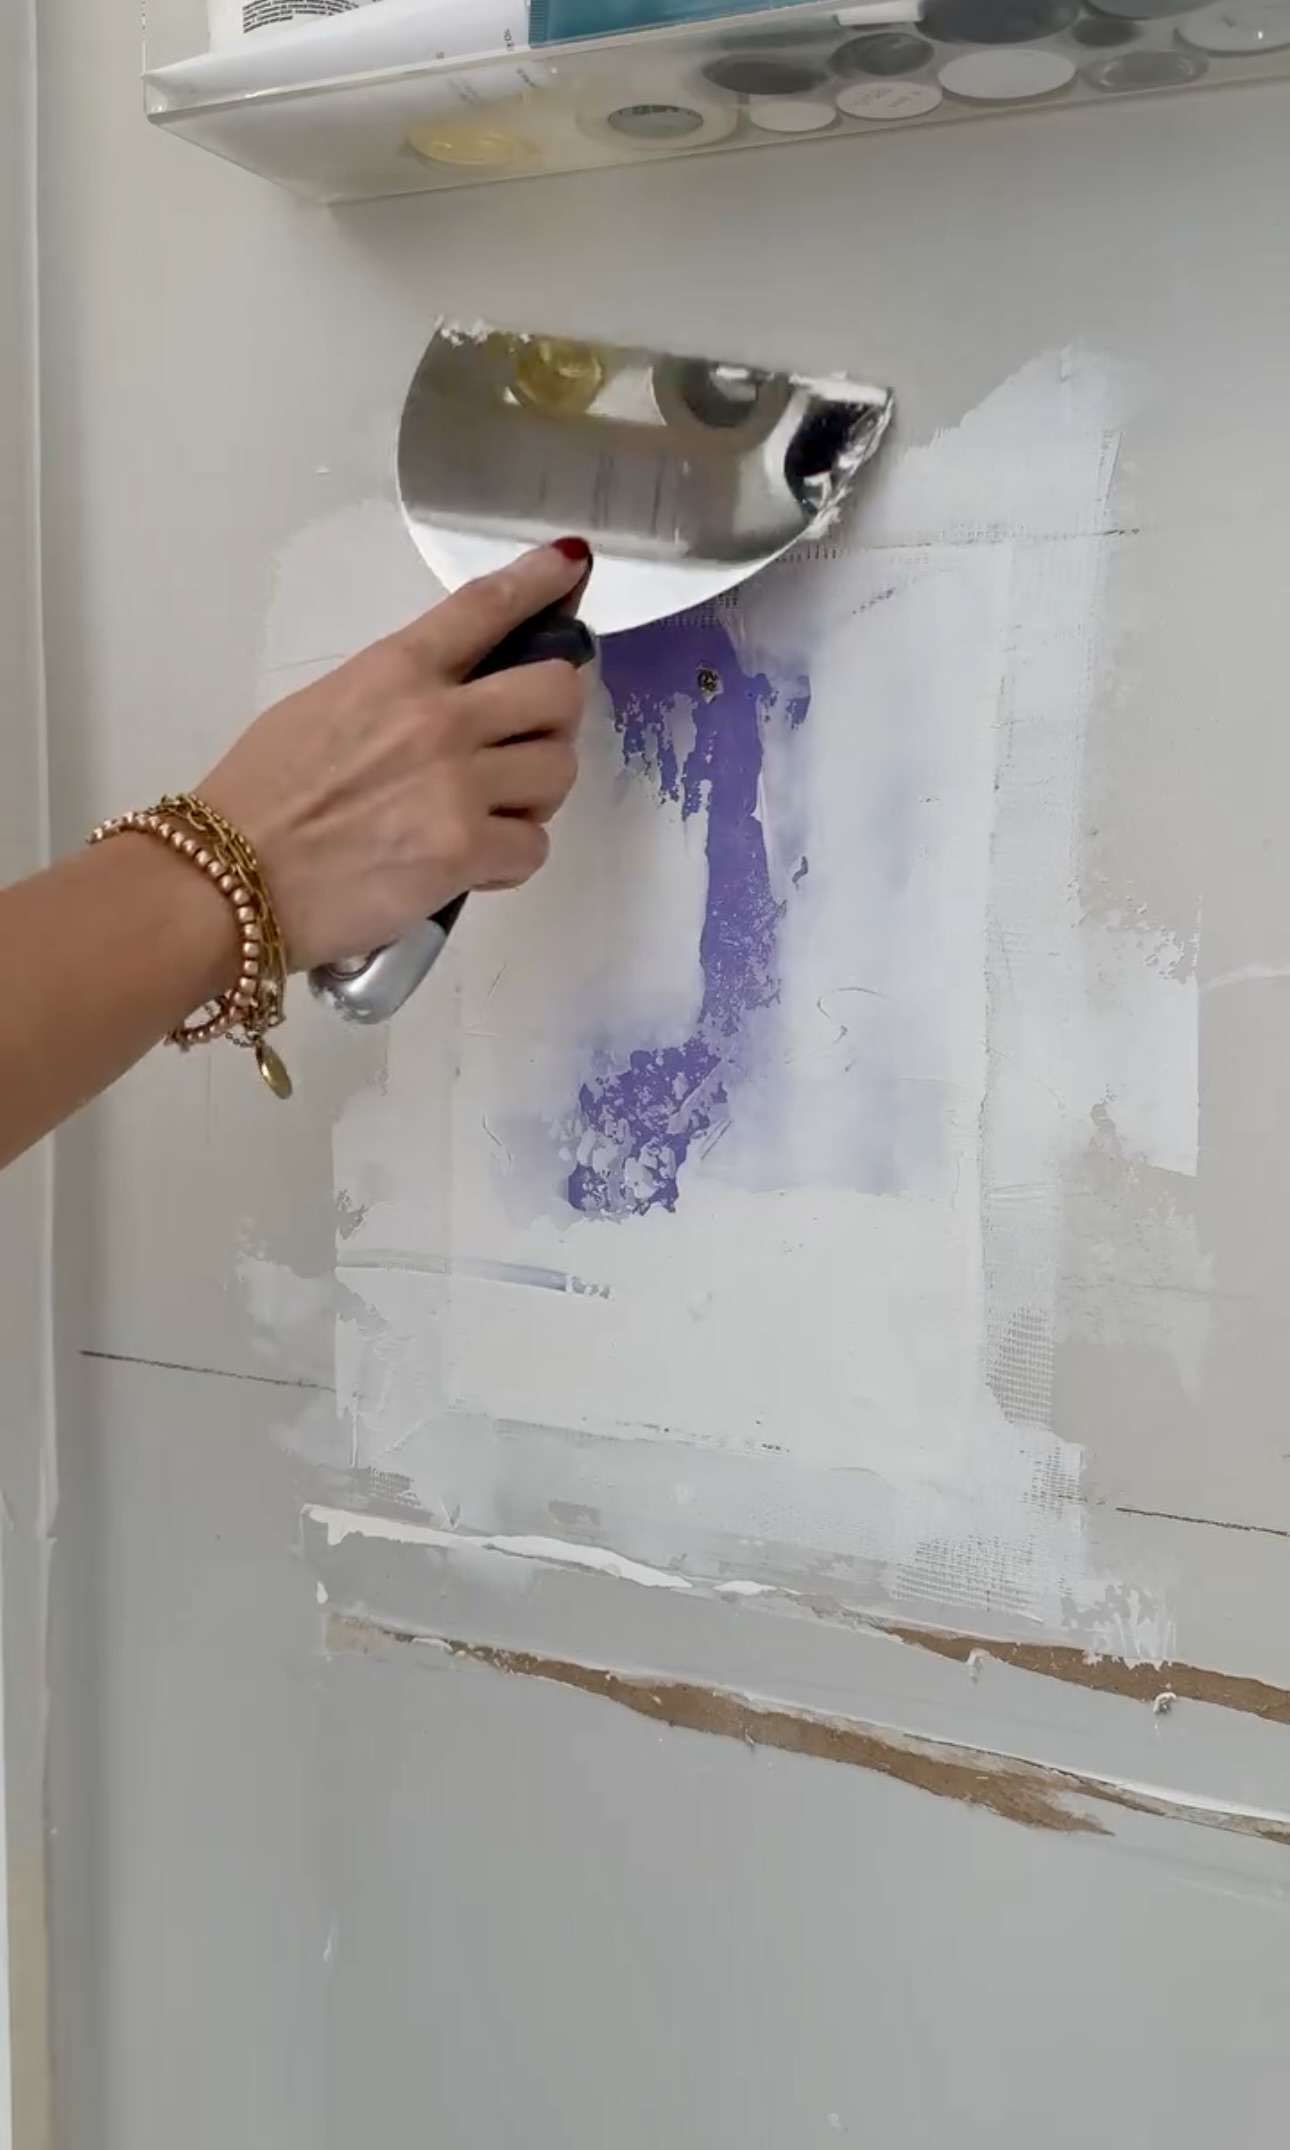

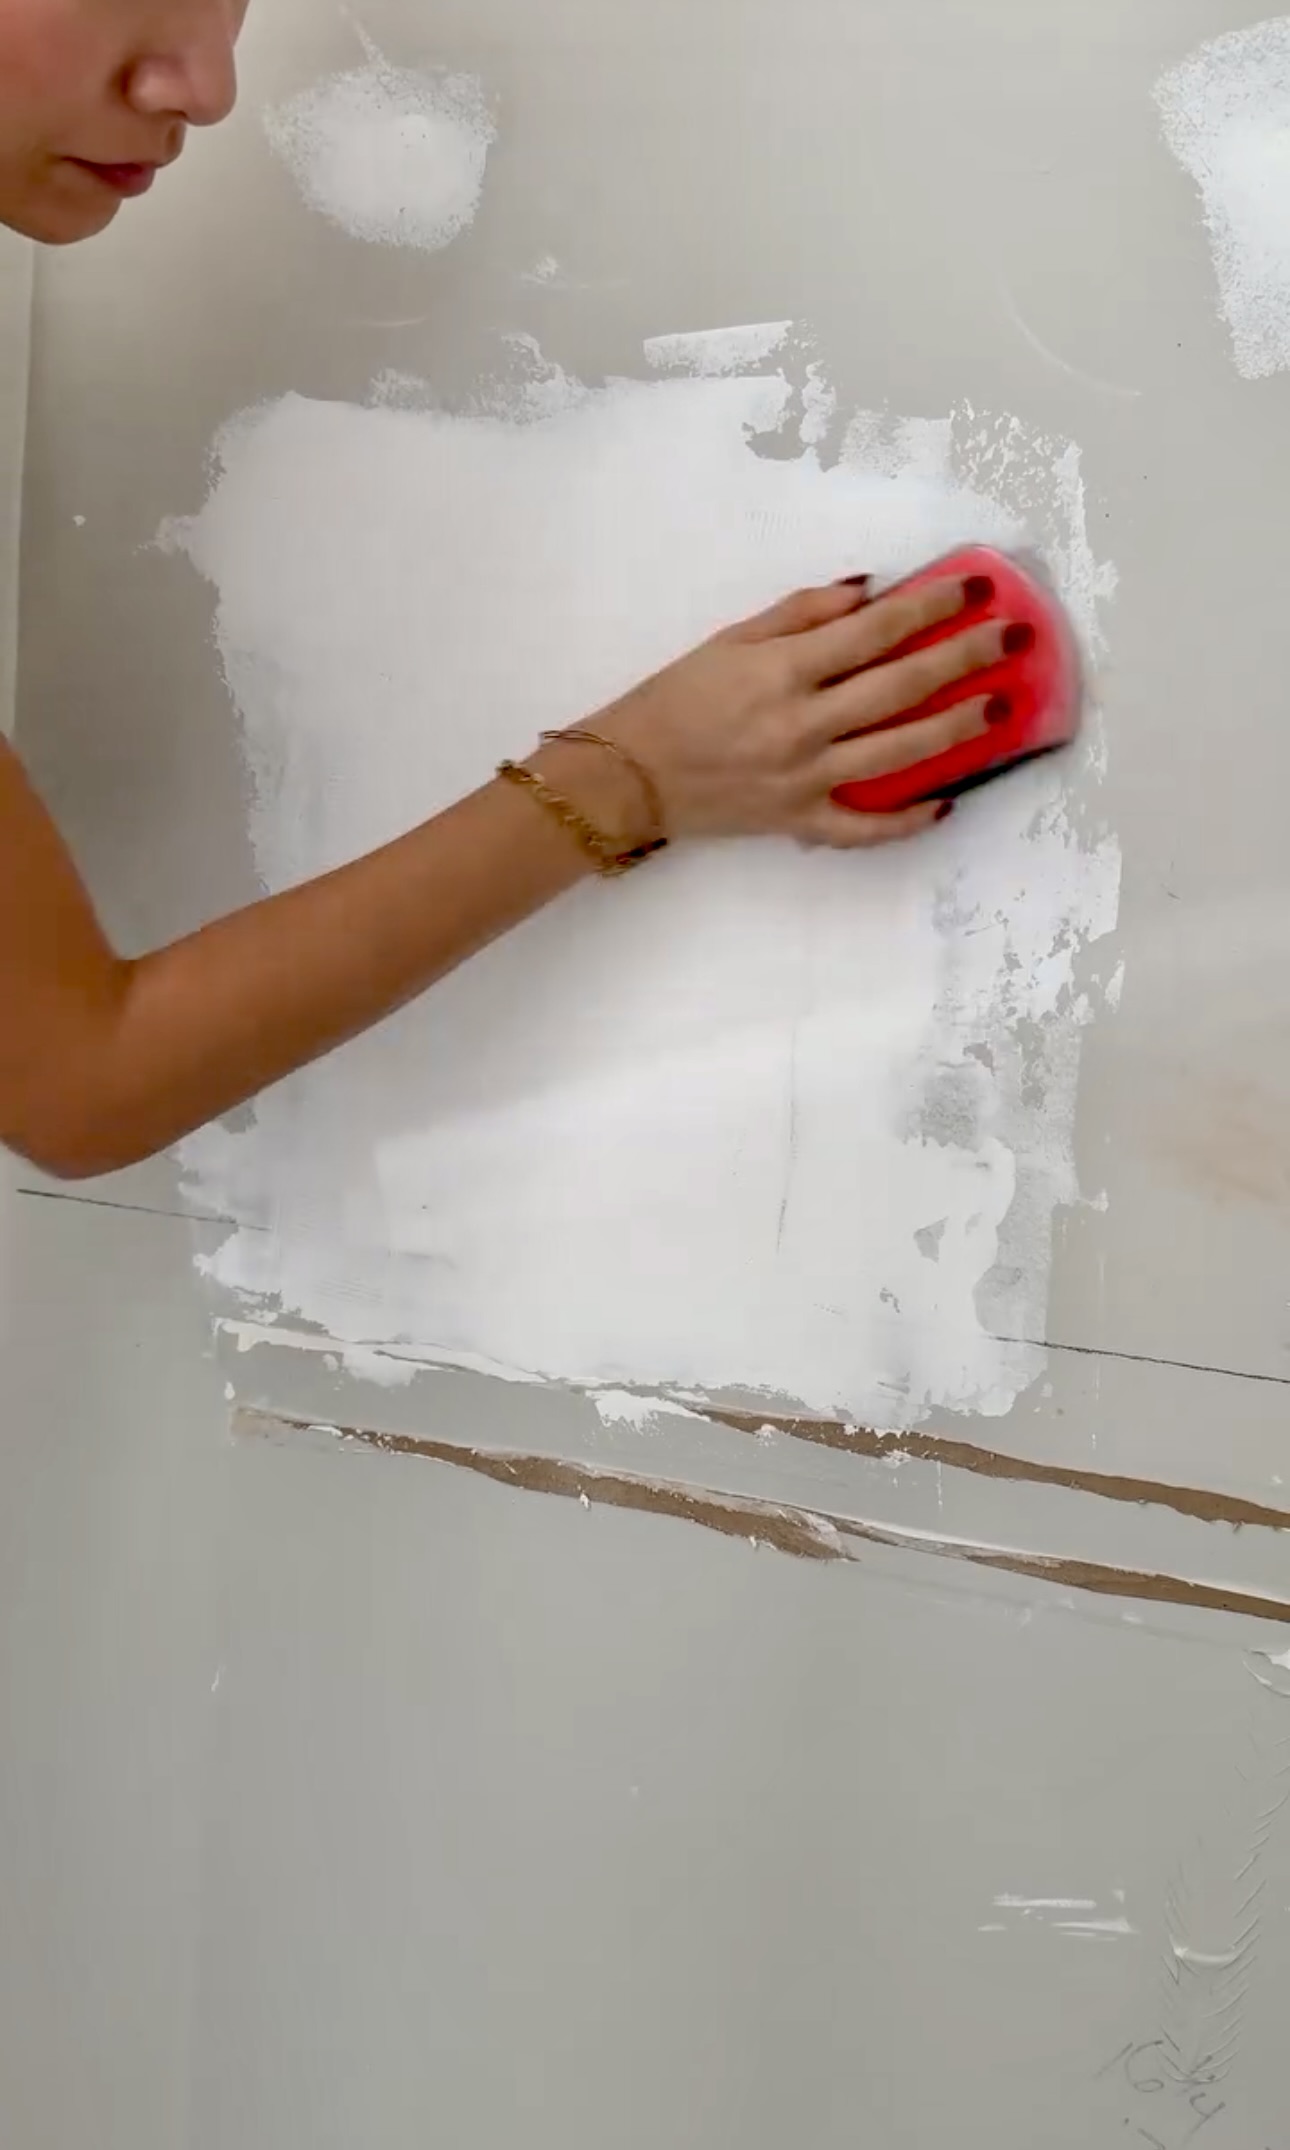
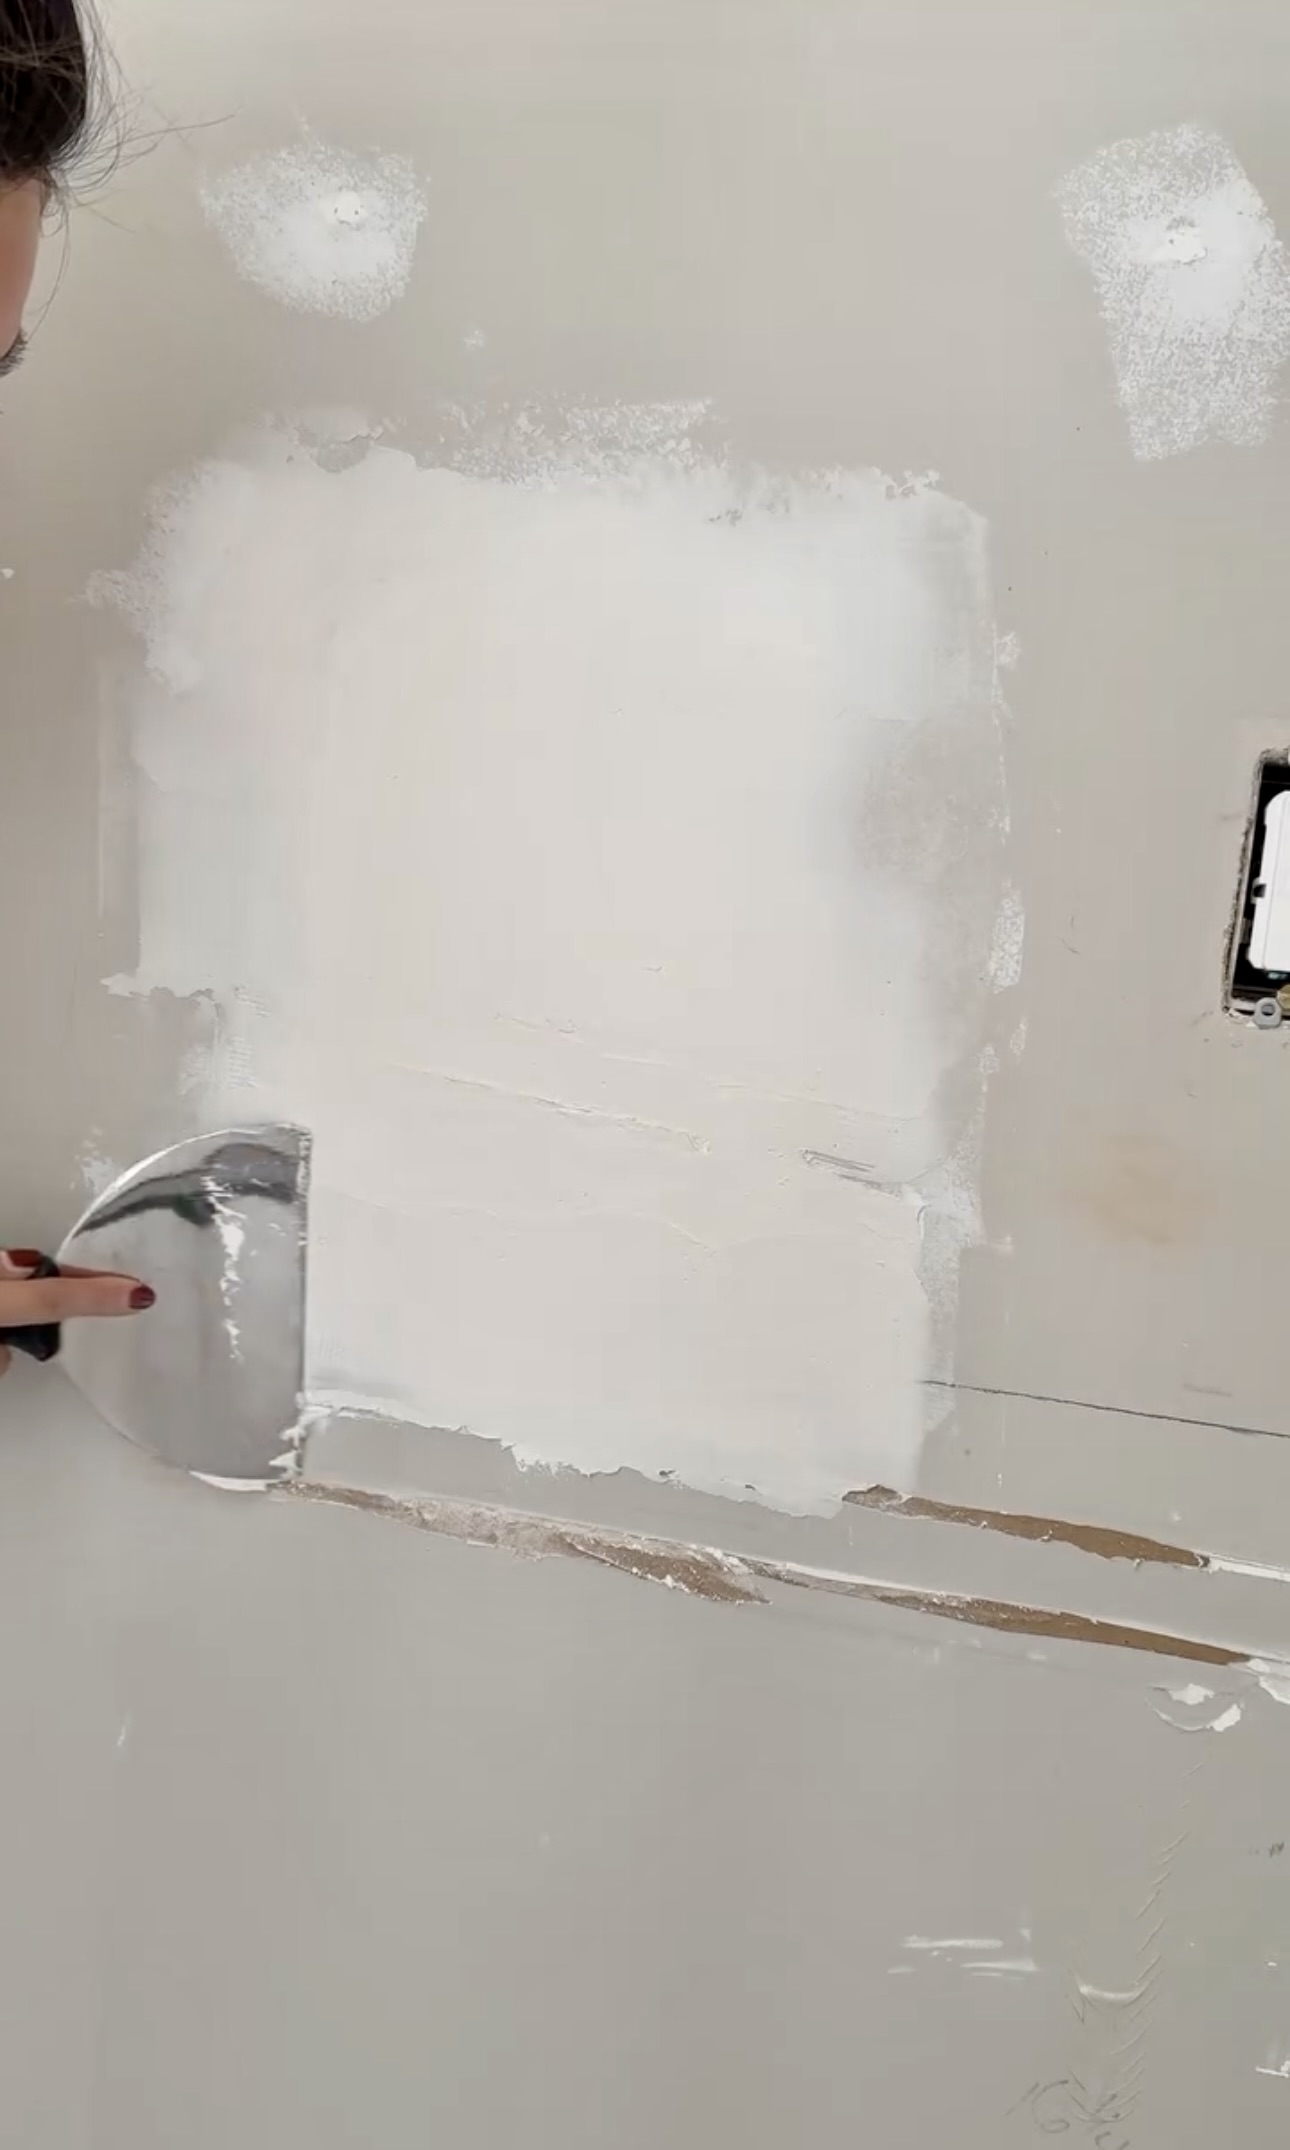
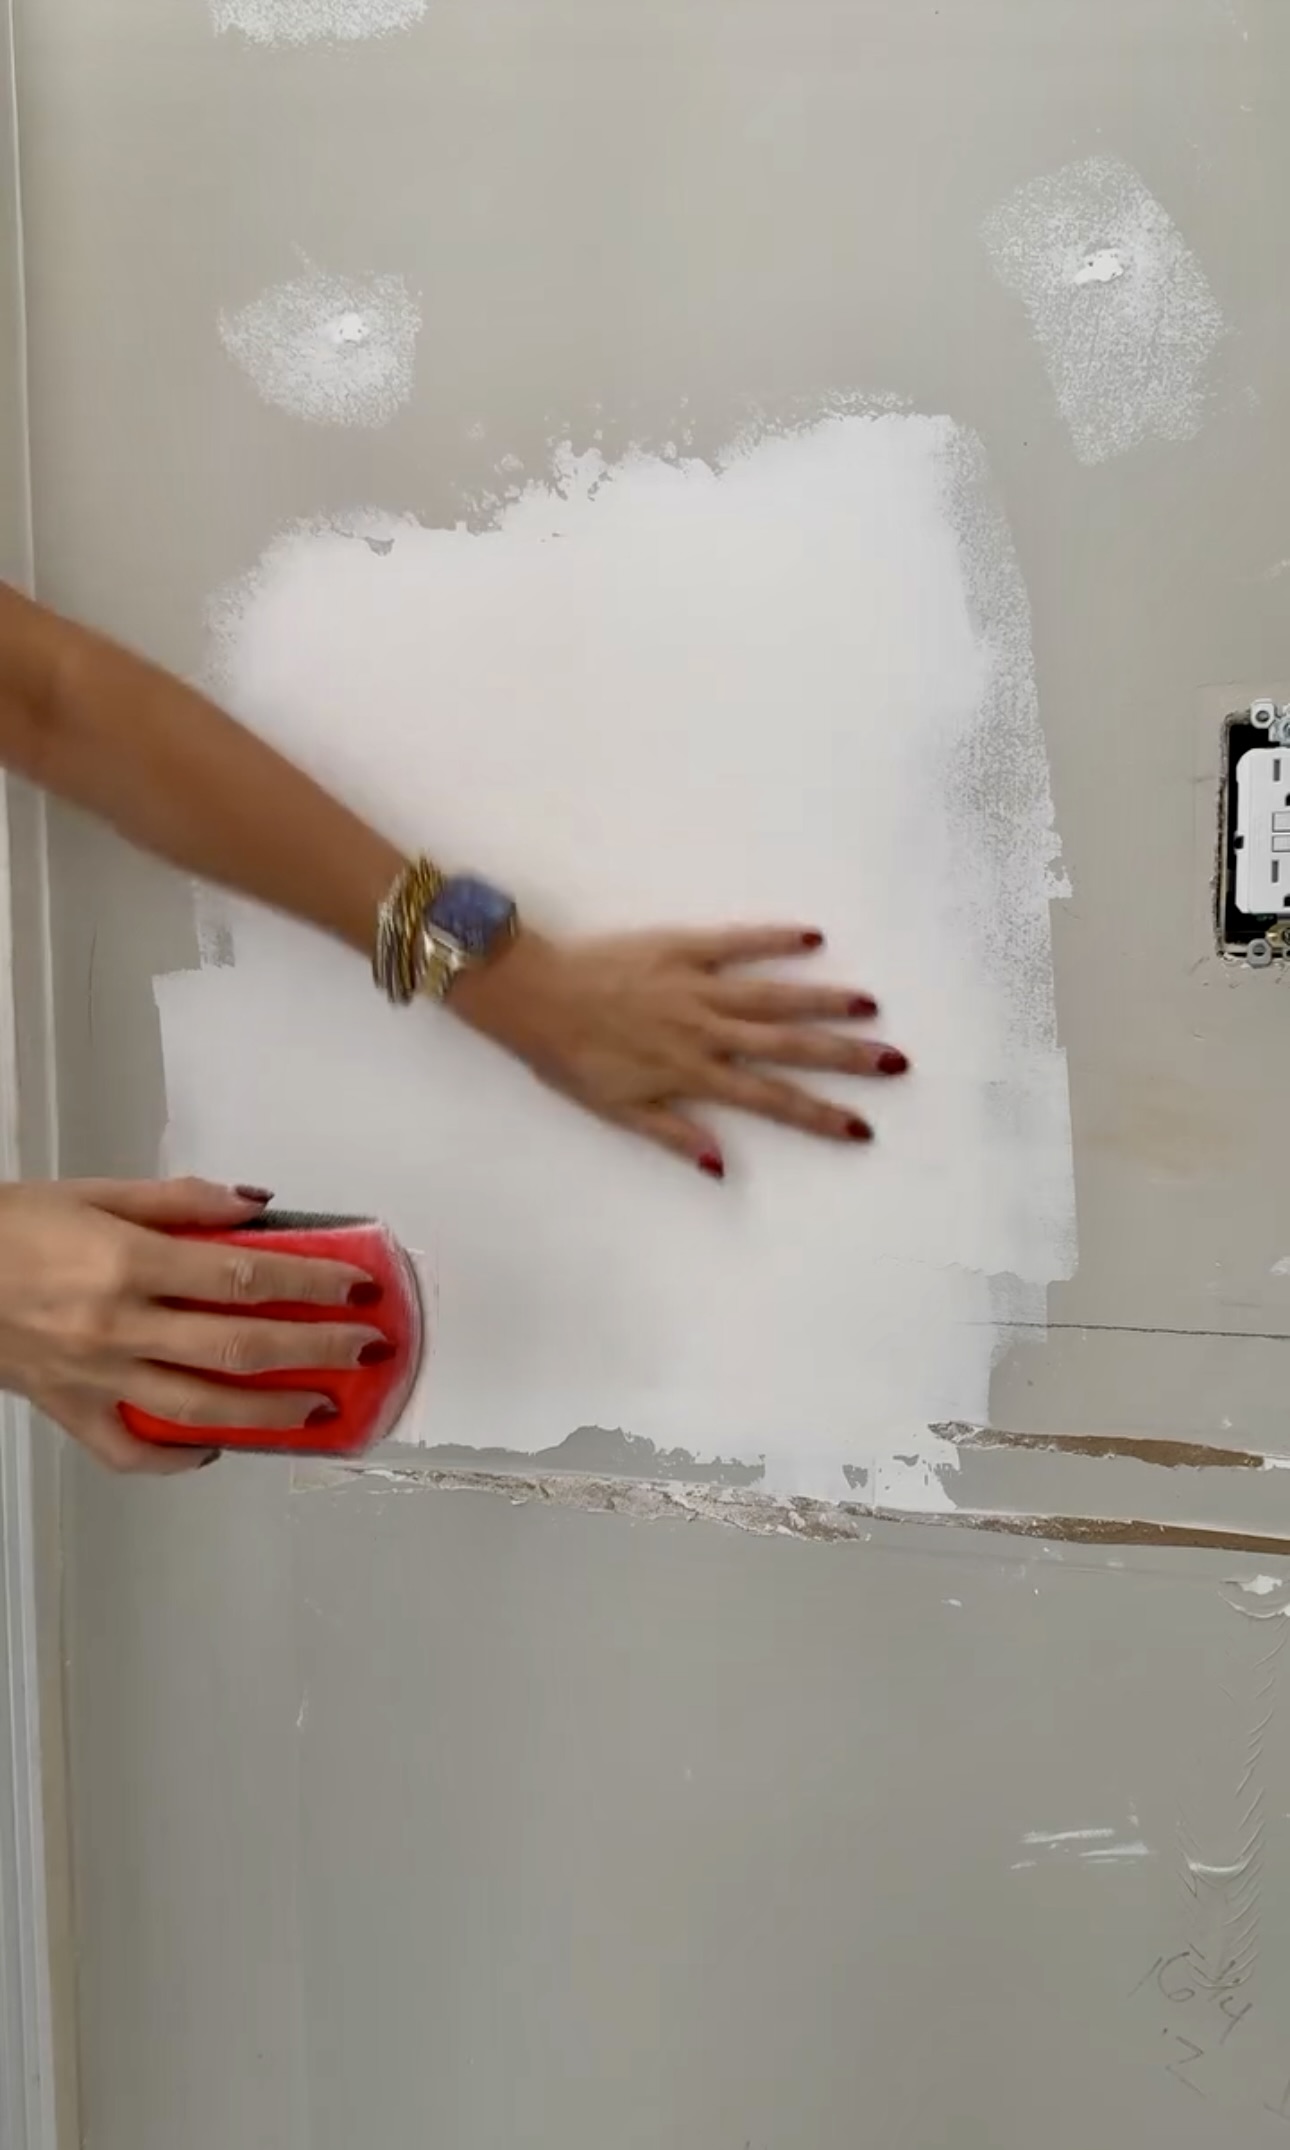
Time for the second layer of mud! The key here is to feather it out from end to end, applying a light coat of mud. I hope you aren’t sick of sanding because you’ve got more to do! After this second layer was dry I sanded like I did before. I ran my hand over the wall to see where I’d need to add more mud or where I’d need to sand more to ensure the patch was even with the rest of the wall.
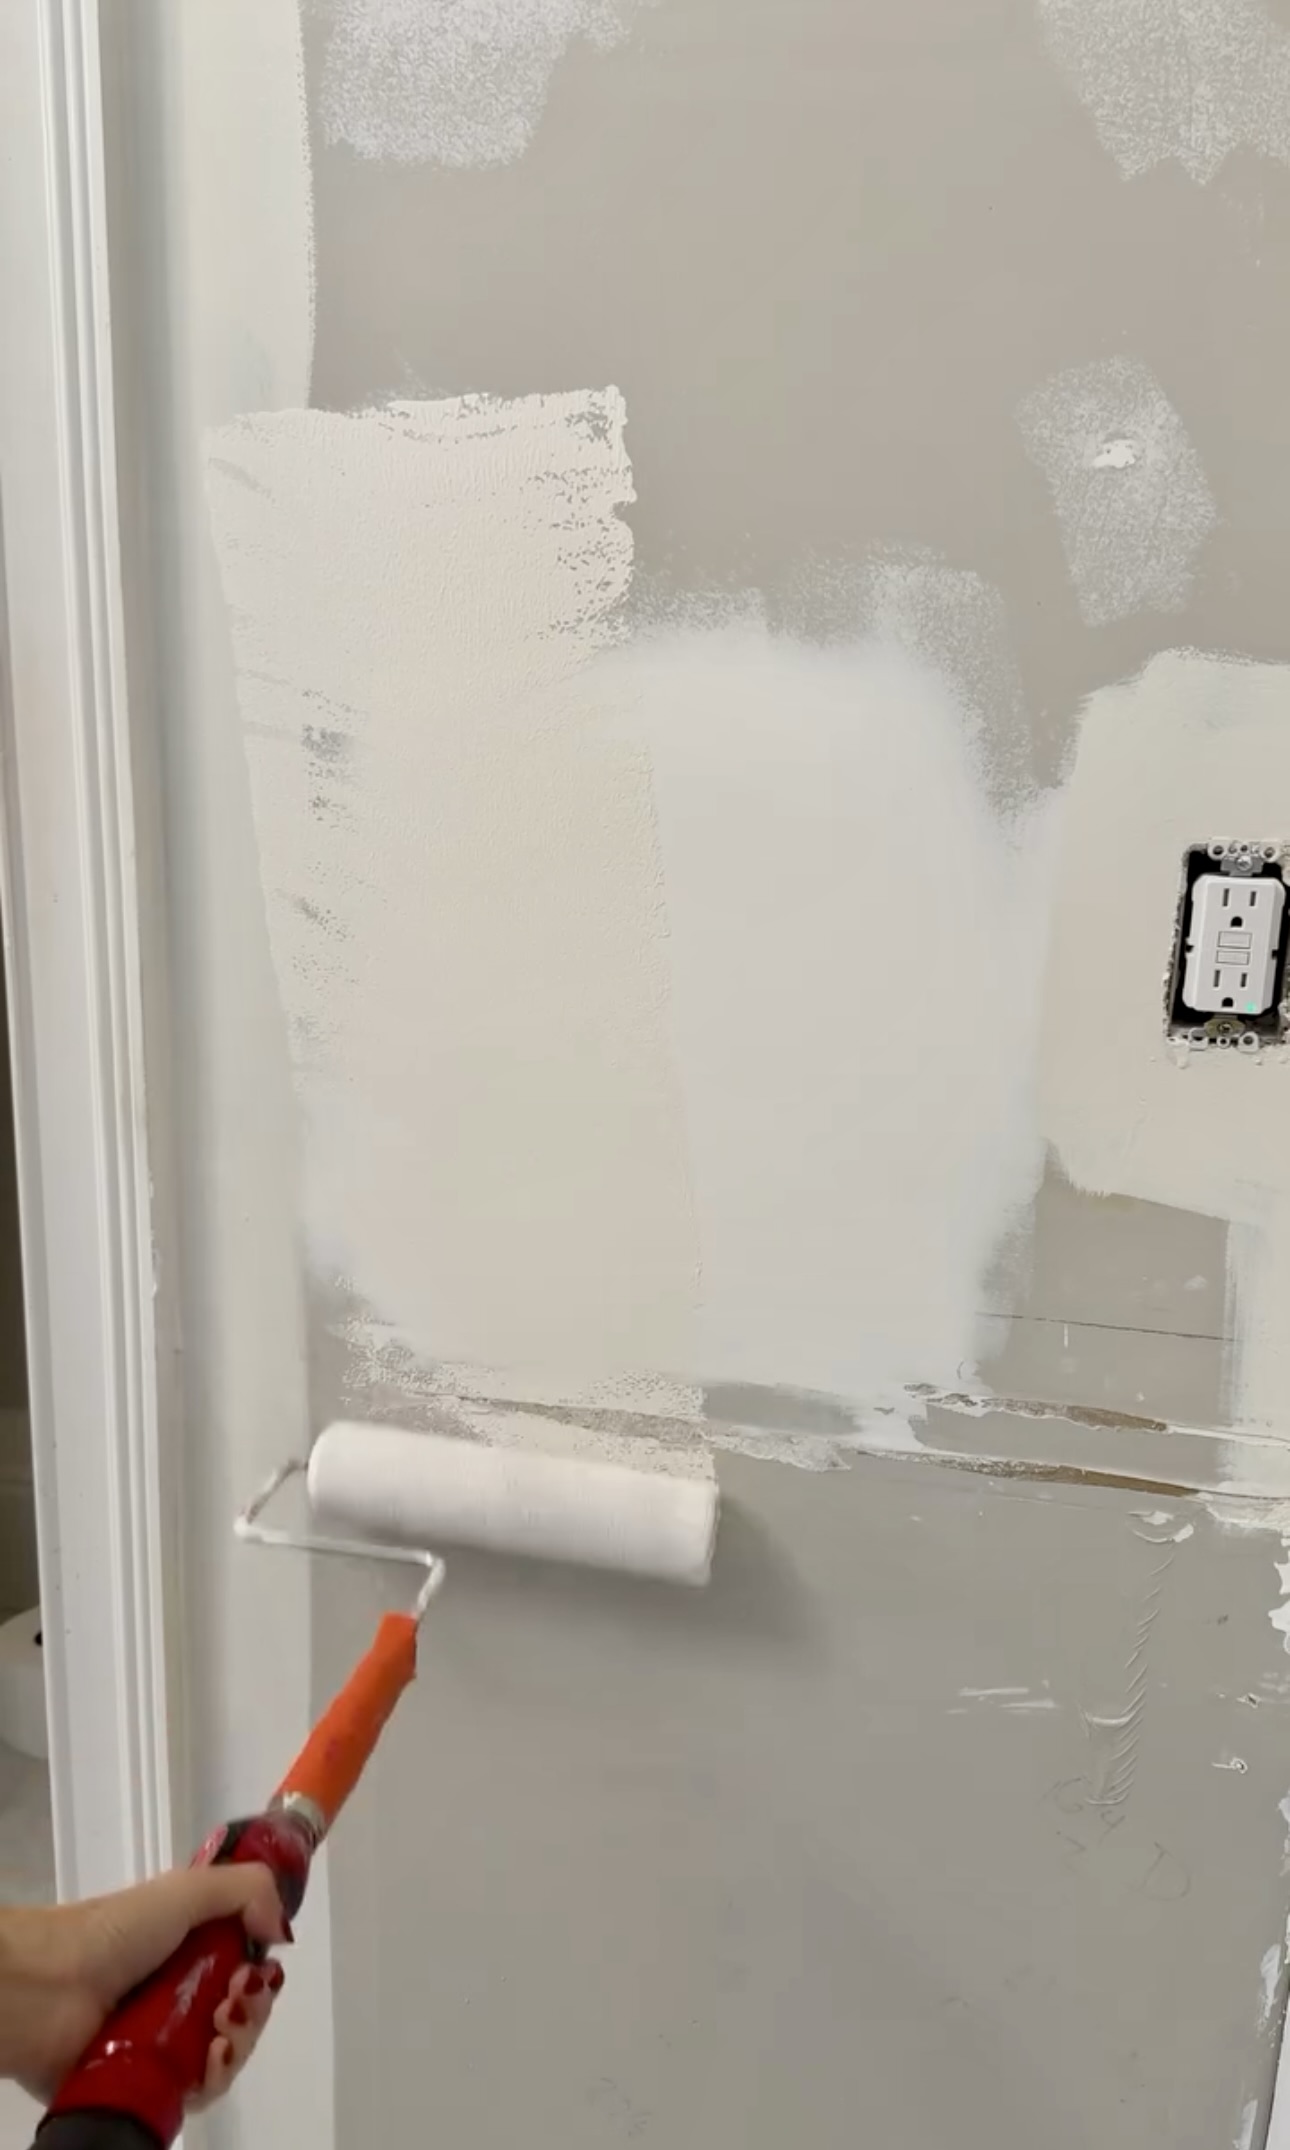
I usually wouldn’t prime for a patch like this, but if you are planning to paint on drywall or mud, you will definitely want to prime first.
Now if someone asks if you know how to patch a hole with drywall, you can say “absolutely I do!” Now go put your new skills to work and let me know how it goes.
If you’ve ever wondered how to replace a toilet, it’s easier than you think! Check out this blog post to learn how!

Nicely done! Clear steps and great tips especially the reminder that the first coat of mud always looks rough (totally normal!). As a fellow drywall contractor, I know how satisfying it is to blend a patch seamlessly into the wall. Keep up the great work!