Hi
I'm Bong
I'm just a girl who likes to DIY anything and everything. More than that, I love teaching people - especially women - how to pick up power tools and create the home of their dreams. Stop waiting for someone else and starting Doing It Yourself. I'll show you how!
diy projects
diy school
life hacks
categories
must have products
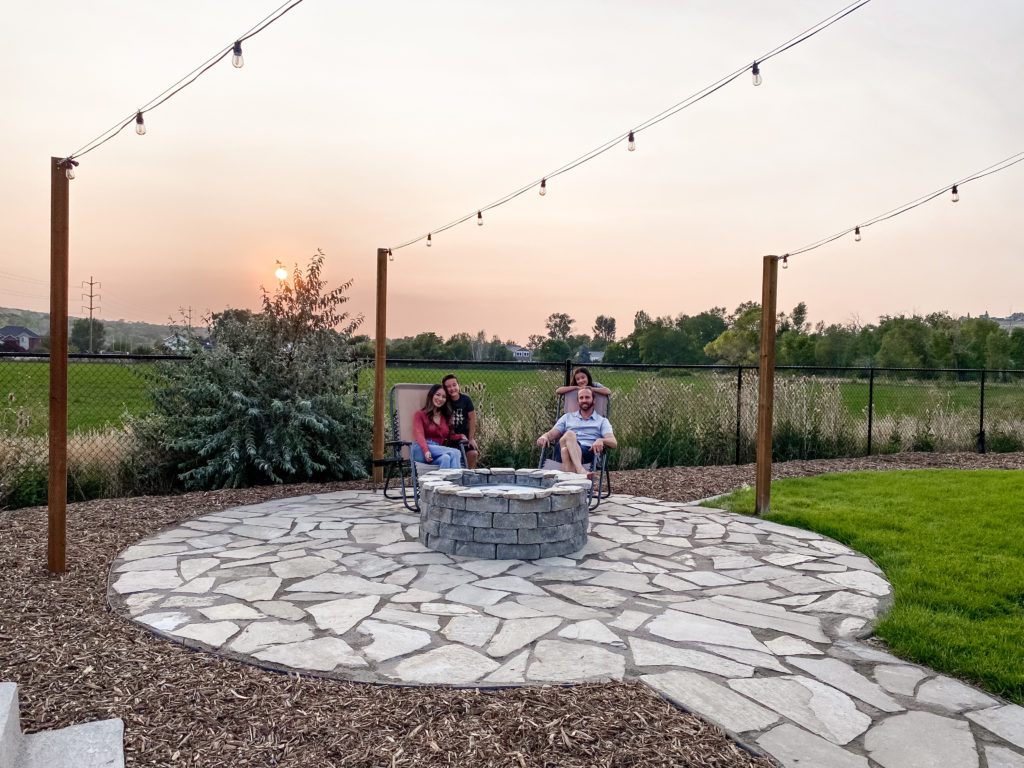
Alright, it is early this morning and it is time to start hanging the patio lights. We are going to do three big four-by-four poles so we can hang three sets of string lights. They will come across our pavers and attach to the side of the house. We rented an auger because of how wide we have to drill and the ground we have here is super compact and has lots of rocks in it. It was about $85 for four hours. So we have four hours to dig these holes.
This was TJ and my first time using an auger, and TJ’s dad is coming to be our project manager. Our original plan was to use a post-hole digger, but because the ground is so hard with big stones, it was easier to use an auger. But you guys wanted to do this project, and your ground was softer. So you could use a post-hole digger.
After the whole has been dug, we cleared out and filled the hole with about 2 in of all-purpose gravel. I am going to share all the details on the materials. This is a 4×4, 10 ft pole that has been pressure treated. Let’s talk about the holes we dug. We dug down about 24 inches and then filled in 2in of gravel. You want the width of the hole to be 3x the size of the base of your pole. So our pole is 4in and we made the hole 12in.
We also have fast-setting concrete that you don’t have to pre-mix. You just pour water into the hole then the mix and it seals the whole deal. You will have the gravel underneath the concrete because you want to have dirt then gravel then cement for drainage. Otherwise, you are going to have water just sitting there and that is not good.
We place the 10ft pole into the ground and measure the part of the pole that is above ground, which turn out to be 8ft. We want them to all be the same and level. I use a post level that has different level gauges on both sides and the plumb on the front. You just wrap it around the pole.
I put water till the hole is about ⅓ full and then pour the concrete mix directly from the bag. If the concrete is dry at the top, just add more water until there is water resting on the top. It will all dry out nicely and evaporate. This concrete sets really quickly so make sure the pole is plumb and level on both sides quickly. The bubble should be in the middle on both sides. If it was not level you would just move it around a little until it was.
So I am just getting ready to hang up my lights but check out this kit from National Hardware. It is really great for the DIYer because it comes with everything you need minus the lights. This kit is great and comes with tutorials as well but it comes with everything you need and even more. You will choose what will work best for your scenario and just apply it to your project.
We then put in the other two poles and leveled them. Next, we will attach metal rope hooks to the top of the poles. I predrilled the holes of the hook and then stuck the screws that came with the kit into this post. This only took one minute to do and was super easy!
I decided to use these turn buckles from the kit because if you put on your screws and your rope outside and it’s too loose or tight, it is adjustable. The way it will attach is that this almost closed hook will connect to the hook installed in the wood. The more open hook will hold the wire and go towards the house. I will show you how to use the cable clamps to make a loop onto your cable. You have to use two and slide them onto the wire, then give yourself some extra line for a loop and rework the wire into the cable clamps. Once they are in, you will tighten the nuts underneath to be nice and snug.
Next, I decided how to hang the lights and pre-drilled for the hook. I twisted in a J hook on the side of my house and turned the carabiners with the cable wire attached.
I pulled the wire until it was taunt. On the other side of the wire I have the turnbuckle hooked on and I am pulling the wire taunt and then tightening the wire clamps with pliers.
Now it is time for the lights. I got outdoor LED string lights that are 48 ft long and have 17 bulbs and 16 sockets. The lights are plastic so you cannot break them and weather proof. I then used zip ties that came with the kit to attach the lights to the cable which was super easy. The only annoying part was having to move the ladder. It took me 27 minutes to get about ⅔ of the way on the three strands. I could not reach all the bulbs but that was a good reminder that it’s okay to ask for help. TJ ended up hanging the rest for me. I am so pleased with the way it turned out!


